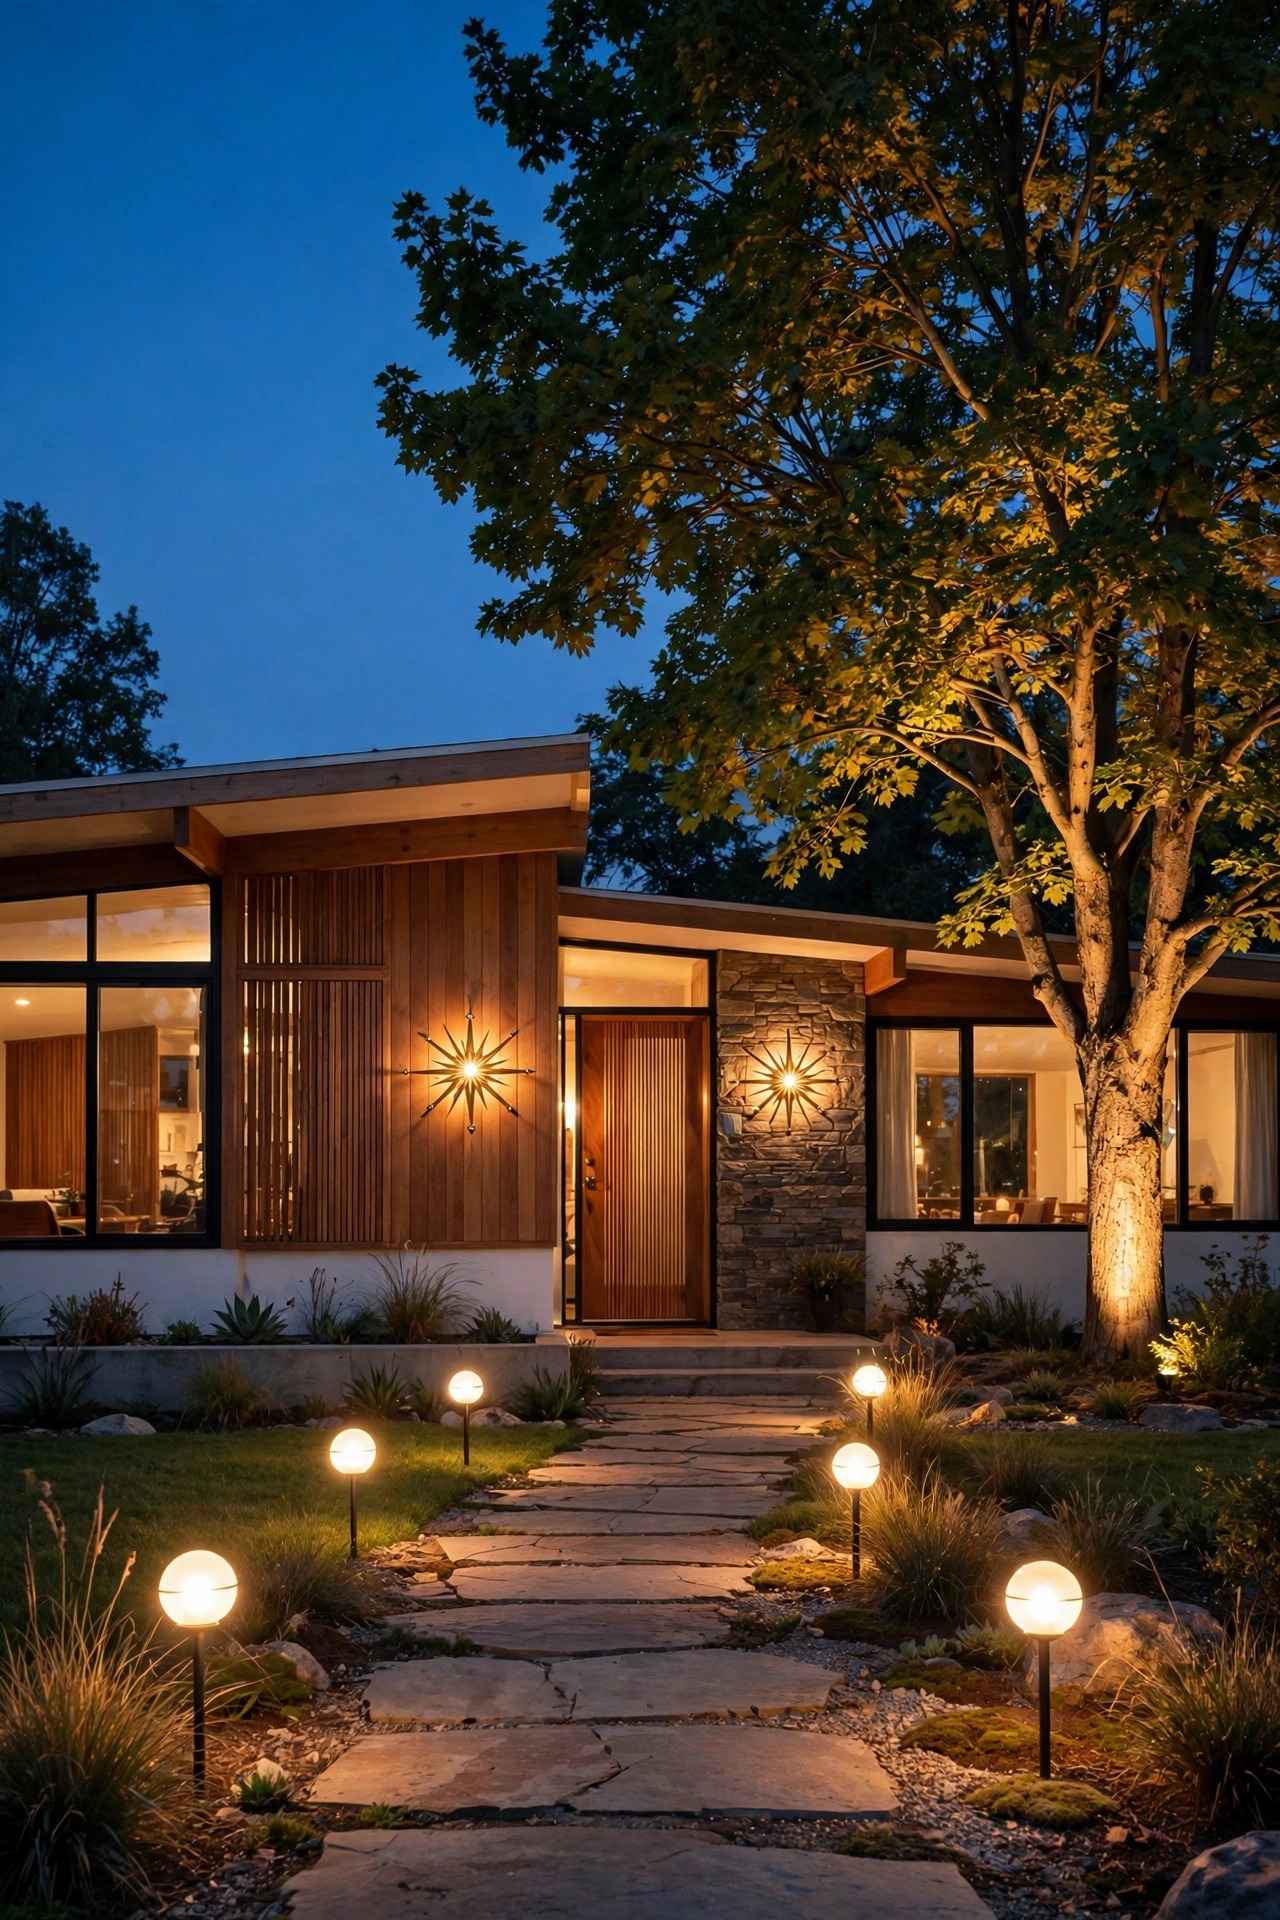
There is a moment every evening when our low, wide ranch house just clicks into place. The breeze-block wall catches a warm wash, the globe lights along the walk start to glow, and the whole front yard looks like it stepped out of a 1962 magazine spread. That moment did not happen by accident. Good mid-century modern front yard lighting is all about clean lines, warm pools of light, and fixtures that double as little sculptures. In my experience, the secret is layering: something low to guide the way, something at eye level to welcome people in, and something with a little drama to show off those retro lines. Below I am sharing the 19 ideas I reach for most, from starburst sconces to moonlighting in the olive tree. Every one works on a real suburban lot, most are low-voltage or solar so the wiring stays simple, and I have included the budget range I actually see for each one, so you can plan the project before buying a single fixture.
1. Layer Your Mid-Century Modern Front Yard Lighting in Three Heights
Every great mid-century yard I have ever lit works in three heights, and honestly, skipping this step is why so many front yards look flat. Start low: path lights and grazing fixtures between 12 and 18 inches tall that skim the walkway and flower beds. Move to eye level next, with sconces and a statement fixture around the door at 5 to 6 feet, which is the layer guests actually see and remember. Finish high with one dramatic move, an uplit tree or a moonlight fixture in the canopy, to give those long horizontal rooflines something to play against. Before I buy anything, I sketch the yard on paper and mark one fixture per layer per zone, then wire each layer to its own run so I can dim or time them separately. I pulled this whole approach together in my guide to mid-century modern outdoor lighting, and it is the plan I would hand any neighbor starting from zero. Keep every bulb at 2700K so the layers blend instead of fighting.
Suggested budget range: $200 – $800.
2. Flank the Front Door With Starburst Sconces
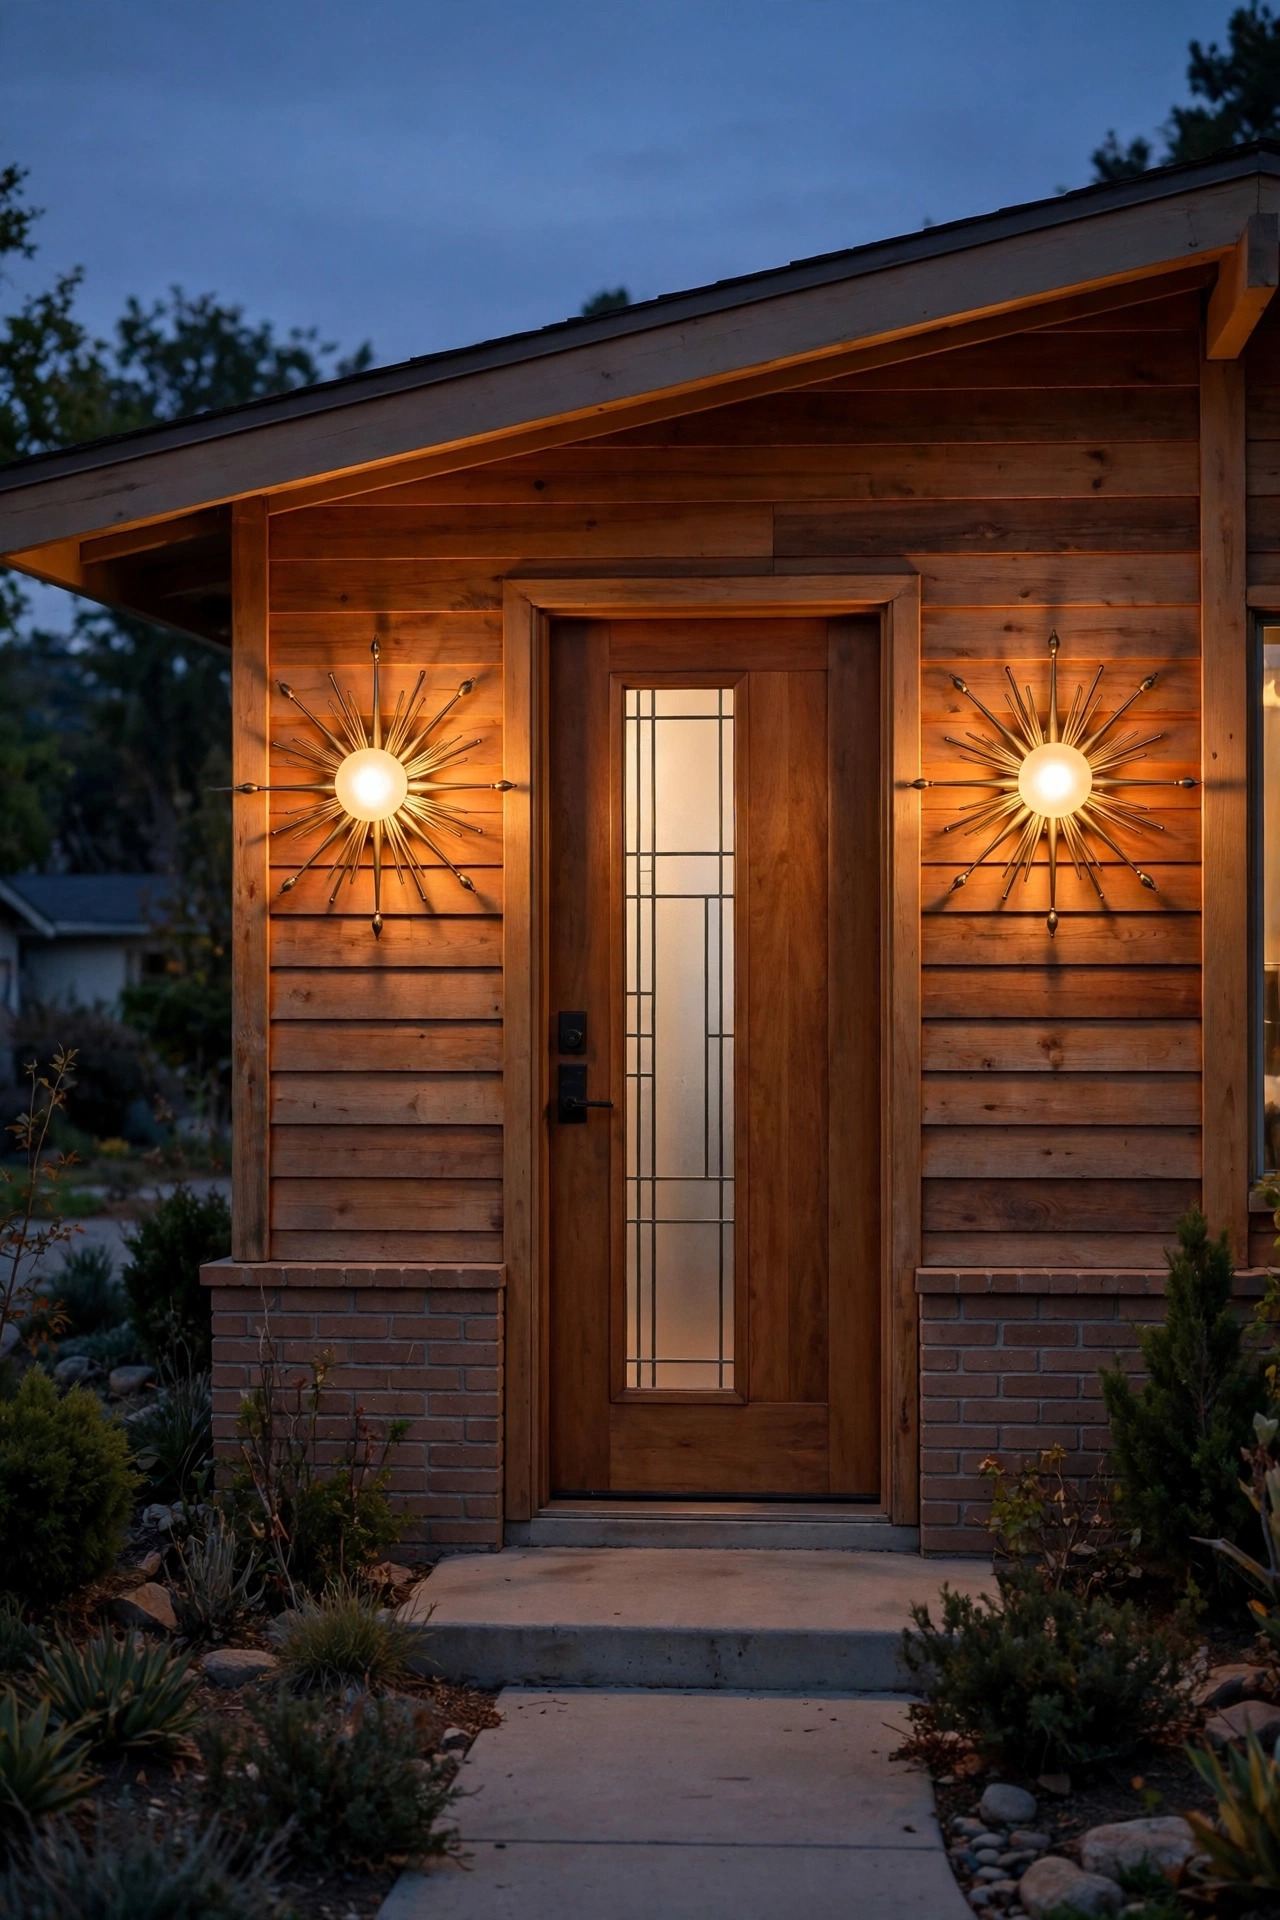
If one fixture says mid-century modern before you even reach the porch, it is the starburst sconce. Those radiating metal spokes around a frosted globe or a bare filament bulb are pure atomic age, and a matched pair flanking the front door gives you the symmetry this style loves. Mount the center of each fixture about 60 to 66 inches off the porch floor, roughly eye level, so the glow lands on faces instead of the top of heads. I always recommend damp- or wet-location rated fixtures with LED filament bulbs in frosted glass, because raw clear glass at eye level glares something fierce. Keep the finish consistent with your door hardware: matte black and aged brass both read period-correct, while shiny chrome tends to look like a bathroom fixture wandered outside. On a wide entry, one oversized starburst centered above the door works too, but the flanking pair photographs better and lights the steps more evenly. One caution: starburst arms collect cobwebs like it is their job, so give them a soft-brush dusting every couple of months.
Suggested budget range: $60 – $180.
3. Hang a Sputnik-Style Statement Fixture Over the Entry
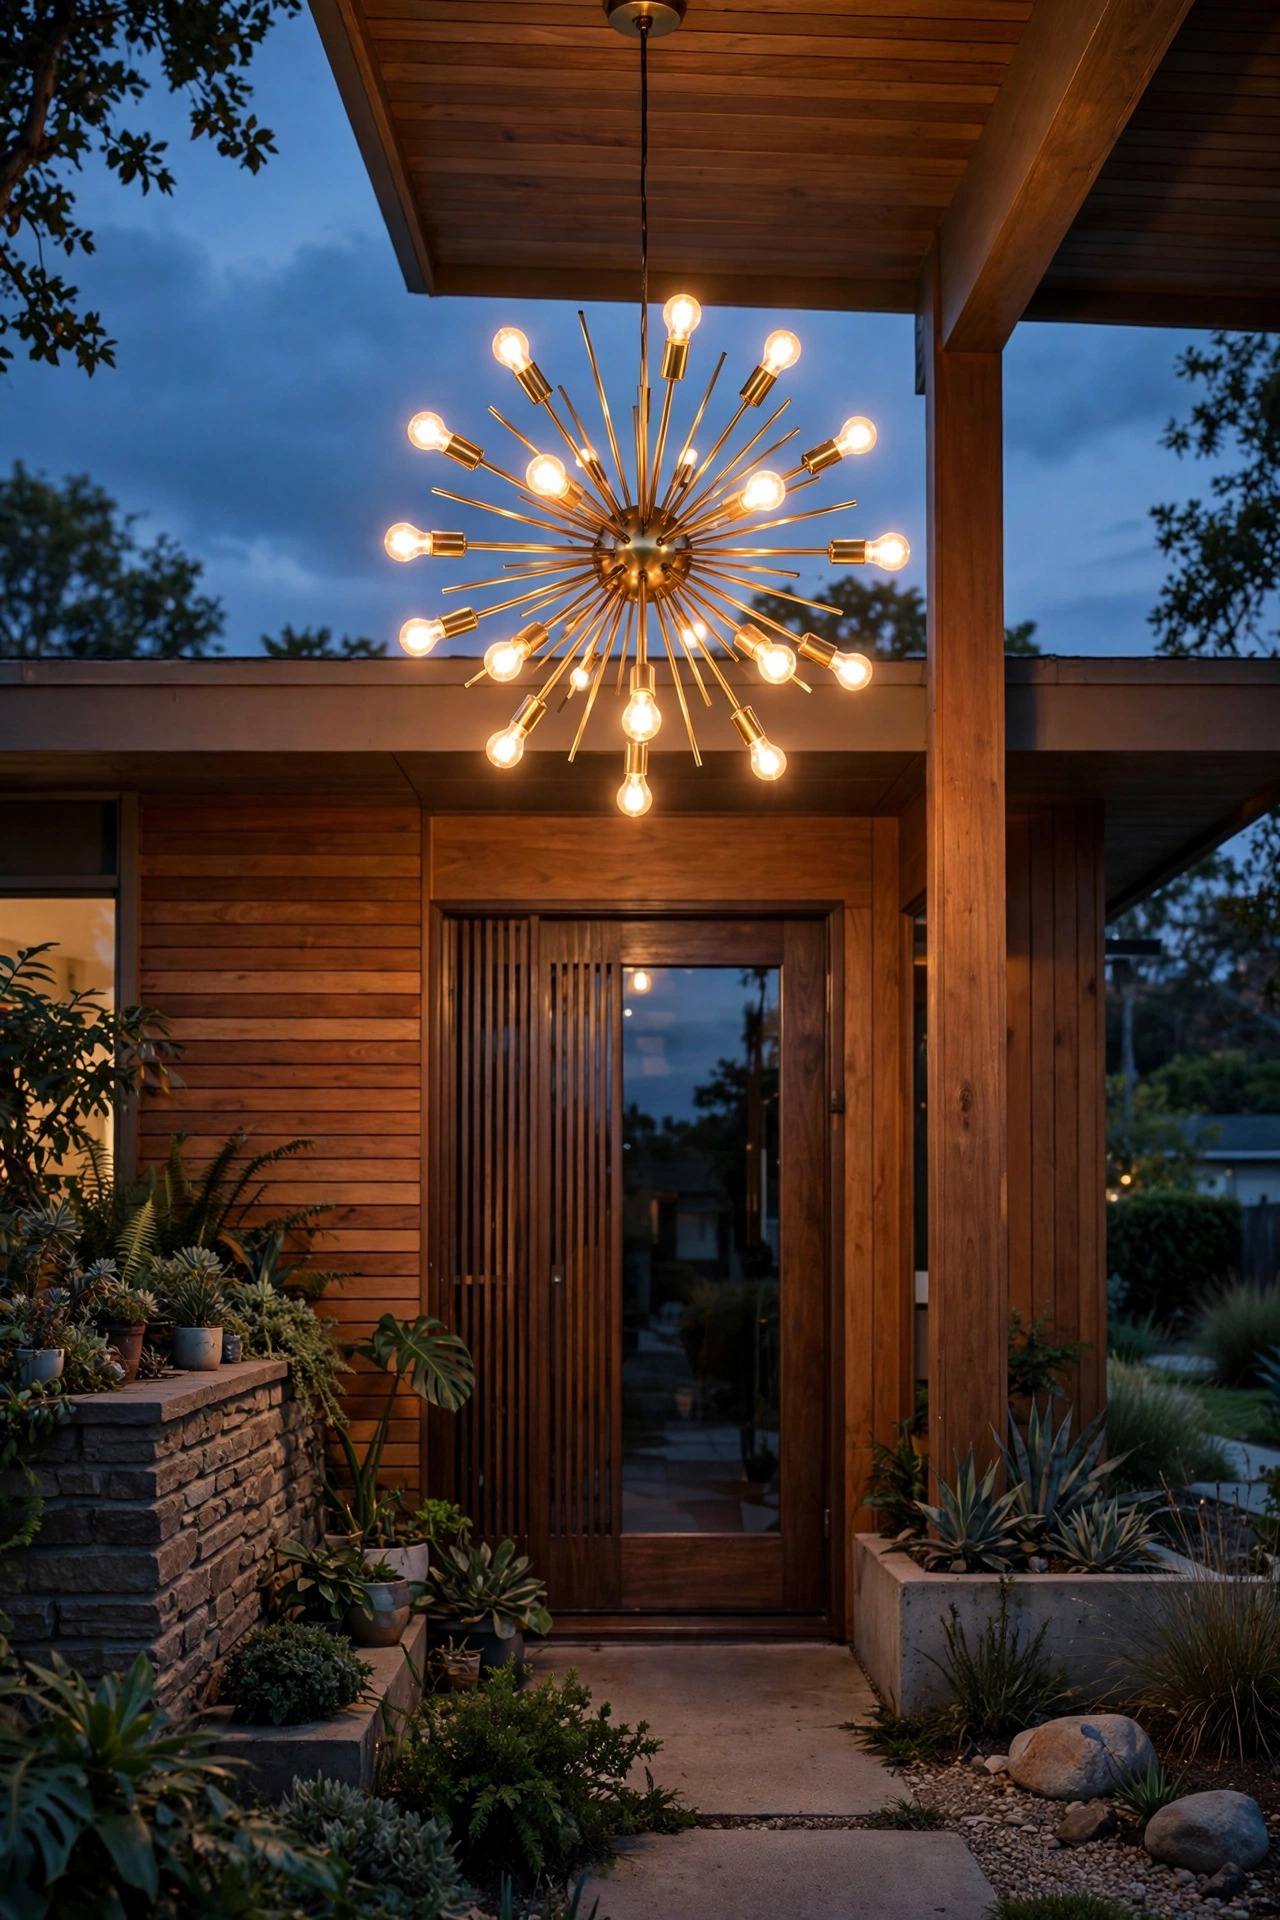
Every retro front yard deserves one unapologetic moment, and mine is the sputnik-style fixture hanging over the entry. A dozen slim arms radiating from a center ball, each tipped with a small warm bulb, reads like a tiny firework frozen mid-pop, and guests comment on it more than everything else in the yard combined. Choose one rated for damp locations if your porch roof covers it, and fully wet-rated if it hangs anywhere near open sky. Hang it so the lowest arm clears 7 feet above the walking surface, and put it on a dimmer, because at full brightness a sputnik can overpower the softer layers around it. I run mine at about 60 percent most nights and only crank it up for parties. Stick with warm 2700K filament-style LED bulbs so the light stays golden instead of drifting into blue-white territory. If your entry is a flat carport ceiling instead of a porch, a flush-mount starburst gives you the same silhouette without the clearance worries. Either way, this is the fixture to splurge on; the rest of the yard can be simple.
Suggested budget range: $120 – $350.
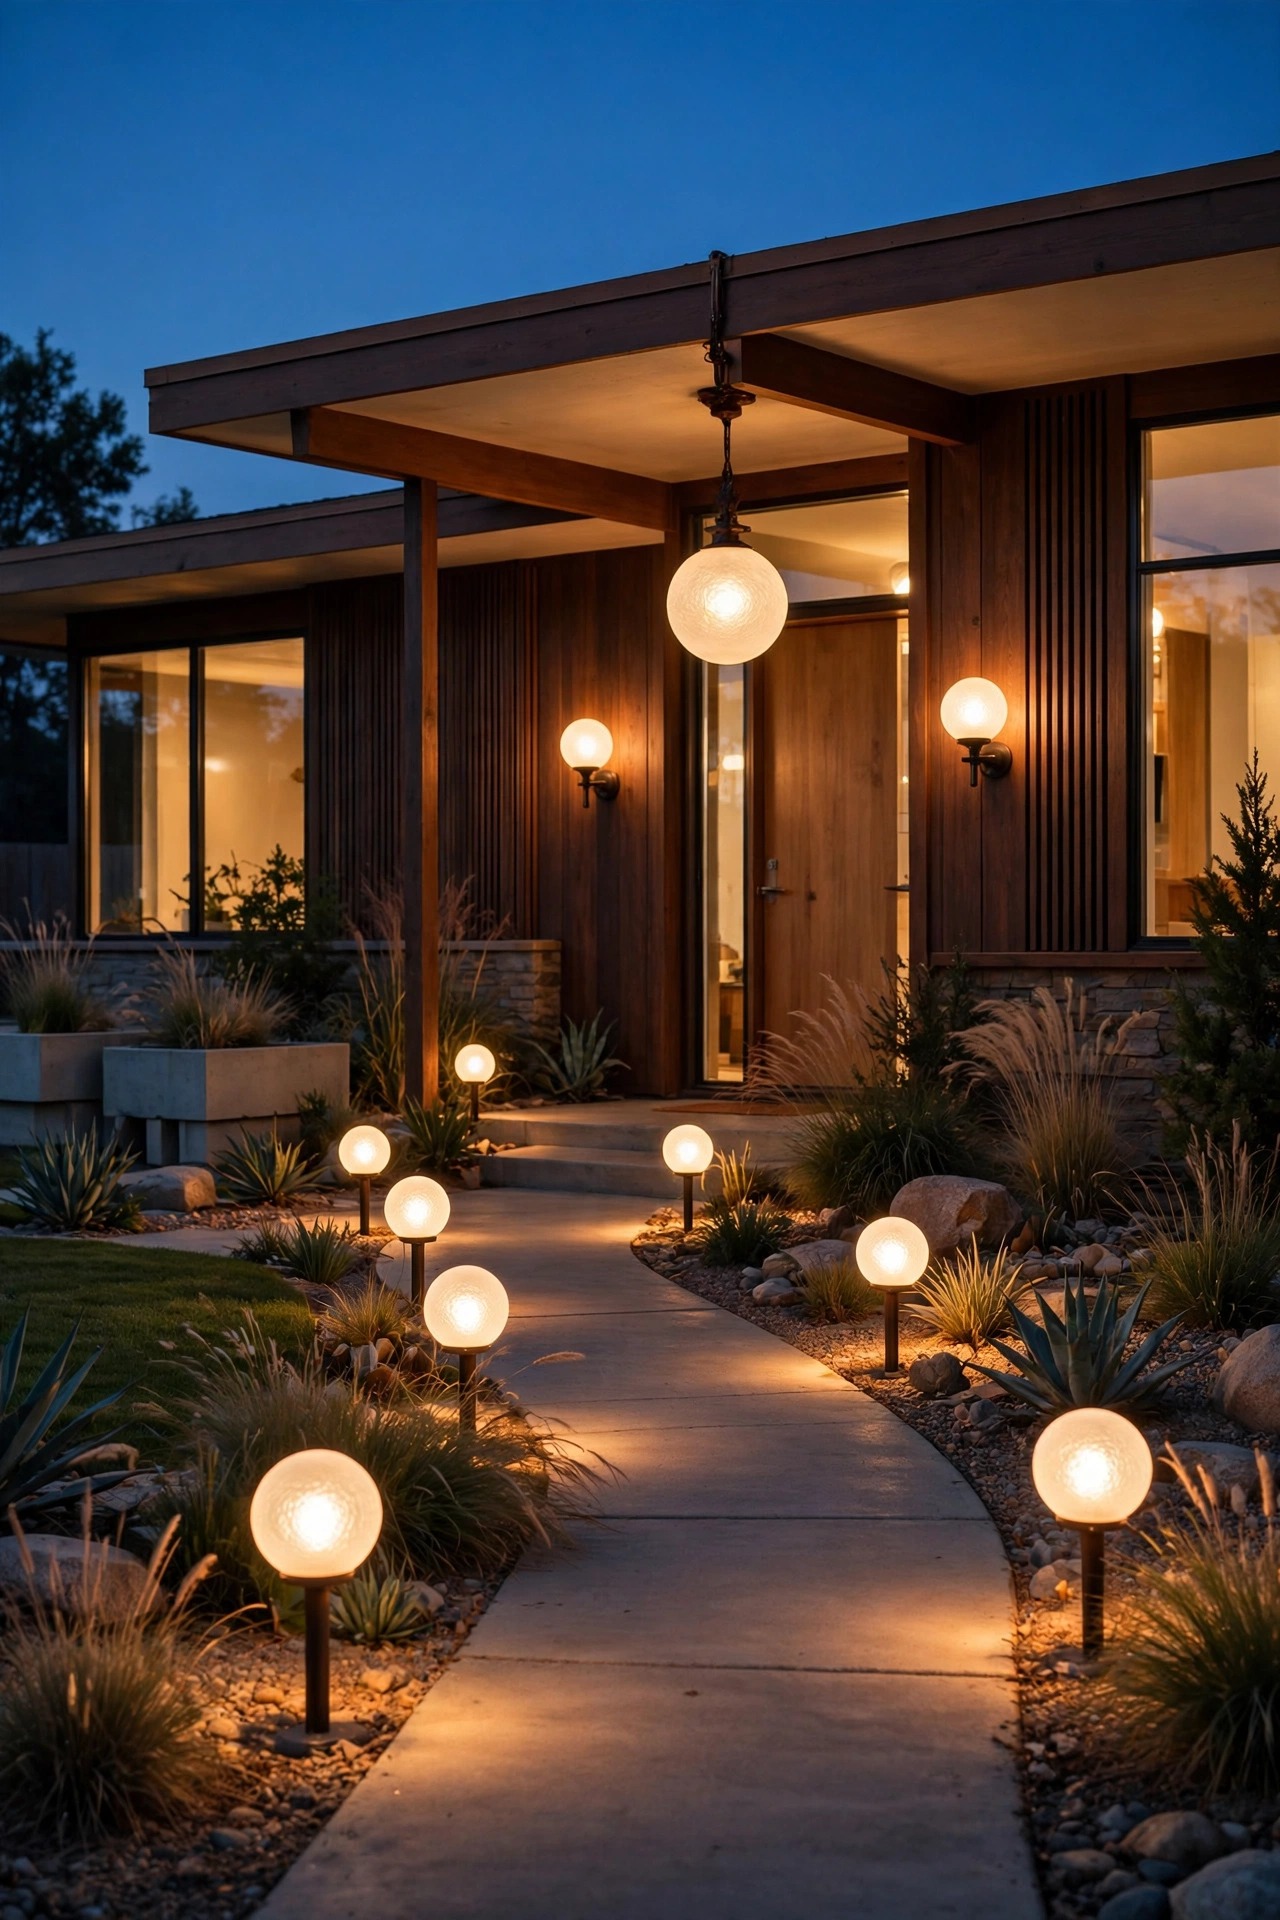
4. Line the Walkway With Globe Path Lights
Nothing says palm-springs-at-dusk quite like a row of glowing orbs leading to the door. Globe path lights, opal or frosted glass spheres on slim metal stems, are the friendliest version of the look: soft light in every direction, zero harsh glare, and a shape that echoes the era perfectly. Space them 6 to 8 feet apart and stagger them on alternating sides of the walk rather than lining them up like a runway, which keeps the pools of light overlapping without looking like an airport. Stems around 18 to 24 inches tall keep the globes above low plantings but below eye level from the street. Low-voltage versions wired to one transformer are my first choice for even brightness; solar globes work on sunny lots but fade unevenly on cloudy stretches. I compared the shapes and stem styles I like most in my roundup of modern path light ideas if you want a deeper look. Wipe the globes monthly, because dust and pollen dim that pretty glow faster than you would think.
Suggested budget range: $180 – $450.

5. Add Low Geometric Bollards Along the Driveway
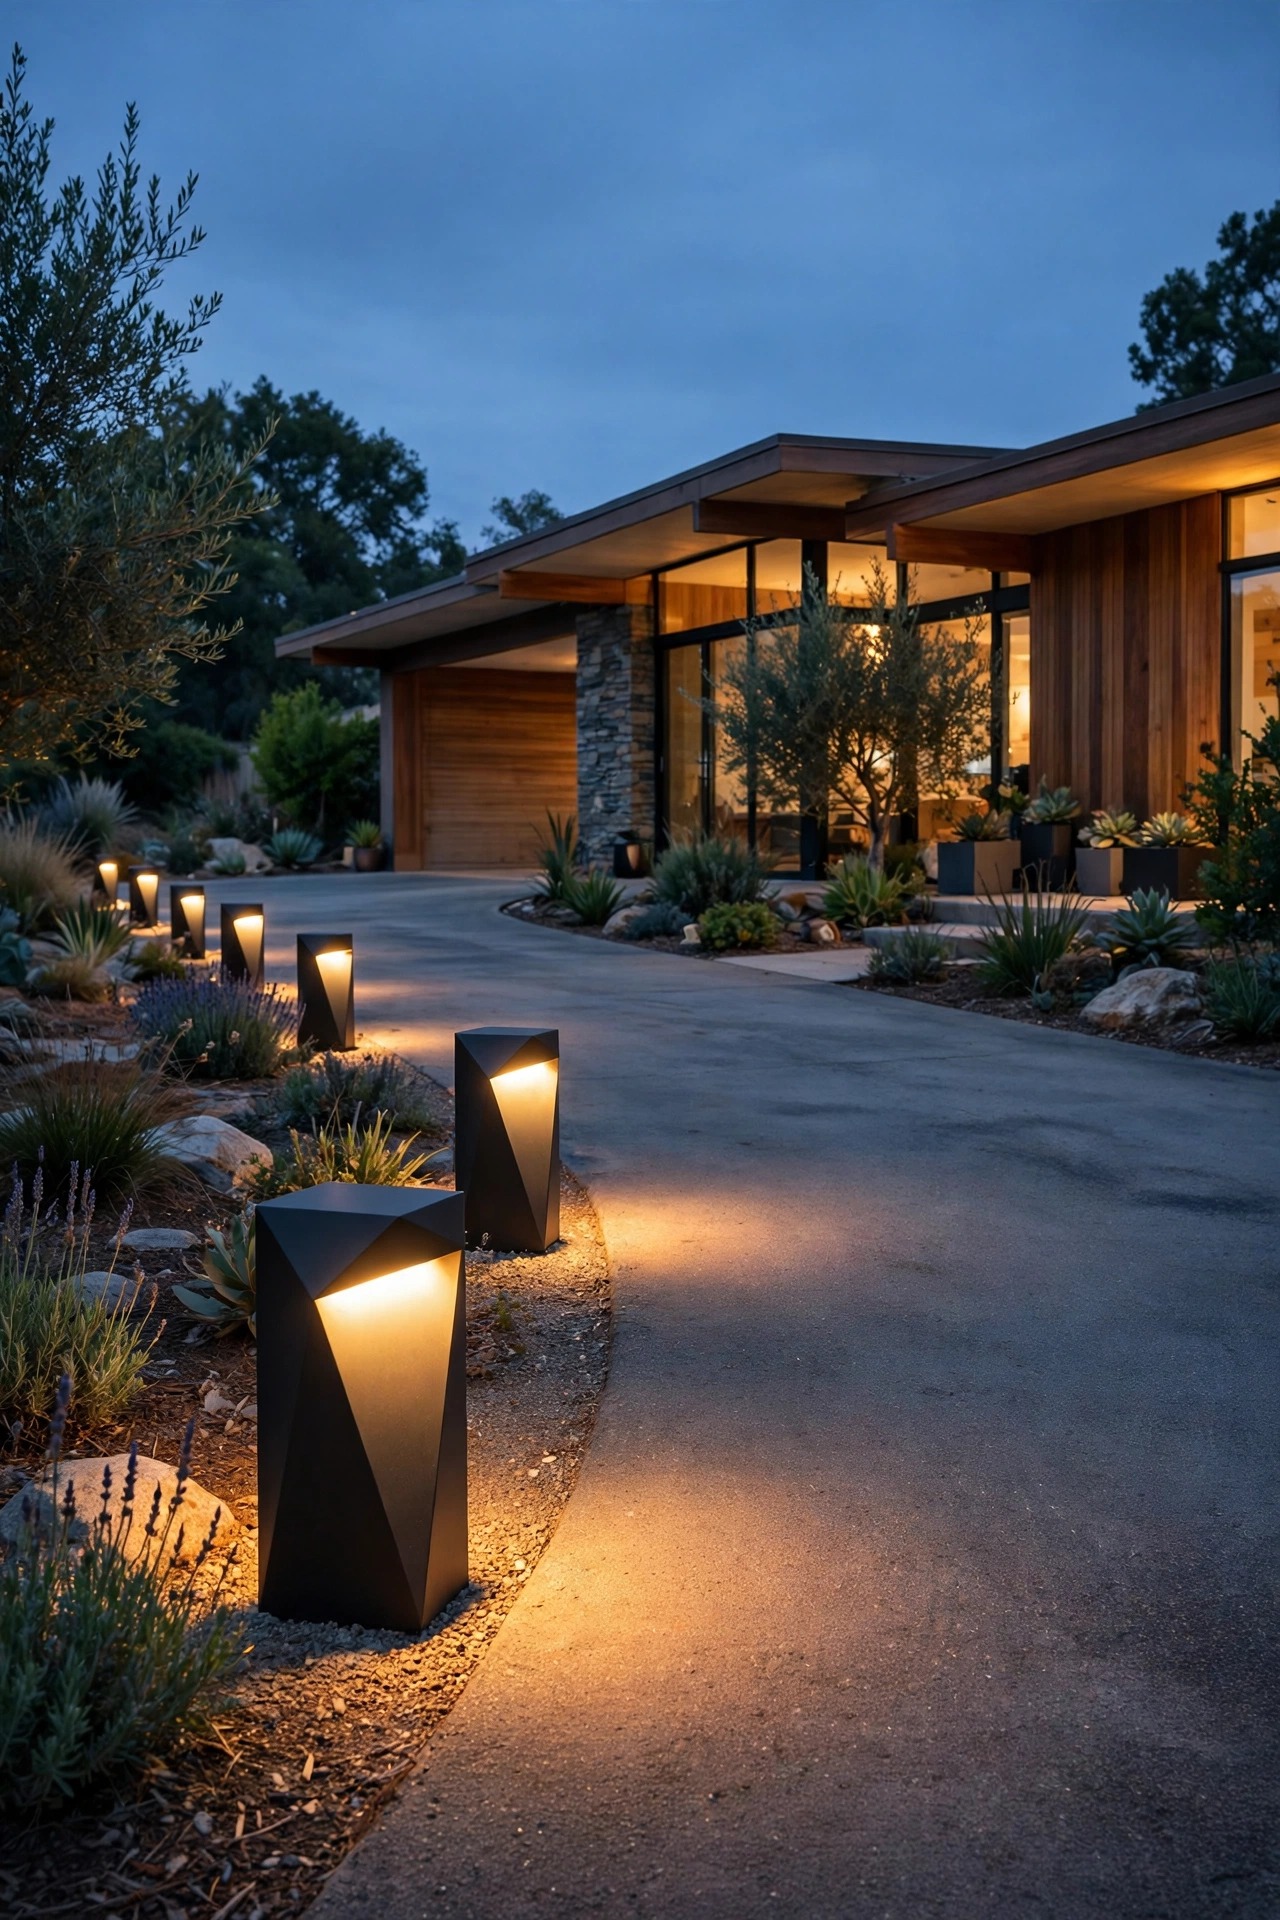
Where globe lights are soft and round, bollards are the crisp geometry of the era, and a driveway edge is exactly where that structure belongs. Look for low cylinders, cones, or rectangular columns in matte black or bronze, about 24 to 30 inches tall, with the light source tucked under a cap or louver so it washes down instead of blasting sideways into drivers' eyes. I space mine 8 to 10 feet apart along the driveway apron and at the corners where the walk meets the drive, the two spots where guests genuinely need guidance at night. Bollards throw a wider, more even pool than little path stakes, so you need fewer of them, and their solid bodies shrug off the occasional bumped garbage can or stray basketball. Choose sealed LED fixtures with replaceable drivers if you can, and anchor them in small concrete footings on soft soil so they stay plumb through freeze and thaw. Keep the finish matched to your path lights so the whole front reads as one family, not a clearance-sale sampler.
Suggested budget range: $200 – $500.
6. Uplight One Sculptural Tree
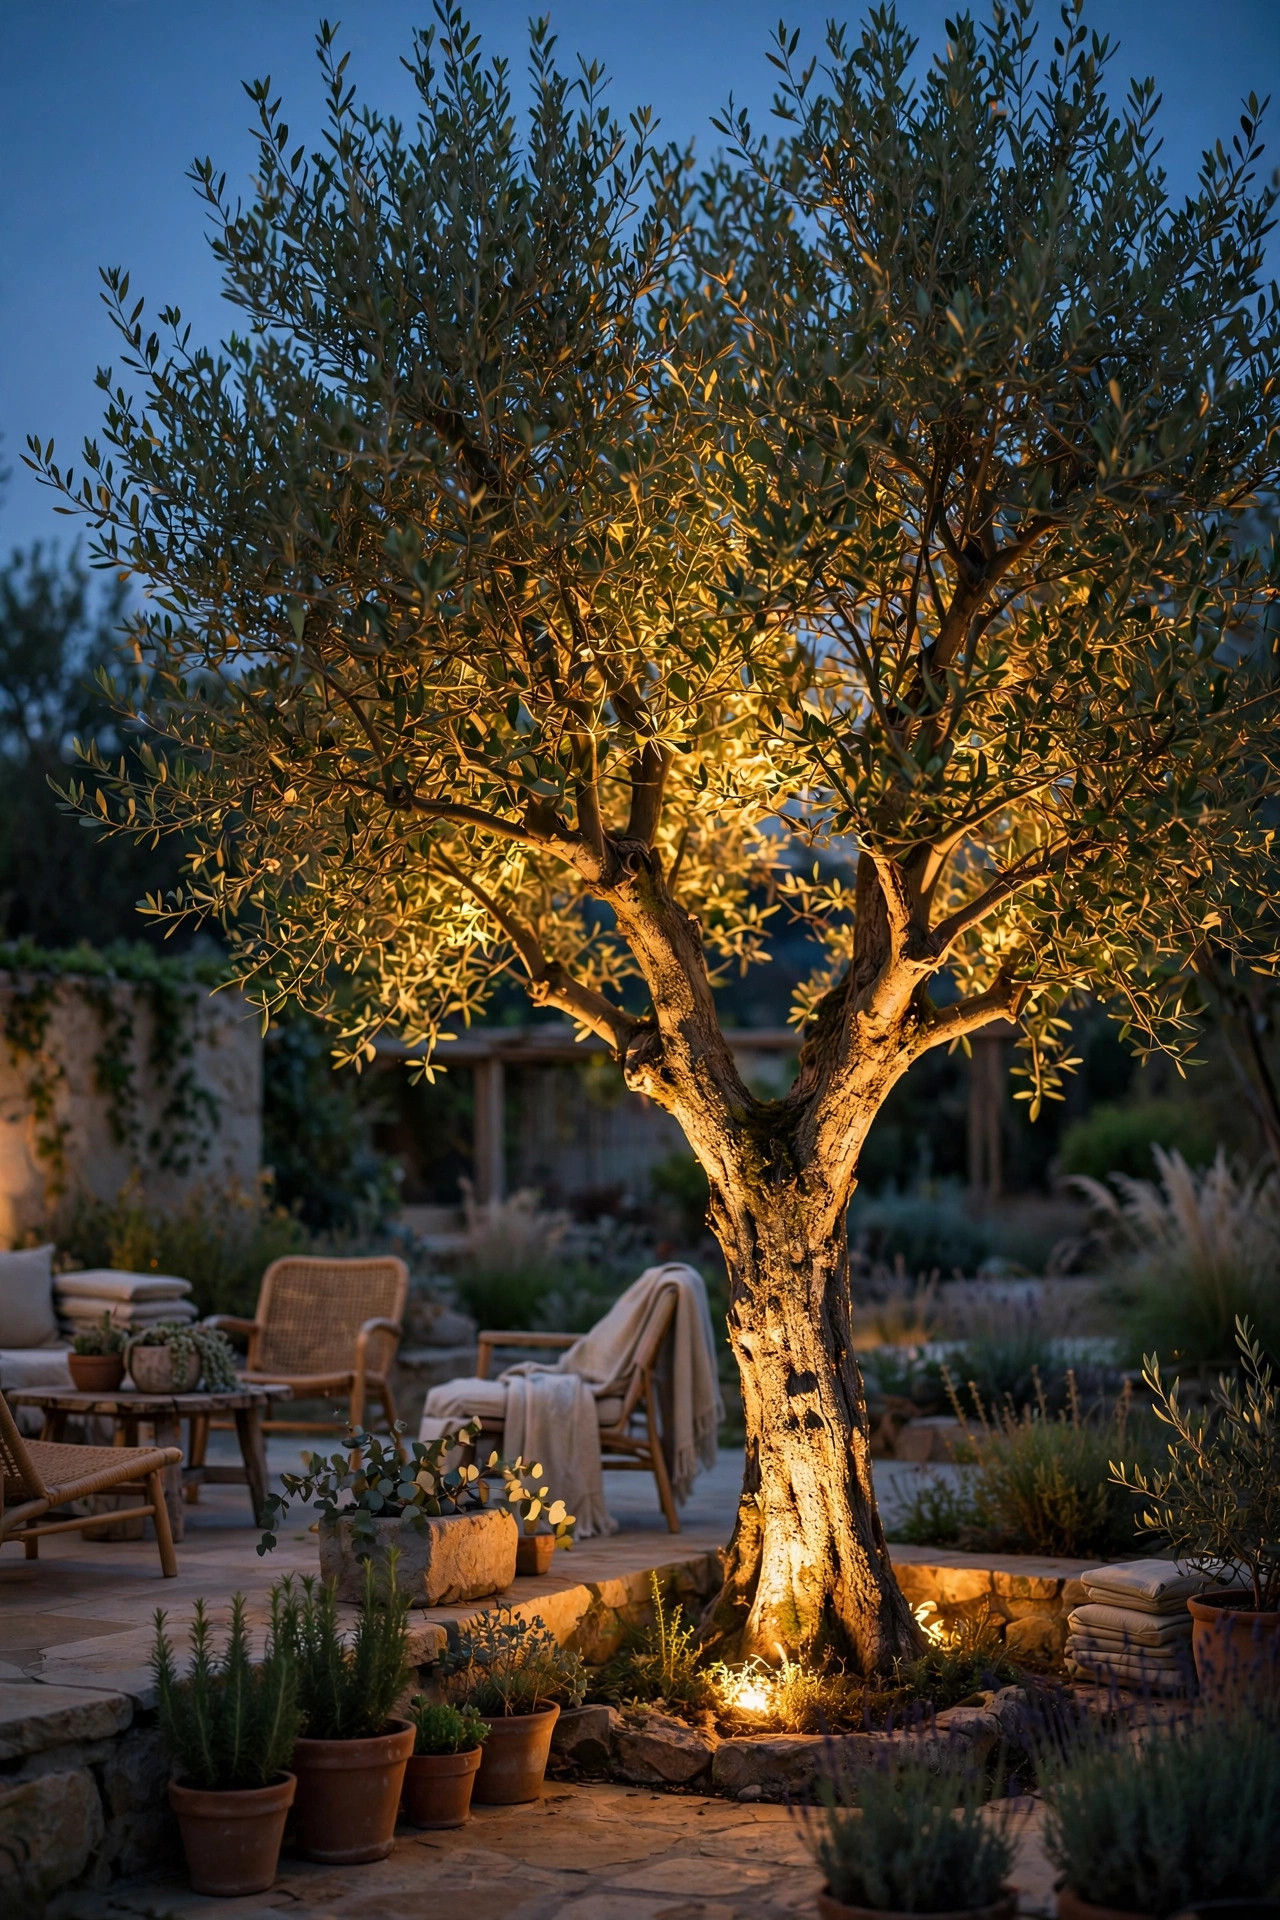
Mid-century landscaping loves a sculptural tree, an olive, a Japanese maple, a twisted pine, and uplighting turns it into the yard's nighttime centerpiece. I use two or three adjustable spotlights or in-ground well lights placed at the base, aimed up through the branching structure rather than straight at the trunk, because the magic is in the canopy pattern, not a glowing pole. Start with fixtures about 12 to 18 inches out from the trunk and angle them around 30 to 45 degrees, then stand at the street and adjust until the light feels balanced from the curb. Warm 2700K keeps bark and foliage rich; anything cooler turns leaves a sickly gray-green. Well lights sit flush so the mower passes over them, while staked spots are easier to re-aim as the tree grows. I walk through fixture placement, beam angles, and the mistakes to avoid in my guide to front yard tree lighting ideas, and it is worth a read before you bury cable. Keep fixtures a few inches clear of mulch so heat and moisture do not cook the seals.
Suggested budget range: $90 – $300.
7. Moonlight From a High Branch for a Palm Springs Glow
Moonlighting is the most romantic trick in this whole list, and it suits mid-century yards beautifully because the light feels like it belongs to the landscape instead of the hardware store. A small shielded fixture mounted 15 to 20 feet up in a mature tree shines down through the branches, throwing dappled, shifting shadows across the lawn and walk that mimic real moonlight. Use a warm 2700K bulb rather than the icy blue some people choose, and you get the shadow play without the haunted-house vibe. The fixture needs a proper tree-mount bracket, never screws driven deep into the trunk, and the cable should run down the back side of the tree with slack loops so the tree can grow without strangling the wire. Honestly, this is the one project where I hire help: an arborist or electrician with a lift can mount it safely in under an hour, and you only climb once. Aim the beam to cover the seating or walk area below, then check from the street that the fixture itself stays invisible inside the canopy.
Suggested budget range: $150 – $400.

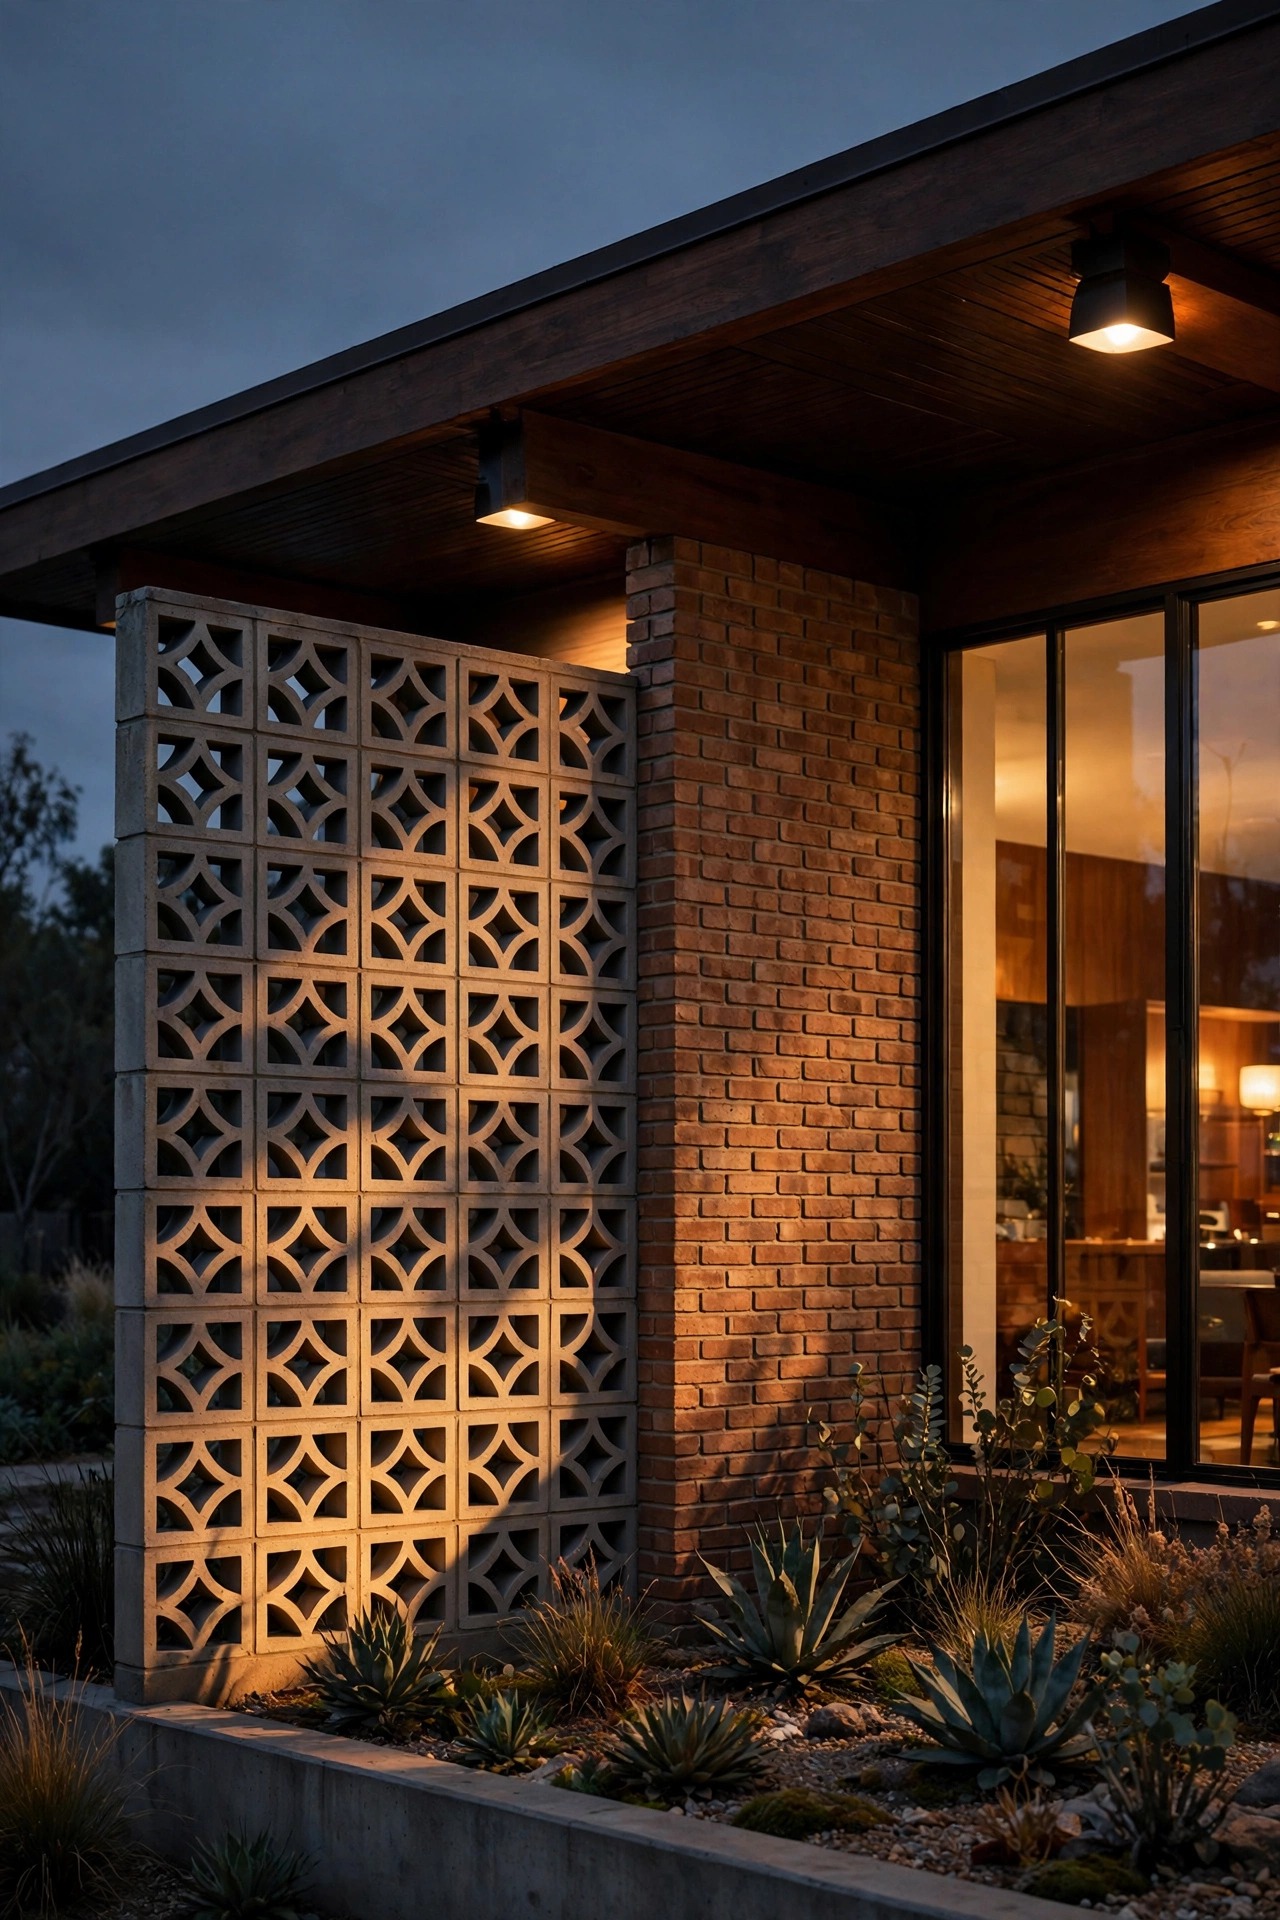
8. Graze Light Across Brick, Stone, or Breeze Block
Mid-century houses are full of texture, stacked stone, raked brick, breeze block screens, and grazing light is how you show it off after dark. Place a narrow-beam fixture just 6 to 12 inches out from the wall and aim it straight up, so the light skims the surface and every bump and mortar line throws a tiny shadow. The closer the fixture sits to the wall, the more dramatic the texture; pull it back a few feet and the same wall goes soft and flat. I love this along a breeze-block screen wall, where the patterned blocks glow like a lantern from the street. In-ground well lights work best here since nothing sticks up to trip over, but a low shielded spot on a short stake does the job on a budget. Keep the beam narrow, around 15 to 25 degrees, so the light stays on the wall instead of spilling into windows. One warning from experience: grazing light shows every flaw, so patch the crumbling mortar first or the whole street will admire it nightly.
Suggested budget range: $100 – $280.
9. Backlight the House Numbers
A glowing address is equal parts style and sanity, because delivery drivers and first-time guests should not need a search party to find you. Backlit house numbers, individual digits floating on standoffs with a warm halo behind them, look like they came straight off a 1960s motel in the best possible way. Mount them on the wall beside the door or on a small plaque near the walk, somewhere lit by the halo itself so the numbers read from a moving car at the curb. Choose 5- to 6-inch digits in a simple sans or classic serif face, finished to match your sconces. Most sets run on low voltage and can share the transformer with your path lights, though battery and solar plaques exist for renters. Keep the glow warm and modest; a number sign should whisper, not shout like a diner marquee. If your numbers sit far from the door, echo the same plaque style at the mailbox so the design language carries to the street. Wipe the faces each spring, since spider webs love the warm corners behind the digits.
Suggested budget range: $40 – $120.

10. Tuck Solar Dome Stakes Into the Flower Beds
Not every retro fixture needs a wire. Solar stakes shaped like little domes, mushrooms, or half-buried globes scatter wonderfully through flower beds, and they lean into the playful side of mid-century design. I use them as accent sparkle only, a dozen or so tucked between plantings at staggered heights, never as the main light for steps or walks, because their brightness depends on the day's weather. Look for warm amber-toned LEDs rather than the blue-white default most cheap solar ships with, and pick stakes with separate solar panels you can angle toward the sun if your beds sit in part shade. Expect 100 to 200 lumens from a decent one, enough for a soft pool among the flowers. Spacing is forgiving here; clusters of three read as intentional, while a lone stake looks lost. They are also my favorite low-commitment test: if you are unsure about a lighting plan, live with solar stakes for a season and note where you keep wishing for more light, then wire those spots permanently next year.
Suggested budget range: $30 – $90.

11. String Café Lights Under the Carport or Breezeway
So many mid-century homes trade the garage for a carport or breezeway, and a few swoops of café string lights turn that flat ceiling into the most inviting part of the front yard. Run commercial-grade string lights on a guide wire in gentle scallops, bulbs hanging 7 to 8 feet above the ground, and the whole space glows like a Palm Springs patio. Choose shatterproof LED bulbs, because the first windstorm will test anything glass, and keep the total run on one GFCI-protected outdoor outlet with the connections under the roofline where rain cannot pool in the sockets. Warm white bulbs around 2700K match the rest of the yard; the multicolor sets are fun for one holiday weekend and then, honestly, they just fight the architecture. Anchor the ends into real framing, not fascia trim, since a loaded string pulls harder than it looks, especially with ice or wet snow. On a breezeway between house and garage, strings also solve a real problem: that passage is usually the darkest route to the door, and now it is the prettiest.
Suggested budget range: $50 – $150.

12. Match the Garage With Starburst-Backplate Sconces
The garage door takes up half the front of most ranch homes, and leaving it dark while the entry glows looks unfinished. My fix is a pair of sconces with starburst backplates flanking the garage door, echoing the front-door fixtures in a slightly larger scale. That echo matters: mid-century design is built on repetition, and carrying the same motif from door to garage makes the whole facade read as one composition. Center the fixtures about 66 inches off the driveway, roughly a third of the way in from each side of a double door, and wire them to the same photocell as the entry sconces so the front of the house wakes up all at once. If your garage sits under a low eave, swap the sconces for a wide, flat starburst flush-mount above the door instead. Keep the bulb wattage modest here; the driveway needs guidance light, not runway light, and two soft pools beat one harsh flood every time. Match finishes exactly across door, garage, and numbers, because near-matches are more distracting than honest contrast.
Suggested budget range: $80 – $220.

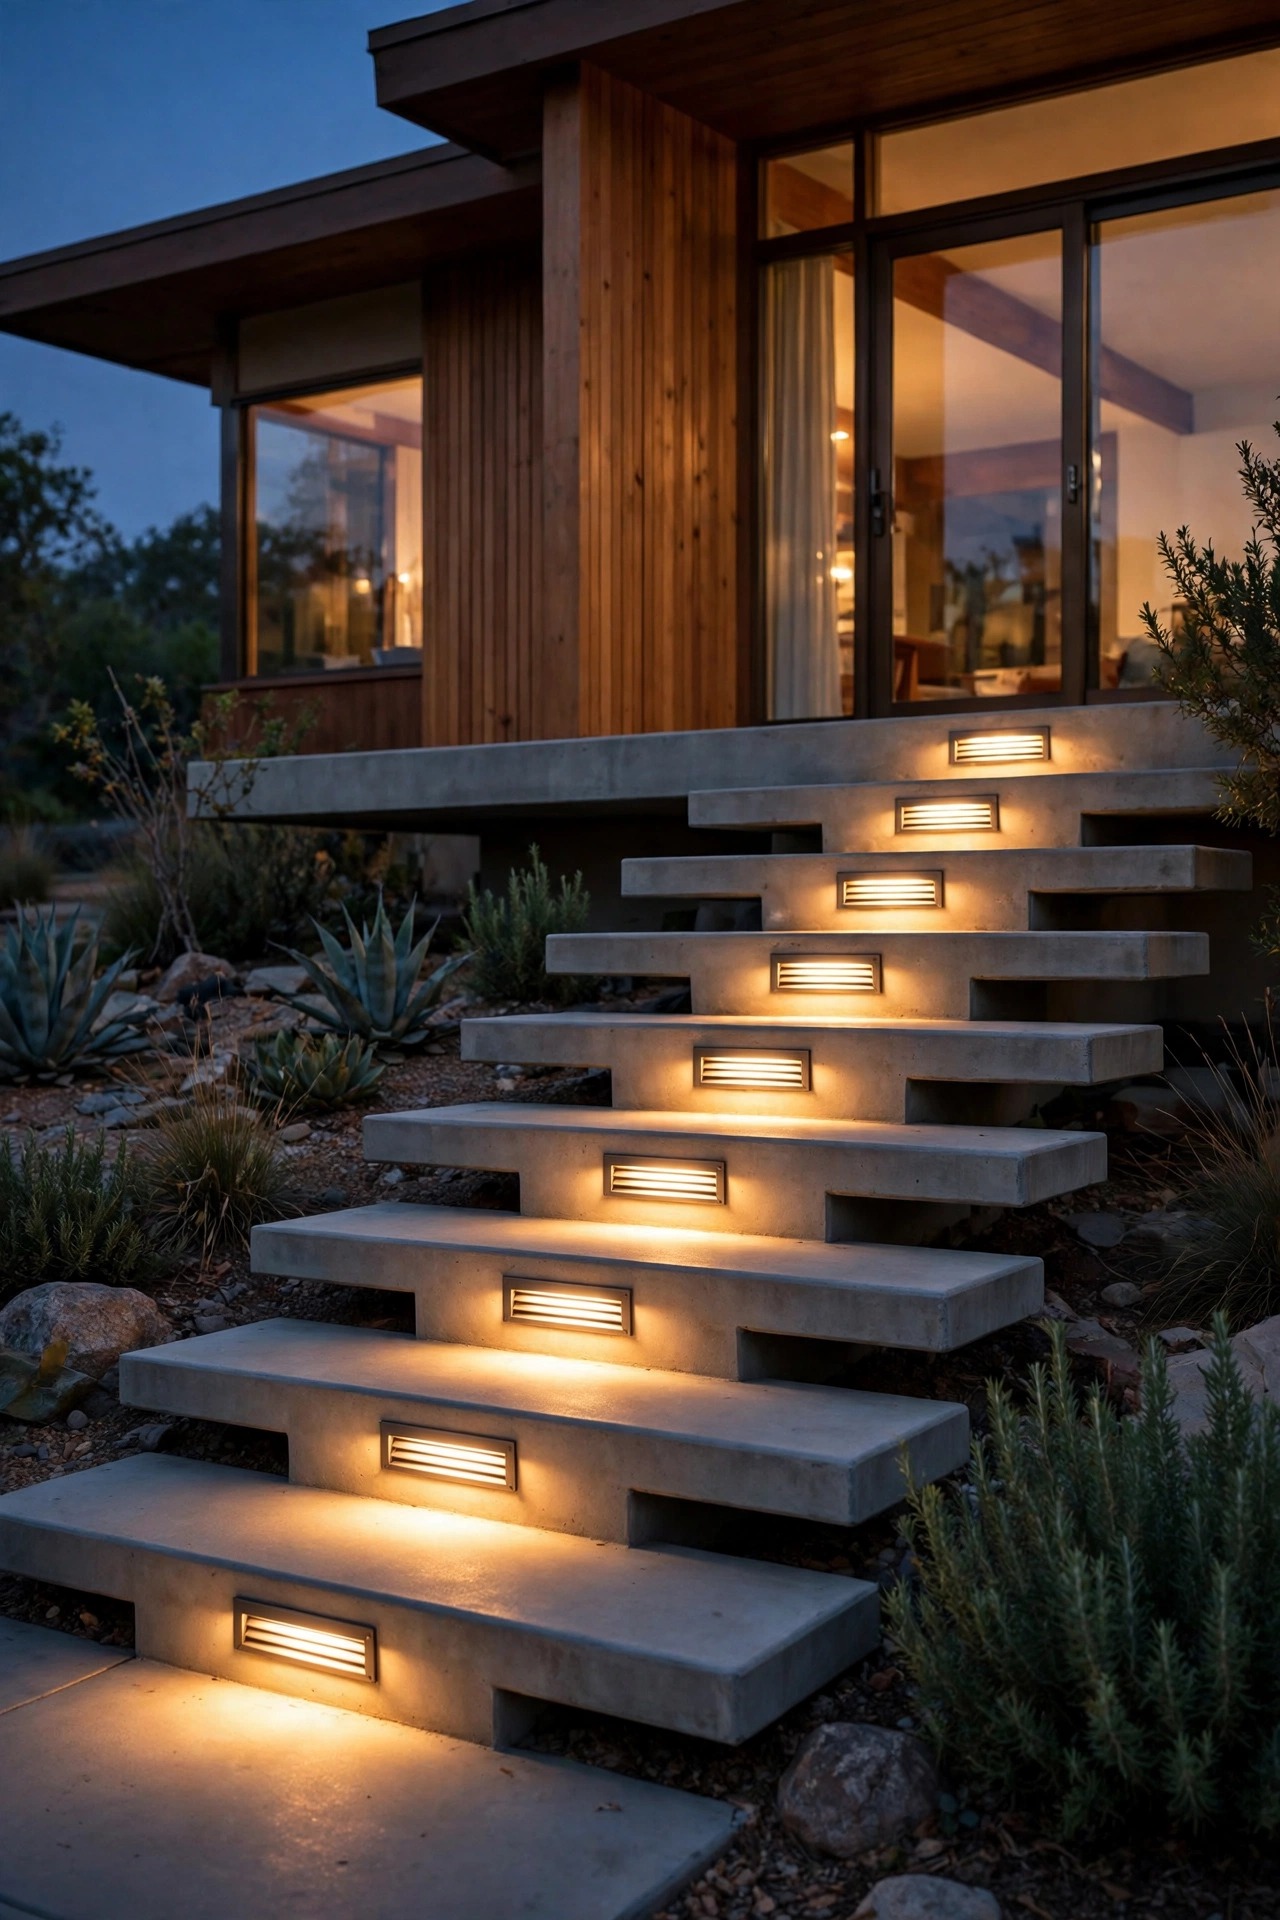
13. Recess Step Lights Into Concrete and Retaining Walls
Mid-century yards are full of level changes, floating concrete steps, low retaining walls, terraced planters, and every one of those edges wants a small recessed light. Louvered step lights set into the riser or the wall face wash the tread below with a soft downward glow, no glare, no fixture sticking out to catch a shin. Space them every second or third step on wide stairs, and center one above each landing. Most recess into a standard single-gang box, so they are easiest to add during concrete or masonry work, though retrofit versions with small junction cups do exist for existing walls. Choose faceplates in a finish that disappears into your material by day: bronze on stone, black on painted concrete, stainless on raw modern pours. Wire them to the same low-voltage run as the path lights and they will never be forgotten on a dark night. Honestly, this is the least glamorous idea on the list and the one guests trip-proof their way up my steps thanking me for most often. Safety with a silhouette this clean is pure mid-century thinking.
Suggested budget range: $90 – $260.
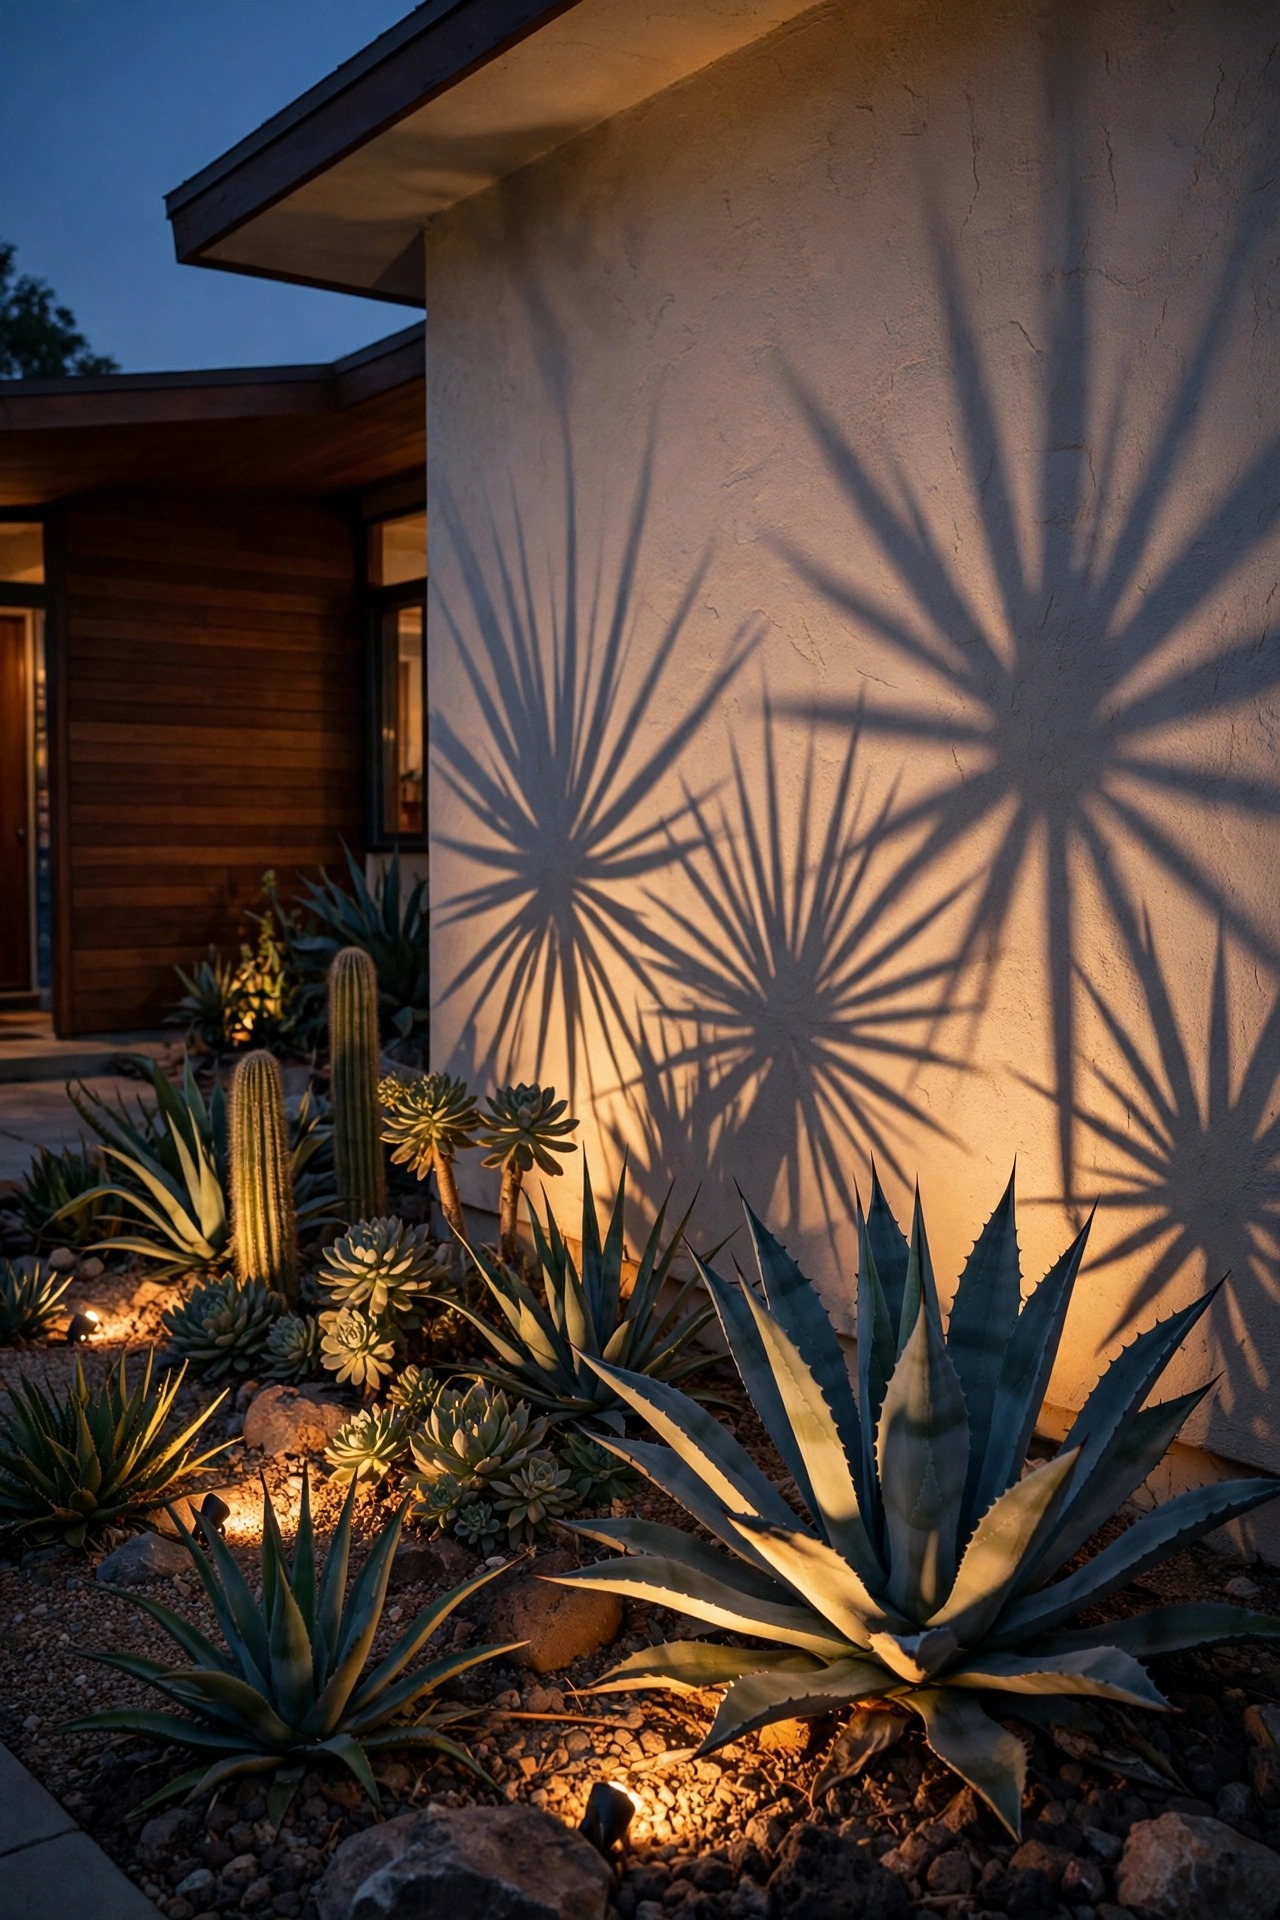
14. Spotlight Sculptural Plants and Planters
Desert-modern plantings are sculpture by daylight, agaves, yuccas, ornamental grasses, a gnarled olive in a big low planter, and a small spotlight keeps the show running after sunset. Use one narrow-beam fixture per plant, placed 12 to 24 inches out and aimed up through the form so the shadows of the leaves paint the wall behind it. That shadow play is the whole trick: an uplit agave throws a starburst of its own across stucco, which is about as mid-century as it gets. Keep beams tight, 15 to 30 degrees, and brightness modest, because sculptural plants read best with contrast, not a flat flood. In planters, tiny well lights or spike spots tuck invisibly among the gravel mulch these beds usually wear. Group plants in odd numbers and light the tallest or most dramatic one, letting the others fall into silhouette; lighting everything equally flattens the scene. Rinse dust off lenses a couple of times a year, since these fixtures sit low where sprinklers and soil splash reach them first.
Suggested budget range: $70 – $200.
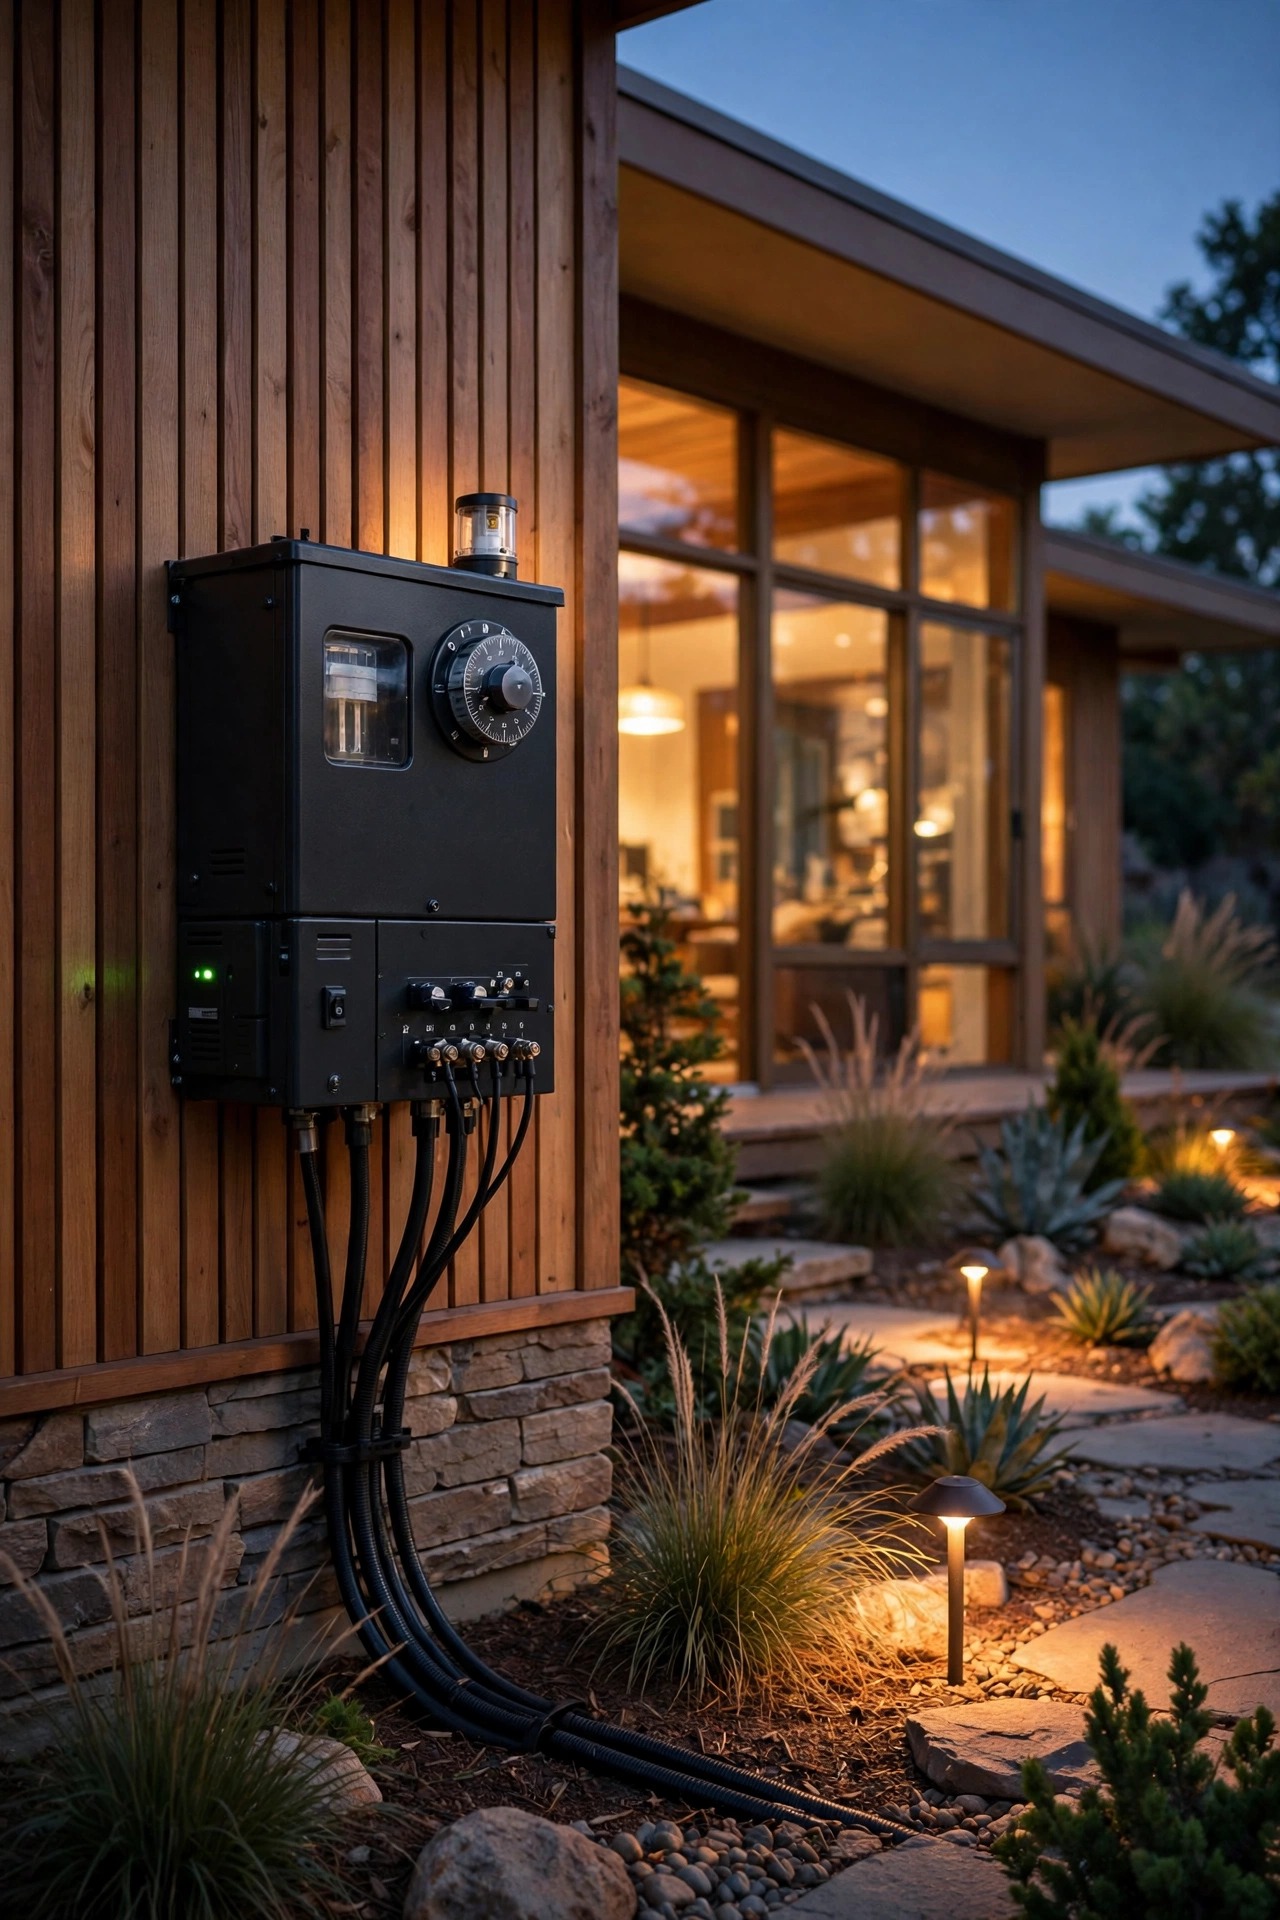
15. Put It All on Timers and Photocells
The most stylish lighting plan in the world fails if nobody turns it on, so automation is a design feature, not an afterthought. A transformer with a built-in photocell wakes the whole low-voltage system at dusk and can shut it off at midnight, at dawn, or after a set number of hours; I run mine dusk to about 11 p.m., which covers every arrival and dog walk without burning light into empty hours. For plug-in fixtures like the carport strings, an outdoor smart plug or an astronomic timer that tracks your local sunset handles the seasons automatically, so you are not reprogramming in June and again in December. Put the entry statement fixture on its own switch or dimmer so you can raise it for guests and lower it for quiet nights. One practical note: keep the transformer and timer where you can reach them without a ladder, mounted at least a foot off the ground near an outlet, and label each run with a tag while you still remember what it feeds. Set it once, and the yard simply performs every evening.
Suggested budget range: $35 – $120.
16. Commit to One Warm Temperature Everywhere
Here is the quiet rule that separates a polished retro yard from a patchwork one: every single bulb at the same warm temperature. I standardize on 2700K across path lights, sconces, uplights, and strings, because that golden tone flatters brick, wood, and stone the way the original incandescent-era fixtures did. The fastest way to cheapen the whole look is one stray 4000K or 5000K bulb glaring blue-white from the garage sconce while everything else glows amber. When you buy, check the Kelvin rating on every box, since product lines often mix temperatures on the same shelf, and look for a CRI of 90 or higher so reds and greens stay rich. Integrated LED fixtures cannot change bulbs later, so confirm the temperature before they go in the ground, not after. If you inherit a yard with mixed bulbs, swap the worst offenders first, starting with whatever sits at eye level. It is the cheapest transformation on this entire list, often just a handful of bulbs, and honestly it makes older fixtures look newly coordinated overnight.
Suggested budget range: $20 – $80.
17. Repeat the Globe Motif in Three Places
Designers of the era repeated shapes on purpose, and borrowing that habit is the easiest way to make a front yard feel composed instead of collected. Pick one motif, mine is the frosted globe, and repeat it in three spots at three heights: globe path lights low along the walk, a globe pendant or sconce pair at the door, and a globe-topped post light or the sputnik's round center ball up high. Three repetitions read as a theme; five or six start to read as a theme park, so stop while it feels effortless. The motif does not have to be globes. Cones, cylinders, or starbursts all work the same way, and mixing one supporting shape is fine as long as the hero shape clearly leads. This is also a budget strategy: buy the best version of the motif for the door, where people stand closest, and choose simpler versions of the same shape for the yard, where they read as silhouettes anyway. From the street at dusk, the repetition is what makes neighbors slow down.
Suggested budget range: $100 – $300.
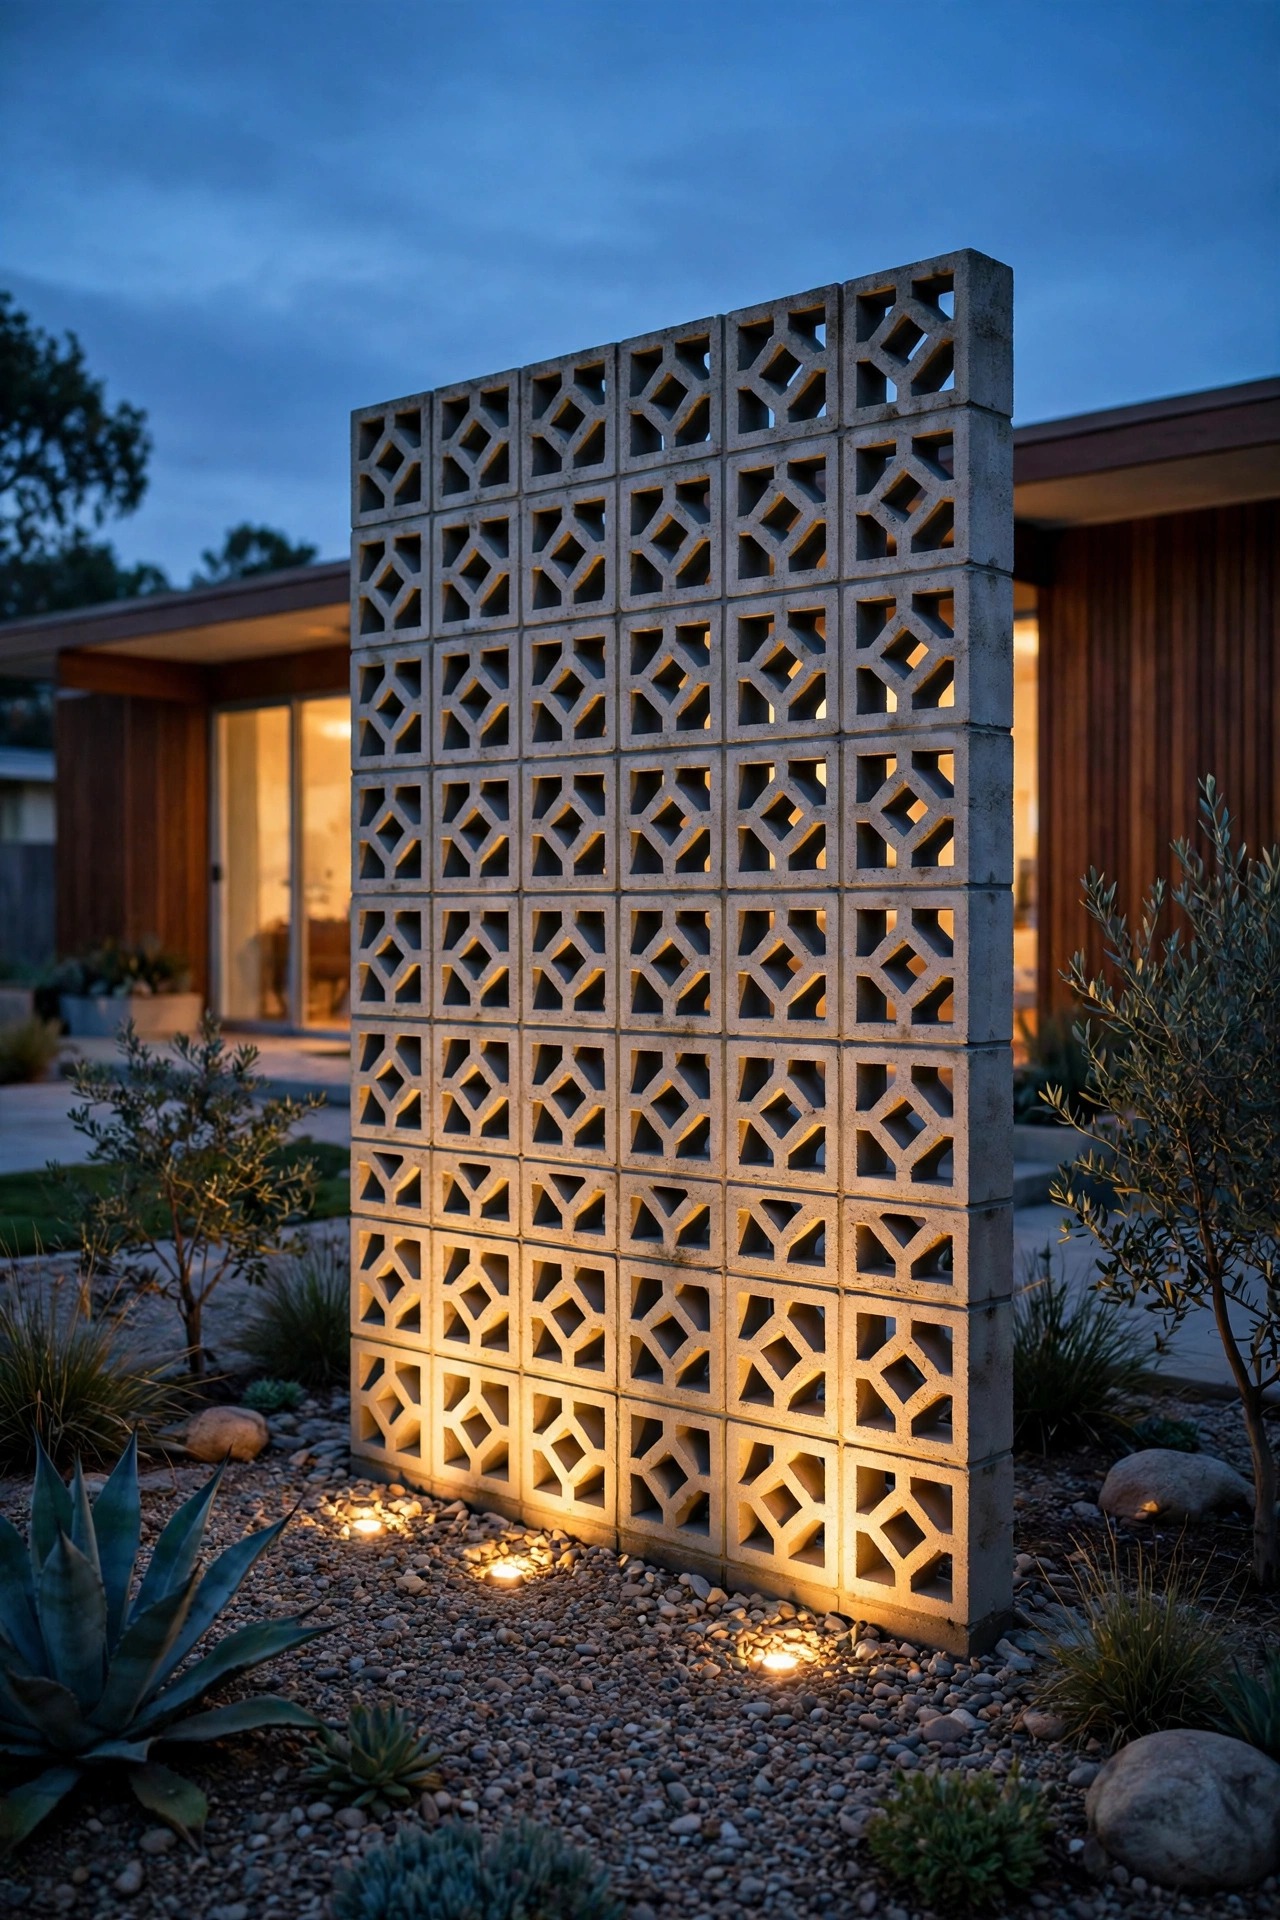
18. Wash a Breeze Block or Fence Line From Below
A breeze block screen or a long horizontal fence is a gift of a backdrop, and washing it with light from below turns a boundary into a glowing feature. Set a row of small uplights or a low linear fixture in the gravel or planting strip at its base, spaced evenly so the scallops of light overlap into one soft wash. On breeze block, the light leaks through the pattern and the wall becomes a lantern; on wood fencing, aim slightly out from the base so the boards show their grain and rhythm. Keep the fixtures shielded from the street side so passersby see the lit wall, never the bulbs. This is a lovely place to use solar in-ground lights if the strip gets real sun, since the effect is decorative rather than safety lighting. Match the rhythm to the architecture: scallops that land on the fence posts or the block pattern look deliberate, while random spacing looks like a string of accidents. Finish the bed with dark mulch or gravel so the fixtures disappear completely by day.
Suggested budget range: $110 – $320.
19. Finish With a Dusk Walk-Through of Your Mid-Century Modern Front Yard Lighting
The last step costs almost nothing and fixes almost everything. Once your mid-century modern front yard lighting is installed, wait for full dark, then walk the whole scene the way a guest would: from the street, up the drive, along the walk, and onto the porch. Carry your phone and photograph each angle, because the camera shows glare and dark gaps your eyes politely ignore. I always find the same three things: one path light aimed a few degrees into the lawn instead of the walk, one uplight glaring straight into the bedroom window, and one corner I swore was lit that is actually a cave. Adjust aim first, then brightness, then spacing, in that order, and most problems vanish without buying anything. Check that no fixture shines into a driver's eyes at the driveway apron, and that the house numbers read clearly from a car at the curb. Do this walk again after the first season change, since growing plants swallow fixtures by July. Twenty unhurried minutes is the difference between a yard that is lit and a yard that is composed.
Suggested budget range: $0 – $50.
Frequently Asked Questions
What color temperature looks best for mid-century modern front yard lighting?
Warm white at 2700K, every time. That golden tone matches the incandescent glow these homes were designed around, and it flatters the era's favorite materials: brick, stone, wood siding, and warm concrete. If a fixture only comes in 3000K, it can blend in small doses, but avoid 4000K and above anywhere in the front yard, since that cool blue-white light instantly reads as a parking lot instead of Palm Springs. Consistency matters more than the exact number, so pick one temperature and hold it across every bulb and integrated fixture.
Are solar lights bright enough for a front yard?
For accents, yes; for safety lighting, usually not. A good solar stake gives you 100 to 200 lumens, plenty for a soft pool in a flower bed or a glow along a fence, but steps, driveway edges, and the main walk deserve low-voltage fixtures that deliver full brightness every night regardless of the weather. My rule is simple: if someone could trip where the light falls, wire it. Solar also needs six or more hours of direct sun on the panel, so shaded north-facing beds will disappoint by midwinter. Use solar to decorate, wired light to guide.
How far apart should I space path lights?
Six to eight feet apart, staggered on alternating sides of the walk, is the sweet spot for most front paths. Any closer and you get the runway effect, a dotted line of glare that flattens the yard; any farther and dark gaps open between the pools. Bollards throw wider light, so they can stretch to 8 to 10 feet. Before you bury anything, lay the fixtures out at dusk with an extension cord or set solar versions in place for a night or two, then adjust until the pools just kiss each other with no bright dots and no black holes.
How much does a full mid-century front yard lighting project cost?
Doing it yourself in layers, most readers land between $400 and $1,500. A starter phase of path lights, door sconces, and a transformer with a timer runs $300 to $600, and statement pieces like a sputnik fixture or tree uplighting can join later as the budget allows. Hiring a pro to design and install the same plan typically runs $2,500 to $5,000 depending on fixture count and trenching. My advice is to wire for the finished plan even if you buy in phases, because cable and transformer capacity are the annoying parts to redo.
Conclusion
If you take one idea from this whole list, let it be this: clean shapes, warm light, and repetition do the heavy lifting. Choose your layers, commit to 2700K, repeat one motif like the globe or the starburst, and let one sculptural tree or statement fixture earn the spotlight. Mid-century modern front yard lighting rewards restraint, so buy fewer fixtures and place them like you mean it. Start with the walk-through at dusk, fix what the street actually sees, and add drama one layer at a time. When you are ready to keep going, browse the rest of my outdoor lighting ideas here on the site for path, porch, and garden projects that pair beautifully with a retro front yard.