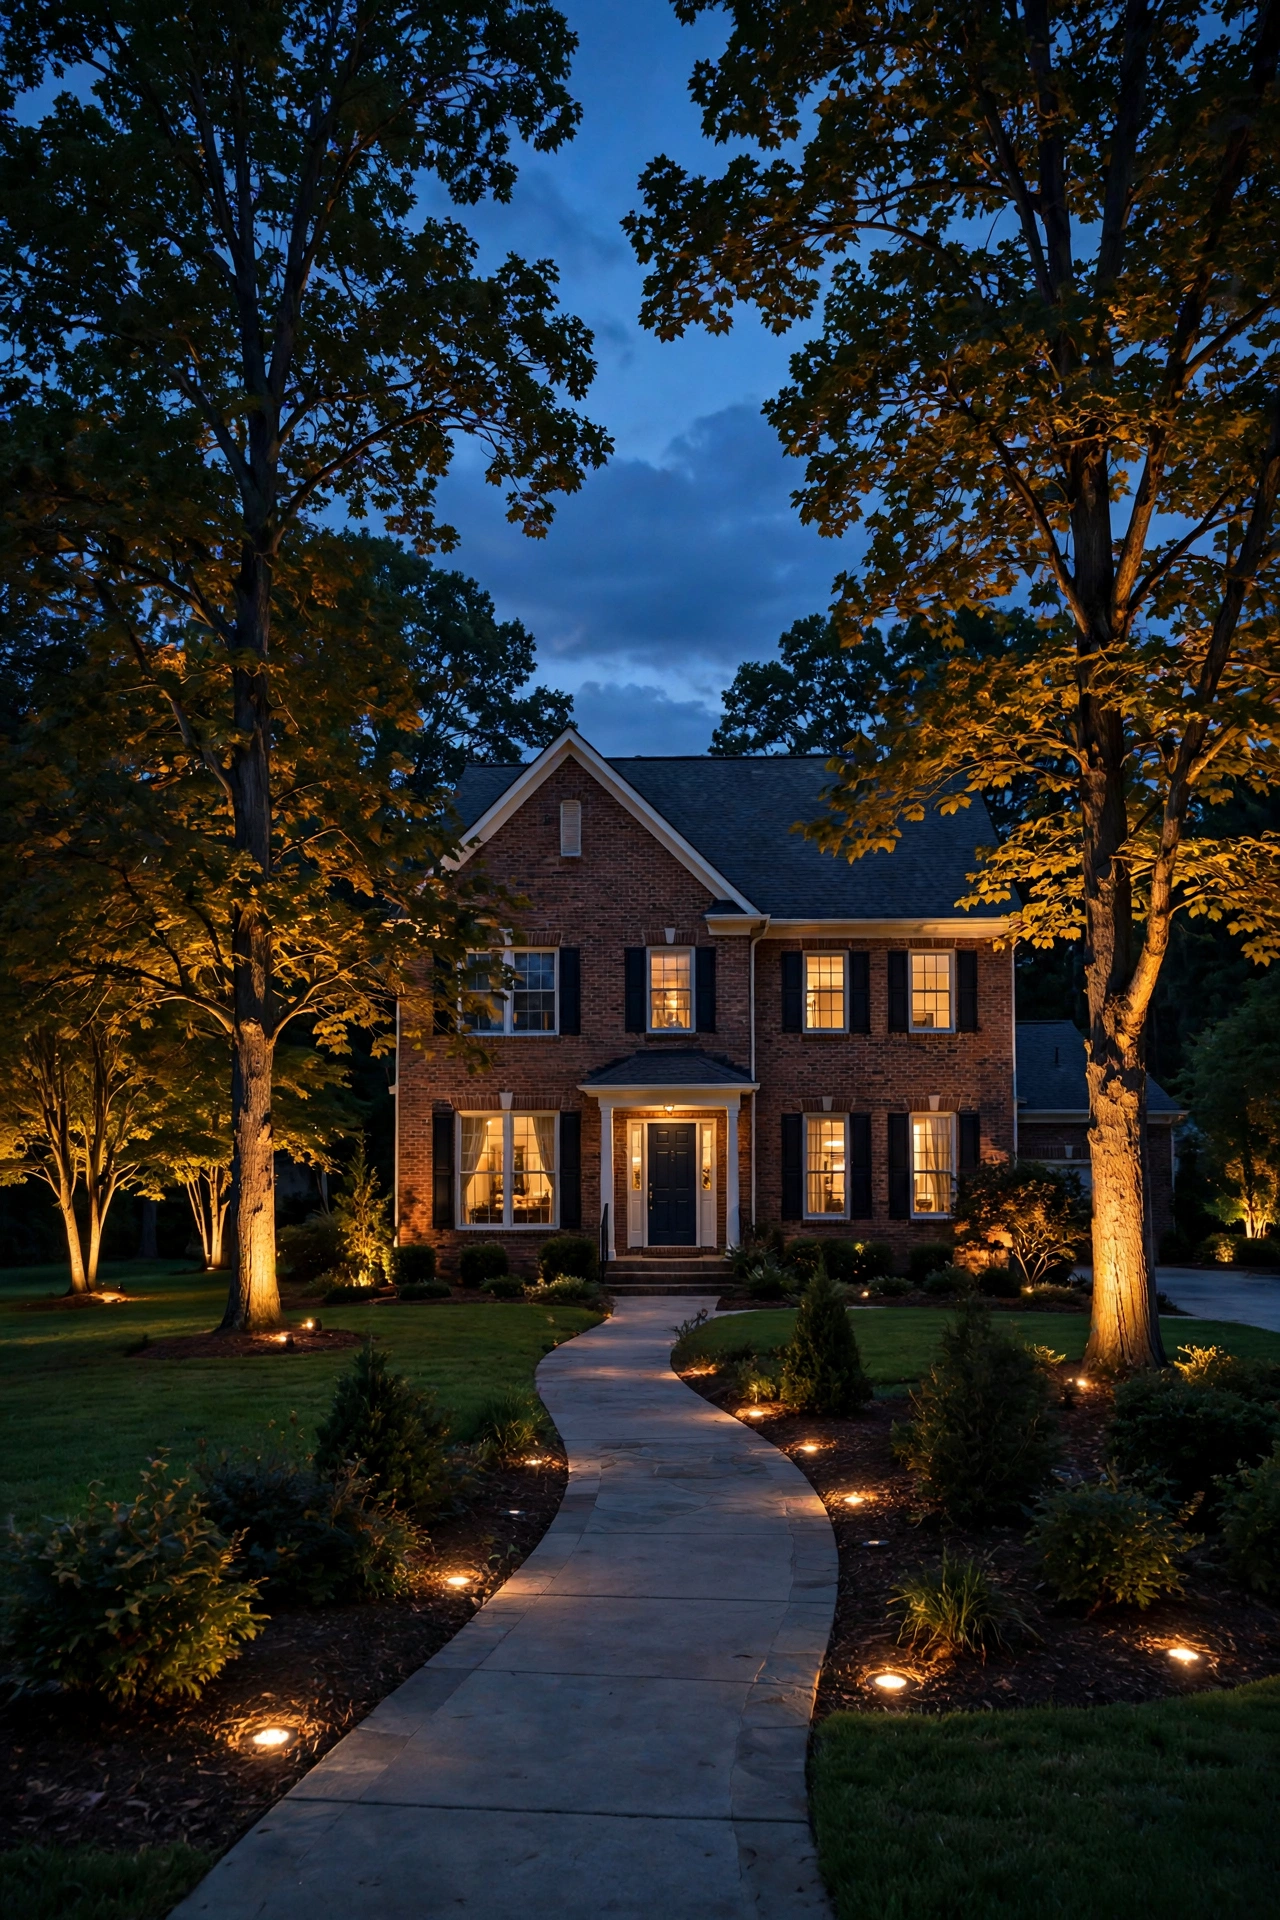
There's a kind of magic that happens when you bury the light source instead of mounting it. The fixtures disappear during the day — no stakes to trip over, no lanterns to knock off a pillar — and at night your yard glows from seemingly nowhere. That's the promise of in ground well lights landscape lighting, and honestly? Once you've lived with it, going back to path stakes feels like a downgrade.
I've lit three yards with well lights over the years, and here's what I always tell friends: think in layers. Well lights are your upward drama — the trees, the stonework, the architecture — and they pair beautifully with a lower layer of path or step lights that keep things safe and readable. You don't need to wire your whole yard in one weekend. Start with one hero tree or the front facade, then expand.
In this post you'll find 17 concrete ways I use in-ground well lights, with real placement numbers, aiming angles, drainage and wiring how-tos, and honest budgets so you can plan your project before you dig a single hole.
1. Uplight a Single Hero Tree
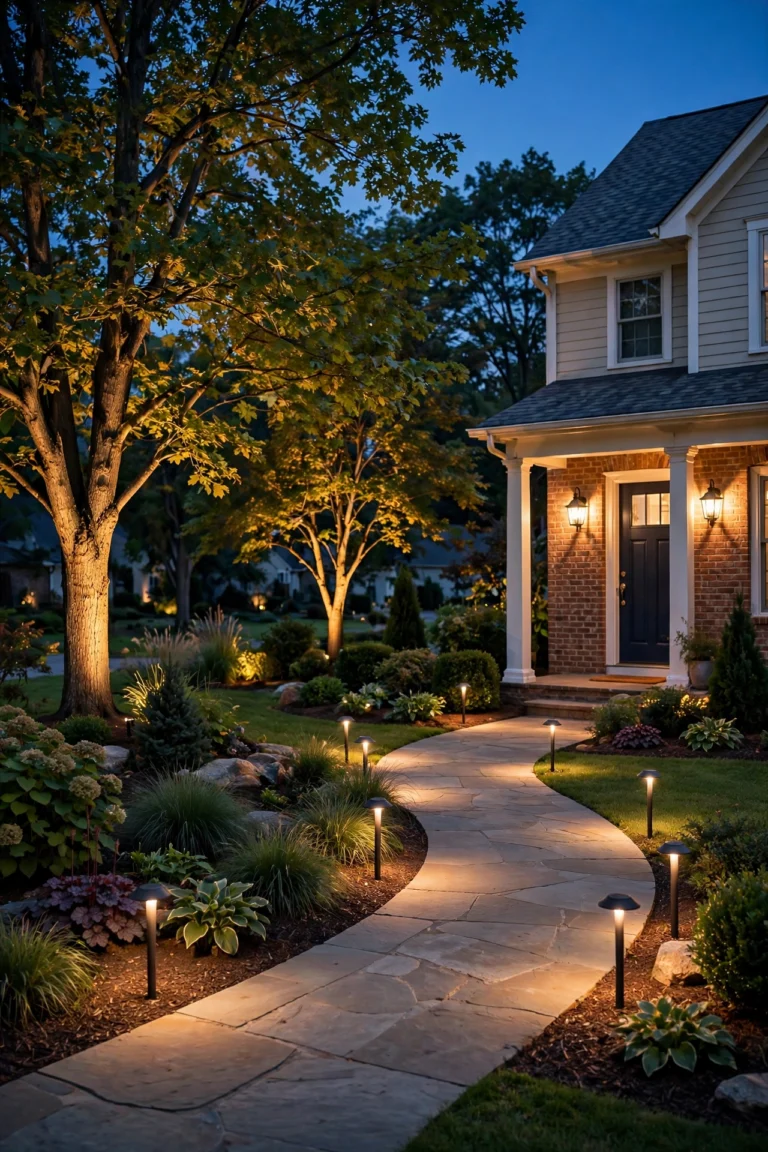
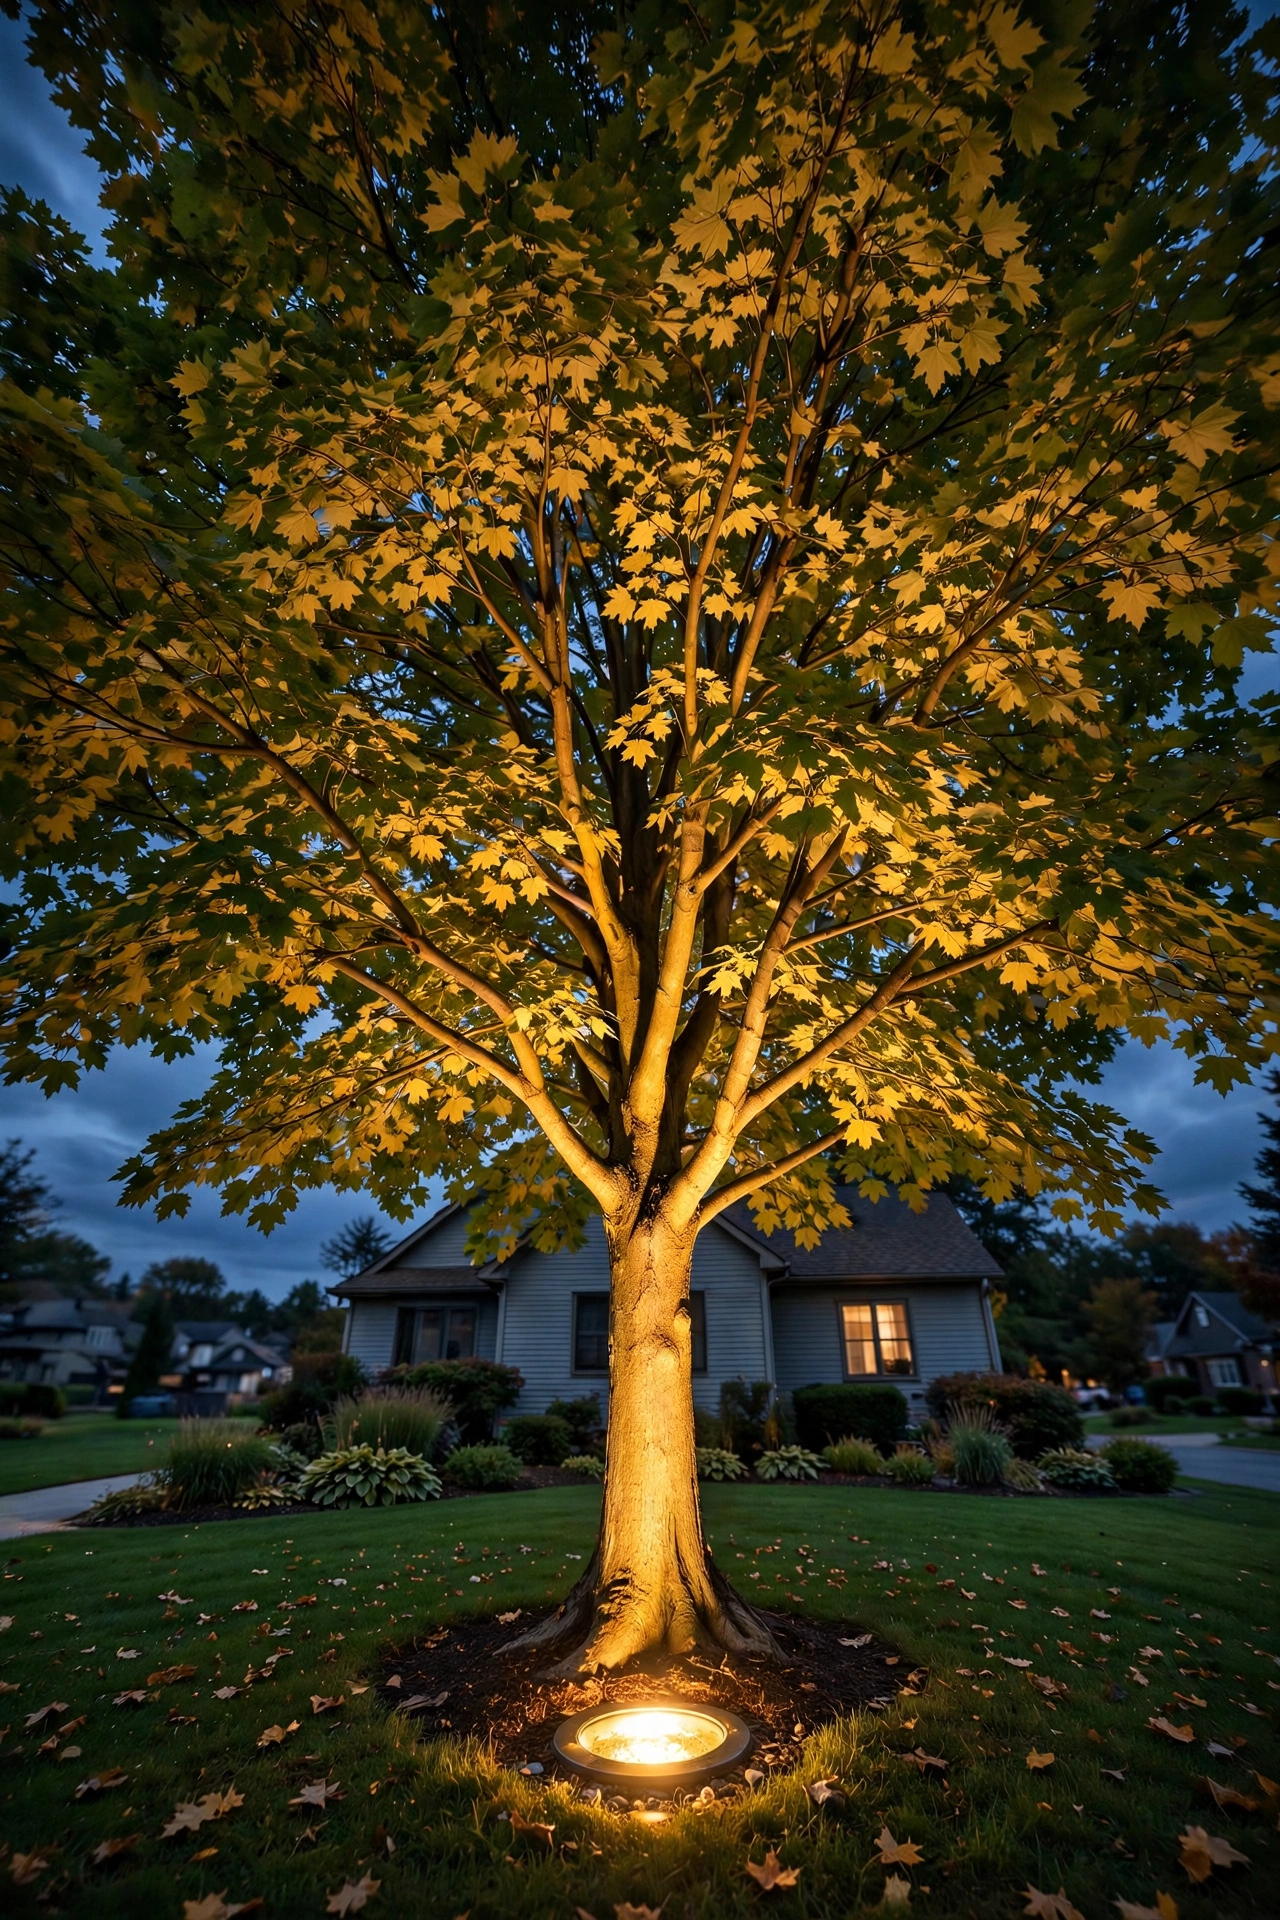
Every yard has that one tree — the maple with the sweeping canopy, the crepe myrtle with peeling bark, the oak that makes the whole property. Give it the spotlight it deserves with a single well light set about 12 to 18 inches from the trunk, aimed straight up into the branches. In my experience, warm white LED (2700K) flatters bark texture and green foliage far better than cool white, which can make a lawn look like a parking lot.
For a tree up to 20 feet tall, one 4-to-6-watt LED spot is plenty. Taller trees want two fixtures on opposite sides, set 18 to 24 inches out, angled slightly inward so the beams cross inside the canopy — that's what creates that full, glowing-crown effect instead of a single hot spot. If your hero tree is a palm or something with a skinny silhouette, place the fixture 6 to 10 inches from the trunk and aim slightly outward to catch the fronds.
Dig the hole about 2 inches deeper than the fixture can, drop in 4 to 6 inches of crushed gravel for drainage, and set the fixture so its rim sits roughly half an inch above grade — high enough to shed rainwater, low enough that the mower passes over. Trim low branches so the beam isn't blocked 2 feet off the ground.
Suggested budget range: $40 – $90.
2. Flank the Front Door with Paired Well Lights
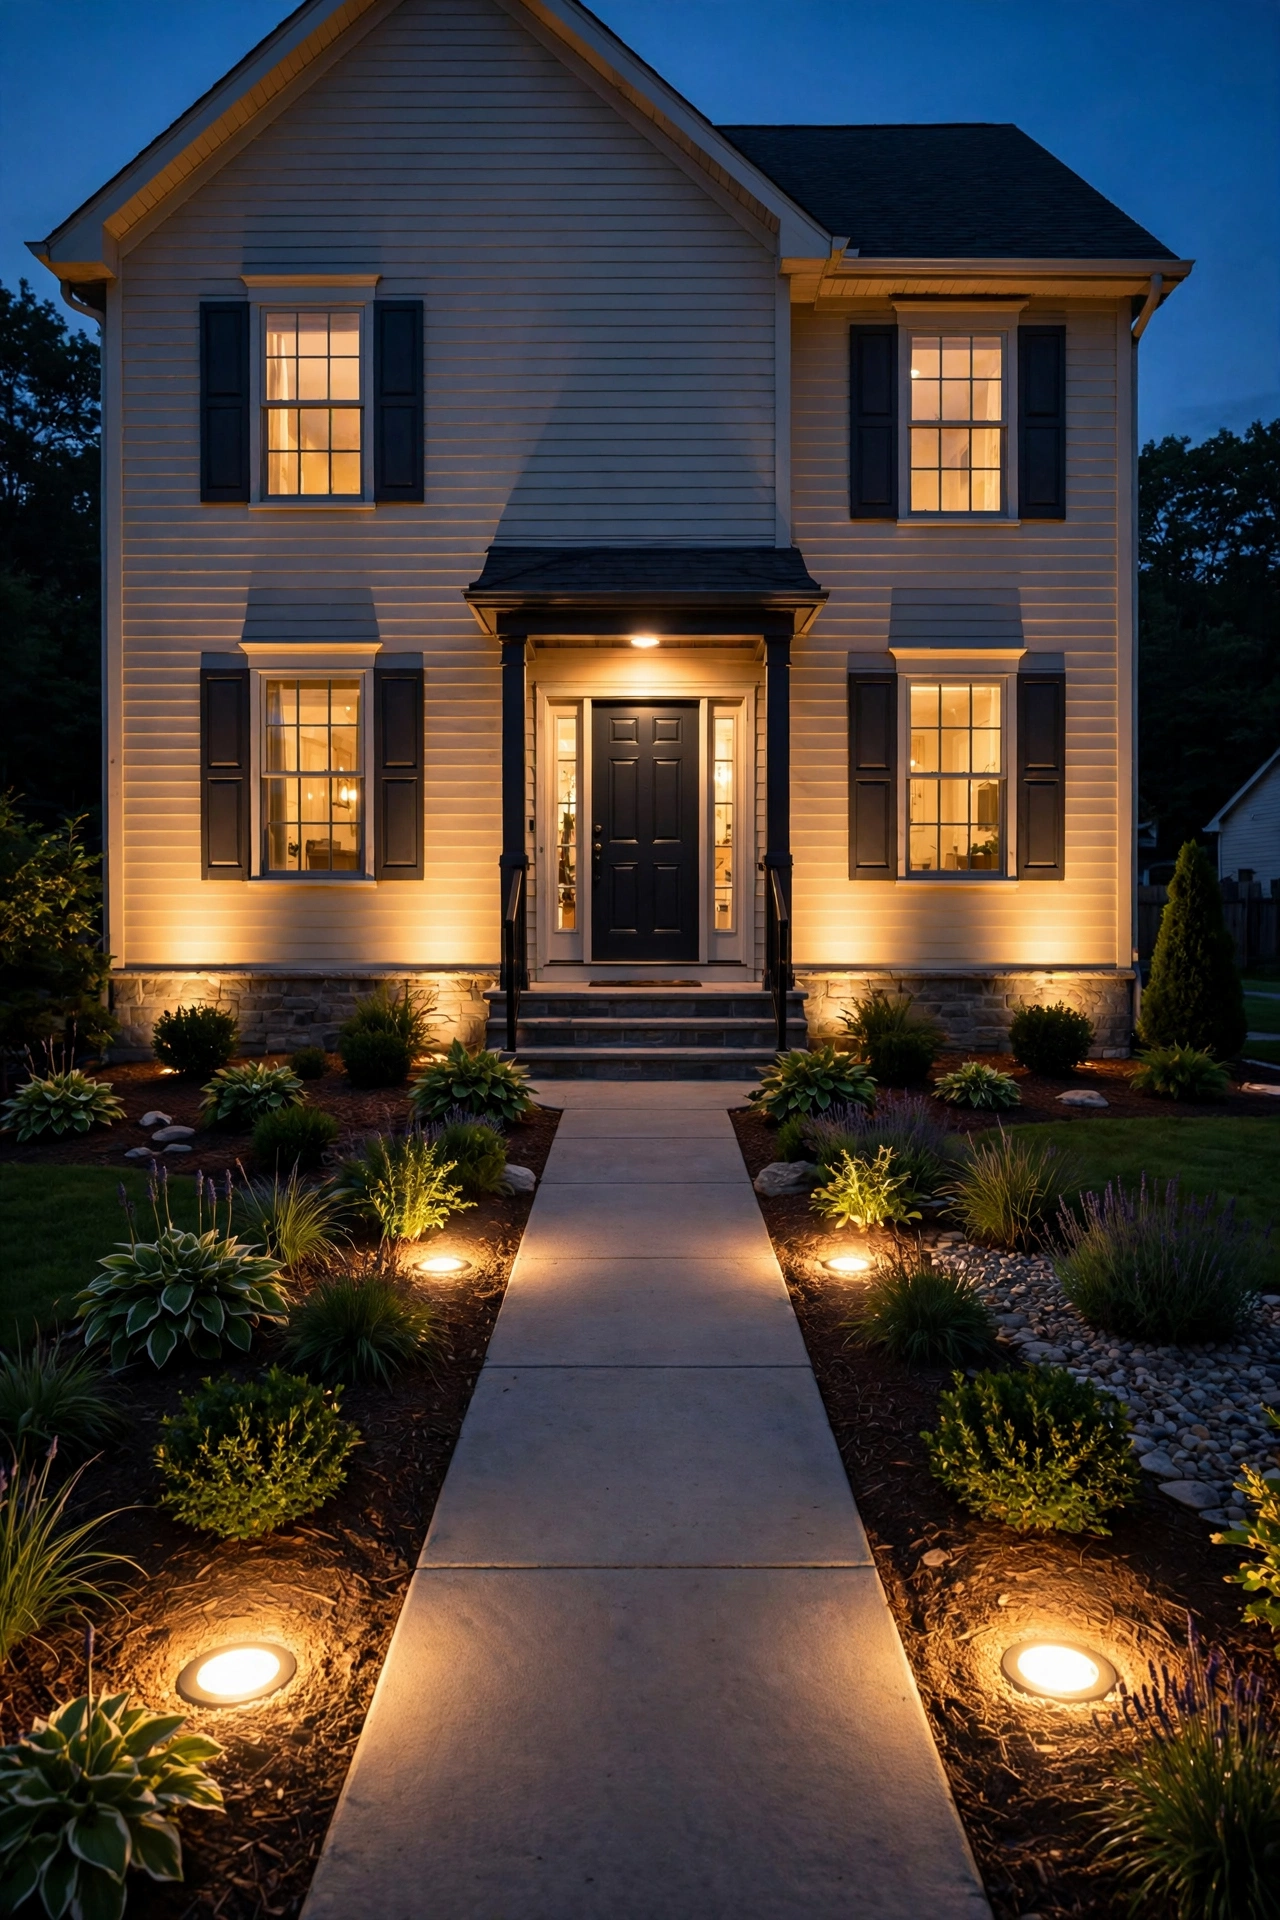
Want a grand entrance without cluttering your porch? Set two well lights into the planting beds flanking your walkway, about 3 feet back from the steps and angled 30 to 45 degrees toward the door. They wash the facade in soft light and frame the doorway like sconces would — except they're invisible by day, which I love for small porches where lanterns crowd the space.
Aim each fixture so the beam's center lands on the siding or stone a couple of feet above door height, not straight into anyone's eyes as they walk up. If your facade is brick, pull the fixtures out to about 3 feet from the wall so the beam spreads evenly across the texture; on smooth siding, 2 feet is fine for a tighter, more dramatic wash. Keep them on a timer or smart plug to come on at dusk, and dim to 50 percent after midnight if your neighborhood is light-sensitive.
Match the color temperature to your porch fixtures — 2700K keeps everything cohesive. And run both fixtures on the same circuit so they switch together; mismatched on-off timing looks sloppy. If you'd rather mount traditional fixtures at the door, pair these with a classic entry setup like the ones in my front-door sconce pair guide.
Suggested budget range: $80 – $180.
3. Graze a Stone or Brick Wall
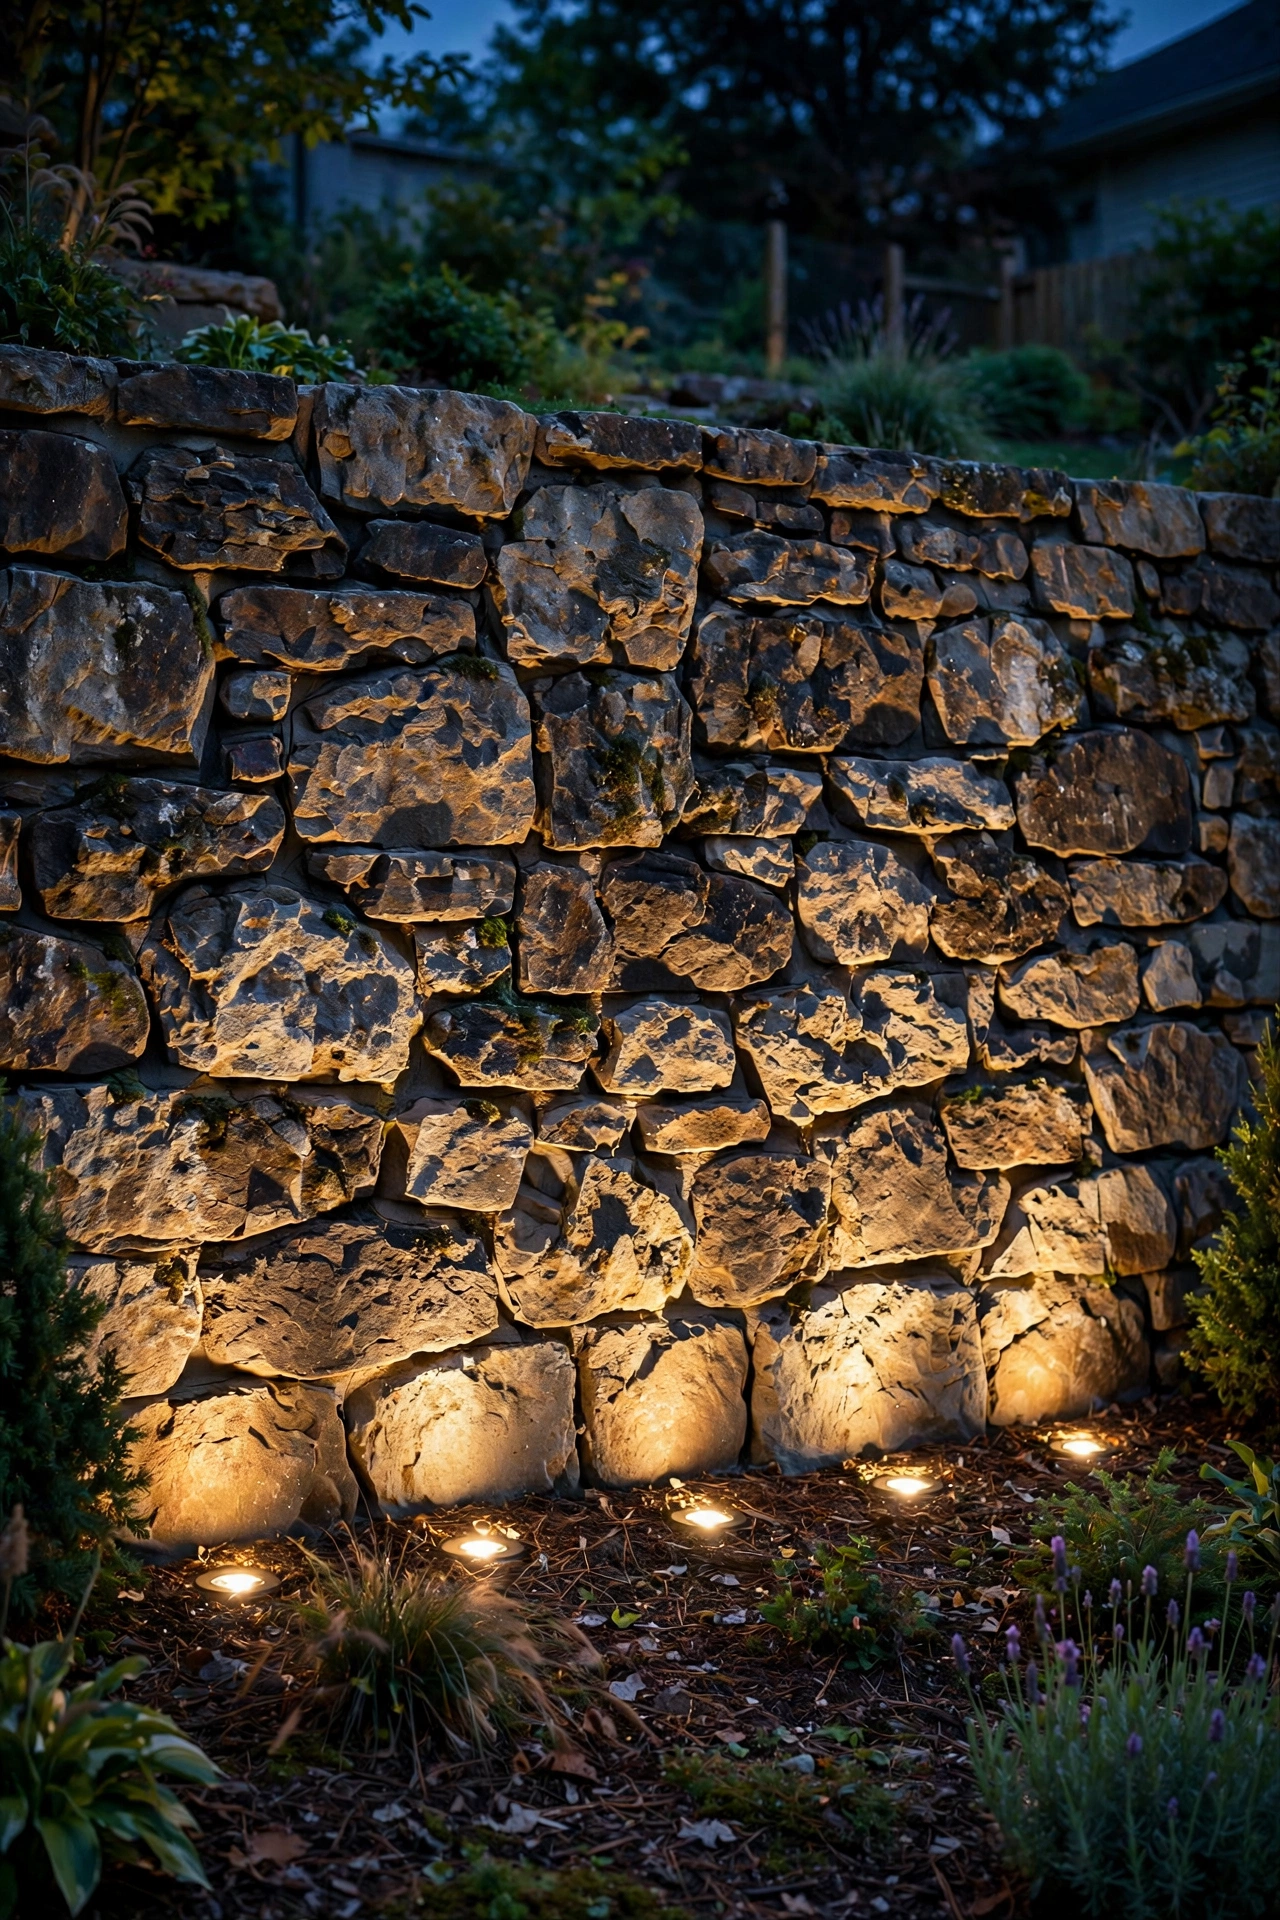
Wall grazing is the technique landscape designers use to make masonry look like it belongs in a magazine. Place well lights 6 to 12 inches from the base of a retaining wall, fence, or garden wall, spaced 3 to 4 feet apart, and aim them straight up. The tight, raking angle throws every ridge and joint into relief — flat walls look interesting, textured walls look spectacular.
This works best on surfaces with genuine texture: natural stone, stacked slate, rough-cut limestone. On smooth stucco or flat vinyl, pull the fixtures back to 18 inches or you'll just get a blob of light. I always recommend doing a dry run at night with a plug-in work light before you commit to digging — move it along the wall and watch how the shadows behave. What looks good at noon tells you nothing.
Spacing is the make-or-break detail: too far apart and you get scallops of light with dark gaps; too close and you waste fixtures. For a wall under 4 feet tall, one fixture every 3 feet is the sweet spot. Taller walls can stretch to 4-foot spacing because the beam has more room to spread.
Suggested budget range: $120 – $350.
4. Light a Garden Statue or Water Feature
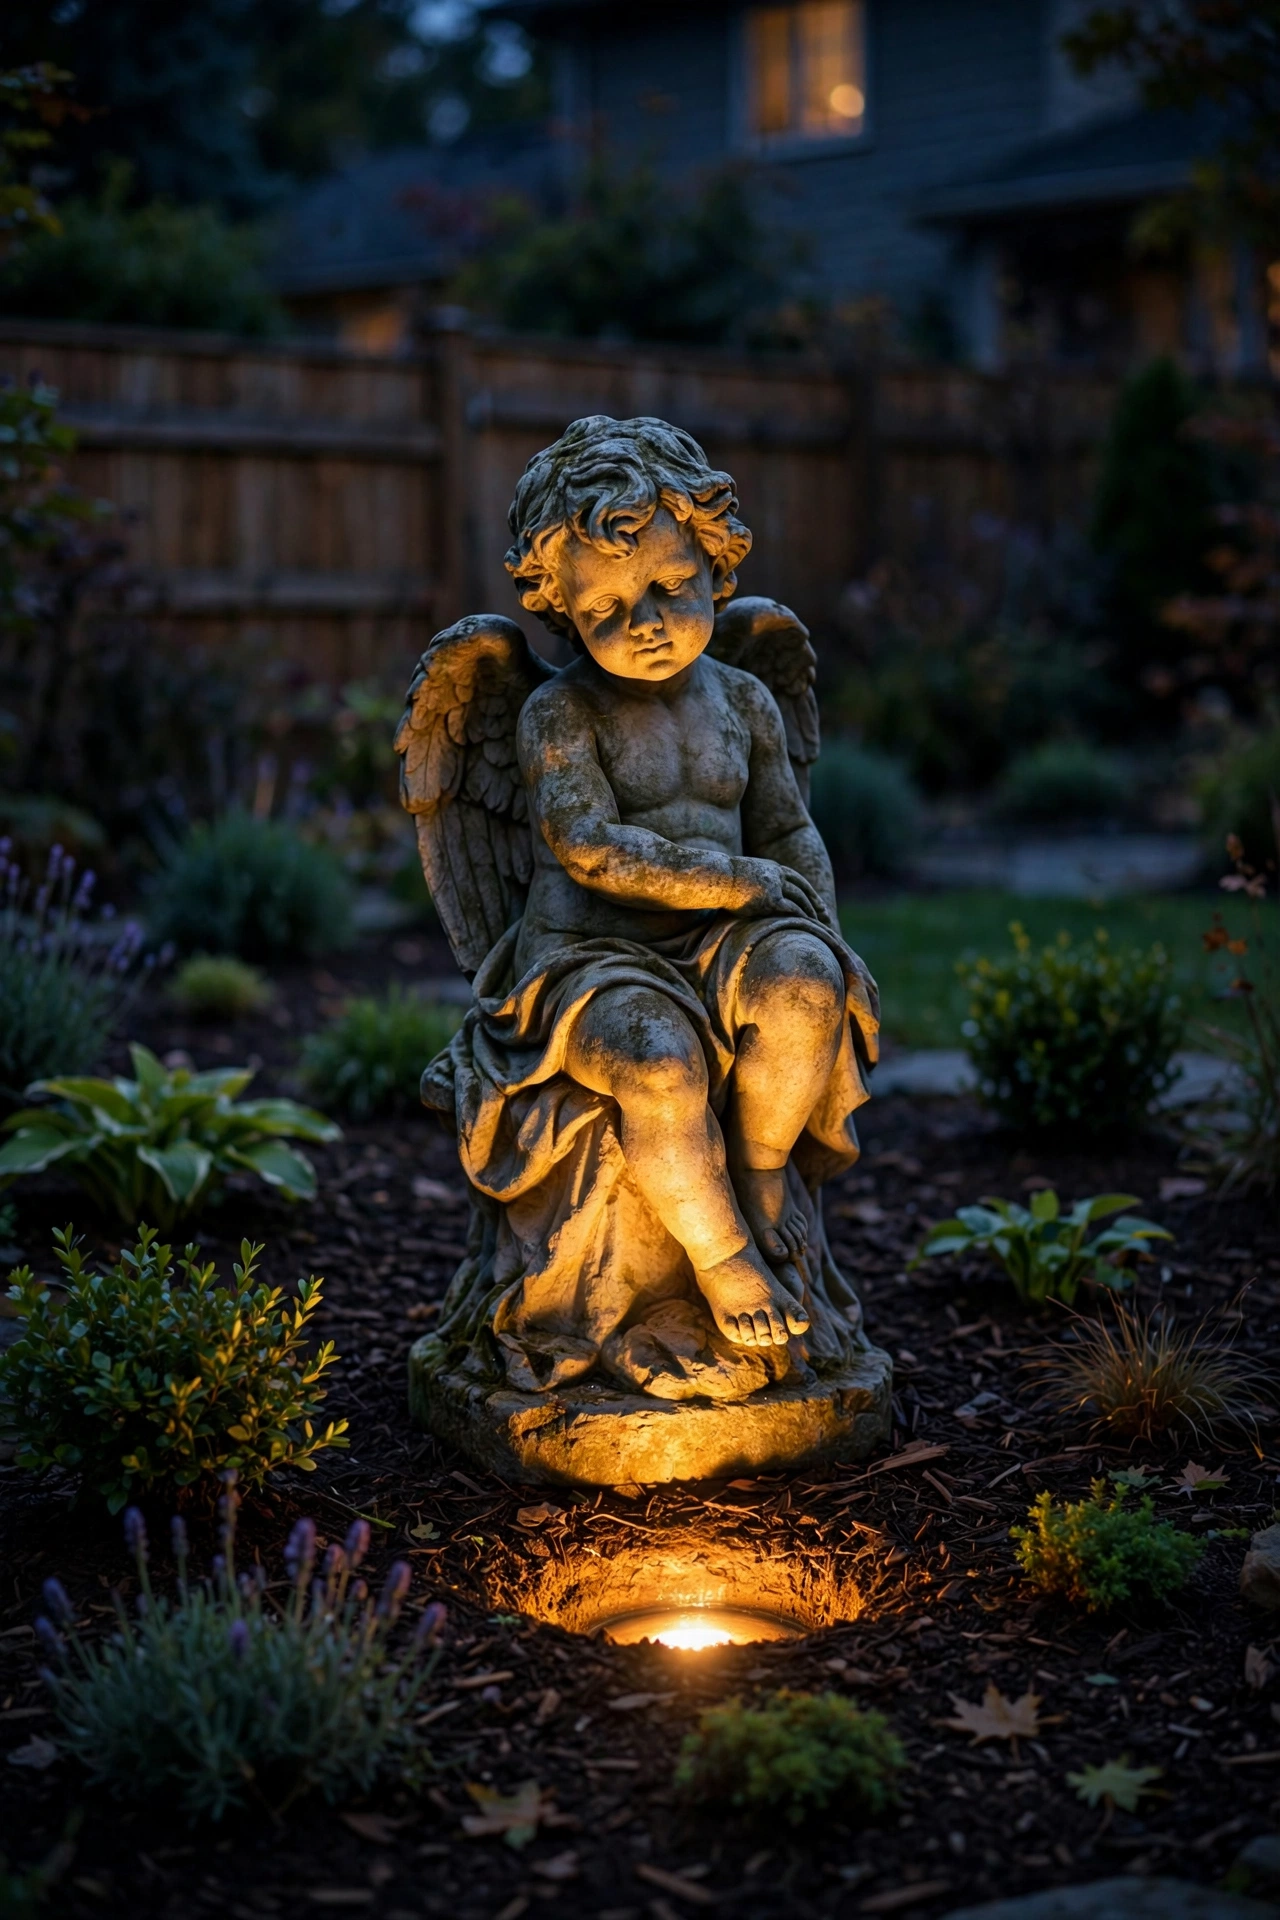
A garden statue lit from below at night becomes a completely different object — more presence, more drama, honestly more interesting than it is in daylight. Place one well light 12 to 18 inches in front of the piece, aimed up at a 20-to-30-degree angle so the beam rakes across the surface. This single-fixture, short-throw setup is where well lights shine brightest, pun intended.
For water features, the play is slightly different: aim from the side rather than the front so the beam catches the moving water without bouncing straight back at viewers. Keep the fixture at least 12 inches from the water's edge and confirm it's rated for wet locations — standing water and electricity only mix when the equipment is designed for it. LED fixtures stay cool, which matters around fiberglass fountains and pond liners.
If your statue is taller than 3 feet, add a second fixture on the opposite side at lower intensity to fill in the back. And put these on the same zone as your other accent lights so the whole garden tells one story at dusk. Sculptural focal points like this are also lovely echoed with small path lights nearby.
Suggested budget range: $50 – $150.
5. Outline a Curved Flower Bed
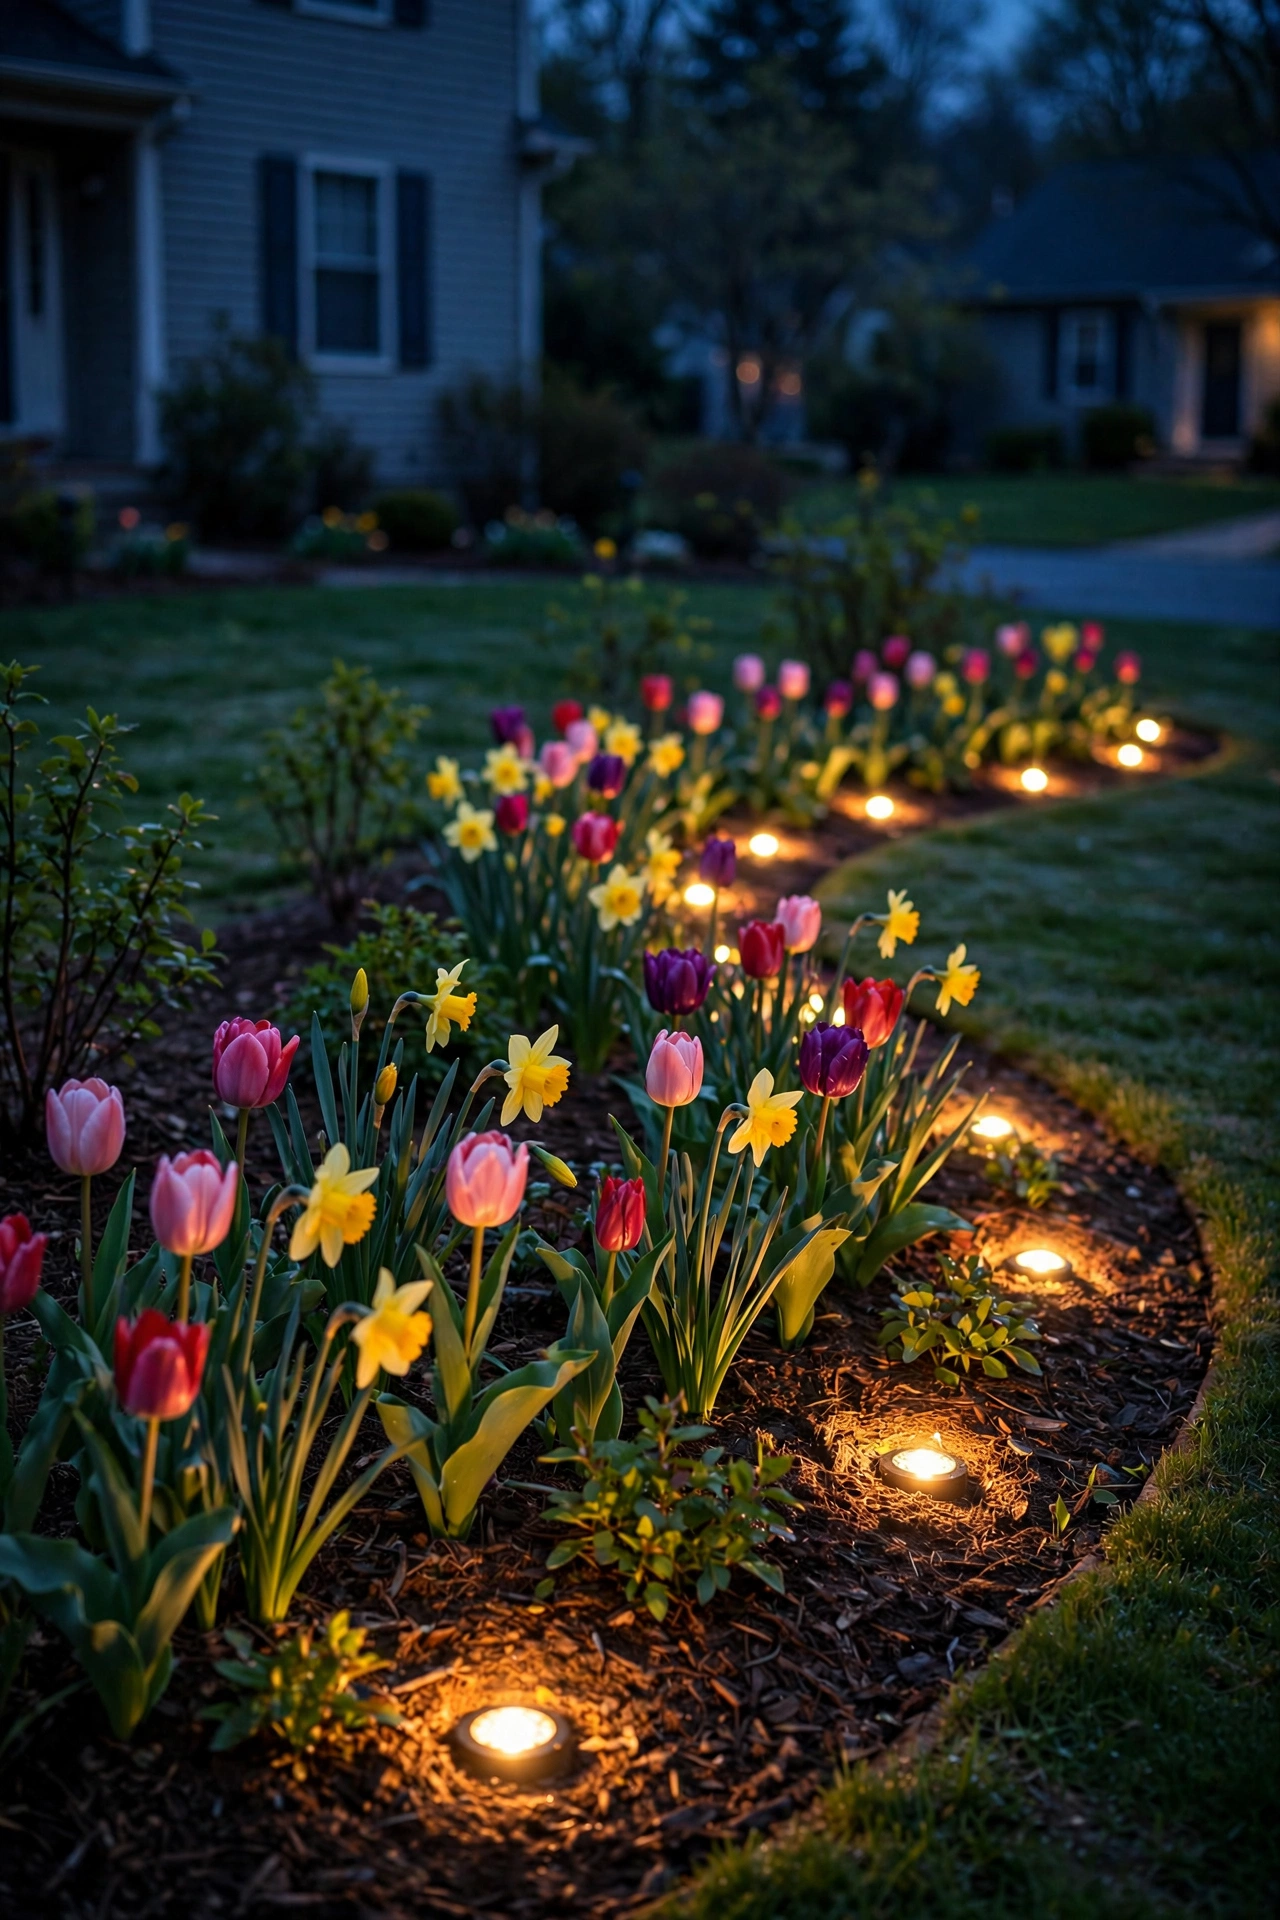
Curved beds are hard to light well because straight rows of path stakes fight the organic shape. Well lights set right into the bed edge, following the curve every 6 to 8 feet, give you a dotted line of glow that traces the planting like a contour map. Use low-wattage fixtures (2 to 3 watts) so the bed edges read as a gentle line rather than a runway.
Aim them straight up or tilted 15 degrees toward the bed so the light catches the foliage edges and blooms. Honestly, this is my favorite spring look: the first tulips and daffodils glowing from below while everything else is still waking up. Set the fixtures 4 to 6 inches inside the bed edge so mulch doesn't bury them — and push mulch back a couple of inches around each rim so water drains away.
Because beds get replanted, use quick-connect low-voltage cable so you can nudge a fixture six inches sideways without rewiring the whole run. Plantings shift; your lighting should be forgiving. A 12-volt low-voltage system is the safe, DIY-friendly choice for this whole category.
Suggested budget range: $100 – $300.
6. Frame a Patio Seating Area
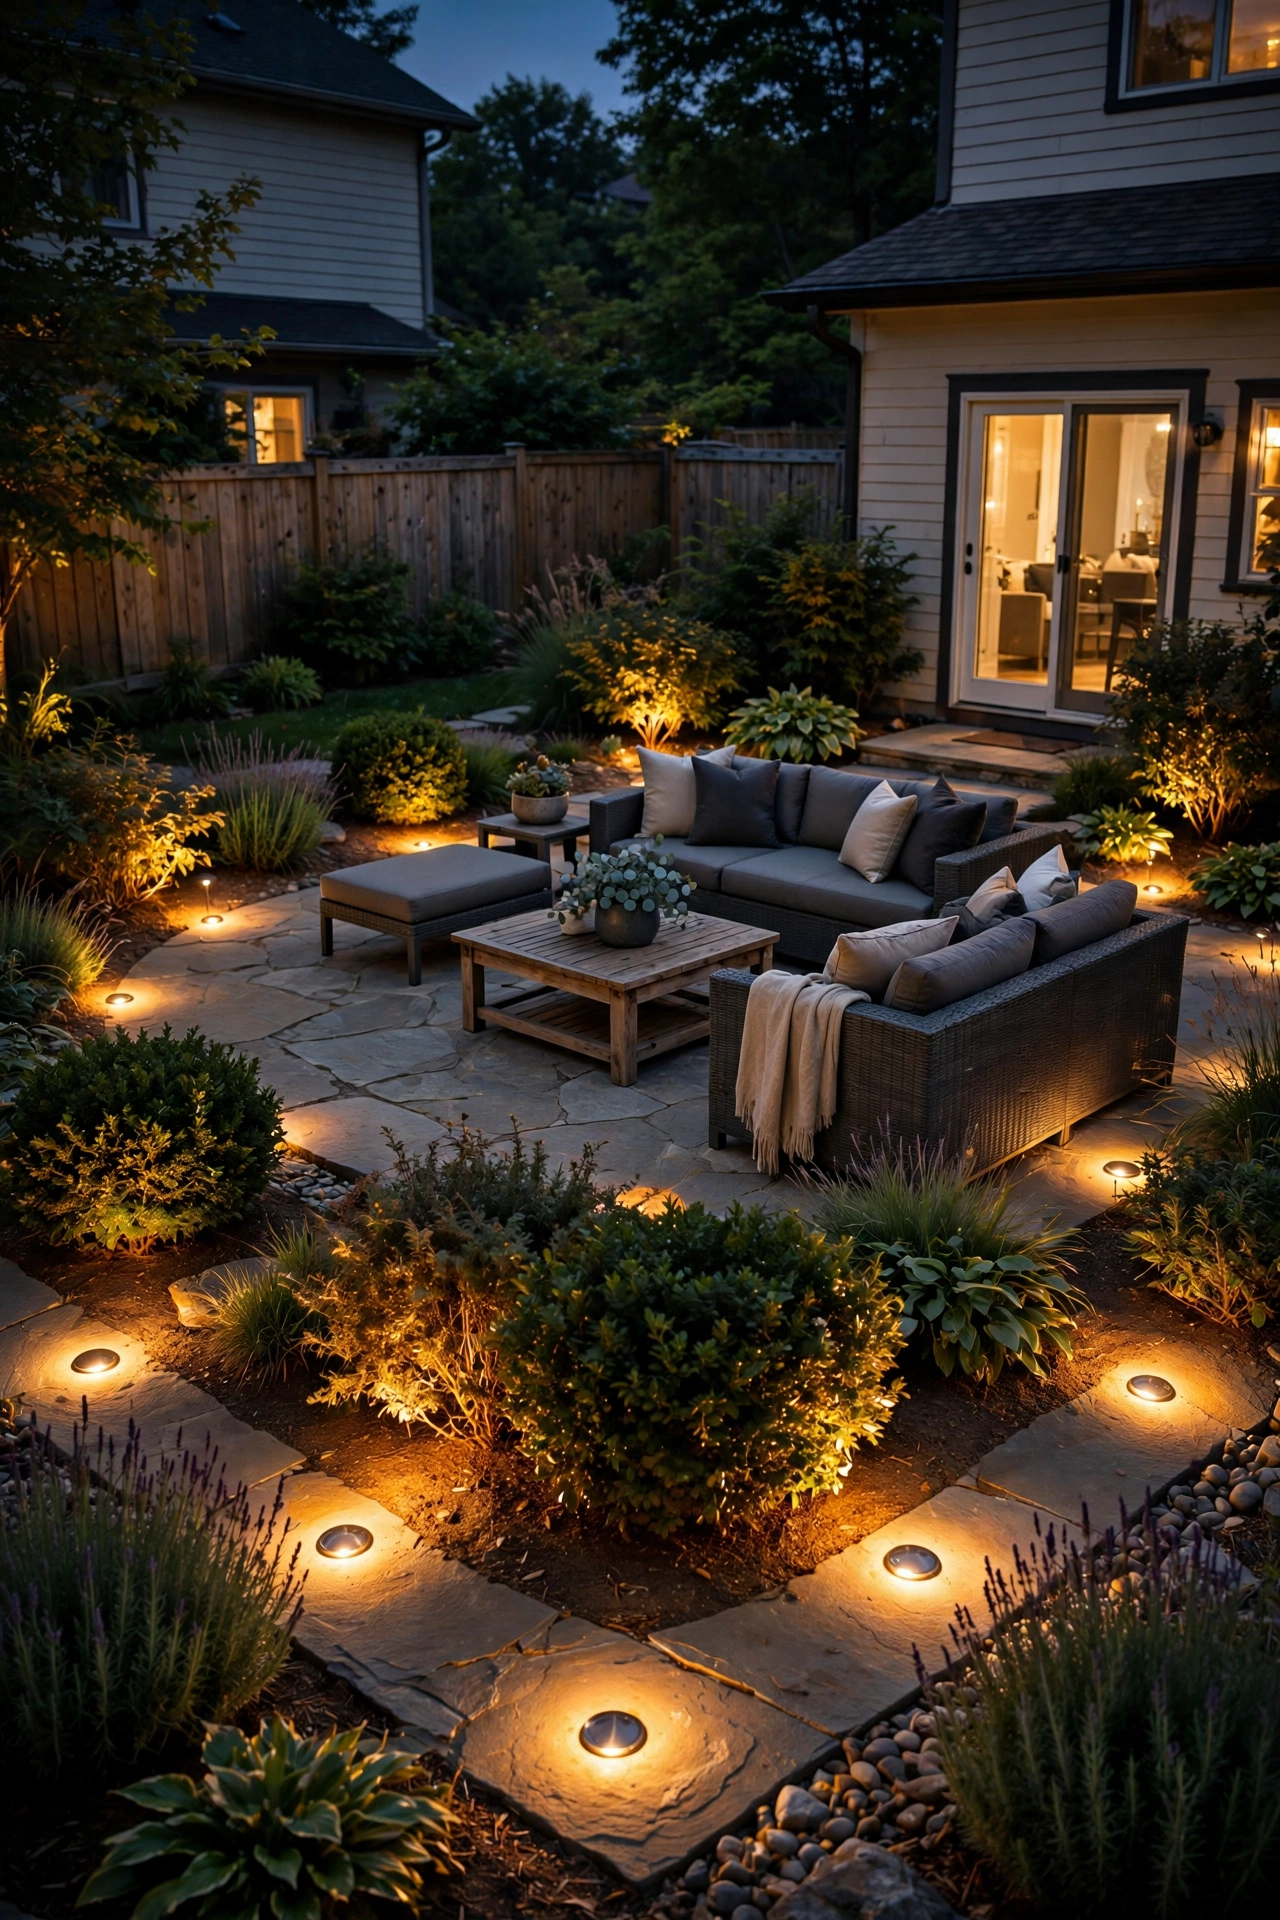
A patio that glows from its edges feels bigger and more inviting after dark. Set well lights into the lawn or bed border around your patio perimeter, 2 to 3 feet out from the edge, spaced 8 to 10 feet apart and aimed up at a shallow angle so the light lifts into nearby planting rather than into guests' faces. The goal is a soft halo around the gathering space, not stadium lighting.
I always recommend pointing these fixtures away from the seating, not toward it — grazing nearby shrubs or the fence behind the patio gives you ambient brightness by reflection, which is far more flattering than direct beams. Keep the color temperature at 2700K; anything cooler turns a cozy patio into an interrogation room. And give this zone its own switch or smart scene so you can dim it down for late-night conversation without killing the security lighting elsewhere.
If your patio has a fire pit, keep well lights at least 6 feet from the fire ring. Heat and plastic lenses are a bad combination, and even LED fixtures have heat limits. For more glow around your fire area, see my favorite fire pit landscaping ideas that pair with buried lighting.
Suggested budget range: $150 – $400.
7. Accentuate Ornamental Grasses
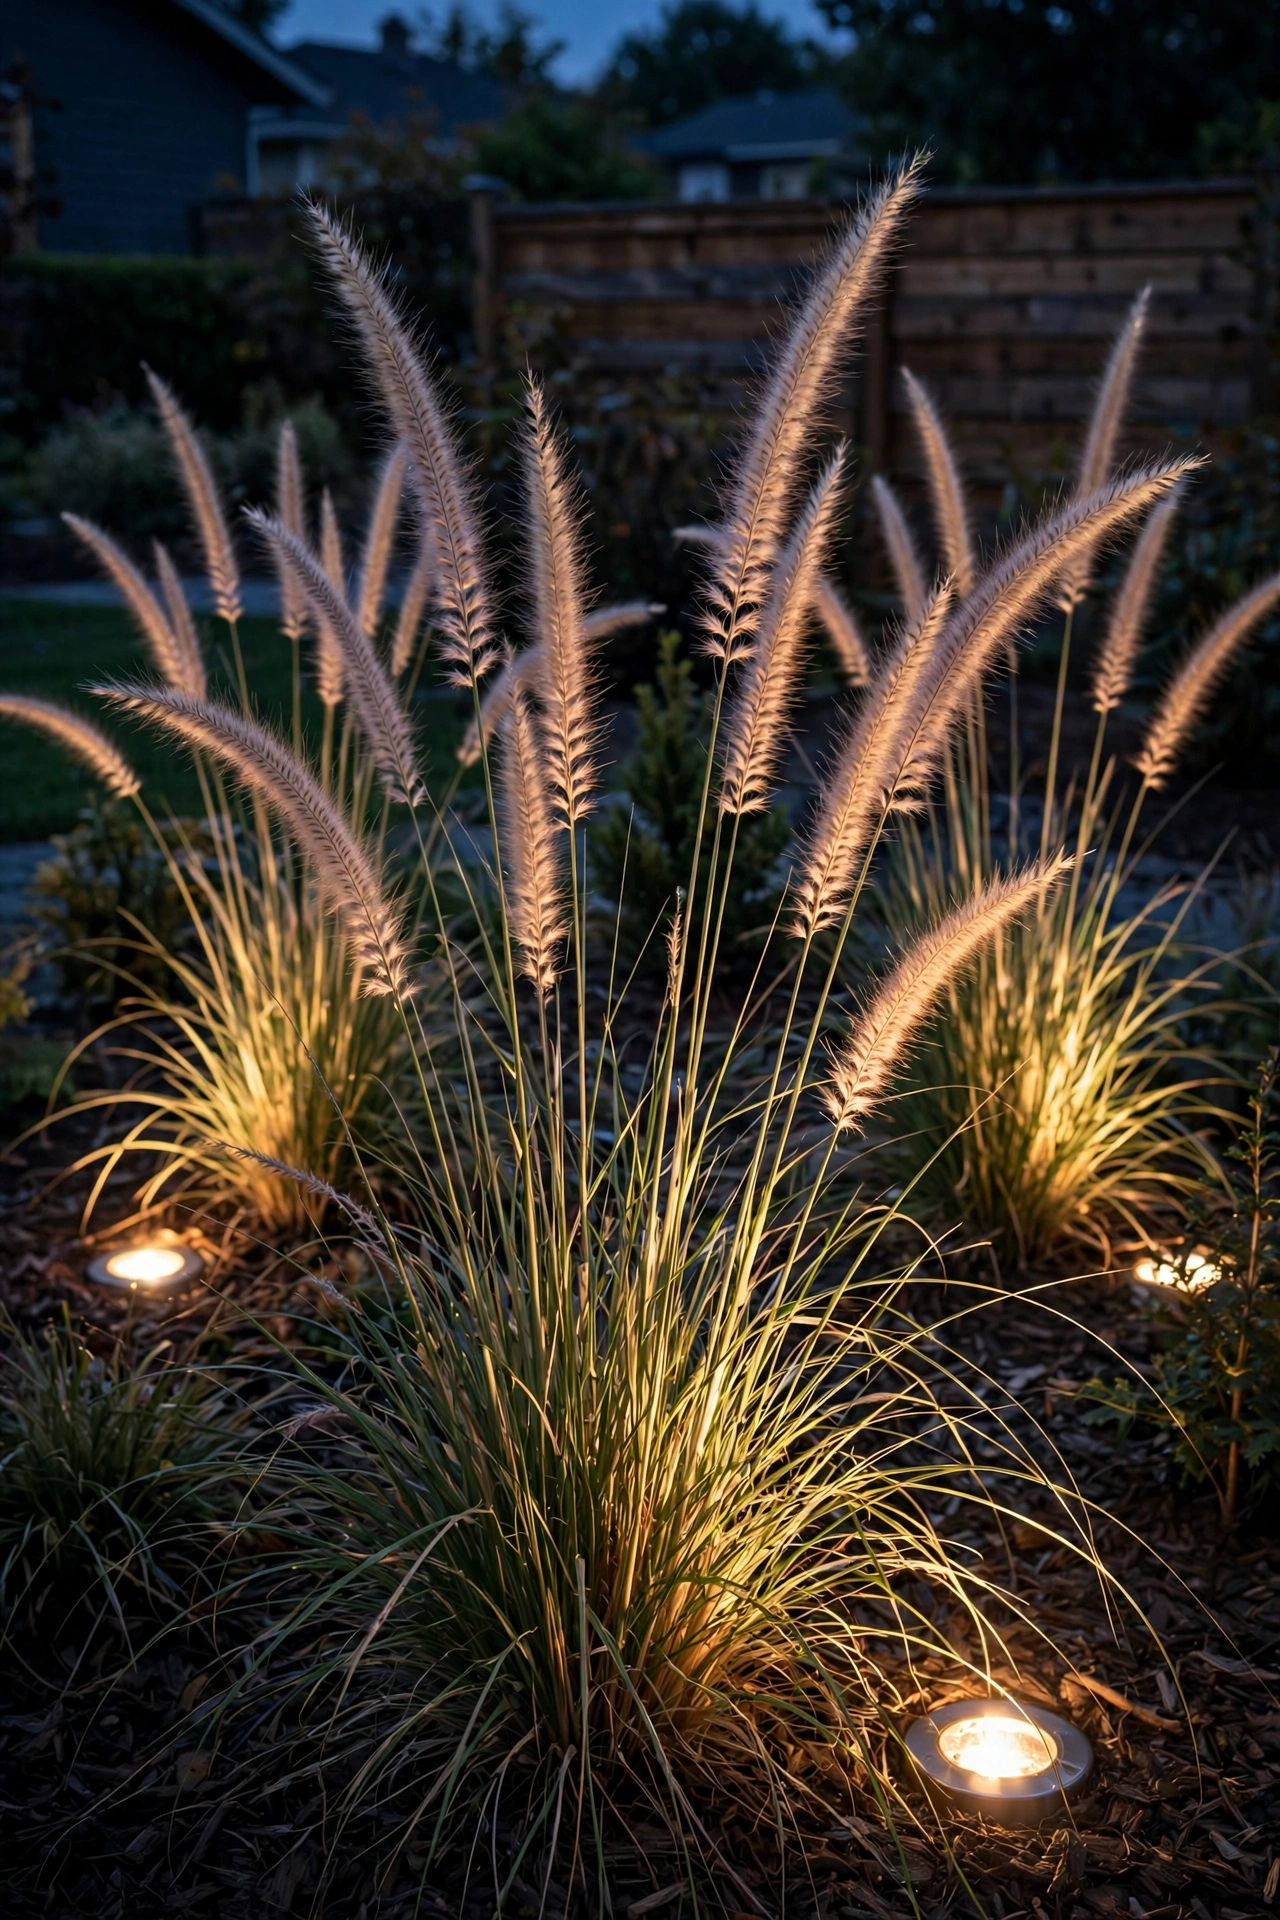
Ornamental grasses are the secret weapon of night lighting — feather grass, fountain grass, and miscanthus turn into luminous fountains when lit from below. Set one small well light at the base of each grass clump, aimed straight up through the plumes. The fine blades catch and scatter the light, and any breeze makes the whole thing shimmer. It stops me every time.
Space fixtures one per clump for grasses up to 3 feet, or two fixtures for big 5-foot specimens, set on opposite sides about 12 inches out. Cut the grasses back in late winter and the fixtures will be easy to access for cleaning — which you'll want to do, because spent blades love to drape over lenses. A quick wipe with a damp cloth each spring keeps output crisp.
Use the lowest wattage you have (2 to 3 watts is plenty); grasses amplify light, so it's easy to overdo it. And plant the fixtures before the grass crowns, not after — digging around an established root ball is miserable. If you're starting from nursery pots, bury the fixture first, then plant around it.
Suggested budget range: $60 – $200.
8. Wash the House Facade with Grazing Light
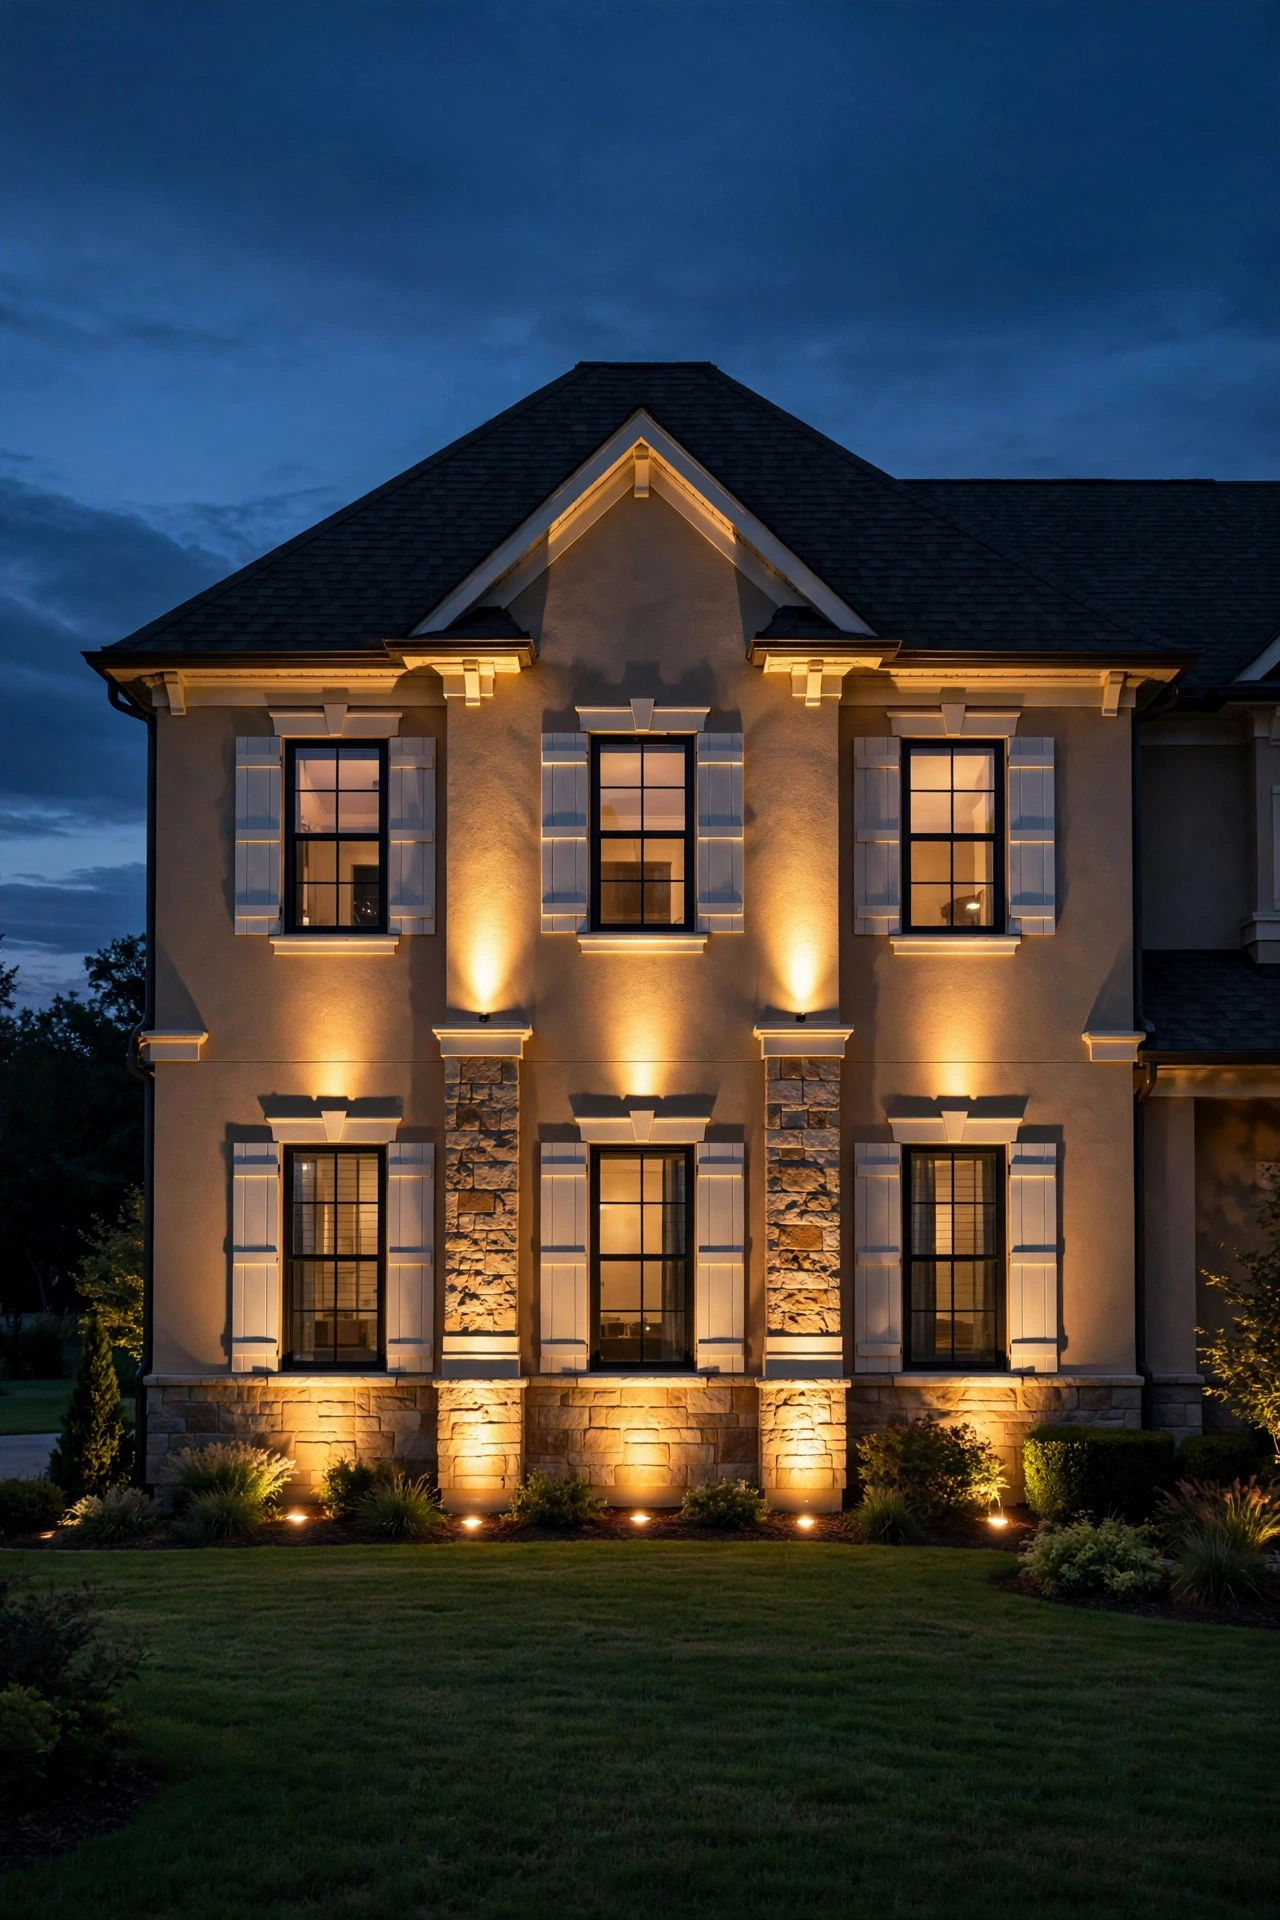
If you only do one project on this list, make it this one. Two or three well lights set 2 to 3 feet from your front facade, spaced 8 to 12 feet apart and aimed upward, transform how your house looks after dark. The upward wash emphasizes height, shows off architectural detail, and makes the whole property read as cared-for from the street.
The distance from the wall controls the look: closer (2 feet) gives a dramatic, concentrated wash with deep shadows under eaves; farther (3 to 4 feet) gives a softer, wider blend. In my experience, 30 inches is the sweet spot for most two-story facades. Space fixtures roughly one per 10 linear feet, and angle them slightly inward at the corners so the beams overlap instead of leaving dark wedges.
Watch your windows — aim between them, never through them. Light bleeding into a bedroom at night is a complaint waiting to happen, and nobody wants their living room lit like a display case. A simple trick: stand where the fixture will go at night, have someone hold a flashlight from that spot, and check where the beam lands before you dig.
Suggested budget range: $120 – $350.
9. Define a Walkway Without Stakes
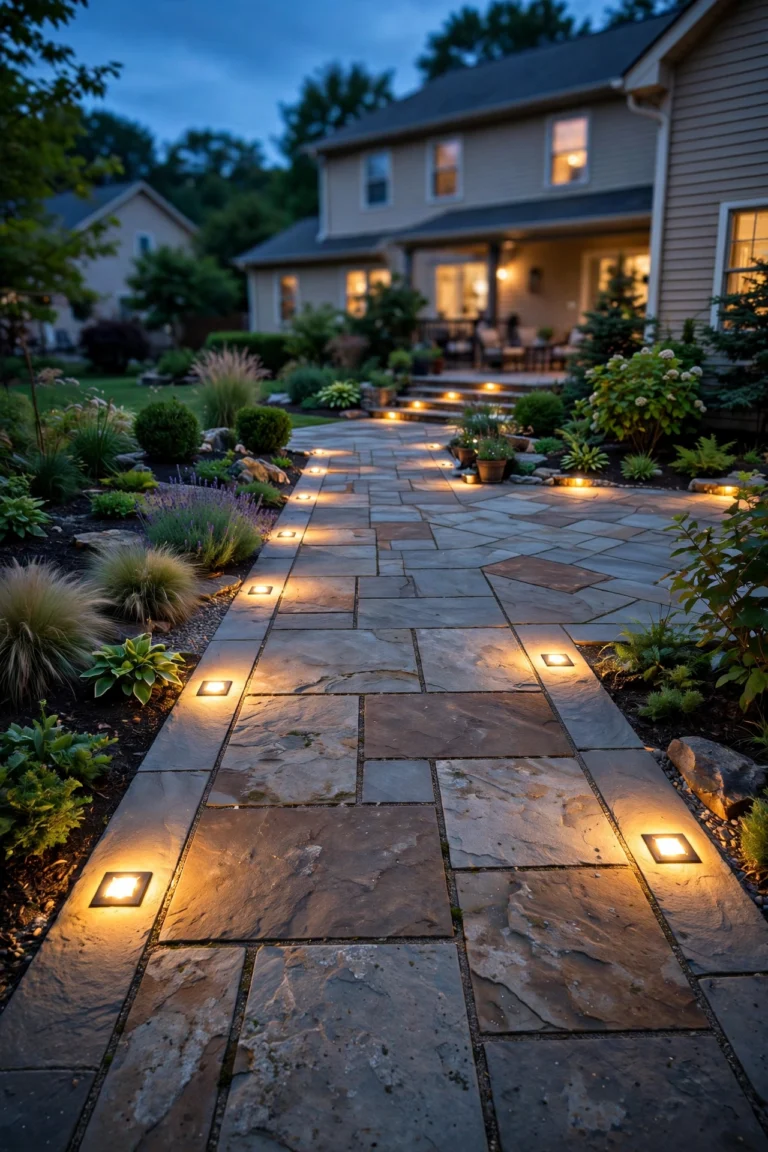
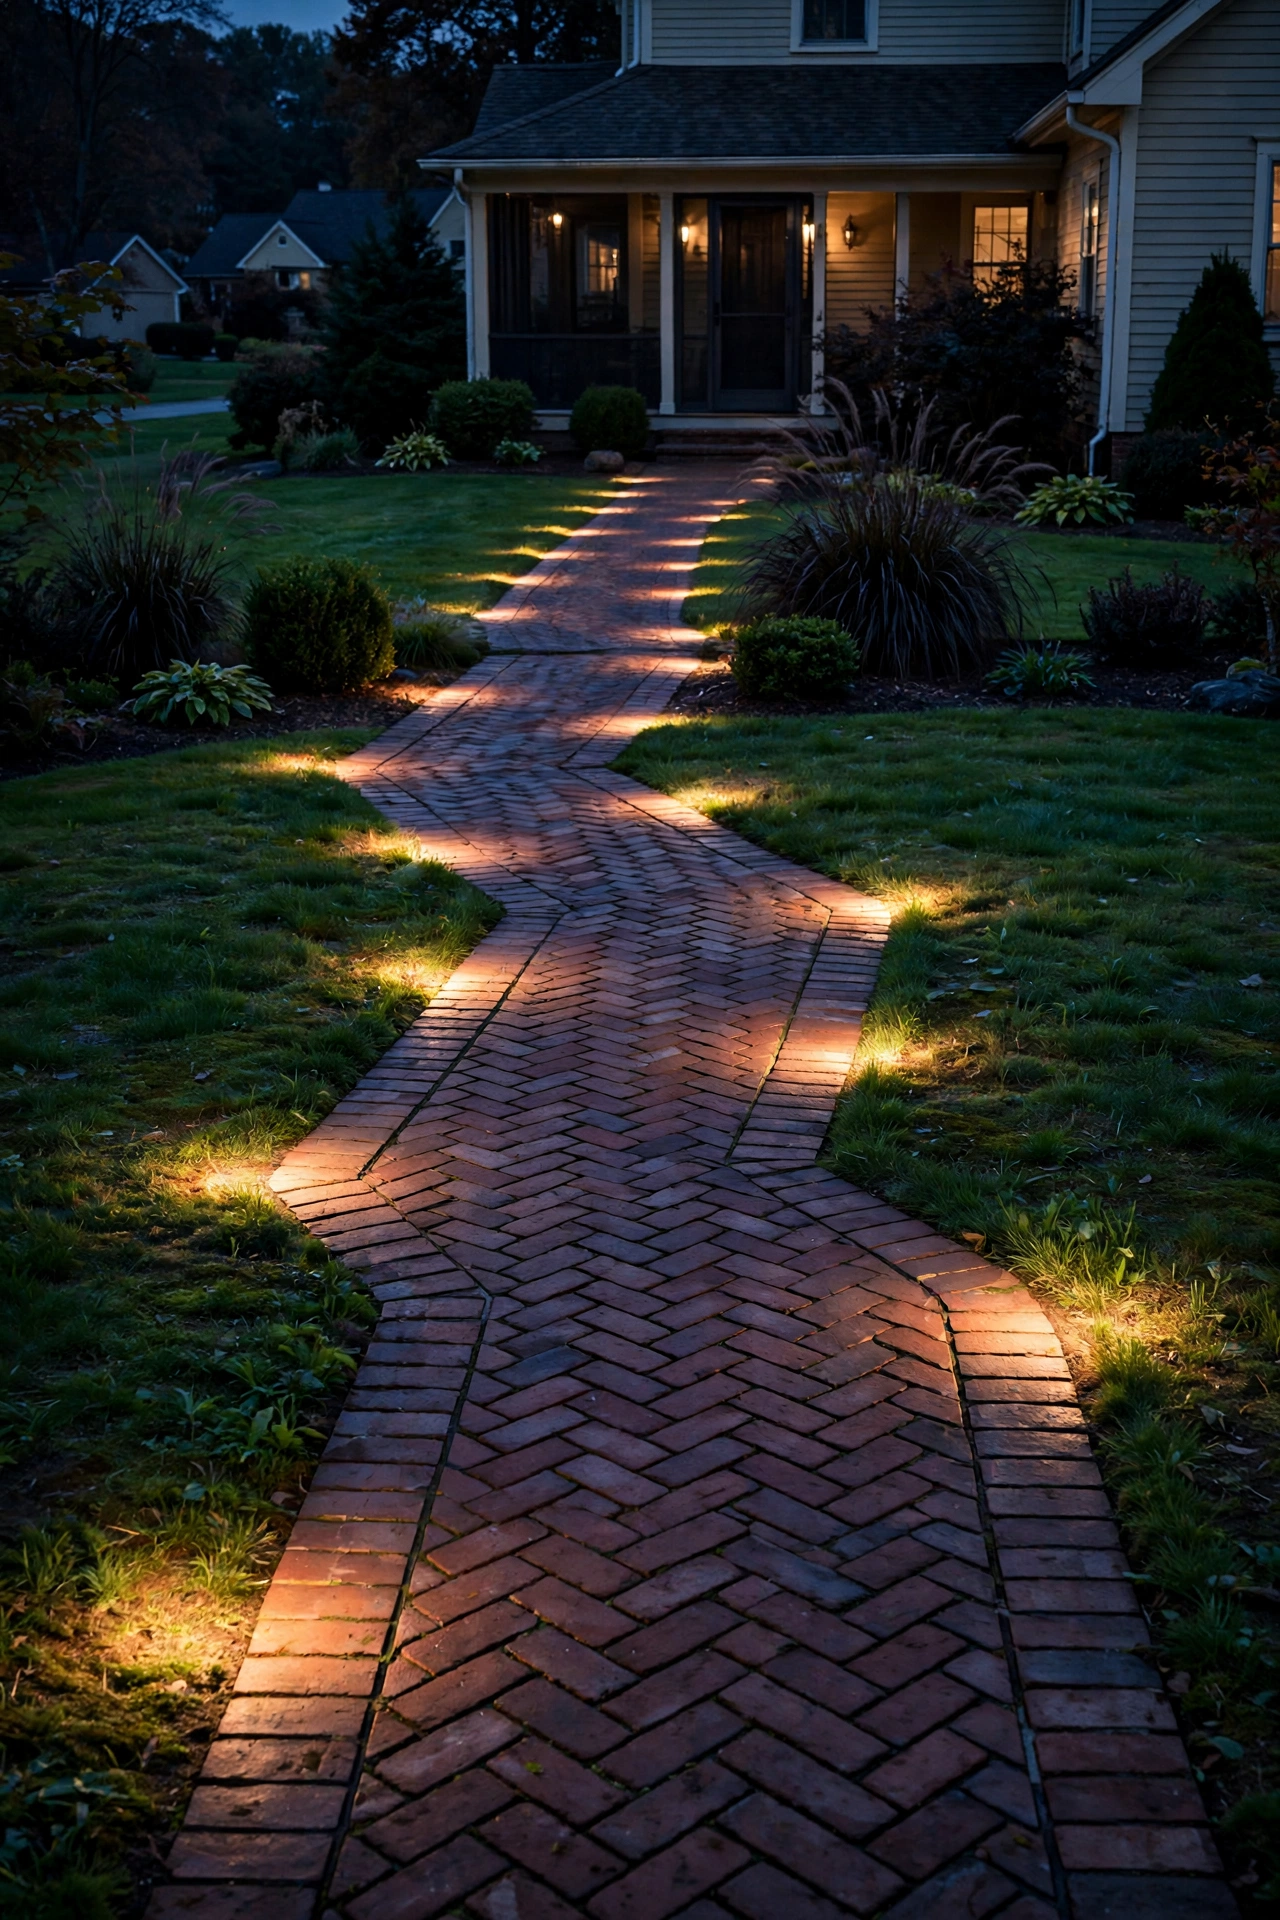
Path lights on stakes have their place, but along a formal walkway — brick, flagstone, pavers — nothing beats well lights set flush with the grade. Place them 18 to 24 inches off each side of the path, alternating sides every 8 to 10 feet in a zigzag pattern. The zigzag reads as intentional design, and it keeps you from lighting one side hot and the other dark.
Aim straight up at the edges or tilt 10 degrees toward the path so the light spills gently across the paving without throwing glare at pedestrians. Use 2-to-3-watt fixtures; walkways need pools of light every few feet, not floodlight coverage. And keep rims truly flush — a raised rim becomes a trip hazard and a mower target. Set them with a torpedo level and backfill carefully so they don't settle crooked after the first rain.
For long paths, run fixtures on a single low-voltage cable in a daisy chain, keeping the total wattage under 80 percent of the transformer rating. Voltage drop over long runs makes distant fixtures dim, so for paths over 60 feet, feed the cable from the middle (a "T" layout) rather than one end. More on layered path approaches in my fall pathway lighting ideas.
Suggested budget range: $200 – $600.
10. Highlight a Privacy Hedge or Fence Line
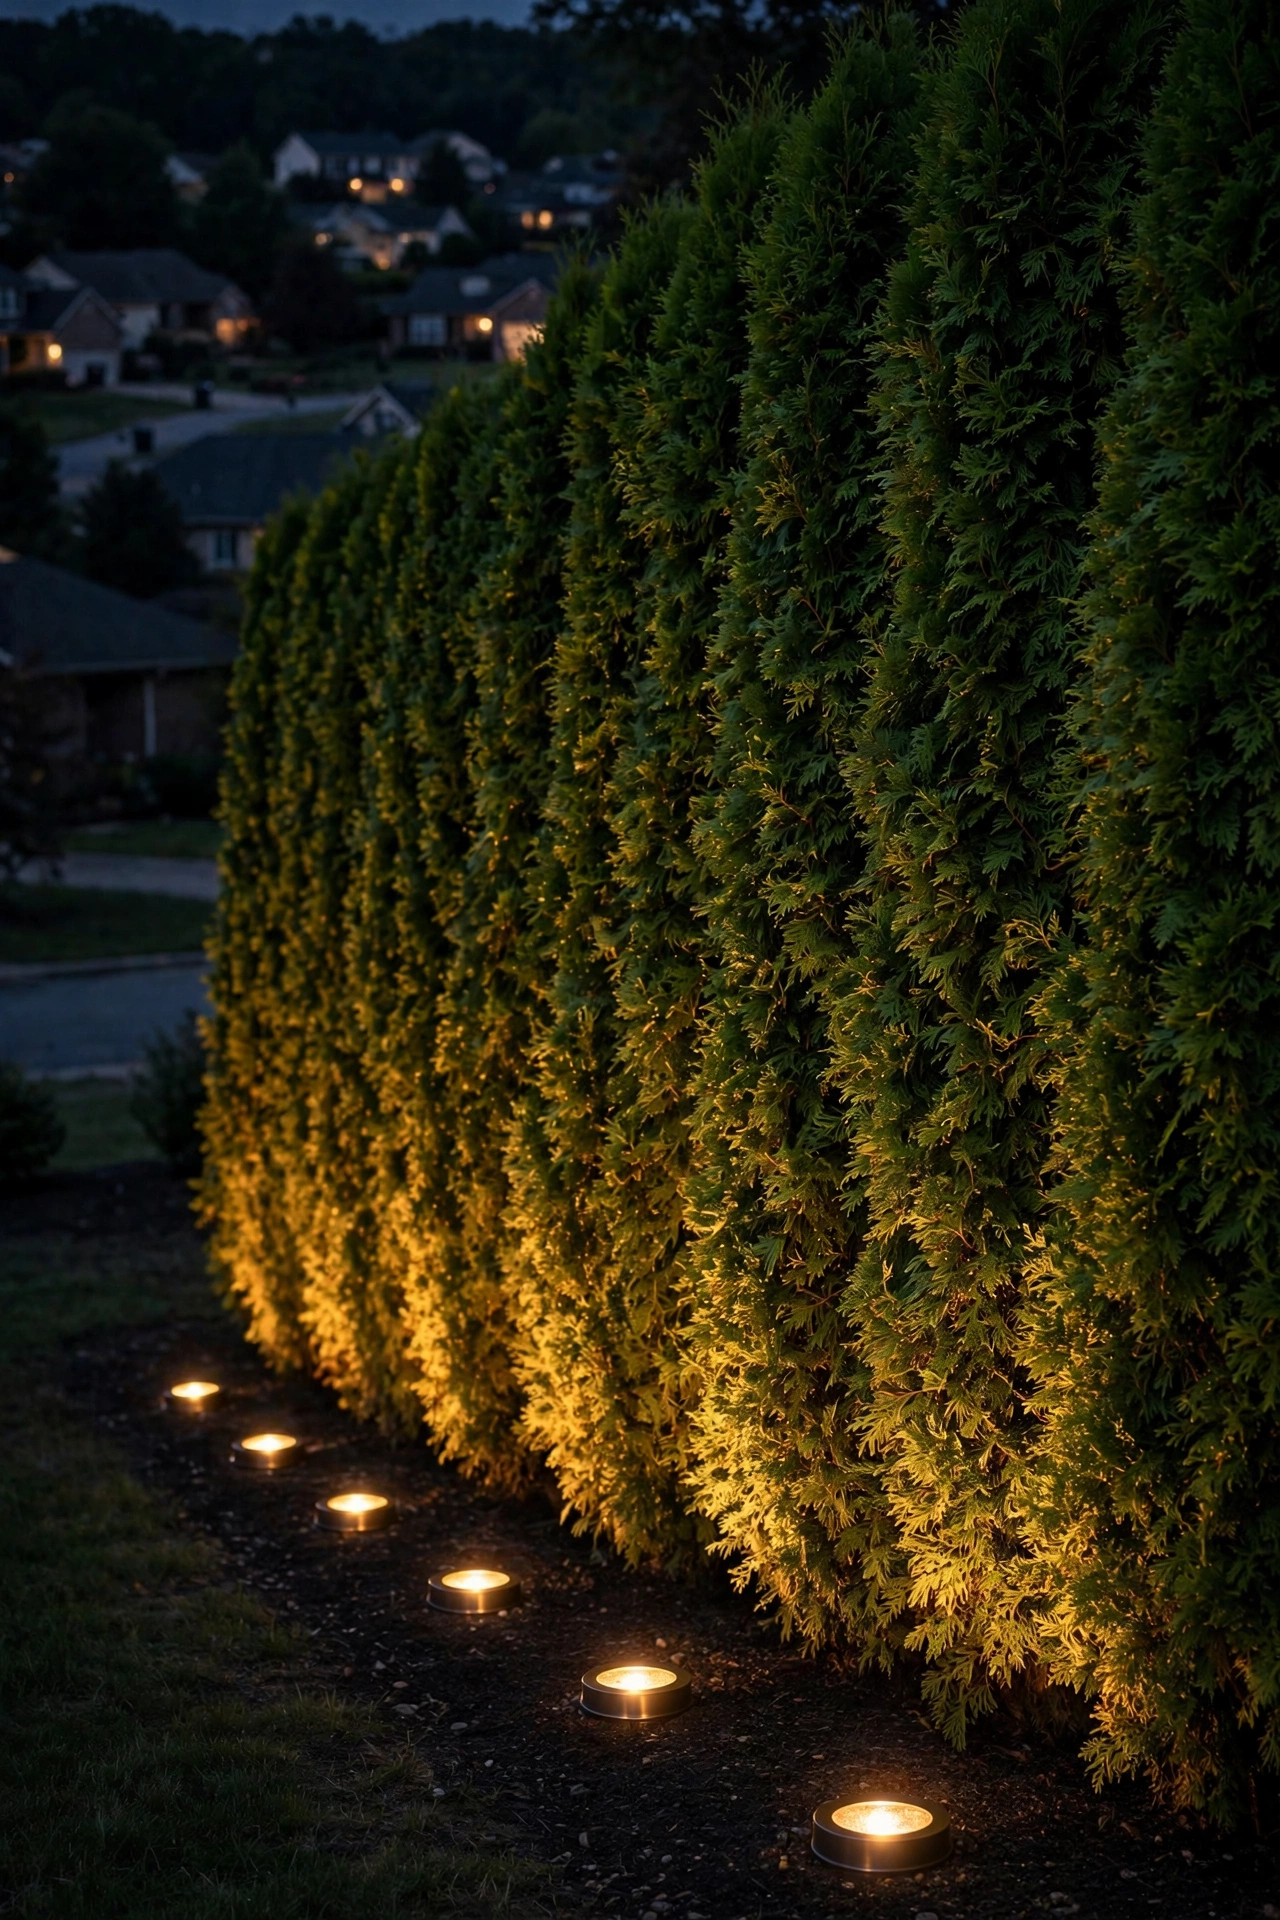
A dark hedge at the property line makes a yard feel smaller; a softly lit one extends the perceived boundary. Set well lights 2 to 3 feet in front of the hedge, spaced 6 to 8 feet apart, aimed up at a 30-to-45-degree angle so the beam rakes the foliage face. The light should wash the front of the hedge, not shoot over the top into your neighbor's windows — aim matters more here than anywhere else on this list.
For dense hedges like arborvitae or boxwood, 3-watt fixtures every 7 feet give an even, continuous glow. For open-branched shrubs like lilac or forsythia, space a little tighter — 5 to 6 feet — because the light passes through and you need overlap to avoid striping. And keep fixtures clear of the drip line so watering doesn't splash mud onto the lenses weekly.
Honestly, this is the single biggest curb-appeal-per-dollar project I know. The hedge you already have becomes the glowing backdrop that makes everything in front of it pop. Time them to run dusk-to-midnight so you're not lighting the neighborhood at 3 a.m.
Suggested budget range: $180 – $500.
11. Create a Moonlight Effect from Below
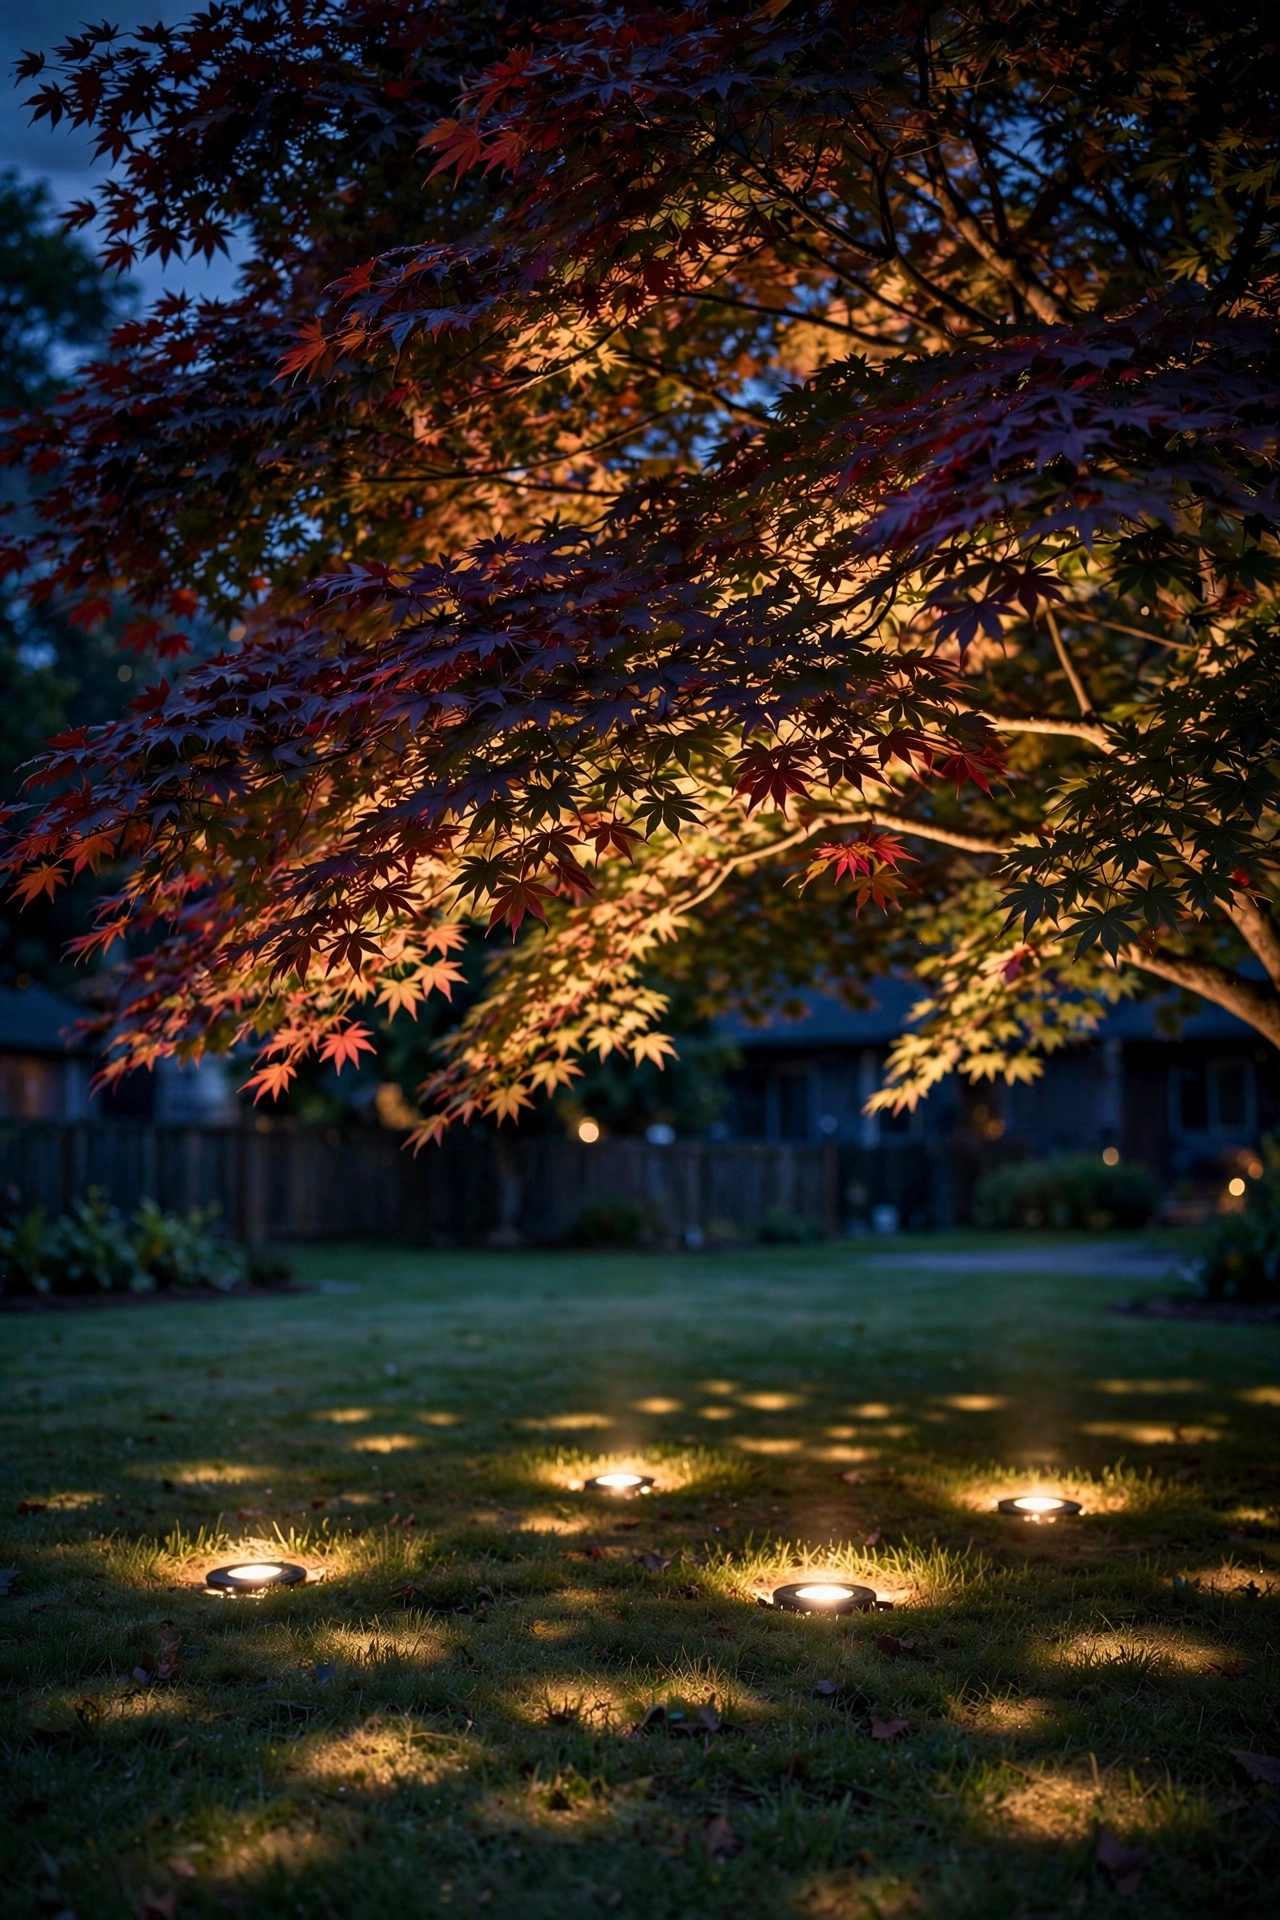
Moonlighting usually means fixtures high in a tree shining down, but you can fake the effect from the ground: aim two or three low-wattage well lights up through a broad canopy from different angles, letting the leaves dapple the light back down onto the lawn. The result is a soft, filtered pool of light that genuinely feels like moonlight — especially on humid summer nights.
Place the fixtures 4 to 6 feet out from the trunk, spaced evenly around it, and angle them inward and slightly upward so their beams converge in the canopy's middle. Use 2700K or even 2200K "extra warm" LEDs; real moonlight is cool, but our eyes read warm dappled light as magical, and cool light from below just looks like a security fixture. Keep wattage low — 2 to 3 watts each — because the goal is suggestion, not illumination.
This works best under trees with layered, open canopies: honey locust, Japanese maple, river birch. Dense shade trees like Norway maples swallow the light. Prune a few interior branches first so the beams have something to filter through rather than a solid wall of leaves.
Suggested budget range: $90 – $250.
12. Glow Up a Rock Garden or Boulder
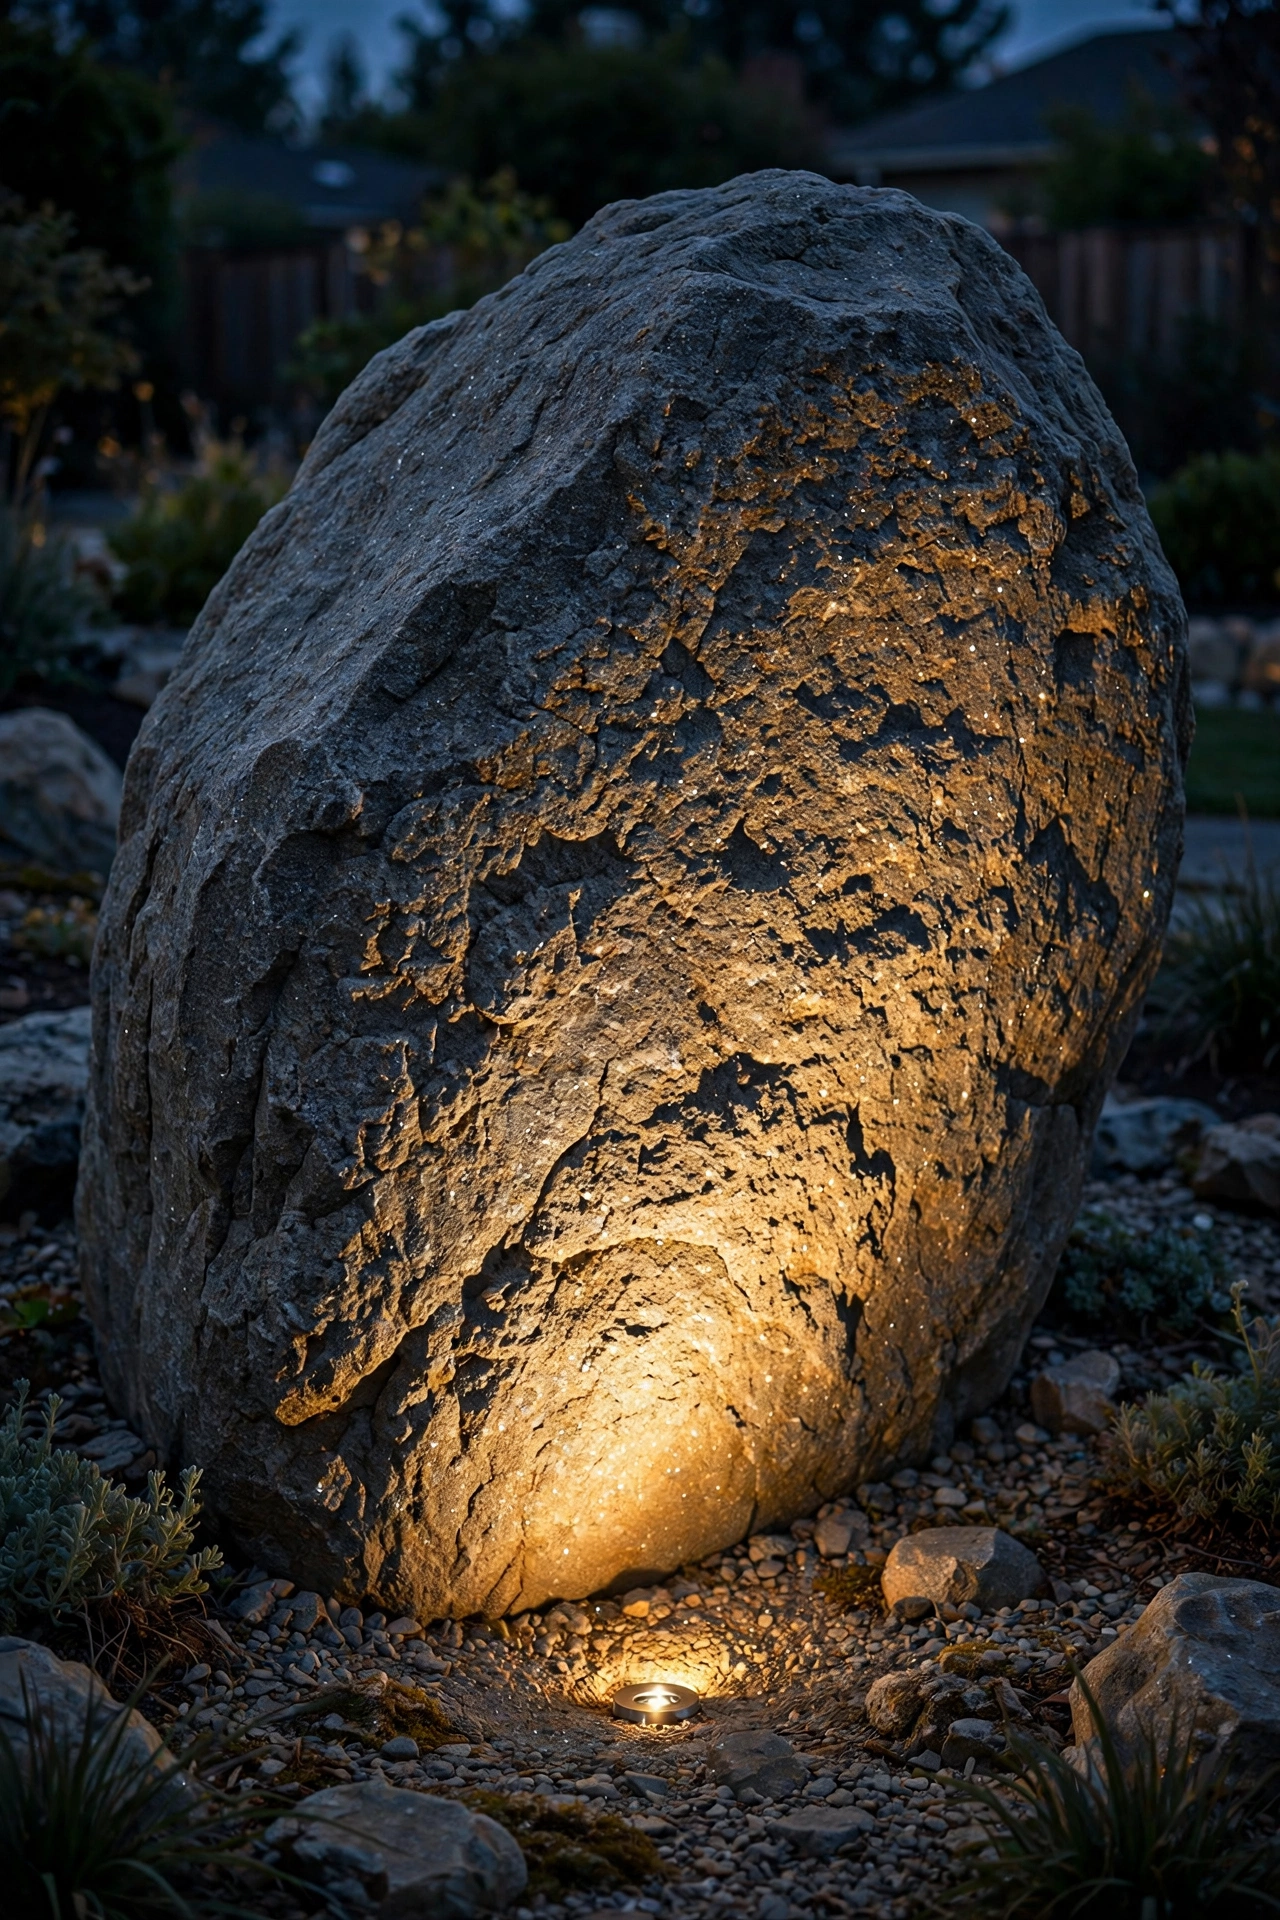
Boulders are expensive and permanent — they deserve lighting that shows off the investment. Set one well light at the base of a feature boulder, 12 inches out, aimed up at a steep 60-to-70-degree angle so the light rakes across the stone's face and throws its texture into relief. Granite with mica flecks will sparkle; sandstone will show every sedimentary layer.
For a rock garden with several boulders, light only the two or three most sculptural ones. Lighting every rock flattens the composition — selective lighting creates hierarchy, and your eye goes to the hero stones first. Space the lit boulders' fixtures on separate low-voltage runs if possible so you can dim the supporting stones to 60 percent while the hero stays at full.
Drainage is critical here because rock gardens sit on compacted soil or crusher run that doesn't drain. Dig the fixture hole 4 inches deeper than standard, fill the bottom with clean gravel, and bed the fixture in it — a fixture sitting in a puddle after every storm will fail early. Stainless steel housings hold up best against the abrasion of grit and gravel.
Suggested budget range: $80 – $220.
13. Uplight a Pergola or Trellis Post
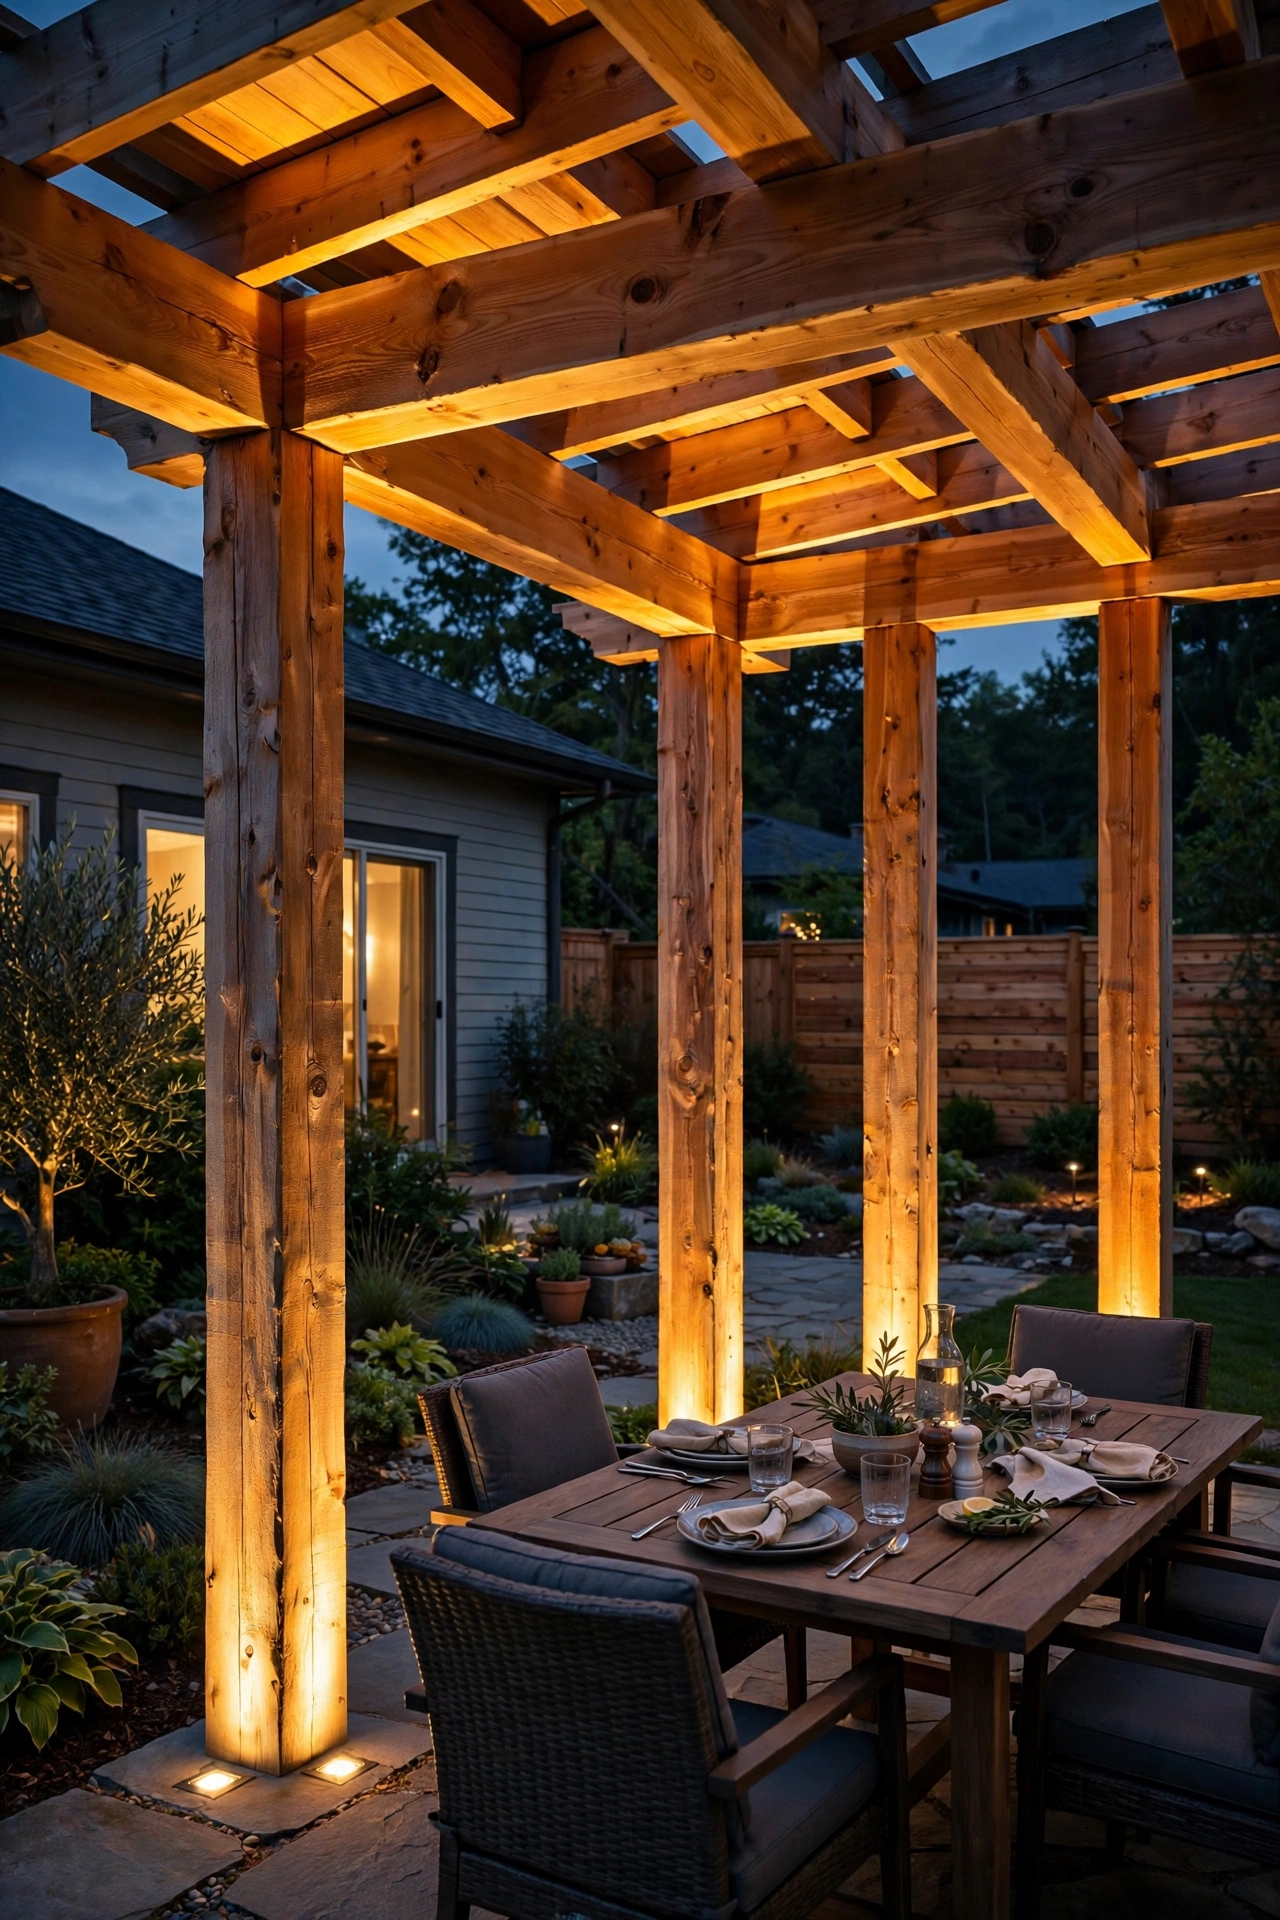
Wooden structures pick up warm light beautifully. Set a well light 18 to 24 inches from the base of each pergola or trellis post, aimed up the post so the beam climbs the wood grain and spills into the rafters above. Four posts, four fixtures, and your pergola becomes a glowing pavilion after dark — one of my favorite transformations for the money.
Angle the fixtures about 20 degrees inward so the beam tracks up the post face rather than shooting past it into the sky. If your pergola is stained dark, bump up to 5 watts; dark wood absorbs light, and underpowered fixtures will look muddy. Light stain or cedar glows beautifully at 3 to 4 watts.
Keep fixtures outside the drip line of the roof or canopy fabric so runoff doesn't pour directly onto them, and choose fixtures with a tempered glass lens — falling twigs and hail happen. If you host dinners under the pergola, put this zone on a dimmer so you can drop it to a romantic 30 percent once the plates are cleared.
Suggested budget range: $120 – $320.
14. Ring a Fire Pit with Low Glowing Accents
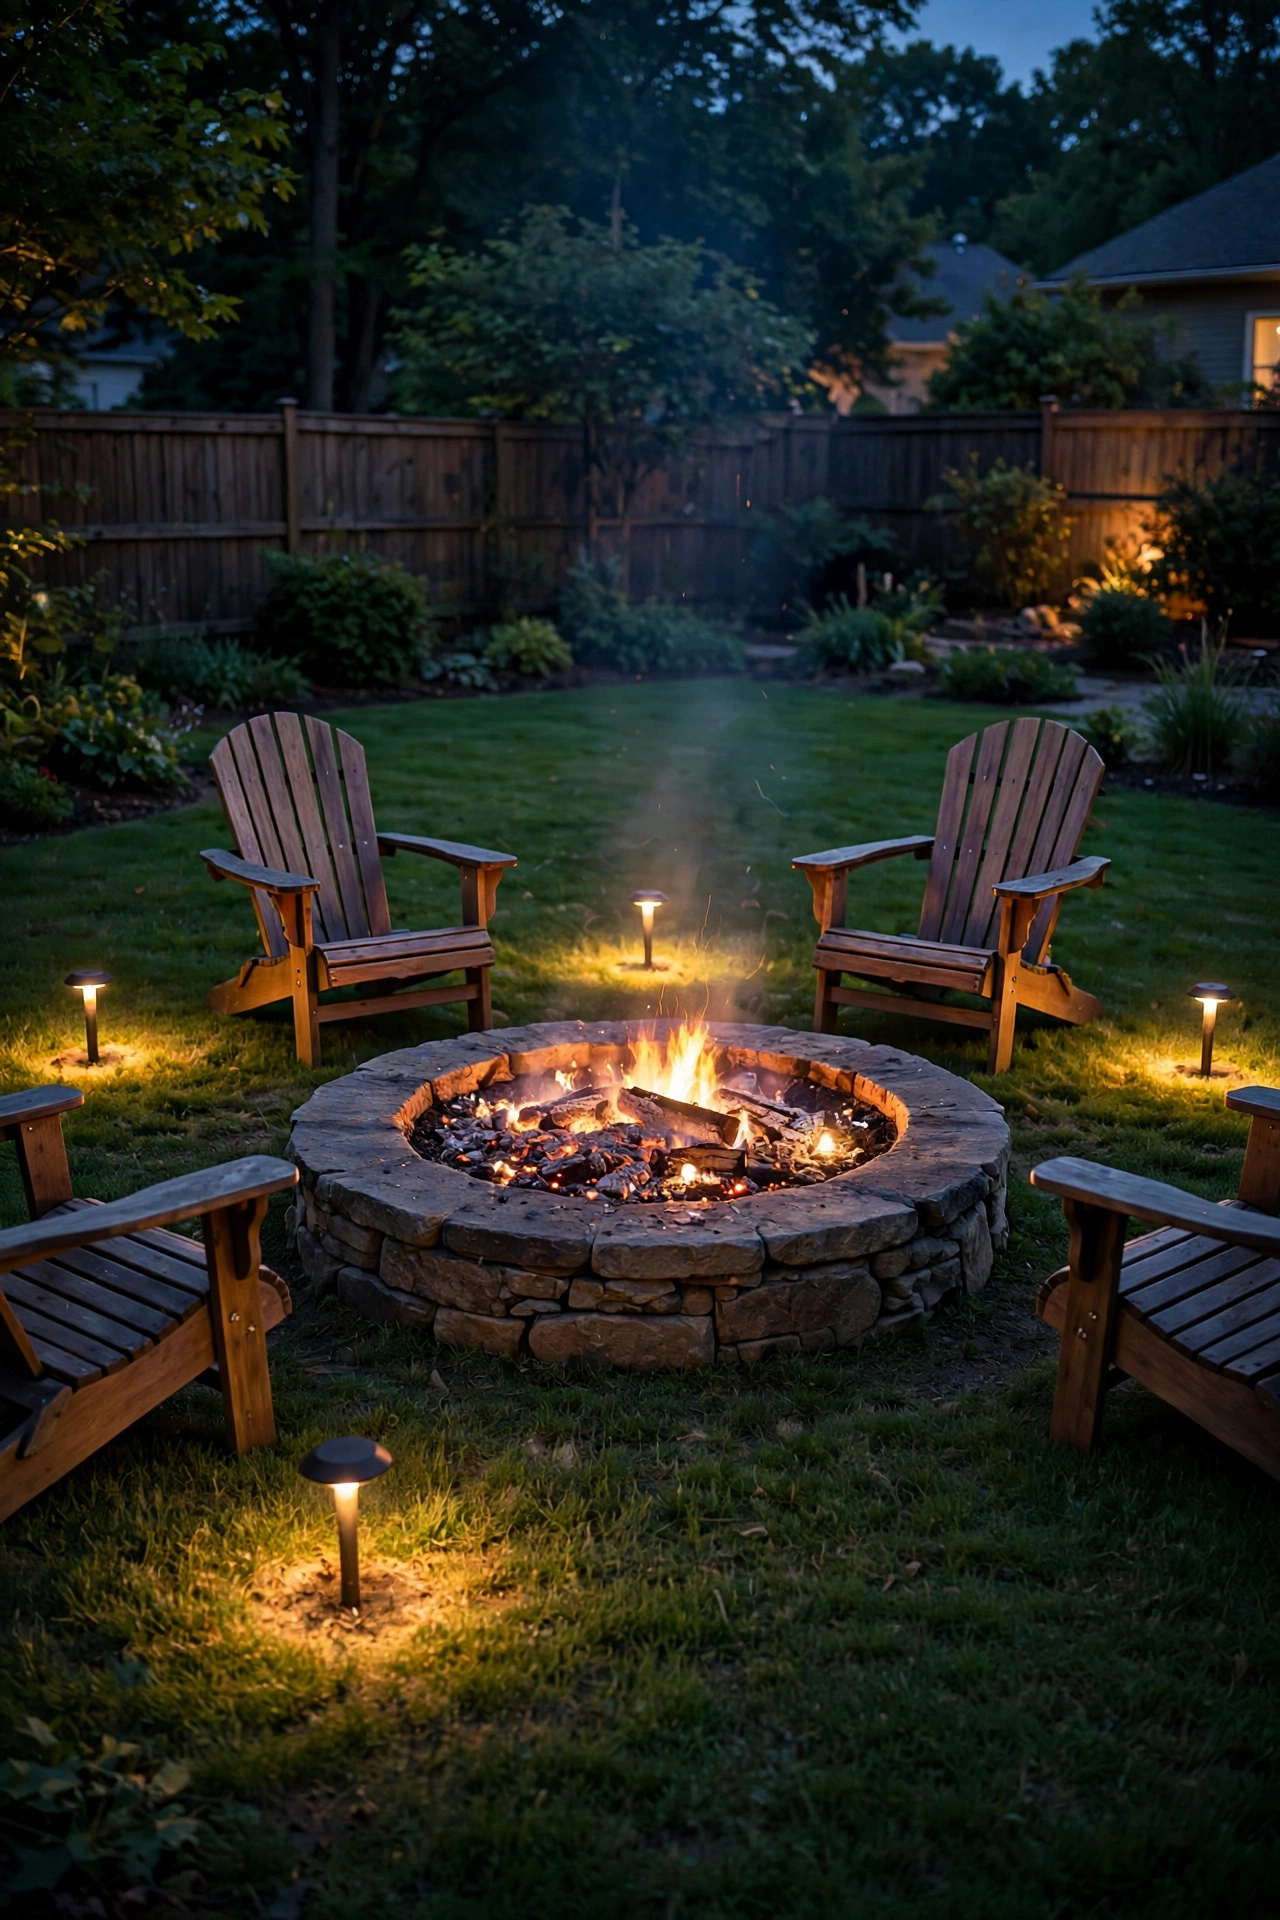
Fire pits need safety lighting that doesn't compete with the flames. Set four well lights in a ring 6 to 8 feet out from the fire ring, aimed straight up into surrounding low planting or simply left to create small pools of light on the ground. They define the gathering circle and keep the trip hazards — chair legs, cooler corners, the edge of the gravel pad — visible without killing the firelight mood.
Use the lowest wattage you own here, 2 watts max, and warm 2200K–2700K so the light blends with the fire glow instead of clashing with it. Point the fixtures away from seating so nobody stares into a lens, and keep them at least 6 feet from the fire — embers drift, and even LED fixtures have plastic parts that don't love sparks.
Put this ring on the same timer as your other entertaining zones but at a fixed low level; I like a smart scene that drops the whole fire-pit zone to 25 percent when it's fire season. For more ideas around fire features, my simple backyard fire pit ideas pair well with this buried-lighting approach.
Suggested budget range: $80 – $220.
15. Backlight a Specimen Shrub for Silhouette
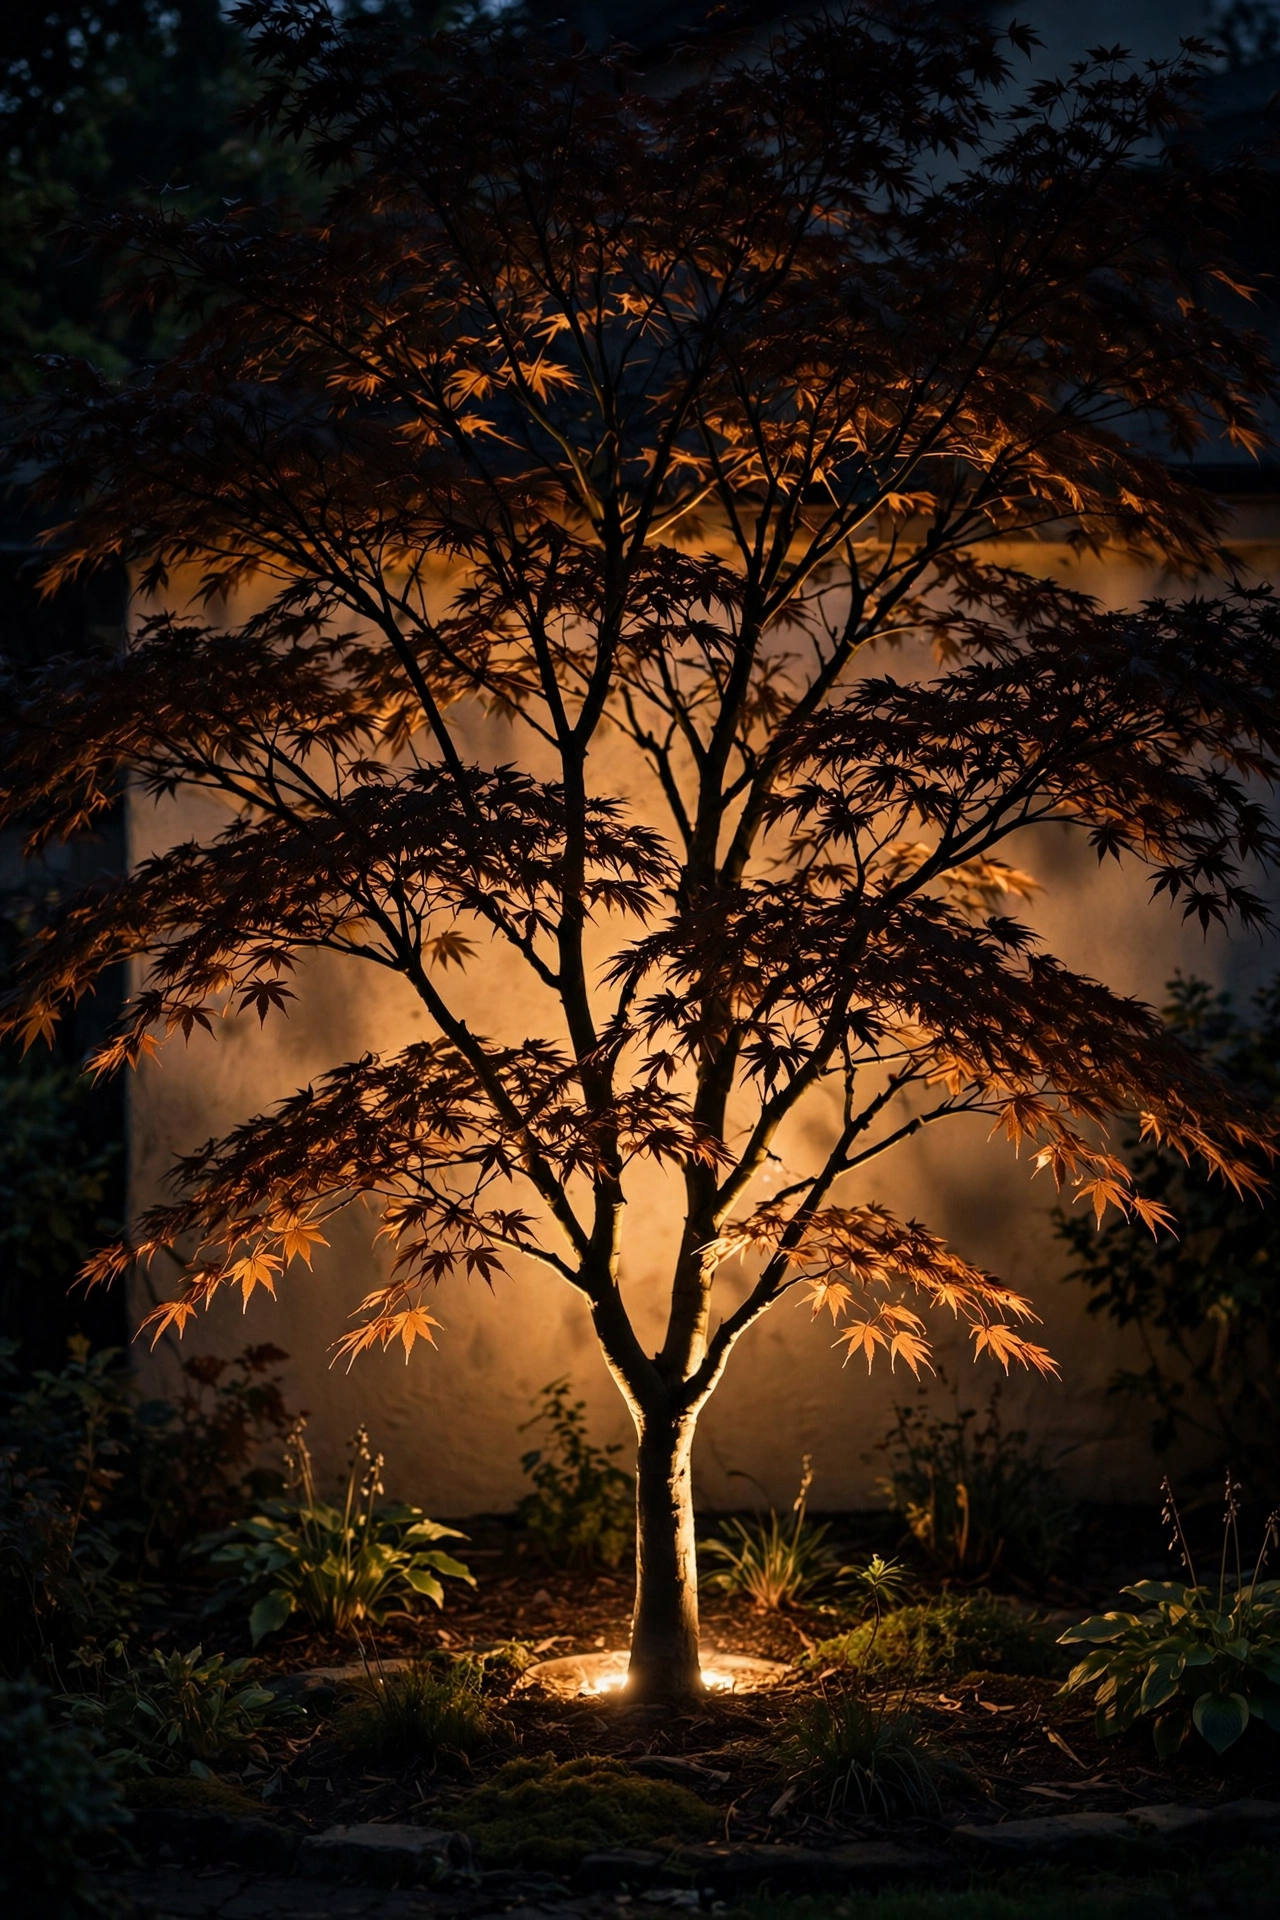
Backlighting is the pro move nobody tries: place the well light behind the shrub, between it and the house or a wall, aimed up so the shrub throws a dramatic shadow silhouette forward while its edges glow. Japanese maples, contorted filberts, and anything with interesting branch structure become living art. I did this with a weeping cherry and guests asked if it was a sculpture.
Set the fixture 18 to 24 inches behind the shrub, centered on its mass, and aim straight up. You'll need a background — a light-colored wall, fence, or even the open lawn at dusk — for the silhouette to read against. The fixture wattage depends on the shrub size: 3 watts for anything under 4 feet, 5 to 6 for larger specimens.
This technique demands a little experimentation, so do the flashlight dry run I mentioned earlier and move it around until the shadow looks dramatic. Prune the shrub first: backlighting shows every crossing branch and dead twig, so a quick cleanup makes the silhouette crisp instead of messy. It also doubles as seasonal interest — bare winter branches make the most striking shadows of all.
Suggested budget range: $50 – $140.
16. Illuminate Steps with Recessed Edge Wells
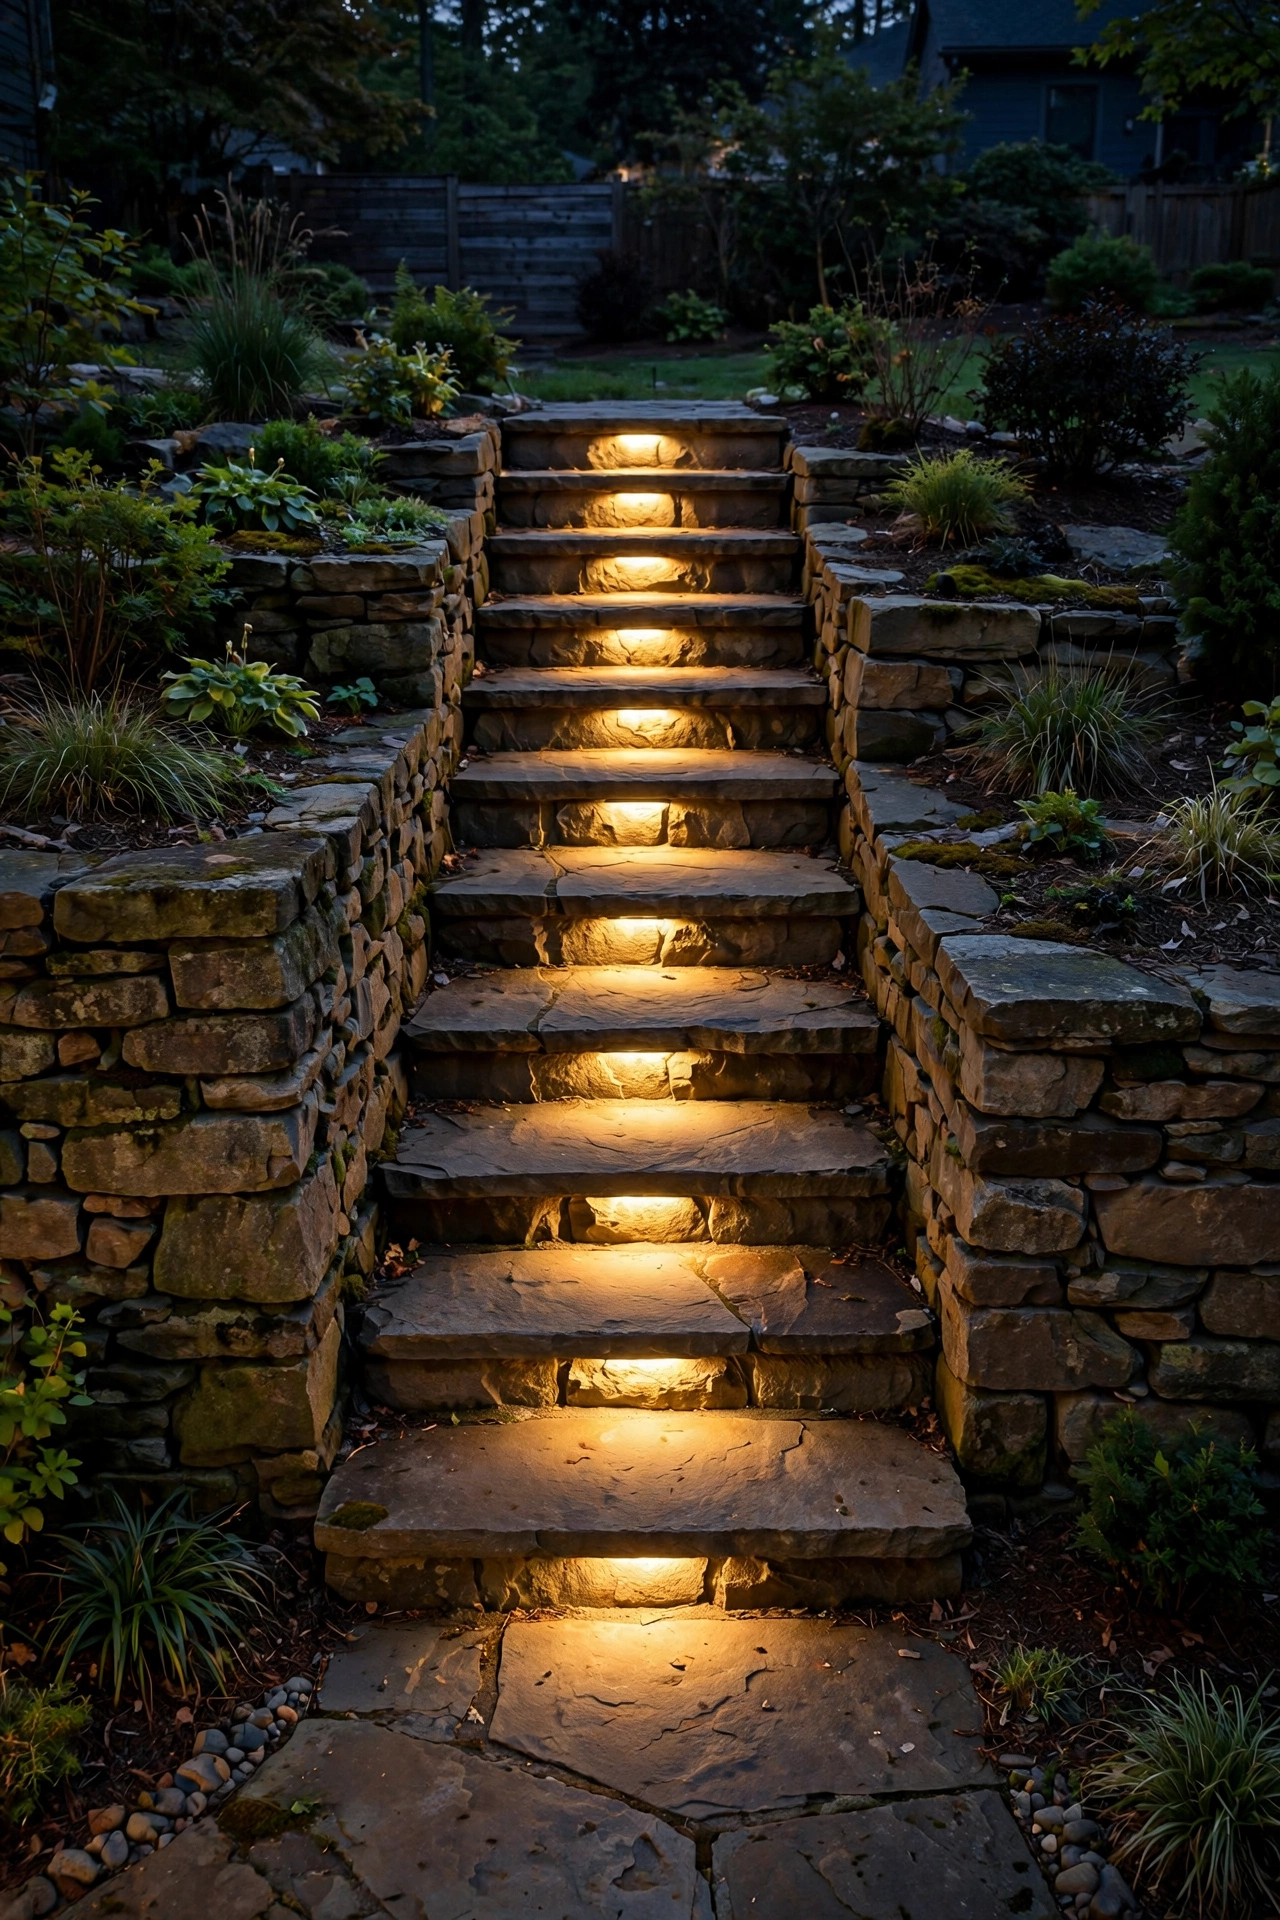
Steps are the one place where lighting isn't decorative — it's safety equipment. Small well lights recessed at the base of each riser, or set into the grade at the sides of each tread, cast a wash of light across every step so nobody misjudges an edge. I always recommend lighting every third step minimum on long runs; every step is better if the budget allows.
Use louvered or shielded fixtures aimed downward-ish across the tread rather than up into climbers' faces. Well lights meant for uplighting can work if you tilt the aim low and pick a fixture with a glare shield — the beam should graze the tread surface, not blast the landing. Keep everything 2700K and dimmable; bright steps at 2 a.m. wake the whole house.
Wiring steps means running cable through or behind the structure, so plan this before you build or rebuild stairs — retrofitting means lifting treads. Low-voltage cable can be tucked under stair stringers in conduit, and every fixture needs a drainage bed of gravel so freeze-thaw cycles don't crack the housings. If your steps are wood, confirm the fixture's heat rating and keep LEDs only — no halogen near wood, ever.
Suggested budget range: $150 – $450.
17. Seasonal Spotlighting for Holiday Displays
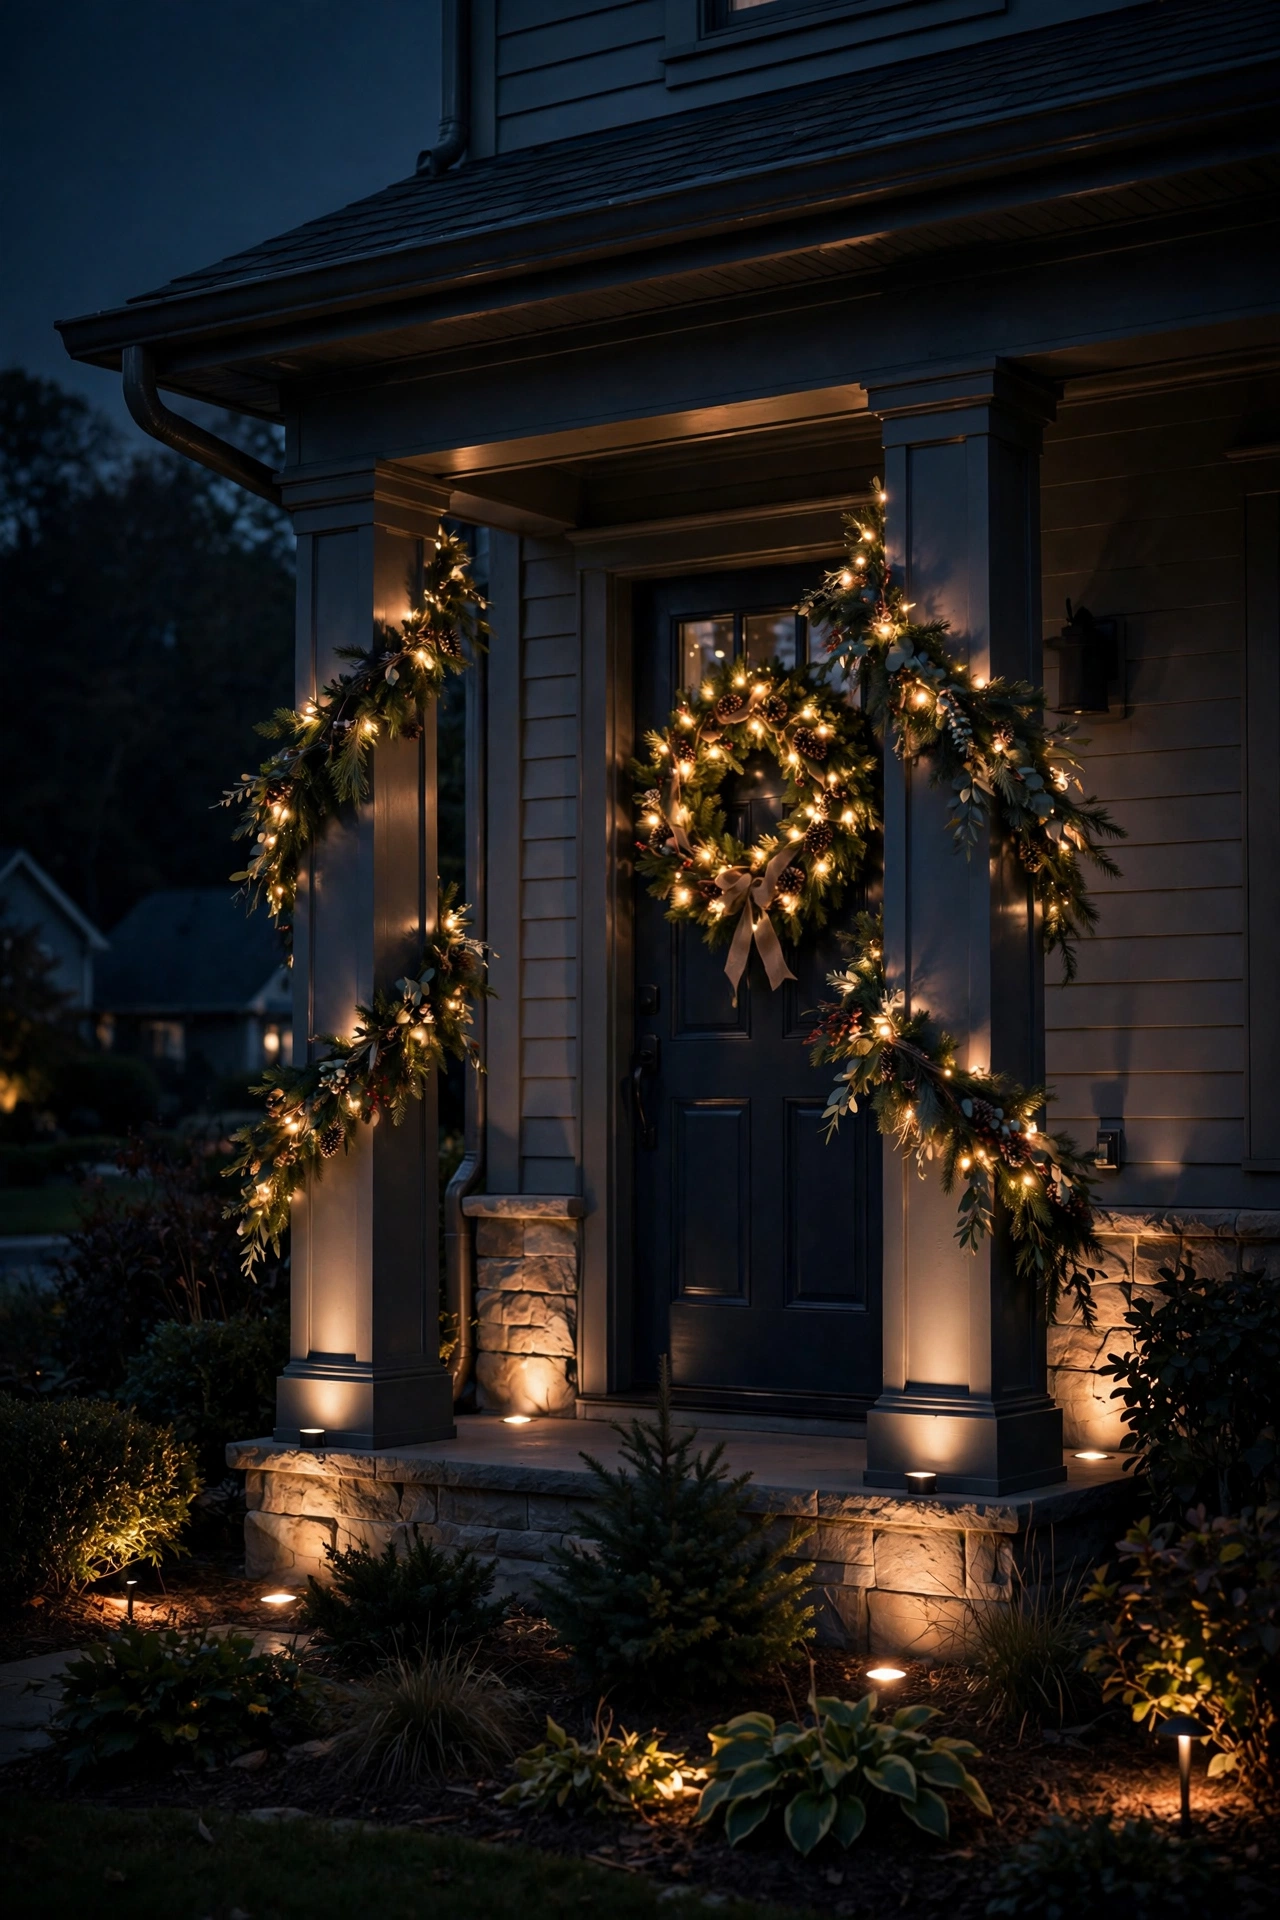
Here's the idea that made me a convert: aim a couple of your existing well lights at the spots where holiday decor goes, and your Christmas setup gets professional-looking accent lighting for free. A well light at the base of the tree where you hang the big wreath, one washing the porch columns where the garland swags, one uplighting the evergreen you wrap in lights — the landscape lighting becomes the stage lighting for the season.
Plan for it when you place permanent fixtures: leave one or two positions near the front facade uncommitted, or install a spare low-voltage cable stub with a cap so you can drop a fixture in come December. Aim the beams to frame the display rather than wash it out — colored holiday lights plus warm white landscape light is a combination that photographs beautifully.
For renters or anyone who doesn't want permanent fixtures, this is also the best argument for a couple of plug-in well lights you set out seasonally. And if you're building a year-round plan, my permanent outdoor Christmas lights post shows how to integrate holiday lighting with your everyday landscape design.
Suggested budget range: $60 – $200.
Frequently Asked Questions
How deep do in-ground well lights need to be buried?
The fixture housing itself sits mostly below grade — you dig a hole about 2 to 4 inches deeper than the fixture's height, fill the bottom with 4 to 6 inches of crushed gravel for drainage, and set the fixture so its rim sits roughly half an inch above the surrounding soil. The gravel bed is non-negotiable: standing water is the number one killer of well lights. In clay soil, go deeper with the gravel and consider wrapping the hole sides with landscape fabric to keep soil from migrating into the drainage bed.
Are well lights safe to install as a DIY project?
Low-voltage (12-volt) well light systems are very DIY-friendly — the cable carries no more voltage than a doorbell, and you can bury it just a few inches deep without conduit in most areas. You'll need a transformer plugged into a GFCI-protected outdoor outlet, and the total fixture wattage must stay under about 80 percent of the transformer's rating. What you should not DIY is running a new 120-volt line to power the transformer location — that part needs a licensed electrician and, in most jurisdictions, a permit.
What color temperature is best for landscape well lights?
Warm white, 2700K, is the right answer for about 90 percent of residential landscaping. It flatters foliage, stone, wood, and siding, and it reads as cozy rather than commercial. Reserve 3000K for modern homes with lots of glass and steel, where a slightly crisper white matches the architecture. Avoid 4000K-plus "daylight" LEDs outdoors — they make plants look sickly and your yard feel like a parking garage. Whatever you choose, keep every fixture the same temperature; mixed color temps look like a mistake.
How much does it cost to install well lights across a whole yard?
A modest DIY project — 6 to 8 fixtures around a facade and one tree — typically runs $300 to $700 including the transformer, cable, and connectors. A professionally installed whole-yard design with 15 to 25 fixtures usually lands between $2,500 and $6,000 depending on your region, soil conditions, and fixture quality. LED fixtures sip electricity (a 10-fixture, 4-watt-each system costs just a few dollars a month to run nightly), so the install is the real expense. Start small and expand — low-voltage systems are easy to grow one cable run at a time.
Conclusion: Start Small, Then Grow Your Glow
The reason in ground well lights landscape lighting feels so magical is also the reason it's so practical: the light source disappears. No fixtures to mow around, no stakes leaning after a storm, no lanterns to repaint — just your trees, walls, and walkways glowing as if the moon decided to help out. Start with one hero spot — a tree, your front door, the facade — get the spacing and aiming right using the numbers in this post, and then grow the system one weekend at a time.
If you loved these ideas, browse more of my outdoor lighting projects for the rest of your layered plan — your yard's best nights are ahead of it.