Every long-running landscape lighting system eventually needs a splice. A shovel nicks a cable during planting, a fixture gets moved two feet to clear a growing shrub, or — my personal classic — one path light in the middle of a run starts flickering like it's sending Morse code. Nine times out of ten, the culprit is an old connection that let water in. Learning how to splice landscape lighting wire properly is the difference between a repair that lasts a decade and one you'll be digging up again next spring. In this guide, I'll walk you through the two waterproof methods I trust, the tools that actually matter, what it costs in 2026, and the mistakes that quietly kill connections. By the end, you'll be able to cut, join, seal, test, and bury a splice with total confidence — no electrician required, honestly. It's one of those quiet little skills that keeps a whole system glowing for years instead of slowly fading one fixture at a time.

The Short Answer
Unplug the transformer first. Cut the cable back until you reach bright, shiny copper — never splice onto green, corroded wire. Join the ends inside a gel-filled (silicone-filled) wire connector, or crimp on a butt connector and seal it with adhesive-lined heat shrink tubing. Give it a firm tug test, restore power and confirm the fixtures light, then bury the splice about 6 inches deep with a small loop of slack beside it. Never bury a plain twist-on wire nut or an electrical-tape join: both fail within a season underground, guaranteed.
Why Splices Fail: Water Is the Real Enemy
Low-voltage wire itself is tough stuff. The copper conductors inside a direct-burial landscape cable can sit in damp soil for twenty years without complaint. The splice, though, is a wound in that cable — and every wound is where moisture gets in. Once water reaches bare copper, corrosion starts within weeks. You'll recognize it instantly: the copper turns dull brown, then green and crusty, like an old penny left in a fountain.
Corrosion raises resistance at the joint, and resistance steals voltage. That's why a failing splice rarely kills a light outright at first. Instead you get the greatest-hits collection of annoyances: one fixture noticeably dimmer than its neighbors, flickering when the soil is wet after rain, or a light that works beautifully all summer and quits the first cold week of fall, when everything contracts slightly. In my experience, homeowners replace bulbs, then whole fixtures, then start side-eyeing the transformer — when the real problem was a ninety-cent connection buried by the hydrangeas.
The fix isn't complicated, but it does require respecting one rule: a buried splice must be sealed against water as completely as the cable's own jacket. Everything in this guide flows from that. Get the seal right and the joint essentially disappears as a maintenance item — the copper stays bright, the voltage stays where it belongs, and the fixture at the end of the run glows just as warmly as the one beside the transformer.

The Main Connection Types, Compared Honestly
You'll see four methods recommended online, and they are not equals. Here's how they stack up after years of digging up other people's repairs (and, early on, a couple of my own):
| Method | Cost per splice | Effort | Buried lifespan | Best for |
|---|---|---|---|---|
| Gel-filled wire connectors | $1.50–$3 | Low | 10+ years | Most splices; beginners |
| Adhesive-lined heat shrink + crimp | $1–$2 | Medium | 10+ years | Straight cable repairs |
| Solder + heat shrink | Under $1 | High | 10+ years | Pros; shop repairs |
| Twist-on nut + electrical tape | Under $1 | Low | One season, maybe | Nothing underground — avoid |
Gel-filled connectors are my default recommendation. They're twist-on connectors pre-filled with silicone sealant inside a sealed tube; as you twist, the gel displaces air and coats the copper completely. They're forgiving, fast, and removable if you ever reconfigure a run.
Adhesive-lined heat shrink over a crimped butt connector is the other pro-grade choice. The tubing has a glue layer inside that melts as it shrinks, forming a genuinely watertight sleeve. It's slimmer than a gel connector, which matters inside tight fixture stems.
Soldering makes a superb electrical joint but a stiff one, and stiff joints crack under soil movement unless sealed perfectly. Pierce-style pinch connectors — the kind that come with many fixture kits — are fine for tapping a fixture lead above the mulch line, but I never bury them as a main-cable splice.
So the honest shortlist is just two methods long. If you're new to wiring, start with gel connectors and don't overthink it. If the repair is a clean mid-run cut and you own a crimper, heat shrink gives you the slimmest, toughest result. Everything else is either a temporary patch or a pro's preference — and none of it belongs in the ground at your house.
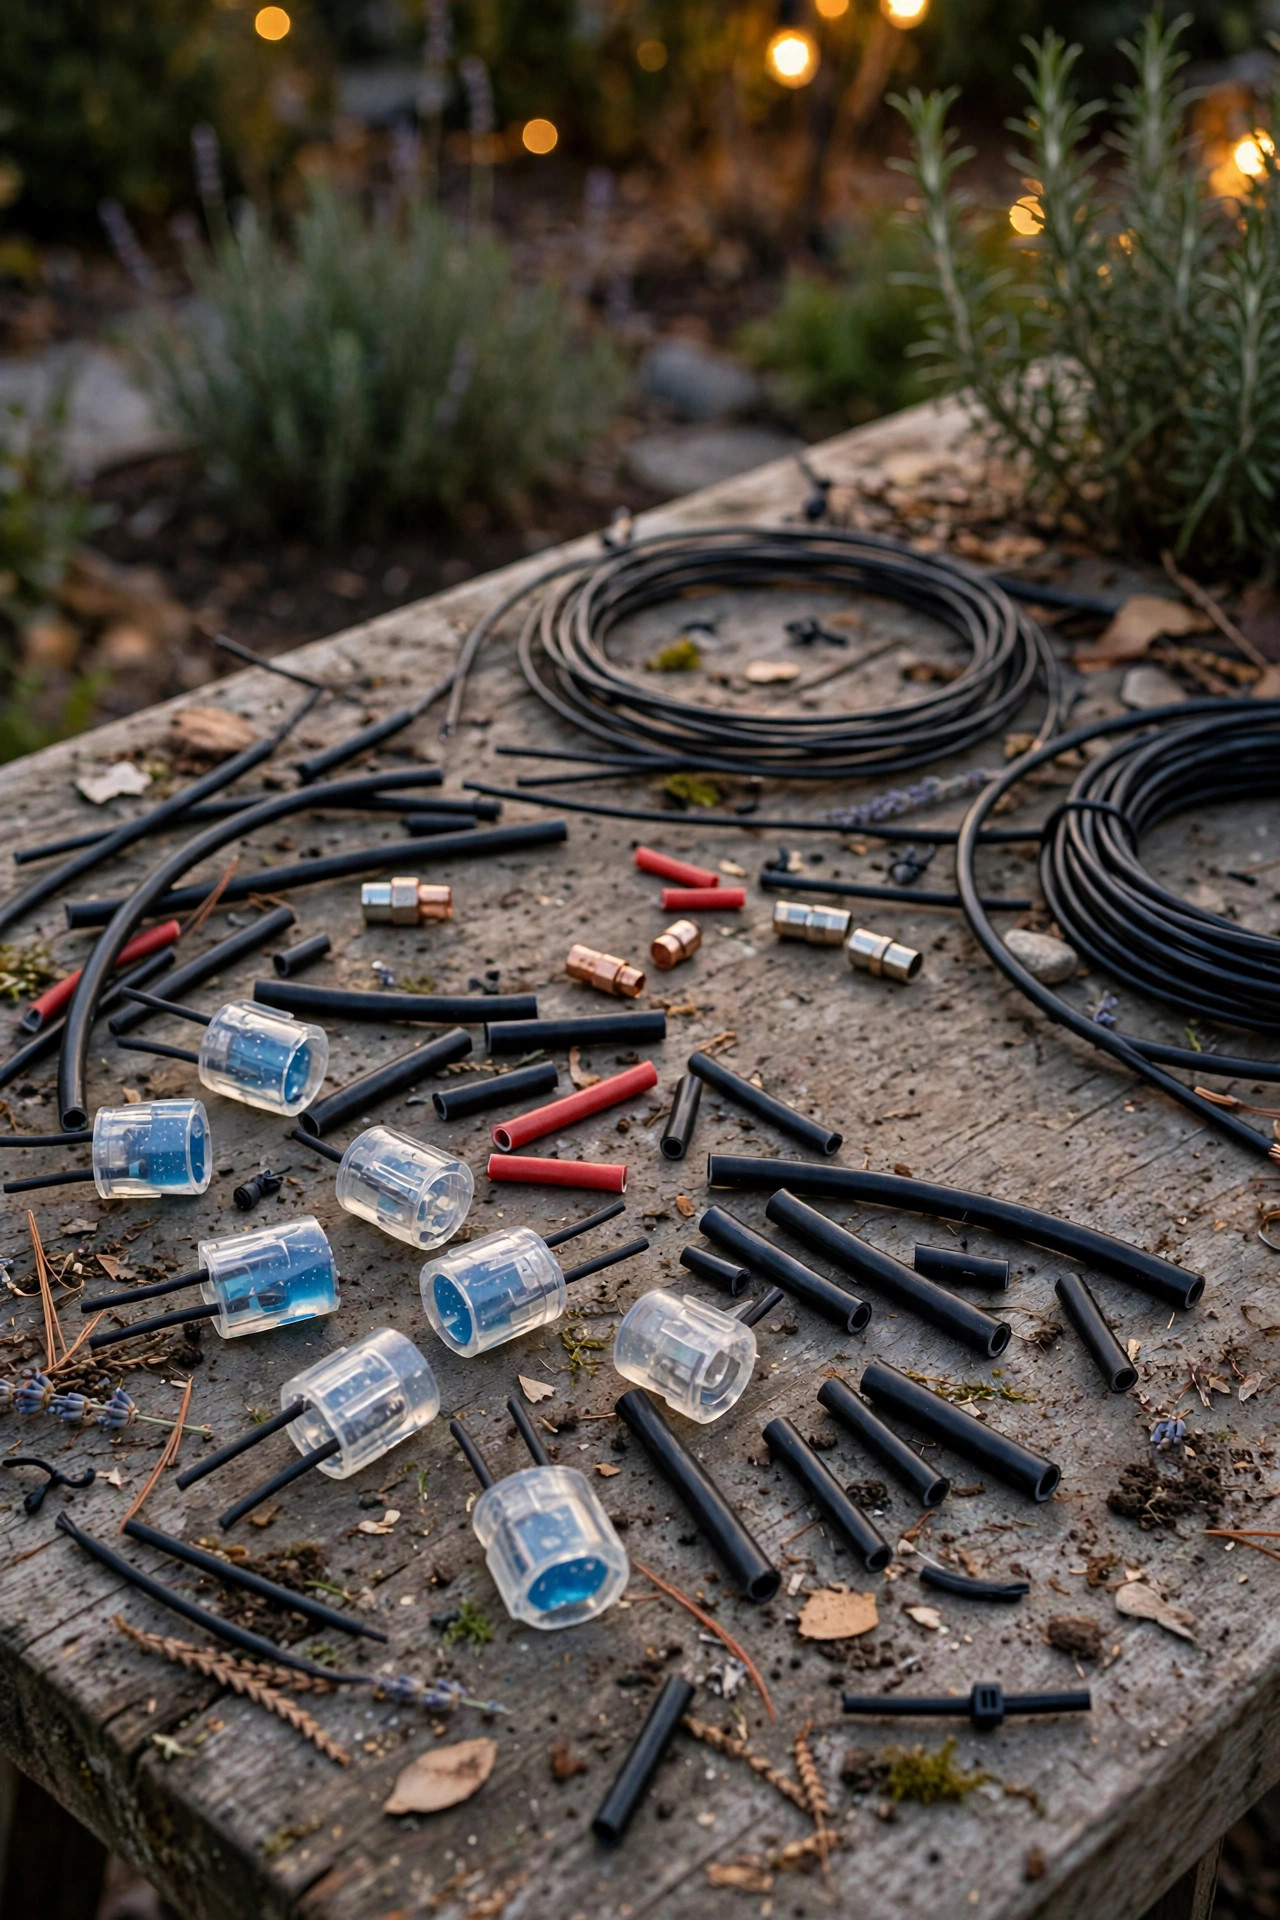
What You'll Need: Tools and Materials
You don't need a truck full of gear for this job. My splice kit lives in one small tote, and it handles everything from a single nicked cable to a whole re-wired bed.
For tools: a pair of combination wire strippers sized for 12- to 16-gauge cable (most landscape systems are 12 or 14 gauge), diagonal cutters, lineman's pliers for a confident twist, and a narrow garden trowel or trenching shovel for exposing the cable. If you're using heat shrink, add a heat gun — a hair dryer works in a pinch but takes forever — and a ratcheting crimper. A basic multimeter is optional but genuinely useful for testing, and costs less than a pizza.
For materials: gel-filled connectors rated for direct burial (check the packaging says exactly that), or adhesive-lined heat shrink butt connectors matched to your wire gauge. Keep a few feet of spare landscape cable on hand in case you need to cut back further than expected to find clean copper — this happens constantly. A small tube of dielectric grease is a nice belt-and-suspenders touch inside fixture housings. Finally, grab a couple of landscape flags or a strip of bright tape to mark where each splice went in. Future you, digging in that bed in three years, will be so grateful.

Step-by-Step: How to Splice Landscape Lighting Wire With Gel-Filled Connectors
This is the method I teach friends, because it's nearly impossible to mess up. Allow about fifteen minutes per splice once the cable is exposed.
1. Kill the power. Unplug the transformer or switch it fully off. Twelve volts won't hurt you, but a short against the transformer's terminals can damage the unit.
2. Expose the cable. Dig carefully around the damaged spot until you have roughly a foot of working room on each side. Probe gently with the trowel flat — most "mystery cuts" come from enthusiastic edging.
3. Cut back to bright copper. Snip out the damaged or corroded section entirely. Keep cutting until the exposed strands are shiny copper, not dull or green. Sacrificing an extra inch now saves a redo later.
4. Strip about 5/8 inch of insulation from each end. Landscape cable has two conductors; keep them identified. One jacket side usually has ribs or printing — that side must join to the matching side on the other cable so polarity stays consistent.
5. Twist each pair together with the connector: hold the two matching ends side by side, push them fully into the gel connector, and twist until snug. The gel should ooze slightly — that's it sealing.
6. Tug-test every connection. A firm pull should move the cable, not slide the connector.
7. Leave a slack loop — coil a gentle S of extra cable beside the splice so soil shifting or a future re-dig has something to give.
8. Power up and test before burying (more on testing below), then cover with about 6 inches of soil.

How to Splice Landscape Lighting Wire With Heat Shrink for a Permanent Repair
When a cable is cut clean through mid-run — severed by a shovel, say — I reach for crimp-and-shrink, because the finished splice is barely thicker than the cable itself and shrugs off soil movement.
Slide a 3-inch piece of adhesive-lined heat shrink tubing (about twice the cable's diameter) over one cable end *before* joining anything. This is the step everyone forgets exactly once. Strip 3/8 inch from all four conductor ends. Insert the matching ribbed-side conductors into a butt connector sized for your gauge and crimp firmly — one crimp on each side of the center seam — then repeat for the plain side. Tug each wire; a good crimp doesn't budge.
Now center the tubing over the whole repair and apply heat starting from the middle, working outward so air escapes instead of bubbling under the sleeve. Keep the heat gun moving. You'll see the tubing shrink tight and a tiny bead of clear adhesive appear at each end — that bead is your waterproof seal, the single best sign the job is done right. Let it cool for two minutes before touching it, and never bury a splice while the tubing is still warm and soft.
Soldered joints get the same tubing treatment, but honestly, for low-voltage landscape cable, a good crimp sealed in adhesive shrink is every bit as durable and twice as fast.

Tapping Into the Main Run: Adding a Fixture Lead
Half of all splices aren't repairs at all — they're additions. You're connecting a new fixture's short lead wire to the main cable run, which makes a T-junction instead of a straight join. The principles are identical, but two things change.
First, you often don't need to cut the main cable at all. On hub-style layouts, fixture leads run back to a central junction where several leads and the main cable meet inside one or two large gel connectors — this is the cleanest approach and the easiest to modify later, as I explain in my guide to landscape lighting wiring methods. If you do tap mid-run, cut the main cable and use two connectors: one joining cable-in, cable-out, and fixture lead (three wires — make sure your connector is rated for the bundle size), keeping ribbed matched to ribbed.
Second, watch your total load. Every added fixture draws watts from the transformer and adds voltage drop to the run. A 300-watt transformer should stay under about 240 watts total, and long runs of thin cable will dim the far fixtures no matter how perfect your splices are. If your new fixture lands at the very end of a 100-foot run, expect it to glow a touch warmer and dimmer than the first one — that's physics, not your workmanship.

Where to Put Splices (and Where Never To)
Location decides lifespan almost as much as the connector itself. My rules, learned the damp way:
Good spots: inside the hollow stem or base of a fixture, where the connection stays a few inches above soil; in a hub junction tucked under a flat stone or inside a small valve box; or in a bed where the cable runs along the edge near a path, so you can find it again. Keep splices on the higher side of a bed's slope, where water drains away rather than through.
Bad spots: the lowest point of a bed, where every rain pools; directly under a downspout splash zone; in the middle of a lawn that gets aerated (aerator tines find buried splices with unerring accuracy); and anywhere you won't remember. That last one matters more than people think — mark every splice with a landscape flag until you've photographed it, and keep a simple sketch in your phone with measurements from two fixed points, like the porch corner and the oak trunk.
However carefully you seal it, the splice goes back underground only after it passes a test. Burial depth and cable routing follow the same rules as the rest of the run, which I cover fully in my guide on how to bury landscape lighting cable — about 6 inches down, no sharp bends, slack at every joint.

How to Test a Splice Before You Bury It
Testing takes three minutes and saves the worst job in gardening: digging up a repair you made yesterday. Never skip it, no matter how confident the tug test felt.
Restore power at the transformer and look first. Every fixture downstream of the splice should light at full, even brightness. Compare the first fixture past your splice with its twin on an untouched part of the system — your eyes are honestly good instruments here. If anything flickers, go back to that connector now, while the trench is open and your hands are already dirty.
If you own a multimeter, set it to AC volts and measure at the fixture furthest past the splice. A healthy 12-volt system reads roughly 10.5 to 12 volts at the fixture under load; anything under 10 suggests a resistive joint or an overloaded run worth investigating before burial. Then do the wiggle test: with the lights on, gently flex the cable a few inches either side of the splice. Any flicker means the connection is marginal — redo it now.
Finally, let the system run one full evening cycle before you call it done. Some gel connectors settle slightly as they cure, and a connection that passes at 4 p.m. occasionally loosens by dusk. Rare, but when it happens you'll be thrilled the trench was still open.

What It Costs in 2026
The happy news: splicing is one of the cheapest repairs in the entire yard. Gel-filled direct-burial connectors run about $1.50 to $3 each, or $15 to $25 for a contractor pack of 20 — and a pack that size rewires most residential systems end to end. Adhesive-lined heat shrink butt connector kits with assorted sizes cost $10 to $18. A decent heat gun is $25 to $40, a ratcheting crimper about $20, and a basic multimeter $15 to $25 if you don't already own one.
Compare that with a professional service call. Landscape lighting companies typically charge $150 to $300 just to diagnose and fix a single failed connection, and $75 to $150 per additional splice on the same visit — fair money for their time, but steep for a fifteen-minute job with $3 of parts. Replacing a mid-run cable entirely because of two bad splices is the real budget-buster people fear, and it's almost never necessary.
My honest take: spend the $30 on the contractor pack of gel connectors and a crimper, keep them in the garage, and every future repair costs you pocket change. Track where your cable runs and splices live, keep connections out of sight the tidy way, and the system mostly disappears into the garden — which is exactly what good lighting should do.

6 Mistakes That Kill a Splice
1. Burying plain twist-on wire nuts. The standard orange connector in every junk drawer is not rated for direct burial, full stop. It will fill with moisture and corrode by season's end.
2. Trusting electrical tape as a seal. Tape unwinds underground, traps water against the copper, and actually speeds corrosion. It has no place below the mulch line.
3. Splicing onto corroded wire. If the copper isn't bright, the connection is pre-failed. Cut back further, even if it means splicing in a short patch of new cable with two connectors.
4. Skipping the slack loop. Soil heaves, roots push, gardeners dig. A splice pulled taut eventually pulls apart. Six inches of lazy S-curve prevents most of it.
5. Crossing the conductors. Join ribbed to plain and the fixture still lights — low-voltage AC is forgiving — but inconsistent pairing across a system makes future troubleshooting maddening and can confuse some LED drivers. Match ribbed to ribbed, always.
6. Overstuffing a connector. Three 12-gauge cables in a connector rated for two is a loose, resistive joint waiting to flicker. Size the connector to the actual bundle, or use two connectors and a short bridge wire. The rating is printed right on the package — five seconds of reading beats a Saturday of re-digging.
Maintenance: Checking Old Connections Each Spring
A well-made waterproof splice needs almost nothing from you — but "almost" is doing some work in that sentence. Once a year, during spring cleanup, walk the system at dusk and simply look at it. Dim or flickering fixtures are your early-warning system, and they almost always trace back to a connection, not a bulb.
Every two or three years, gently uncover the splices you know about — this is where that phone sketch earns its keep — and give each a visual once-over. Gel connectors should still look plump and sealed; heat shrink should show no cracks or lifted edges. If a connector looks tired but the light performs fine, leave it alone. Disturbing a working seal causes more failures than age does. If performance has slipped, cut the old connector off entirely rather than re-twisting it: once gel is disturbed and copper has been exposed, a fresh connection on freshly cut wire is the only fix worth doing.
While you're in there, it's a good moment to confirm your splices are still hidden and dressed neatly — the same tidiness habits I recommend in my tips for hiding landscape lighting wires keep connections protected from rakes, edgers, and curious dogs. A system you inspect yearly, honestly, should never surprise you.

Frequently Asked Questions
Can I use regular wire nuts to splice landscape lighting wire?
Only above ground and inside a protected fixture housing, in a pinch. Standard twist-on wire nuts are not rated for direct burial: underground they fill with moisture, corrode the copper, and typically fail within a single season. For anything that goes in soil or mulch, use gel-filled connectors rated for direct burial, or adhesive-lined heat shrink. The price difference is about two dollars per splice — the cheapest insurance in your whole system.
How long does a waterproof splice last?
A gel-filled or adhesive heat-shrink splice made on clean, bright copper should last 10 years or more — roughly the life of the cable itself. I've opened ten-year-old gel connectors that looked brand new inside. Longevity drops sharply if the copper was corroded when joined, the connector was undersized for the wire bundle, or the splice sits in a pooling low spot. Location and clean copper matter more than the brand of connector.
Is it safe to splice low-voltage wire myself?
Yes, with basic care. Landscape systems run at 12 volts, which can't shock you under any normal circumstance — that's precisely why they're so DIY-friendly. Still, always unplug the transformer before cutting or joining wire, because shorting a live run can damage the transformer or blow its fuse. Keep connections out of standing water while you work, and if your system plugs into an outdoor outlet, make sure it's GFCI-protected, as all outdoor outlets should be.
Can I splice two different wire gauges together?
You can, and sometimes should: a 12-gauge main run often branches into 16-gauge fixture leads. Just use a connector rated for the combination — many gel connectors list a range like 12–18 gauge — and crimp butt connectors need the size that fits both ends, occasionally two different sizes on one splice. What you shouldn't do is downgrade the main run itself to thinner cable mid-route, since the thinner section becomes the bottleneck for voltage drop on everything downstream.
Conclusion
Knowing how to splice landscape lighting wire turns the most common lighting failure into a fifteen-minute, three-dollar fix: cut back to bright copper, seal the joint in gel or adhesive-lined heat shrink, test it before the soil goes back, and leave yourself a little slack. Do those four things and the splice will outlast the fixtures it feeds. Keep a small kit in the garage, mark every splice on a sketch, and your evening garden stays exactly as glowing as you designed it. Ready for the next project? Browse the rest of my lighting guides and ideas here — your yard at dusk is about to become your favorite room in the house.