
Intro
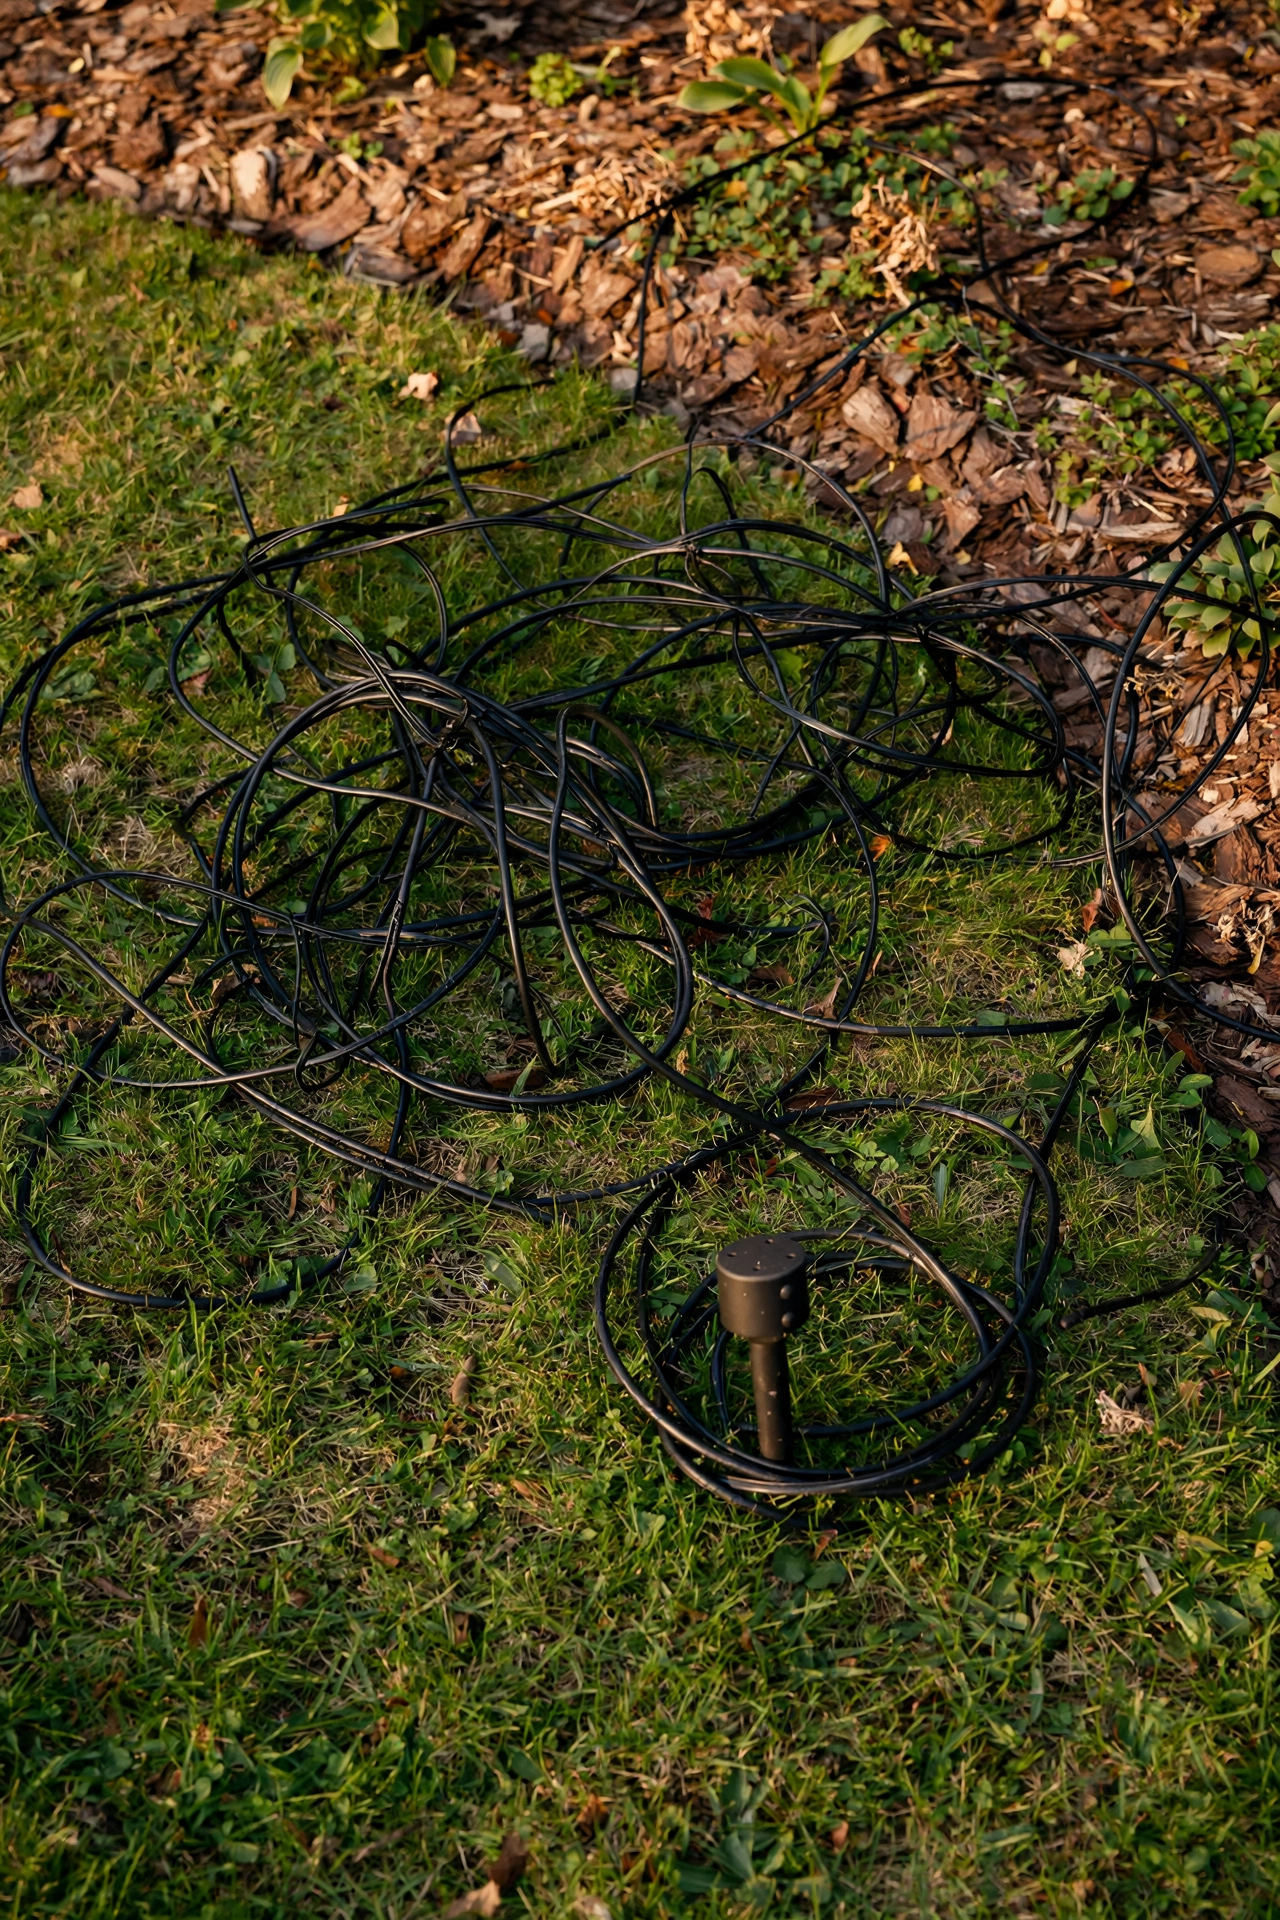
Here's a question I get more than almost any other: how to hide landscape lighting wires so a yard looks professionally designed instead of like a construction site. You've spent real money on gorgeous fixtures and warm bulbs — then one black cable snakes across the lawn and ruins the effect. I know the frustration firsthand; my first system looked magical at night and like a spaghetti spill by day.
The good news: hiding wires isn't a separate project, it's just part of doing the installation right. In my experience, the difference between a DIY job that looks DIY and one that looks professionally designed comes down almost entirely to cable management — and most of that work happens with a flat spade and a plan, before a single fixture goes in the ground.
In this guide I'll walk you through planning wire runs, the burial depths that matter, tricks for mulch beds, fences, and patios, where to hide connectors, and how to camouflage the transformer without blocking airflow. I'll also cover retrofit fixes for exposed wires, wire-sizing basics, and safety ground rules. By the end, you'll know how to make your system invisible by day and gorgeous at night.
The Short Answer
Hide landscape lighting wires by burying direct-burial low-voltage cable 4 to 6 inches deep in a narrow trench, tucking it under 2 to 3 inches of mulch in beds, and routing it tight along fences, edging, and foundation walls where the eye never goes. Hide the transformer on an inconspicuous wall behind shrubs with 12 inches of ventilation clearance, paint it to match, or use a vented enclosure. Keep connectors buried in mulch beds in waterproof grease-filled caps, and leave a small service loop at each fixture so maintenance never pulls cable back above ground.
Why Visible Wires Ruin an Otherwise Perfect Yard
I always tell people that landscape lighting is a daytime art form too. A fixture that looks sculptural at night but has a cable draped across the mulch like a garden hose is only doing half its job. Our eyes are wired to notice lines that don't belong — a straight black cable against green grass or tan bark reads as clutter instantly, the same way a power cord across a living room rug does. It doesn't matter how expensive your fixtures are; one visible wire run can make a thousand-dollar installation look like a weekend afterthought.
There's a practical side too. Wires left on the surface are wires that get hit by the string trimmer, chewed by the mower, baked by the sun until the insulation cracks, and tripped over by guests. In my experience, surface cable has a lifespan measured in a couple of seasons, while the same cable buried four inches down lasts a decade or more. So hiding wires isn't vanity — it's the single best thing you can do for the longevity of your system.
The mindset shift that helped me: plan for the daylight view first. Walk your yard at noon and note where the eye naturally travels — along the walkway, across the lawn, up the foundation. Those sightlines are where wires must never appear. The spots behind plantings, under mulch, and along the back of the fence are your hiding highways. Once you start seeing the yard as a map of visible and invisible zones, every wire run practically routes itself.
Plan Your Wire Runs Before You Dig a Single Trench
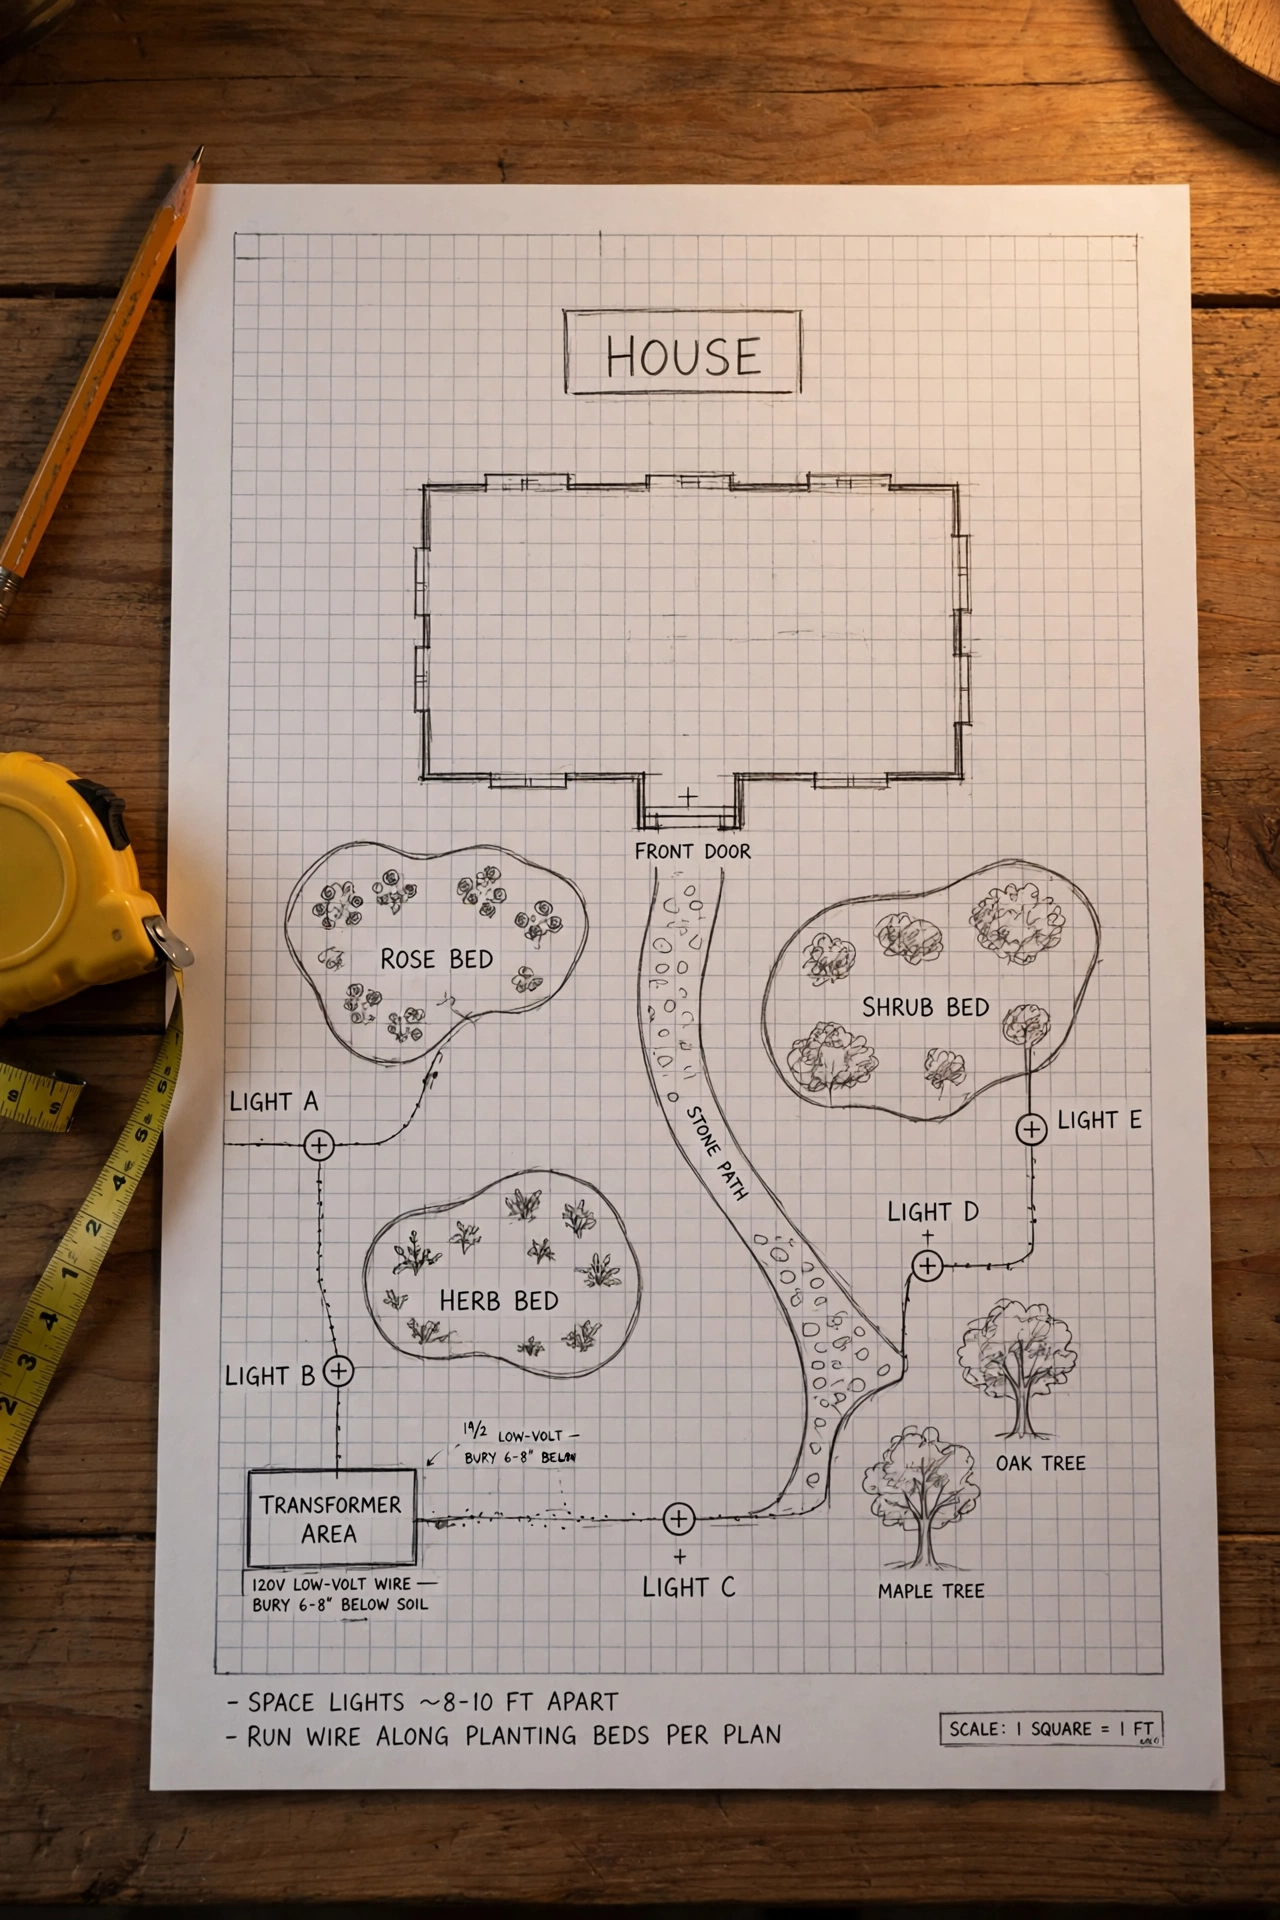
Nothing creates a visible-wire mess faster than figuring out the layout while you're holding a shovel. Before anything goes in the ground, I sketch the yard on graph paper — or honestly, a phone photo of the yard with lines drawn over it works just as well. Mark every fixture location, then draw the shortest sensible path from each fixture back to the transformer. You're looking for routes that pass through planting beds, along the house foundation, and behind edging, because those are the zones where cable disappears with almost no effort.
Transformer placement is the first big decision, and it drives everything else. Mount it on an exterior wall near a GFCI outlet, as central as possible to your fixture clusters, and as out of sight as you can get it — the side of the garage, behind the air-conditioning unit, anywhere the eye doesn't linger. Shorter wire runs mean less cable to hide and less voltage drop, so a central transformer is a double win. Measure each planned run with a tape or a measuring wheel and write the footage on your sketch; you'll need those numbers when you buy cable and size your wire gauge.
Two planning rules I never break: first, call 811 at least a few days before you dig so utility lines get marked — even a shallow trench can find a buried cable line or irrigation pipe. Second, photograph or save that sketch. A year from now, when you want to add two more path lights, you'll thank yourself for knowing exactly where every buried wire runs instead of playing lawn roulette with a spade.
Trenching and Burial Depth Rules That Actually Matter
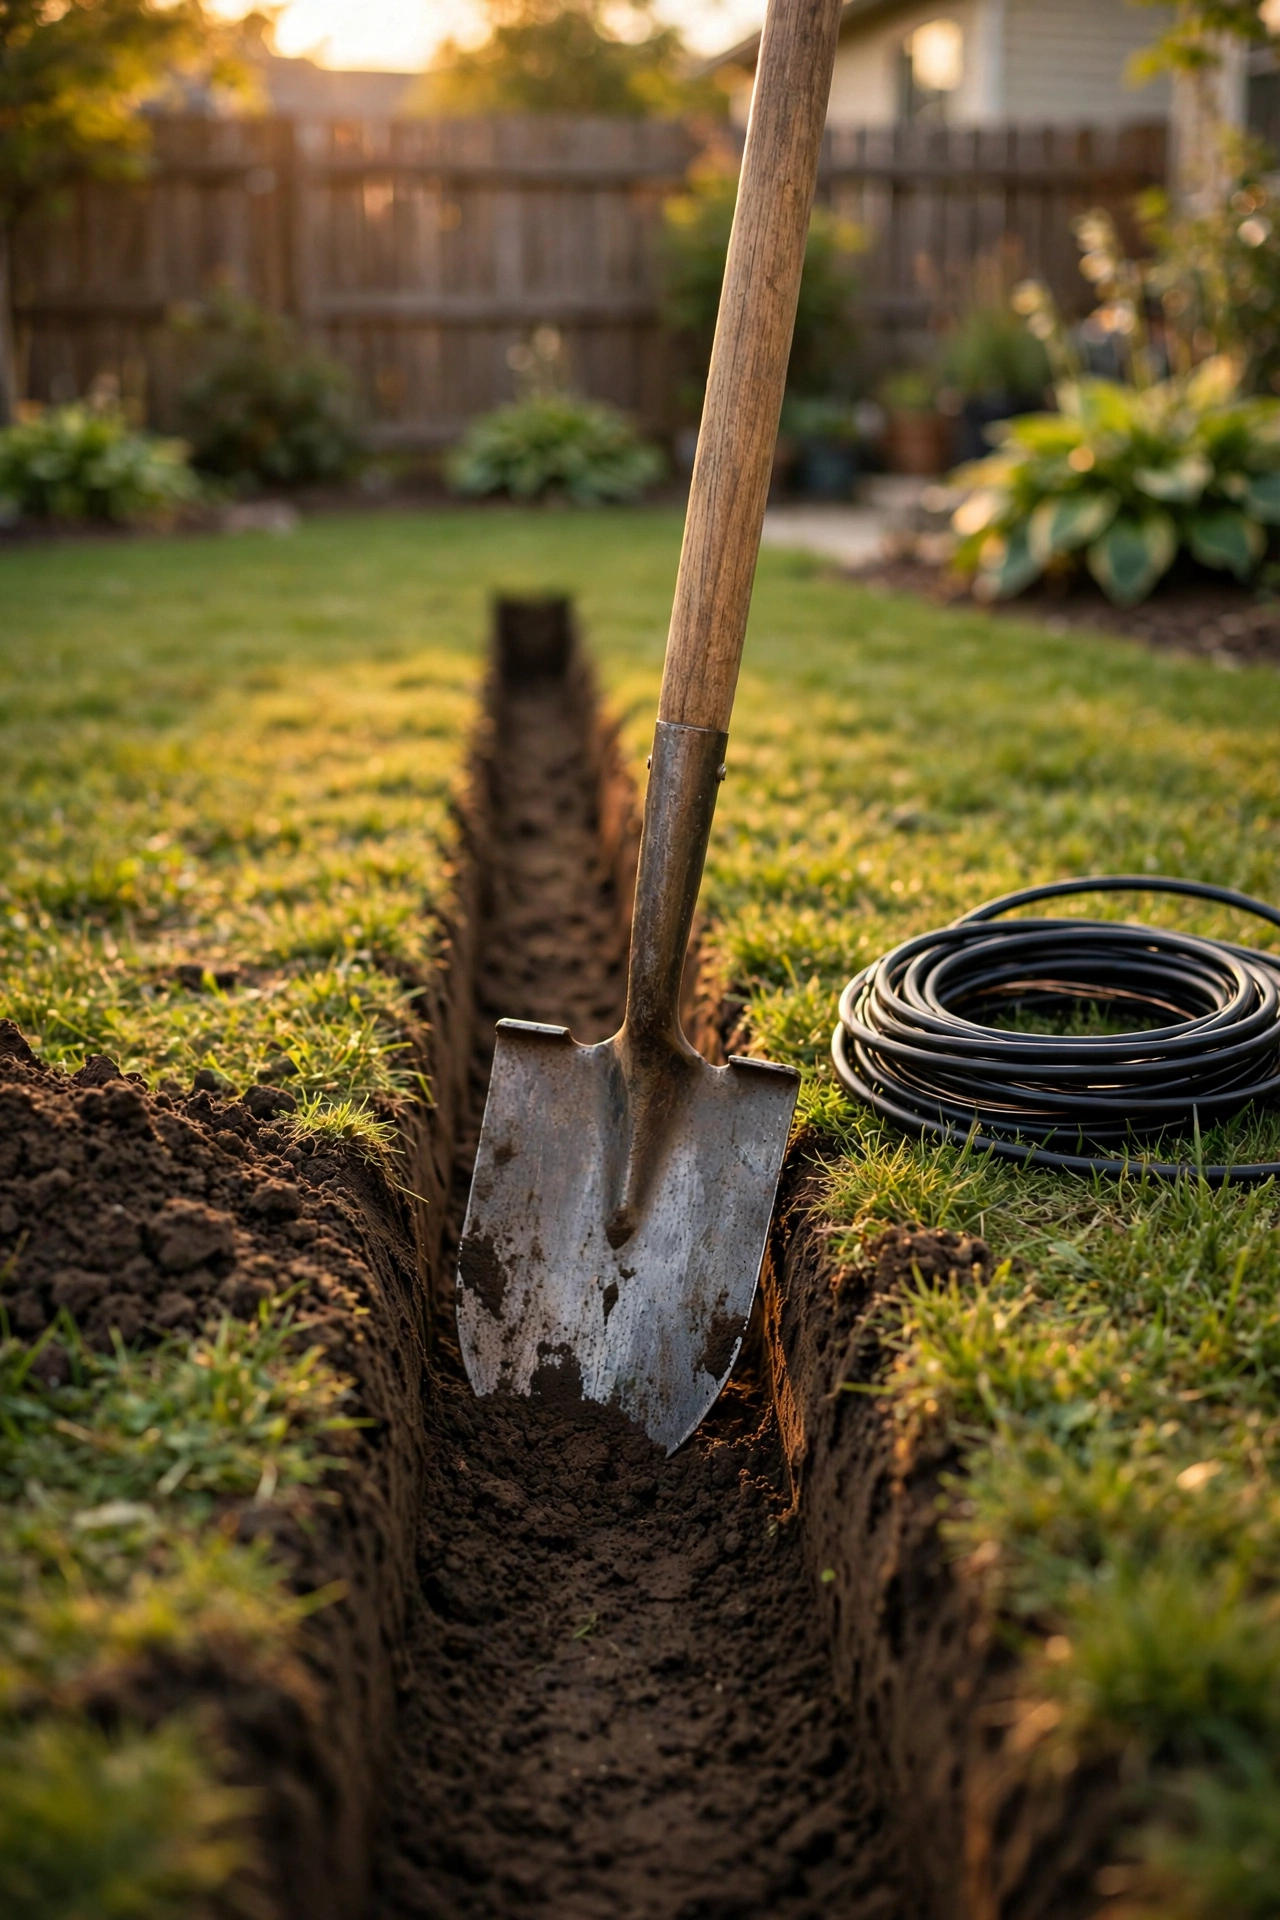
Here's where a lot of confusion lives, so let me untangle it. Low-voltage landscape lighting wire (12-volt, direct-burial rated) is not the same animal as 120-volt line-voltage cable, and the rules are far more forgiving. For low-voltage cable, burying it 4 to 6 inches deep is the sweet spot — deep enough that a rake, an edger, and a curious dog won't find it, shallow enough that you can still locate and service it. Line-voltage cable, by contrast, typically needs 18 to 24 inches of depth plus conduit under most codes. That difference is the entire reason most of us stick with low-voltage systems for DIY yard lighting.
My favorite trenching tool isn't a trencher at all — it's a flat garden spade. Push it straight down 5 or 6 inches, rock it forward and back to open a narrow slot, press the cable into the bottom, and step the slot closed with your boot. You can trench 50 feet this way in about half an hour, and the lawn barely notices. A gas-powered trencher is overkill for most yards and tears up turf you'll spend weeks repairing. Save your back and your grass.
A few trench-craft details make the difference. Keep the cable in one continuous piece wherever possible — every splice is a future failure point. Ease the cable around corners in gentle curves rather than sharp kinks, which can stress the insulation. And when you cross under a spot where you'll edge or aerate, dip the cable an inch or two deeper in that stretch. If you're wiring the kind of setup in my guide to low-voltage path lights, those long runs along a walkway are exactly where this slot-trench method shines.
How to Hide Landscape Lighting Wires in Mulch and Flower Beds
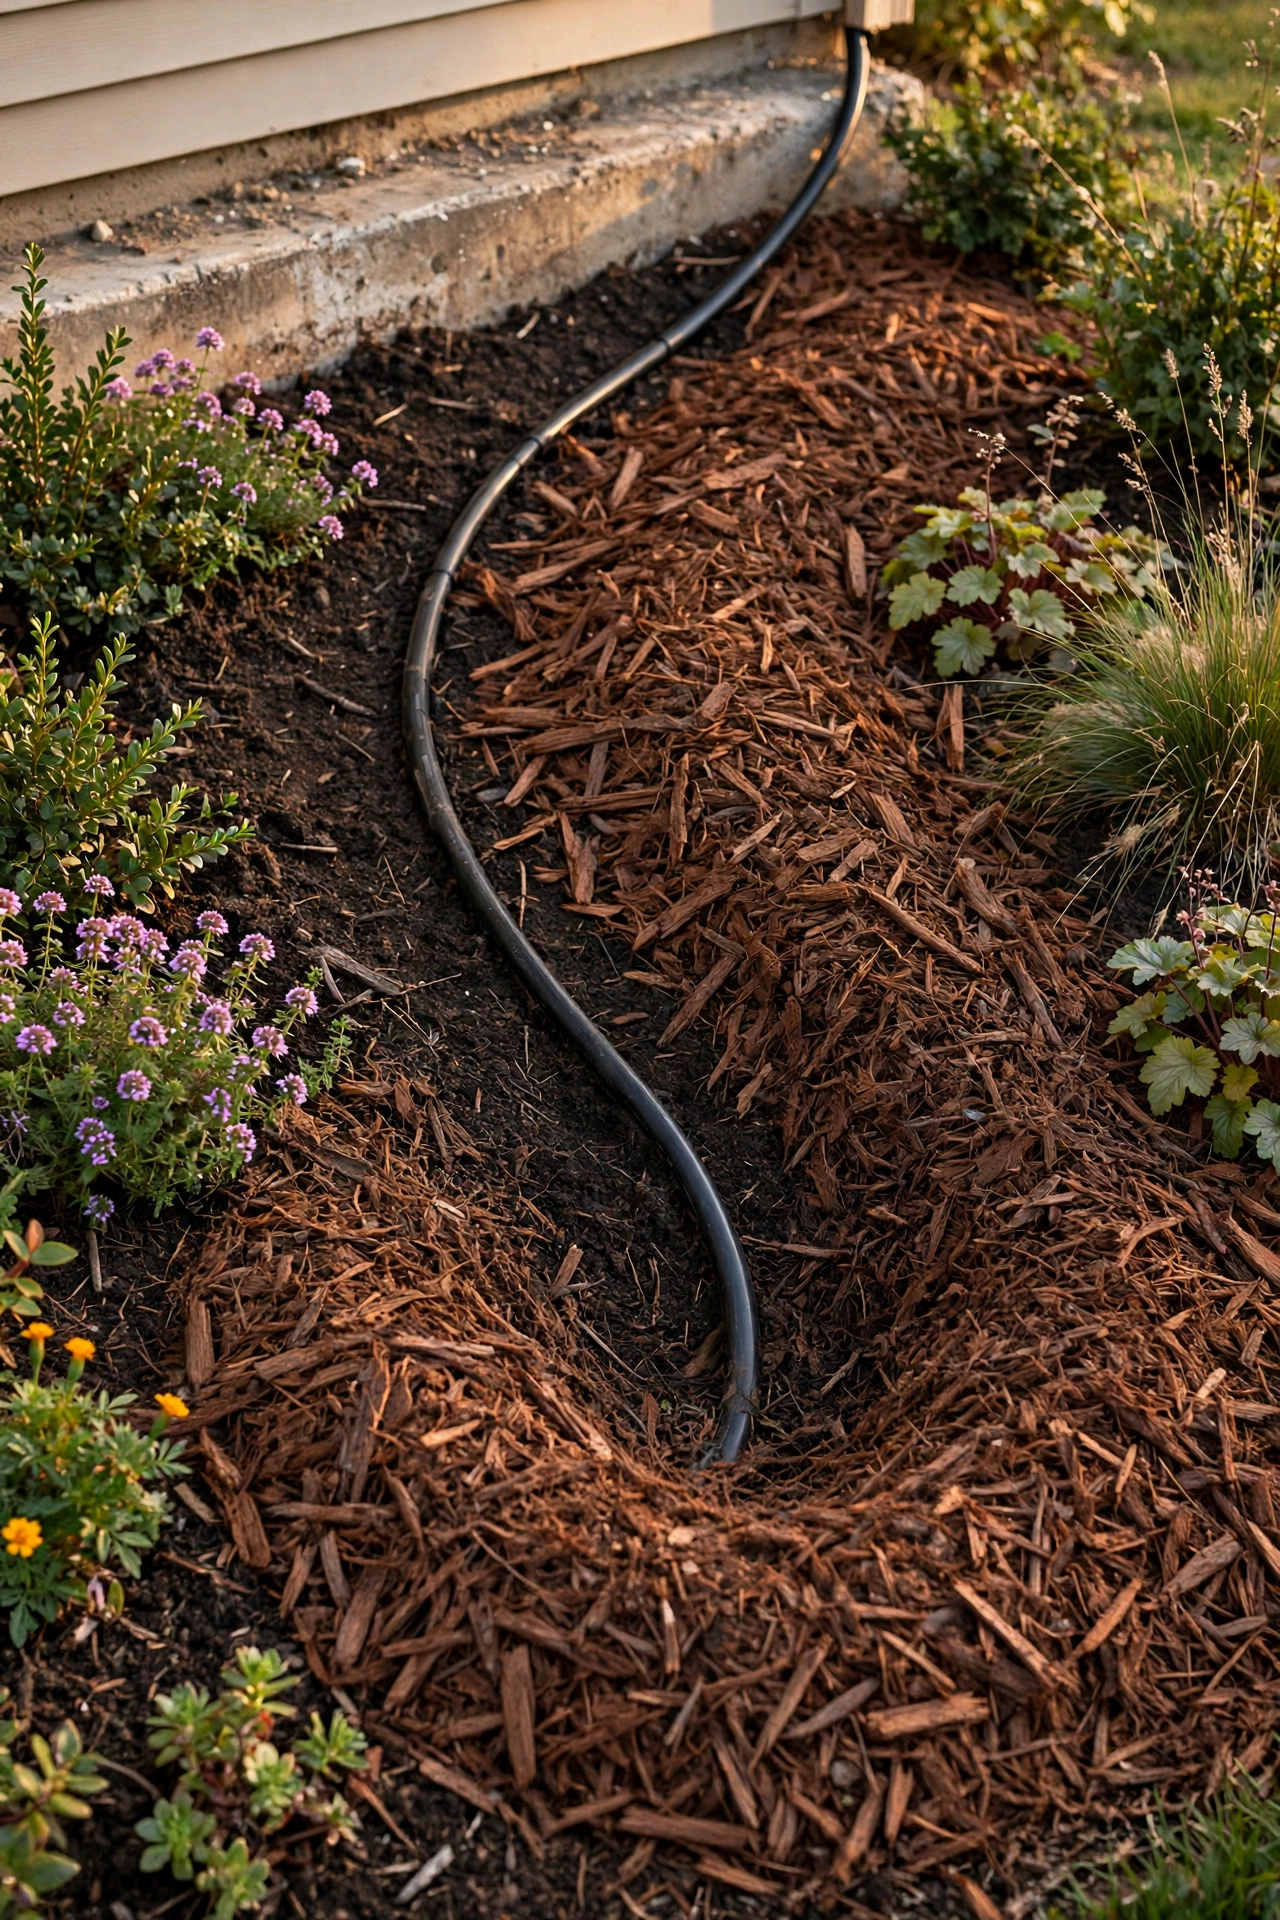
If I had to pick one hiding method that gives the most invisibility for the least effort, it's this: run your cable through planting beds under the mulch. Two to three inches of shredded bark, wood chips, or pine straw swallows a black low-voltage cable completely, and it does it while looking completely natural. No trench, no special tools, no soil to haul — you just pull the mulch back with a rake, lay the cable on the soil surface, and rake the mulch back over it. Done in minutes per bed.
There are a few things that make this work beautifully instead of just adequately. First, keep the cable tight to the back of the bed, hugging the foundation or the rear of the plantings, rather than wandering through the middle where you'll stab it with a trowel come planting season. Second, give it a little slack — not a loose coil, just enough gentle give that seasonal soil movement and mulch top-ups don't tug the connections at either end. Third, remember that mulch decomposes and settles, so every year or two when you refresh the mulch, take thirty seconds to confirm the cable is still covered. Fresh mulch is basically a free re-hiding.
This is also the perfect place to park your connections. Waterproof wire connectors tucked under mulch stay dry, stay out of sight, and stay easy to find when you need them, because you know exactly which bed they're in. I always recommend putting a small landscape flag or noting the spot on your sketch the first year; after that, you'll remember. Flower beds are the unsung heroes of wire hiding — treat every bed as a cable highway and your lawn stays pristine.
Routing Wire Along Fences, Edging, and the House Foundation
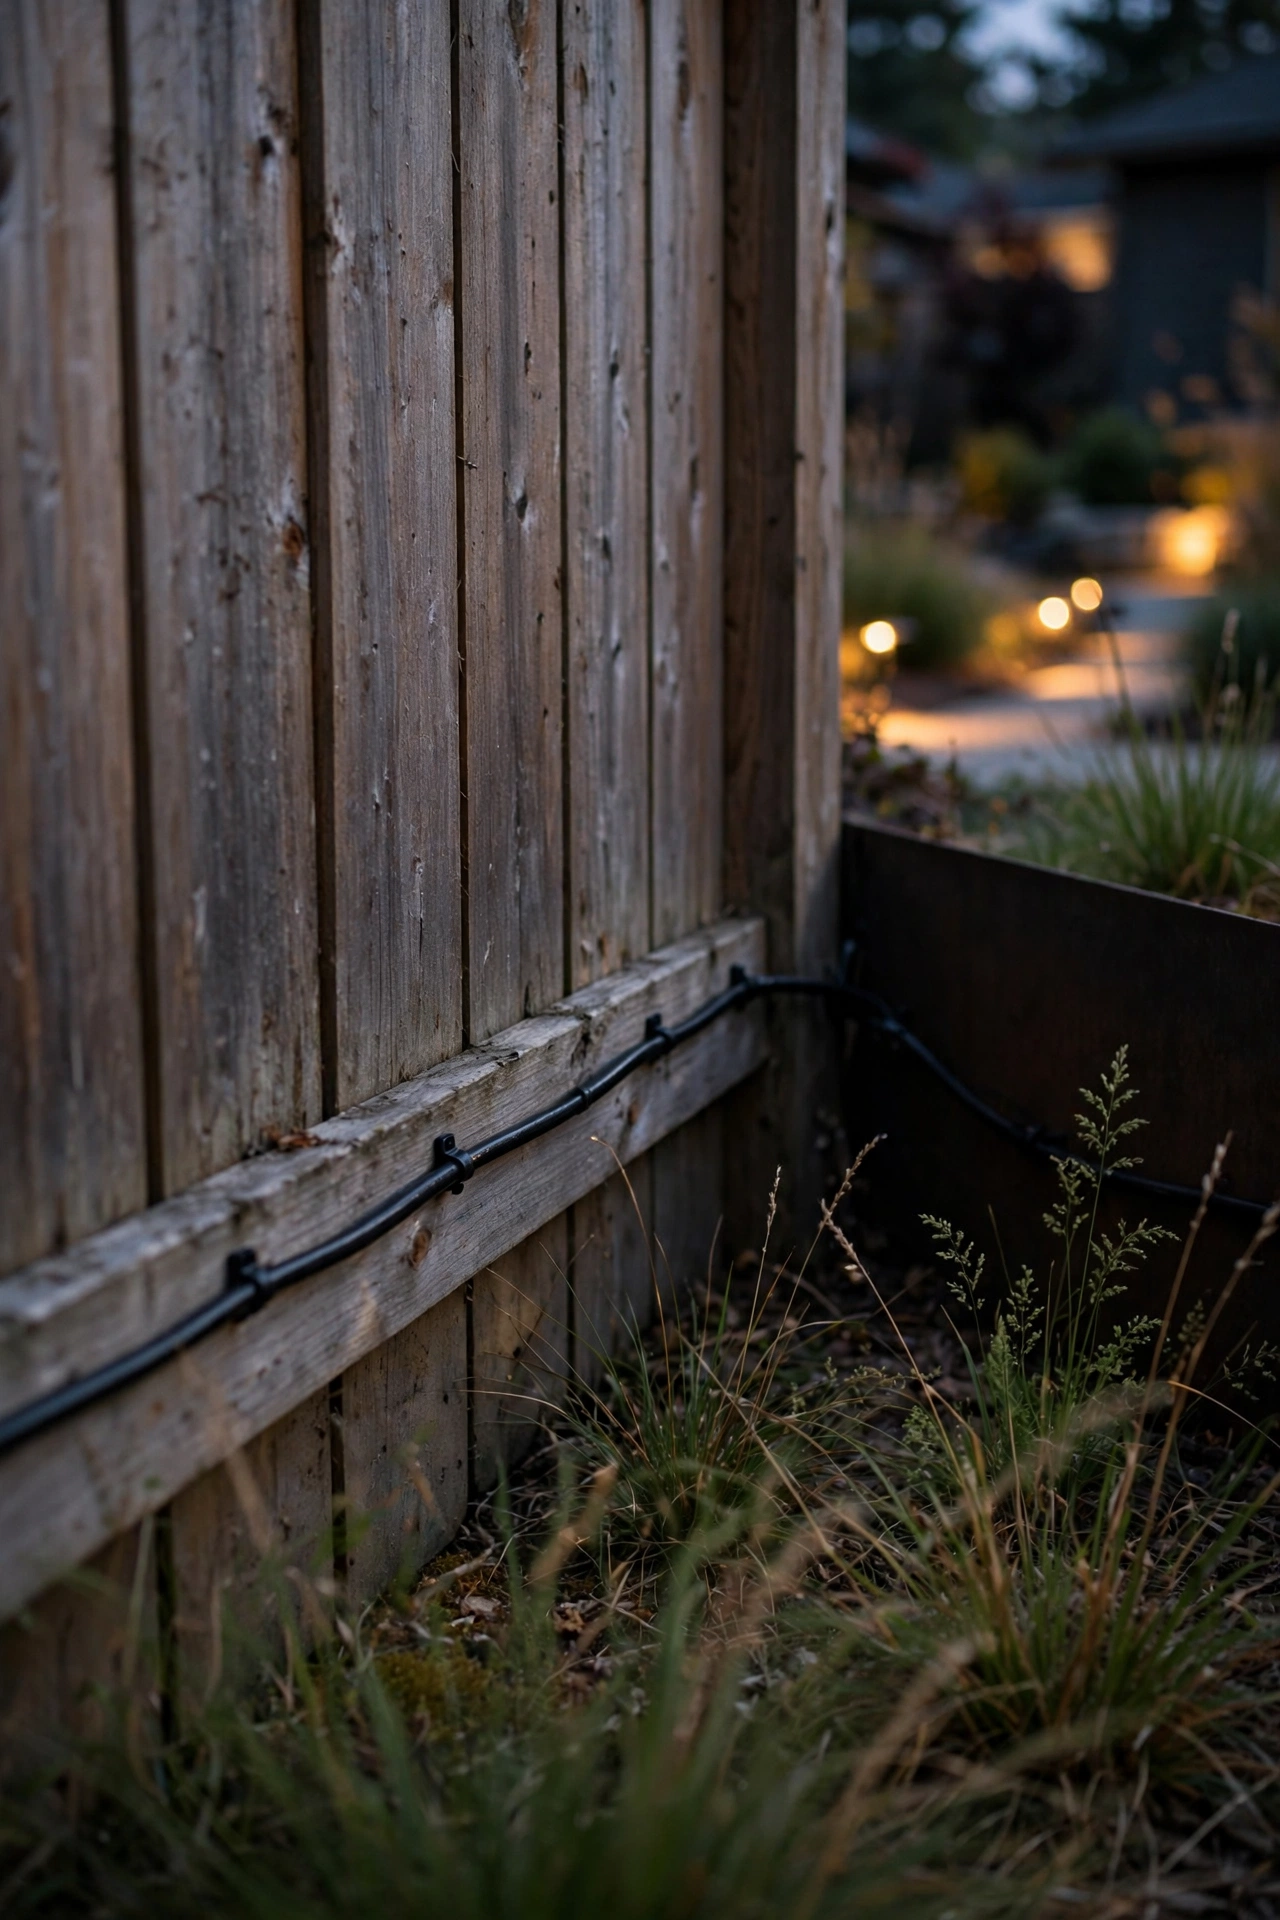
Not every run can dive underground or hide in a bed. Sometimes the shortest sensible path follows the perimeter — along a fence line, against the foundation, or tucked behind steel landscape edging. These routes can be just as invisible if you respect one principle: cable hugs surfaces, it never dangles. A wire pressed tight against a fence rail, six inches off the ground in shadow, simply doesn't register to the eye. The same wire sagging in a catenary curve between two posts screams for attention.
For fence runs, I use UV-rated cable staples or clips every 12 to 18 inches, driven into the fence's lower rail or post — never through the cable itself. Keep the run on the side of the fence that faces away from the main viewing angle, and drop it as low as practical so grass or border plantings screen it. Against the house foundation, tuck the cable into the soil right where the siding meets the grade, or use small masonry clips to hold it in the shadow line under the first course of siding. Dark cable against a dark foundation gap vanishes.
Steel or aluminum landscape edging is a secret weapon. The L-shaped profile creates a natural channel on the bed side; lay the cable in that channel and it's protected from trimmers and completely hidden from every angle except directly overhead. Just don't sandwich the cable between the edging and a paver where freeze-thaw movement could pinch it. And honestly? When you're uplighting trees near a fence line, running the feed tight along that fence to the tree's well light is usually the cleanest possible route — one hidden line instead of a trench across open lawn.
Getting Wire Under Patios, Walkways, and Driveways
Crossing hardscape is the part people dread, but it's very doable — the trick is timing and conduit. If you're building a new patio or walkway, this is almost embarrassingly easy: before the pavers or concrete go down, lay a 1-inch PVC conduit or two under the base, running from one side to the other, with the ends marked by small flags. That empty pipe is a wire highway for the next twenty years — you'll pull cable through it in minutes whenever you add lights, and you'll wonder why anyone ever stressed about this.
For existing hardscape, you have three honest options. Option one: go around. It's not elegant, but routing along the edge of the patio through a bed is often faster and cleaner than fighting the concrete. Option two: lift and relay. With paver patios, you can usually pop up a line of pavers with a flat pry bar, cut a shallow channel in the bedding sand, lay the cable, and set the pavers back in under an hour — the repair is genuinely invisible if you keep the sand bed level. Option three: for poured concrete or a driveway, bore under it with a water-driven sleeve kit or hire a pro to directional-bore a 1-inch conduit; the cost is typically a couple hundred dollars and beats jackhammering by every measure.
Whatever method you choose, never run bare cable directly against concrete with no protection. Concrete is abrasive and alkaline, and ground movement will saw through insulation over the years. A short length of PVC conduit or even a slit length of old garden hose as a sleeve at the crossing point is cheap insurance. And always oversize the conduit — pulling a second cable through a 1-inch pipe later is a gift your future self will appreciate.

Hiding Wire Right at the Fixture
Here's a truth nobody mentions in the glossy installation photos: the last two feet of wire — the run from the buried cable up into the fixture — is where most "hidden" systems betray themselves. You can bury fifty feet of cable perfectly and still have a little black pigtail looping through the air at every path light. The fix is mostly about geometry and slack management, and it's simple once you see it.
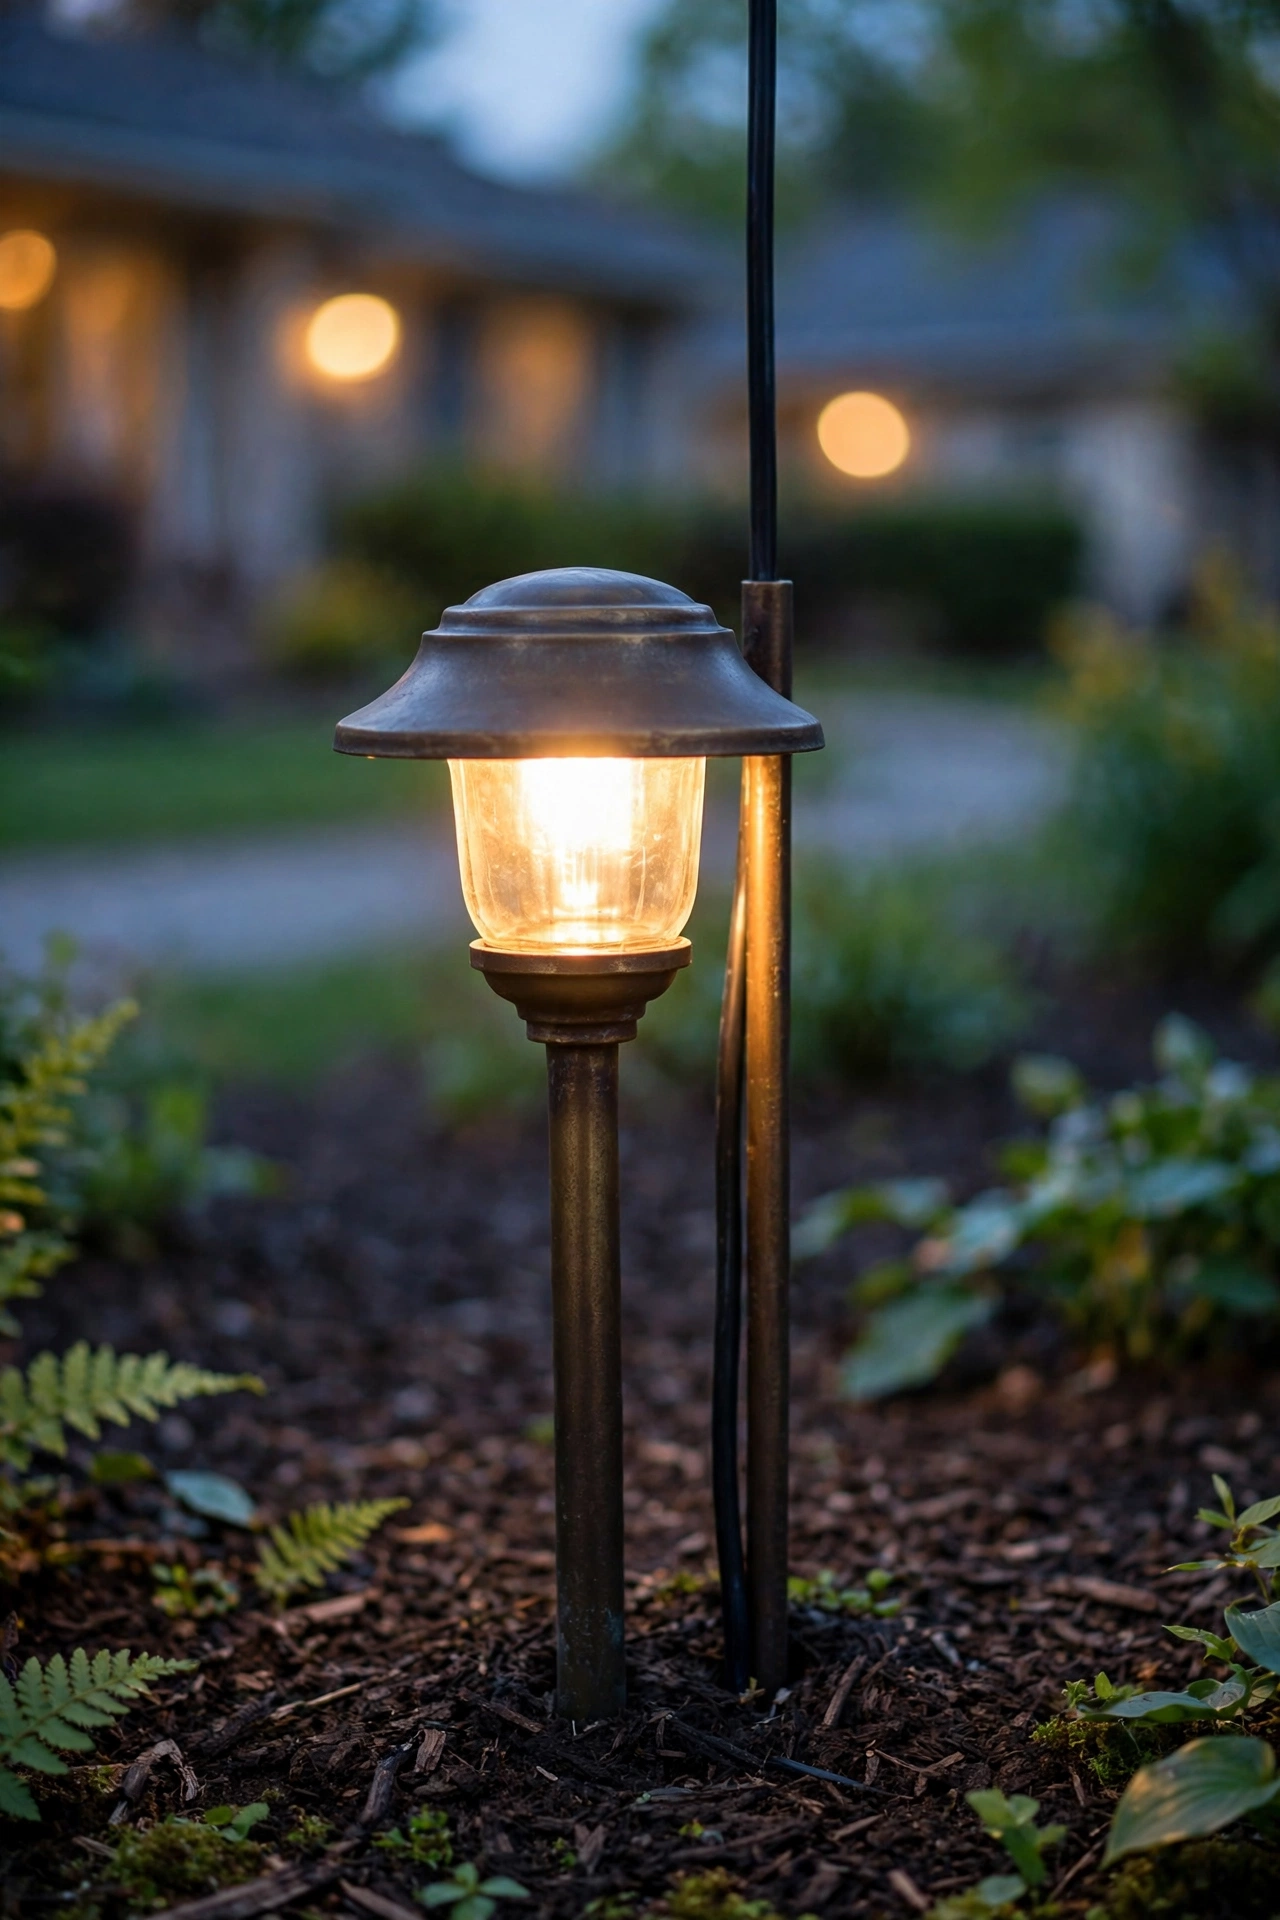
Start by bringing the cable up directly under or behind the fixture, not beside it. For stake-mounted path lights and spotlights, I bury the cable so it surfaces exactly at the stake, then use the stake itself as a visual screen — the eye reads the fixture and its post as one object, and a cable hugging that post disappears into the silhouette. Keep the visible portion as short as physically possible, and make sure the cable enters the fixture from the side facing away from the walkway or street.
Slack is the silent culprit. Too much slack and you get loops; too little and seasonal frost heave or a bumped fixture yanks the connection apart. My rule: leave a small service loop — about 6 to 8 inches of gentle curve — buried just beside the fixture, then a short, taut rise into the fixture. That buried loop absorbs movement without ever showing itself. For well lights and in-ground fixtures, this is even easier, since the whole connection lives below grade in the fixture's own housing. When I'm done at a fixture, I step back to the walkway and look: if I can see cable, I rebury and shorten until I can't. Two minutes of fussing per fixture is what separates the pros from the pack.
Camouflaging Your Transformer: Placement, Paint, and Planting
The transformer is the hardest thing to hide because it can't be buried, it can't be smothered, and it needs to breathe. It's a chunky metal box that has to live somewhere reachable, and most people just mount it on the garage wall and hope nobody looks. But with a little thought, that box can become practically invisible while staying perfectly functional — the secret is working with its requirements instead of against them.
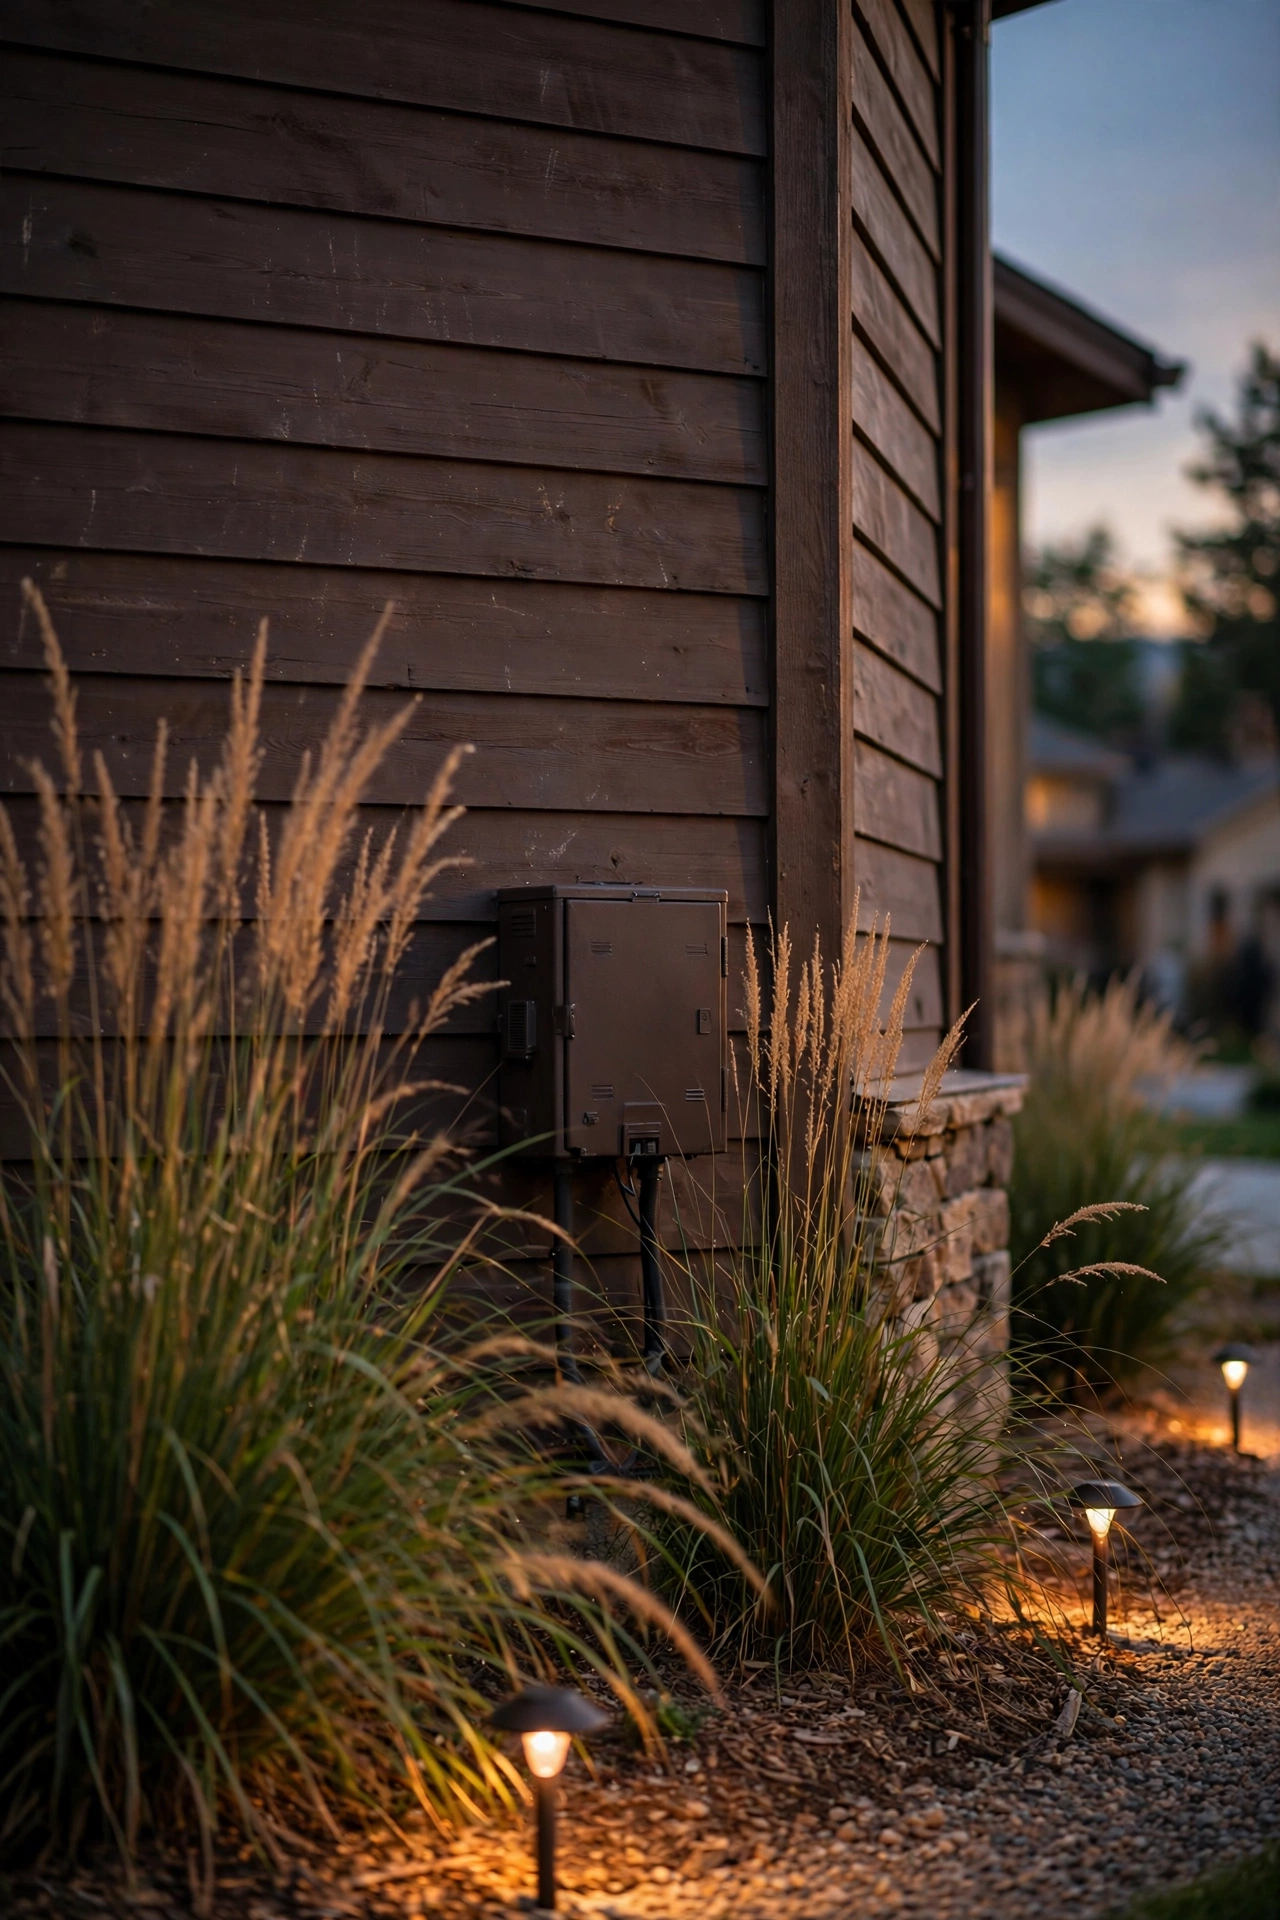
Placement comes first. Mount it on the least-visible exterior wall that has a GFCI outlet — often the side of the garage, the wall behind the air-conditioning condenser, or inside a utility corner of the yard. Lower is better than eye-level: a box mounted 12 to 18 inches off the ground reads as "utility equipment" and the eye slides right past it, while one at chest height demands attention. Keep a minimum of 12 inches of clear air on all sides for ventilation and cooling; transformers get warm, and cooking one inside a sealed box is an expensive mistake.
Once it's placed, camouflage is easy. Most transformer housings take paint beautifully — scuff lightly with fine sandpaper, wipe clean, and use an exterior spray paint matched to your siding, brick, or trim. I always recommend painting before mounting if you can. Then plant around it: an ornamental grass or a compact evergreen shrub 18 inches in front softens the silhouette without blocking airflow. Just keep plantings from growing into that 12-inch clearance zone — a yearly trim keeps everything honest. Vented fake-rock or louvered enclosures also work, but honestly, a well-placed, painted box behind one shrub beats a bulky enclosure every time. Nobody has ever complimented my transformer, which is exactly the point.
Connector and Hub Placement That Stays Out of Sight
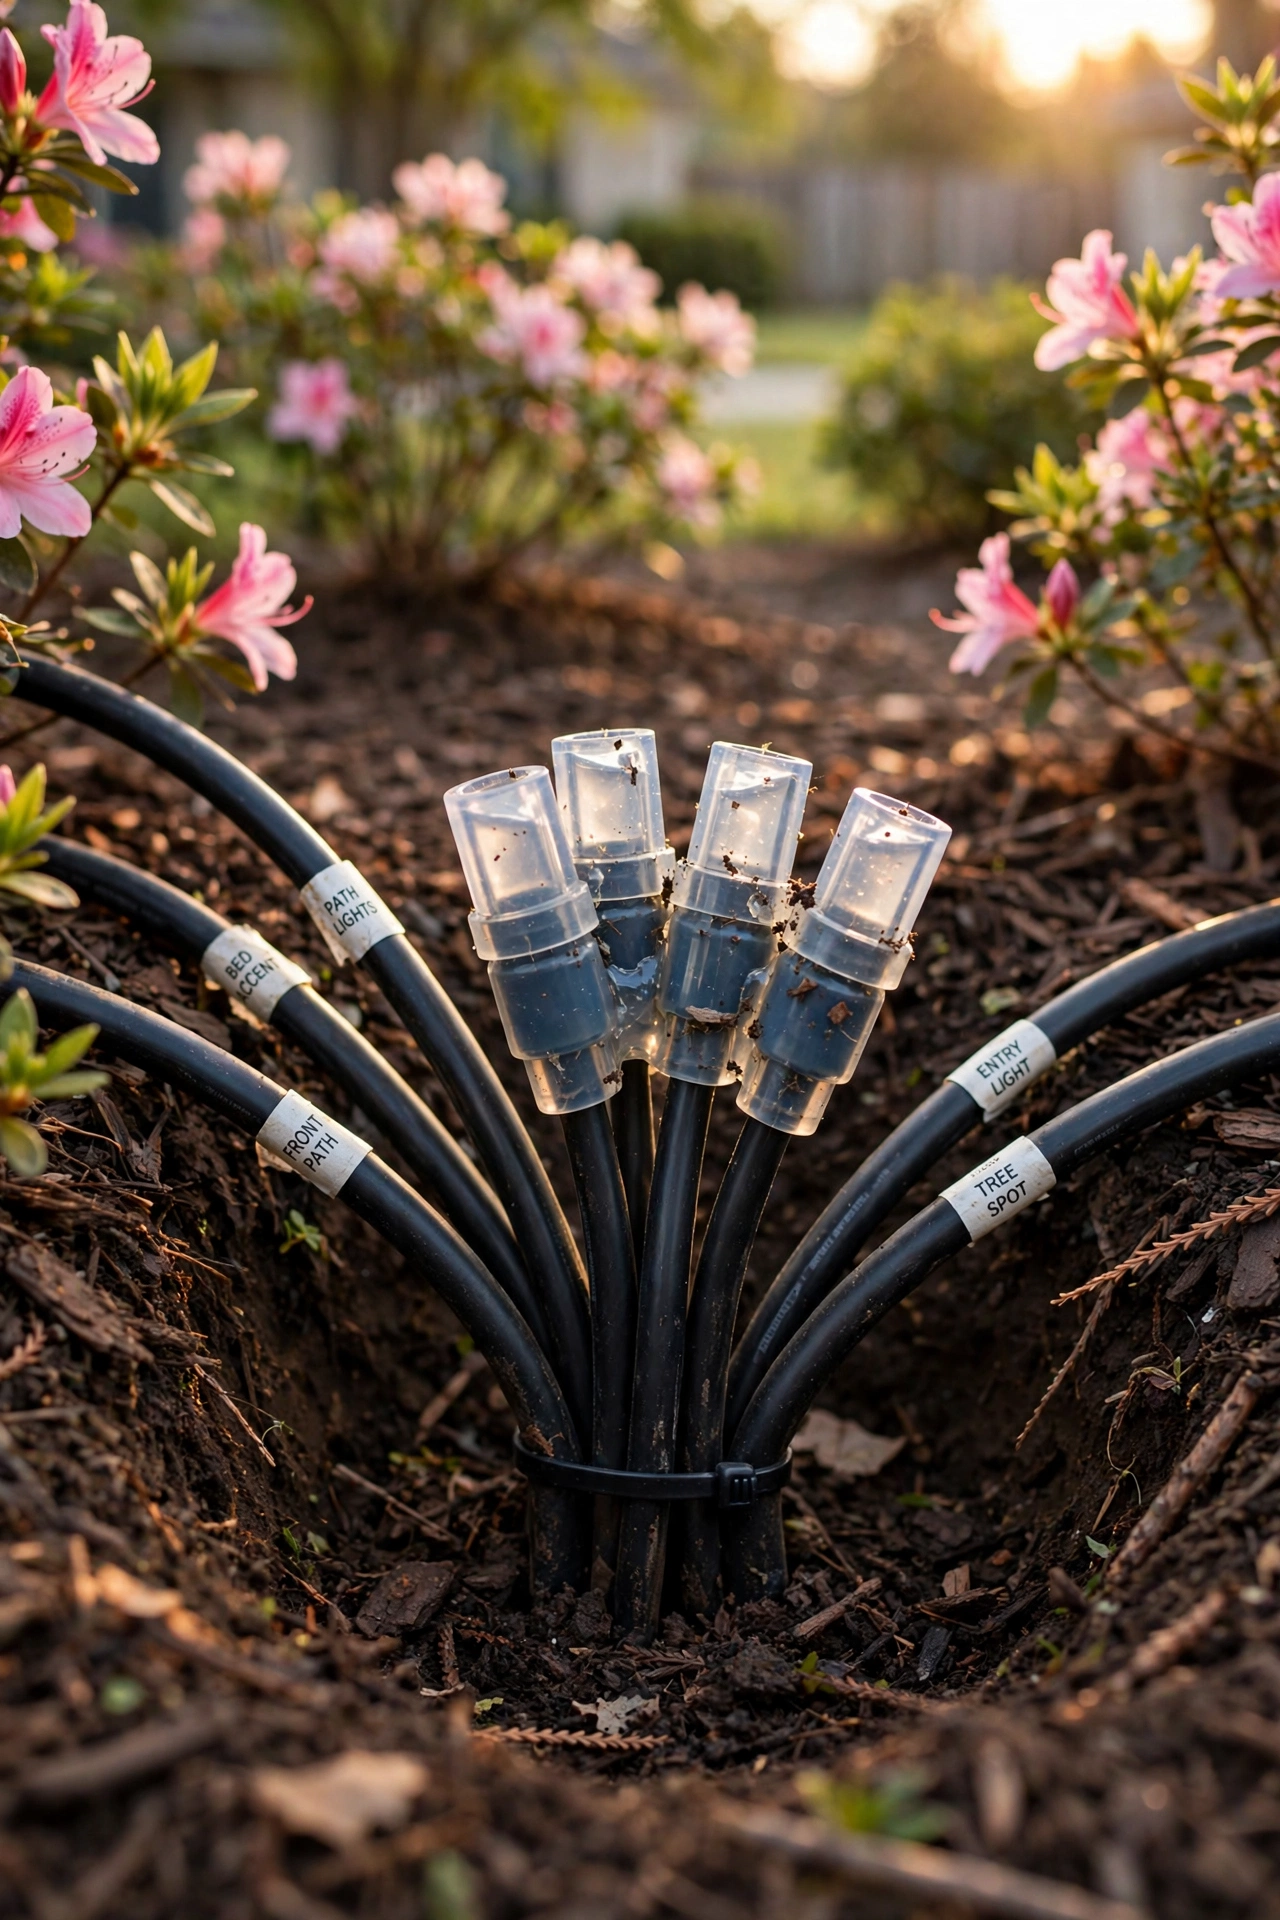
Connectors are the fiddly little details that separate a tidy system from a fragile one, and their placement is a hiding decision as much as an electrical one. The old-school daisy-chain method — piercing or splicing the main cable at every fixture — puts a vulnerable connection at every light, often right where the cable surfaces. I prefer the hub method: run one main cable from the transformer to a central hub point (usually buried in a planting bed), then run short individual cables from the hub to each fixture. Fewer splices in the open, every connection in one known location, and adding a fixture later means one trip to the hub instead of digging up a daisy chain.
Wherever your connections live, they need to be waterproof, and "waterproof" means grease-filled silicone wire nuts or heat-shrink crimp connectors rated for direct burial — not the twist caps from an indoor lamp kit. Bury hub connections 4 to 6 inches deep in a mulch bed, with the cable ends pointing slightly downward so water drains away from the connection instead of pooling into it. In my experience, a connection that sits in a little puddle of trapped water will corrode within two seasons, while the same connection six inches away in well-drained soil lasts indefinitely.
Label everything. A strip of weatherproof tape on each cable at the hub, marked with a paint pen — "path 1-3," "tree spots," "deck" — turns future troubleshooting from archaeology into a five-minute job. And photograph the open hub before you bury it. That photo, saved with your yard sketch, is the closest thing to x-ray vision you'll ever own. Connectors don't need to be accessible daily, but they do need to be findable — hidden and lost are two very different things.
Fixing Visible Wires on an Existing System (Retrofit Tricks)
Maybe you're reading this because the wires are already there — snaking across the lawn from a system you inherited or installed in a hurry. Good news: retrofitting is absolutely worth doing, and it's often faster than the original install because the fixtures are already placed. You're just giving the cables a proper burial, one run at a time.
Start with a daylight walk-through and flag every visible cable with a little survey flag or a strip of bright tape. You'll usually find the offenders fall into three categories: cables that were never buried, cables that have worked their way to the surface through frost heave or erosion, and cables that were "temporarily" left on the surface three years ago. For the first two, the flat-spade slot trench I described earlier is your best friend — open a 5-inch slot right alongside the existing cable, press the cable in, and step it shut. You can rebury a 30-foot run in twenty minutes without disconnecting a thing, as long as you work gently and don't yank the fixture ends.
For cables that cross open lawn with no bed to hide in, consider rerouting rather than just burying. It's often easier to pull a new run through a planting bed — even a longer one — than to maintain a trench across turf that gets aerated every fall. And while you're at it, inspect the cable itself. Sun-baked insulation that cracks when you bend it is telling you it's done; replace that section with new direct-burial cable rather than burying a failure waiting to happen. A retrofit weekend — one Saturday with a spade and a bag of mulch — can take a system from eyesore to invisible. I've done it twice now, and both times I kicked myself for waiting so long.

Wire Sizing and Voltage Drop Basics So Hiding Doesn't Cause Problems
Here's the part that actually matters for how your lights look at night: hiding wires must never come at the cost of starving your fixtures of voltage. Low-voltage lighting runs at 12 volts, and thin wire over long distances eats voltage the way a long, narrow hose eats water pressure. The result is voltage drop — the fixtures farthest from the transformer glow dimmer and more amber than the ones nearby, and no amount of pretty trenching fixes that. So let's get the sizing right.
The practical rule I use: for most residential runs up to about 100 feet, 12-gauge direct-burial cable is the safe default. Runs under 50 feet can usually get away with 14-gauge, and I rarely recommend 16-gauge for anything except very short fixture pigtails. When in doubt, go thicker — the price difference between 12 and 14 gauge on a 100-foot spool is typically under fifteen dollars, which is nothing compared to digging up a dim system later. Add up the total wattage on each run and keep it comfortably under your transformer's rated capacity; I aim to load a transformer to no more than 80 percent.
The hub (or "T") wiring method I mentioned earlier is also your best friend against voltage drop, because it gives every fixture a nearly equal-length path from the hub instead of a diminishing daisy chain. And if you want to be precise, grab an inexpensive multimeter and check the voltage at the farthest fixture — you want to see roughly 11 to 12 volts with the system running. If it's sagging toward 10 or below, shorten the run, upsize the wire, or split the load across a second run. A hidden system that glows evenly is the whole point; if your far fixtures look dim, that's your cue to troubleshoot your system before you bury the evidence.
Safety and Code Basics: Low-Voltage vs. Line-Voltage, GFCI, and When to Call a Pro
Let's talk safety, because "low voltage" sometimes makes people careless, and careless around anything electrical is a bad idea. A 12-volt landscape lighting system is genuinely low-risk — you can't get a dangerous shock from 12 volts under normal conditions — but the transformer plugs into 120-volt household power, and that side of the equation deserves full respect. The dividing line is the transformer: everything on the 12-volt side is DIY-friendly; everything on the 120-volt side follows the same rules as any household wiring.
Three non-negotiables. First, your transformer must plug into a GFCI-protected outdoor outlet — that's the outlet with the little test and reset buttons. If your exterior outlet isn't GFCI protected, have an electrician swap it; it's a quick, inexpensive job and it's code in most places for outdoor receptacles. Second, mount the transformer and make all your 120-volt connections with dry hands, and never hardwire a transformer directly into household wiring unless you're a licensed electrician — plug-in is the DIY lane. Third, call 811 before you dig, every time. Utility marking is free, and even shallow trenching has found buried cable lines, gas lines, and irrigation mains. I mention this twice in this guide because it's the one step people skip.
A note on code: low-voltage landscape cable doesn't require conduit under the National Electrical Code when it's rated for direct burial, which is why the shallow-trench method is legitimate — but local codes can add requirements, especially for cable crossing driveways or running near pools. A five-minute call to your city's building department beats a failed inspection or an insurance headache. And keep low-voltage cable at least a few inches from 120-volt lines where they cross, and well away from gas lines. Respect the electrons, even the small ones.
How to Hide Landscape Lighting Wires: Mistakes to Avoid
I've made most of these myself, so learn from my tuition payments. The classic blunder is burying cable too shallow — an inch of soil and a prayer. Anything less than 4 inches will surface within a season or two thanks to rain, frost, and earthworms, and then you're doing the job twice. Go the full 4 to 6 inches the first time; your future self is counting on it.
Mistake two is stapling or clipping through the cable instead of around it. One punctured conductor creates an intermittent fault that flickers, corrodes, and drives you slowly mad — and it's completely avoidable if you use proper cable clips sized for your wire gauge. Mistake three is sealing the transformer in an airtight box or stuffing it into a sealed fake rock with no ventilation. Transformers shed heat; trap that heat and you'll shorten its life dramatically, or worse. Ventilation clearance is not optional.
Mistake four: no slack and no service loops at fixtures, so the first frost heave or bumped mower pops a connection. Mistake five: mixing wire gauges haphazardly on the same run, which makes voltage drop unpredictable. And the quietest, most common mistake of all — burying everything with no record. No sketch, no photos, no labels. Six months later, you're the person playing lawn roulette with a spade. A phone photo of each open trench takes ten seconds and saves hours. Hide your wires like a pro, but document them like one too.
Frequently Asked Questions
How deep should landscape lighting wire be buried?
For low-voltage (12-volt) direct-burial landscape cable, 4 to 6 inches deep is the standard recommendation — deep enough to avoid rakes, edgers, and aerators, shallow enough to find and service. Line-voltage (120-volt) cable is a different story and typically requires 18 to 24 inches of depth plus conduit under most electrical codes. In planting beds, tucking cable under 2 to 3 inches of mulch counts as hidden and protected, since beds don't get mowed or aerated. Always call 811 for utility marking before you dig, even for shallow trenches.
Can I just leave landscape lighting wire on top of the ground?
You can in limited situations, but I don't recommend it as a long-term solution. UV-rated low-voltage cable will survive on the surface for a while, but sun exposure degrades insulation, and mowers, trimmers, and foot traffic will eventually damage it. The one exception is cable tucked under mulch in planting beds — that's technically above the soil but it's protected, shaded, and invisible, which is the best of both worlds. If a run must cross open lawn, take the twenty minutes to slot-trench it.
Do I need to run landscape lighting wire through conduit?
For low-voltage direct-burial cable, conduit is not required by the National Electrical Code — the cable's jacket is designed for direct soil contact. That said, I always use conduit where cable crosses under driveways, patios, or walkways, and in any spot that gets heavy digging or vehicle traffic. Think of conduit as cheap insurance in high-risk zones and unnecessary everywhere else. Always check local codes, since some municipalities add their own requirements.
What's the best way to hide the transformer box?
Mount it low (12 to 18 inches off the ground) on your least-visible exterior wall near a GFCI outlet, paint it to match your siding or trim, and soften it with an ornamental grass or compact shrub planted about 18 inches in front. Keep 12 inches of clear ventilation space on all sides — never seal it in an airtight enclosure. A painted, well-placed box behind one plant is effectively invisible, and it stays accessible for timer adjustments and maintenance.
Will burying my wires cause voltage drop or dim lights?
Burying cable doesn't cause voltage drop — undersized wire and overloaded runs do, whether the cable is buried or not. Use 12-gauge cable for runs up to about 100 feet, keep each transformer's load under about 80 percent of its rating, and consider the hub wiring method so every fixture gets a similar-length feed. Check voltage at your farthest fixture with a multimeter; if it's holding 11 to 12 volts, your hidden system will glow evenly and brightly.
Conclusion
Learning how to hide landscape lighting wires is really about adopting one habit: thinking like a designer in daylight, not just at night. Bury low-voltage cable 4 to 6 inches deep, let mulch beds do the heavy lifting, hug fences and foundations on perimeter runs, sleeve every hardscape crossing, and give your transformer a low, painted, well-ventilated home behind a shrub. None of these steps is complicated on its own — together, they turn a system that looks DIY by day into one that looks professionally designed around the clock.
If your system is already installed and the wires are showing, don't despair — a single weekend with a flat spade and a bag of mulch can retrofit almost any yard. And if you're planning a new installation, sketch those wire runs before you buy a single fixture; it's the highest-leverage hour of the whole project. For more ideas on making your yard glow, browse the rest of our outdoor lighting guides — your evenings are about to get a whole lot prettier.