Intro
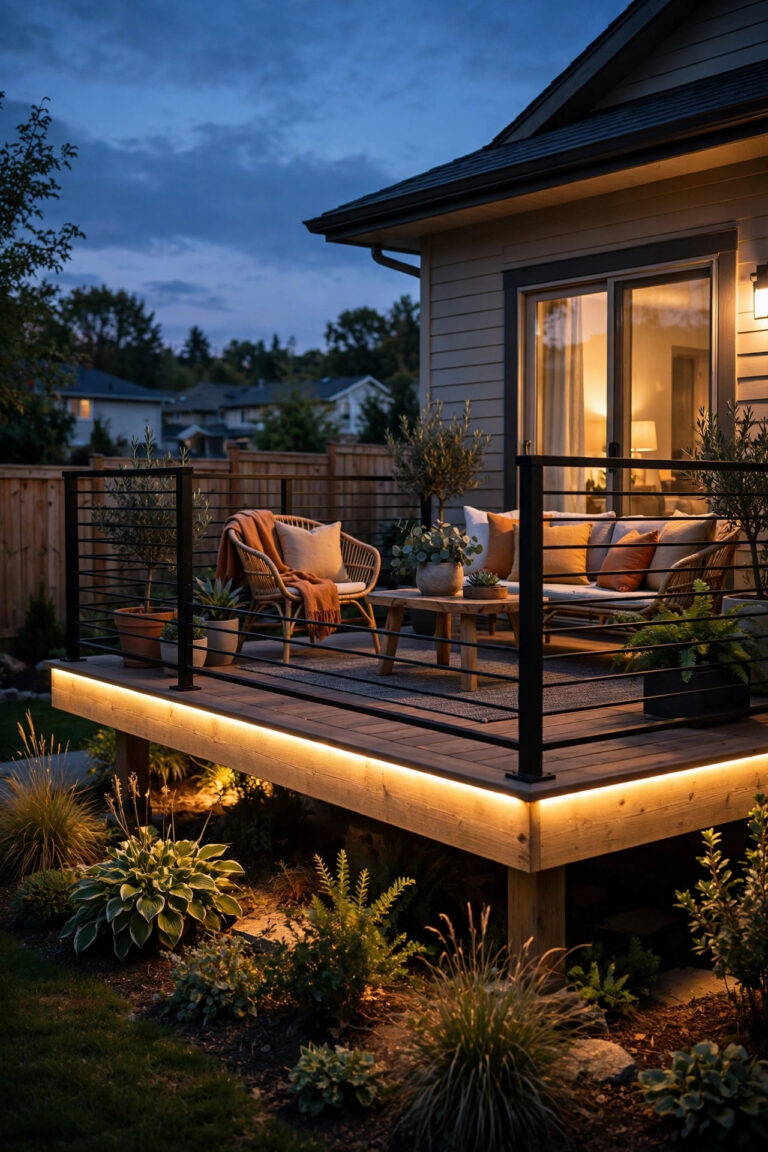
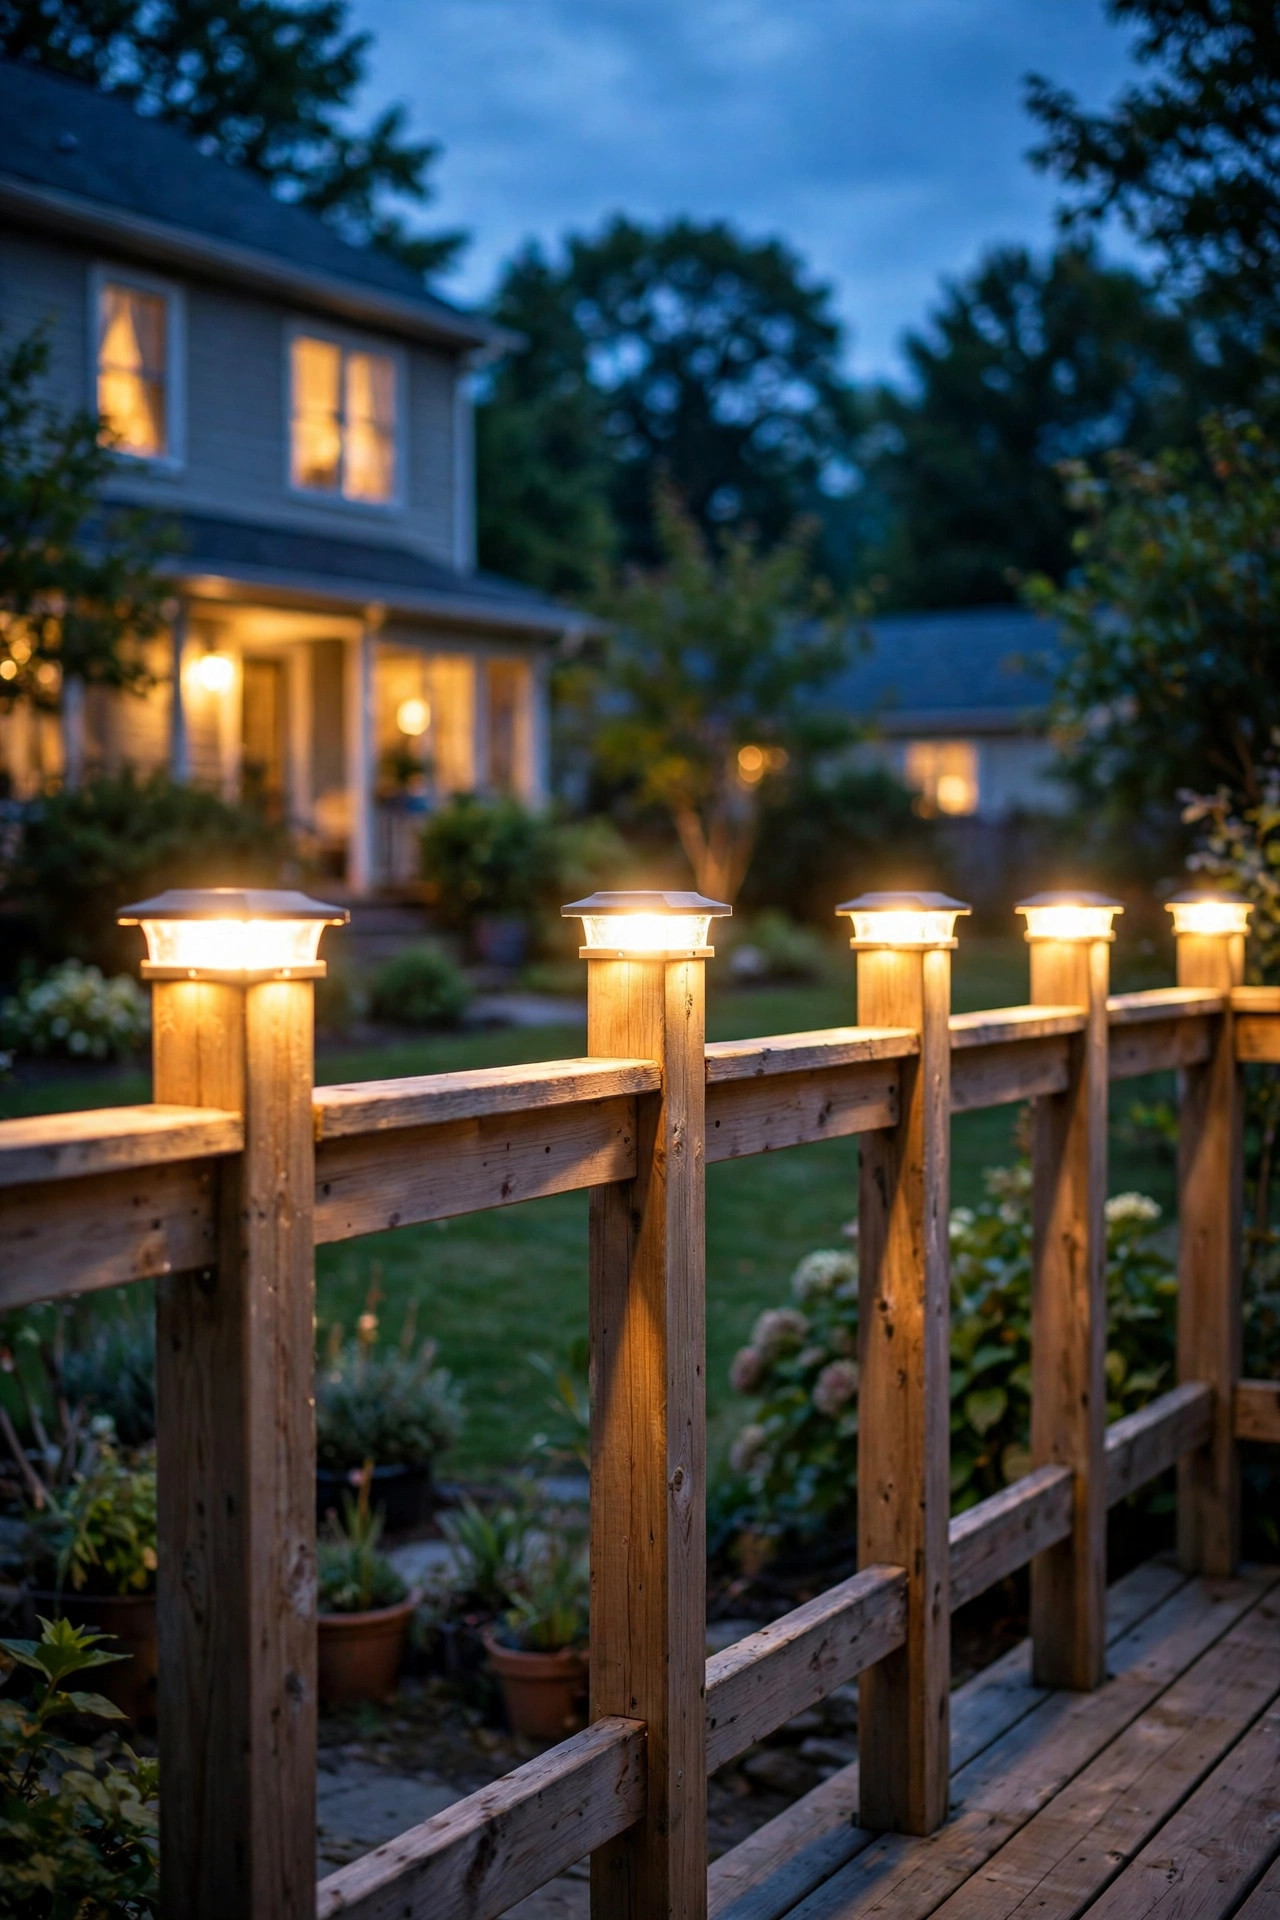
Here's the thing nobody tells you when the deck goes in: the railing is the frame around your entire outdoor room, and bare post tops make it look unfinished — like a picture hung without a frame. The first time I saw deck post cap lights done right, on a neighbor's cedar deck at blue hour, I stopped mid-walk. Every post wore a little crown of warm light, and the whole railing glowed like lanterns guiding you outside. One afternoon's work, honestly, and an ordinary deck became the place everyone wanted to sit after dinner.
I always recommend lighting a deck in layers: something at eye level, something low along the boards, and something tracing the railing itself. Post cap lights are that railing layer — they mark the perimeter so steps feel safe after dark, wash soft light across the boards, and give your deck a finished look from the street, too.
Below are 15 deck post cap light ideas, from $10 solar pop-ons to wired copper showpieces, with real install tips and honest budget ranges. Pair them with broader backyard lighting layers, and the whole yard glows as one scene.
1. Classic Warm-White Solar Caps
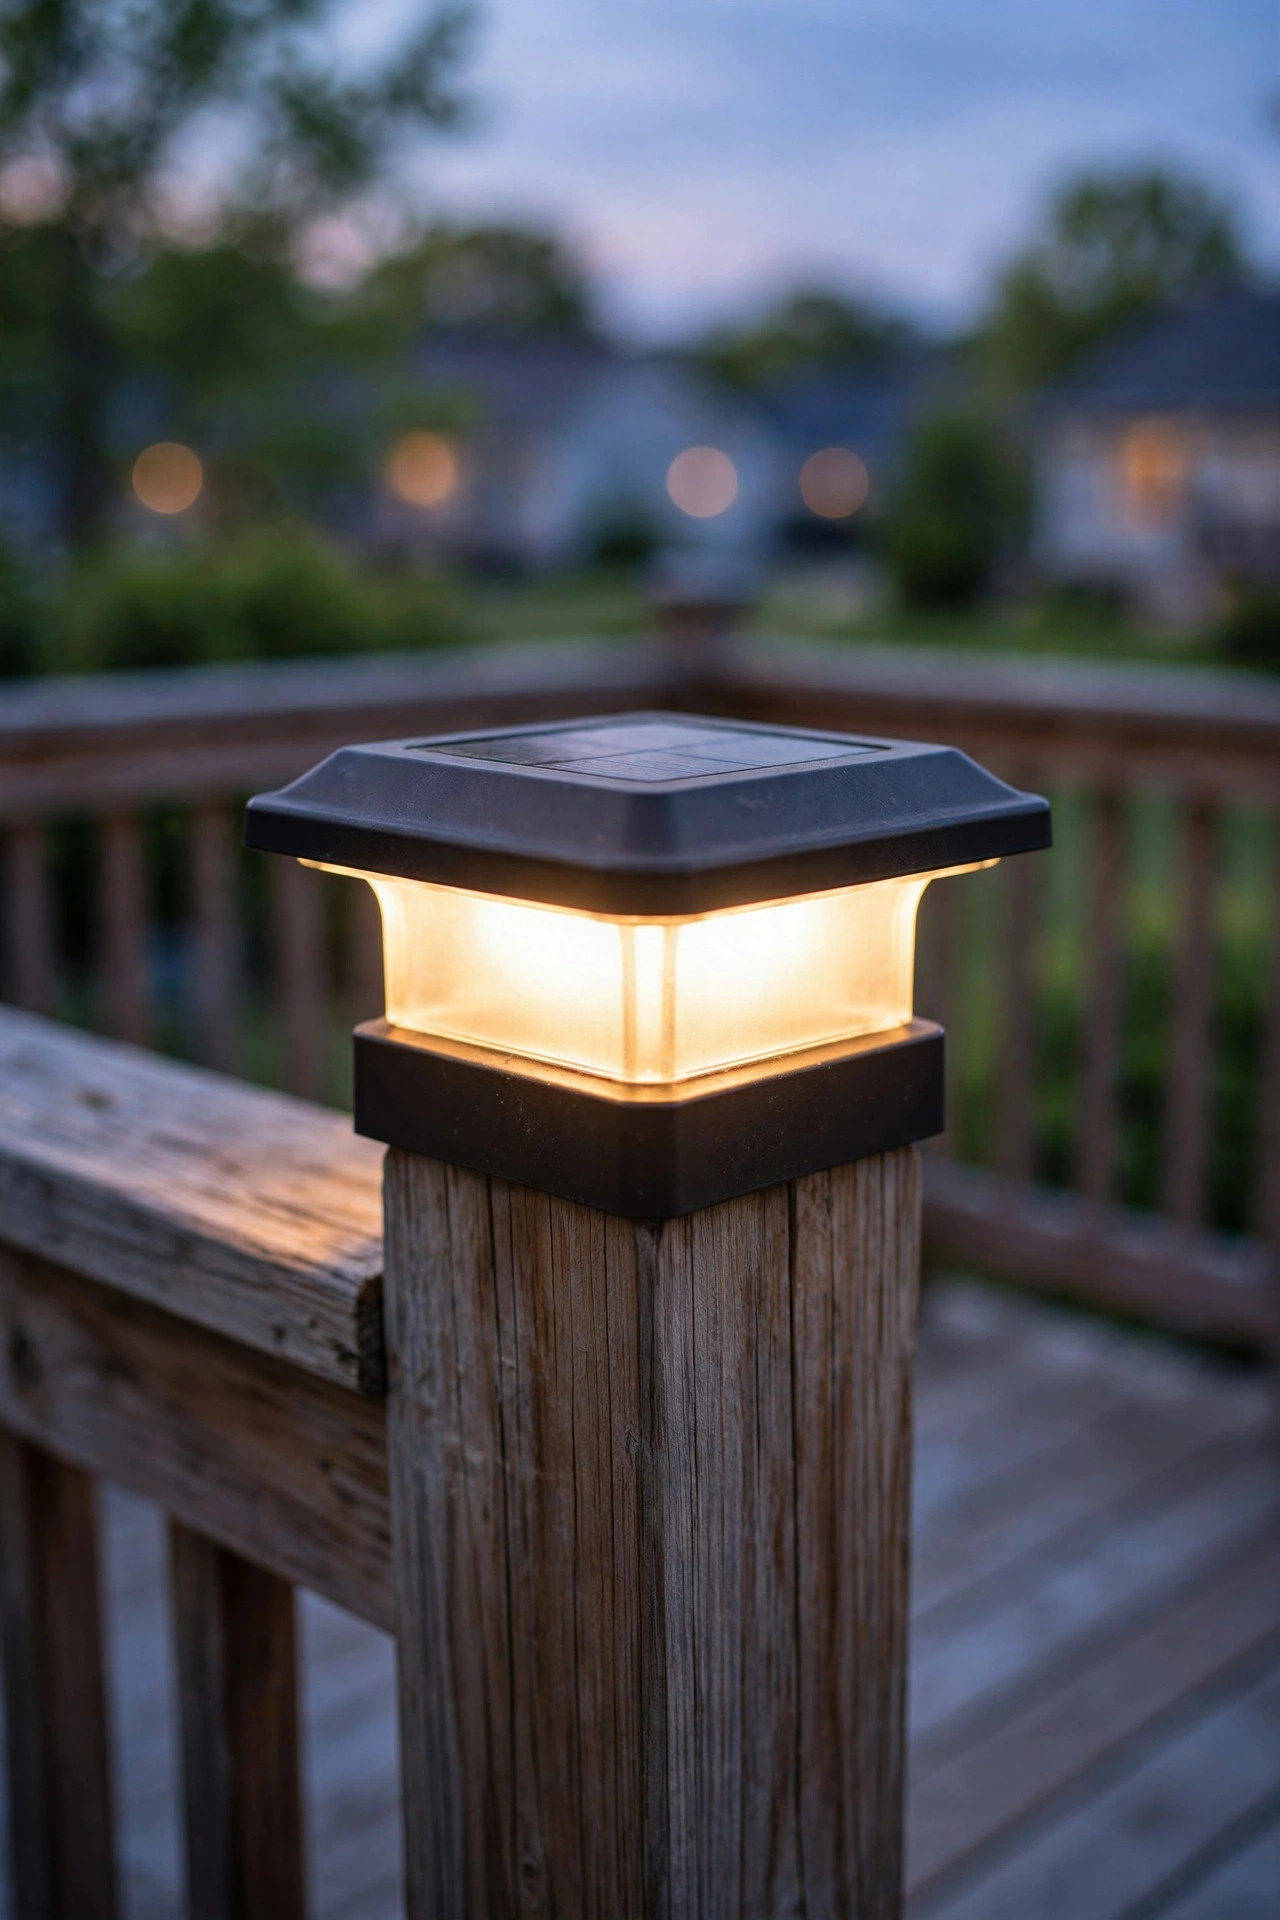
If you've never tried deck post cap lights before, start here. Classic solar caps are the gateway upgrade: they slip right over standard 4×4 posts (measure first — a "4×4" post is actually 3.5 by 3.5 inches, and a snug fit matters more than you'd think), soak up sun all day through a little panel on top, and click on automatically at dusk. No wiring, no electrician, no trenching cable through the yard. In my experience, most folks can cap an entire deck in under an hour with nothing but a step stool.
Here's how to get the most from them. First, buy warm white — look for 2700K to 3000K on the package. Cool-white solar caps make a wood deck look like a parking lot, honestly, and you'll regret it every evening. Second, give the little solar panel a quick wipe with a damp cloth once a month; pollen and dust can cut charging by a surprising amount. Third, set expectations: on a full-sun day you'll get 8 to 10 hours of glow, but after three cloudy days in a row they'll dim out early. That's just the physics of a small panel and a small battery.
Place one on every post for the full lantern-row effect, and make sure at least the sunniest posts get caps — a shaded post is a dim post. Look for an IP44 rating or better so rain rolls right off.
Suggested budget range: $50 – $130.
2. Low-Voltage Wired Deck Post Cap Lights
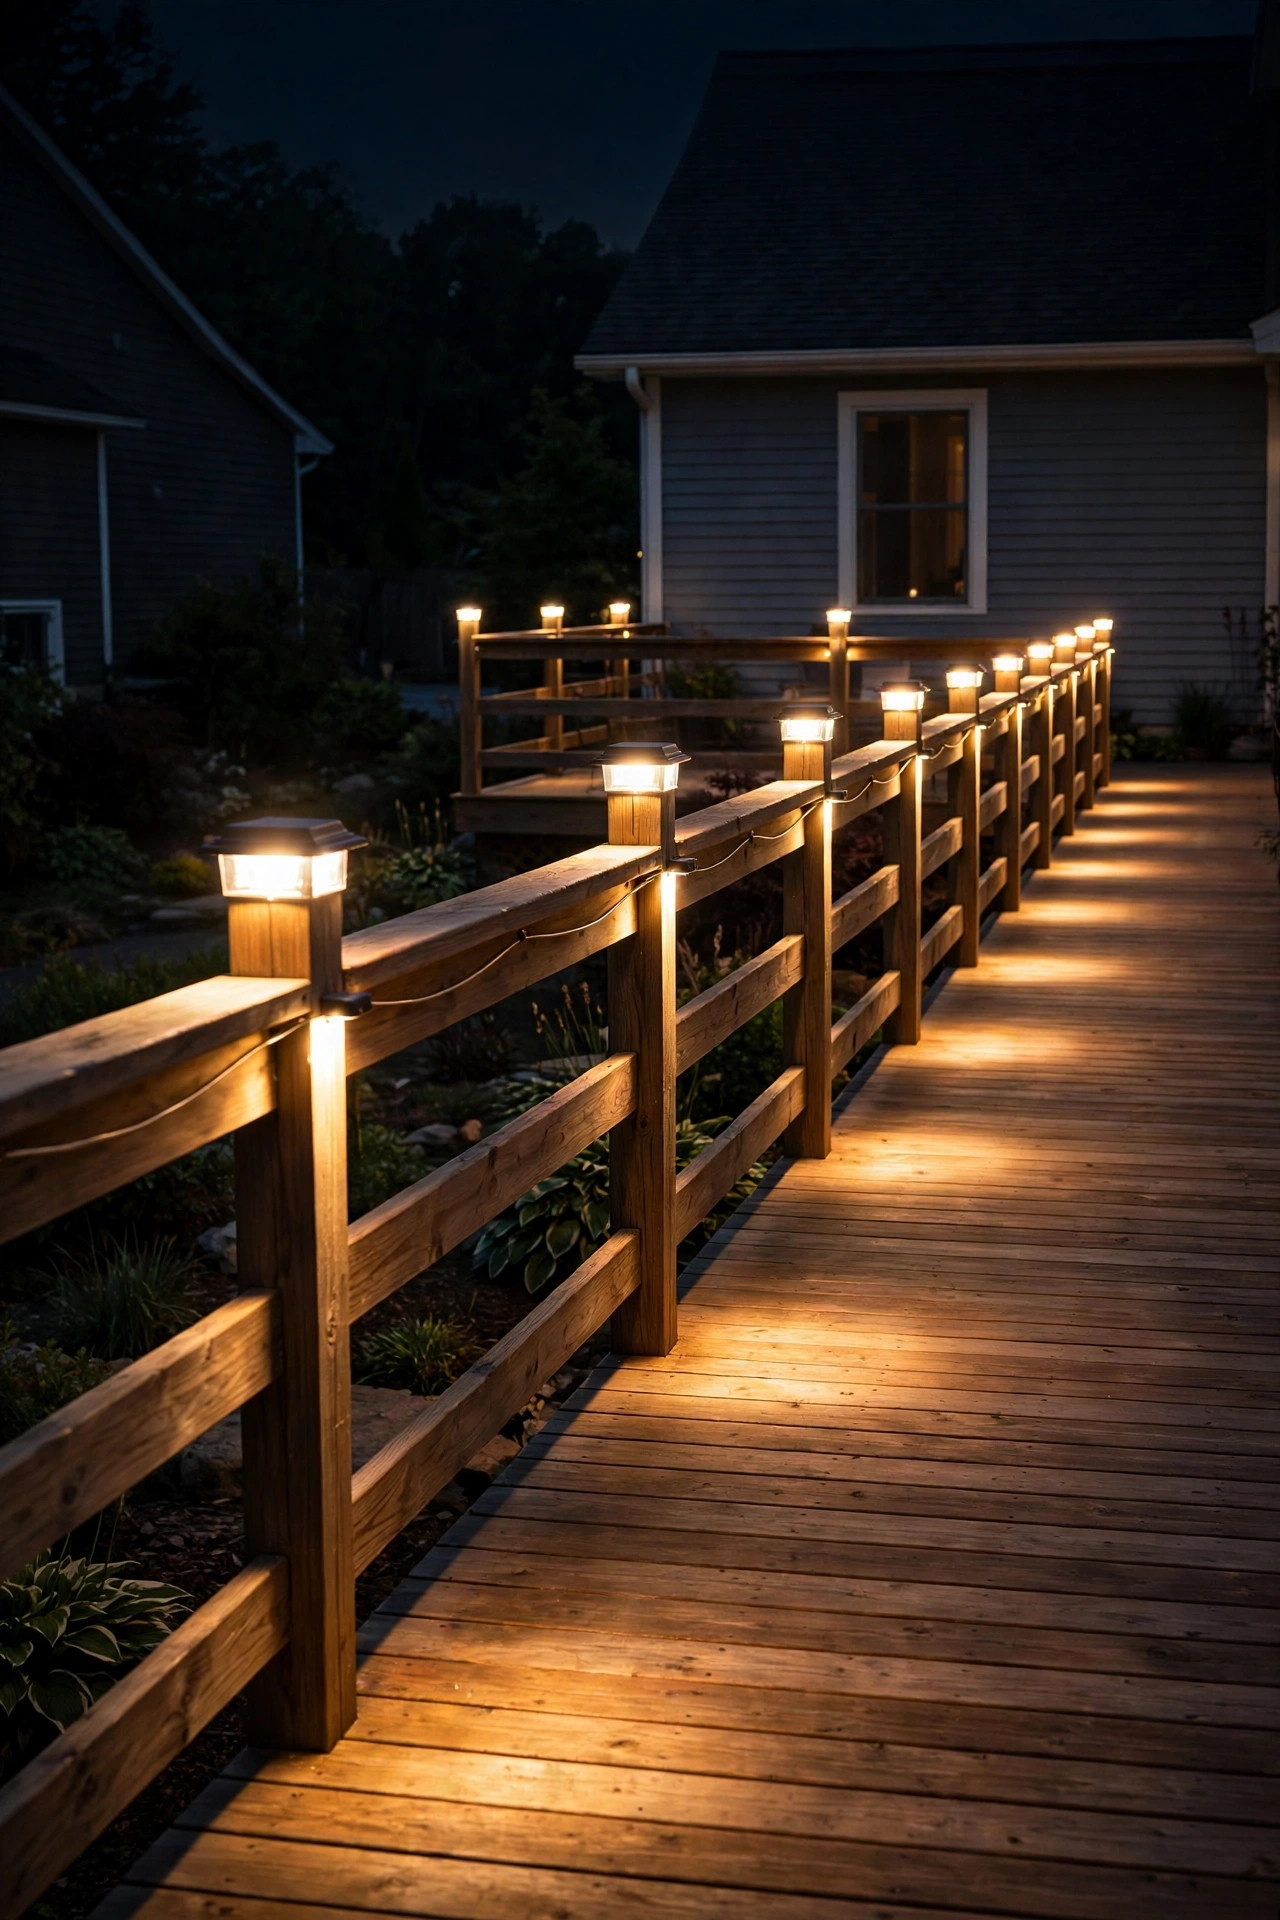
Solar is easy, but wired deck post cap lights are the upgrade you feel on night three of a cloudy week — the night the solar caps would have given up by 10 p.m. and these are still glowing strong at 2 a.m. Low-voltage caps run on a 12-volt system: one plug-in transformer (plugged into an outdoor GFCI outlet), one thin cable snaked post to post under the railing, and caps that put out a genuinely useful 100-plus lumens each. It's the same family of lighting as landscape path lights, just dressed for the railing.
Installation is very doable as a weekend project. Mount the transformer within a few feet of your GFCI outlet, run the main cable along the underside of the deck or clip it discreetly beneath the bottom rail, and daisy-chain each cap with the little quick-connect clips most kits include. Keep cable runs under about 100 feet from the transformer so the far caps don't dim, and if you must bury cable across open ground, tuck it 6 inches down. The one non-negotiable: everything plugged in outdoors lives on a GFCI-protected outlet, and the transformer itself should be rated for outdoor use.
If you're torn between solar and wired, our solar vs. wired comparison walks through the trade-offs honestly — but for a deck you use nightly, wired wins on consistency every time.
Suggested budget range: $180 – $450.
3. Lantern-Style Carriage Caps
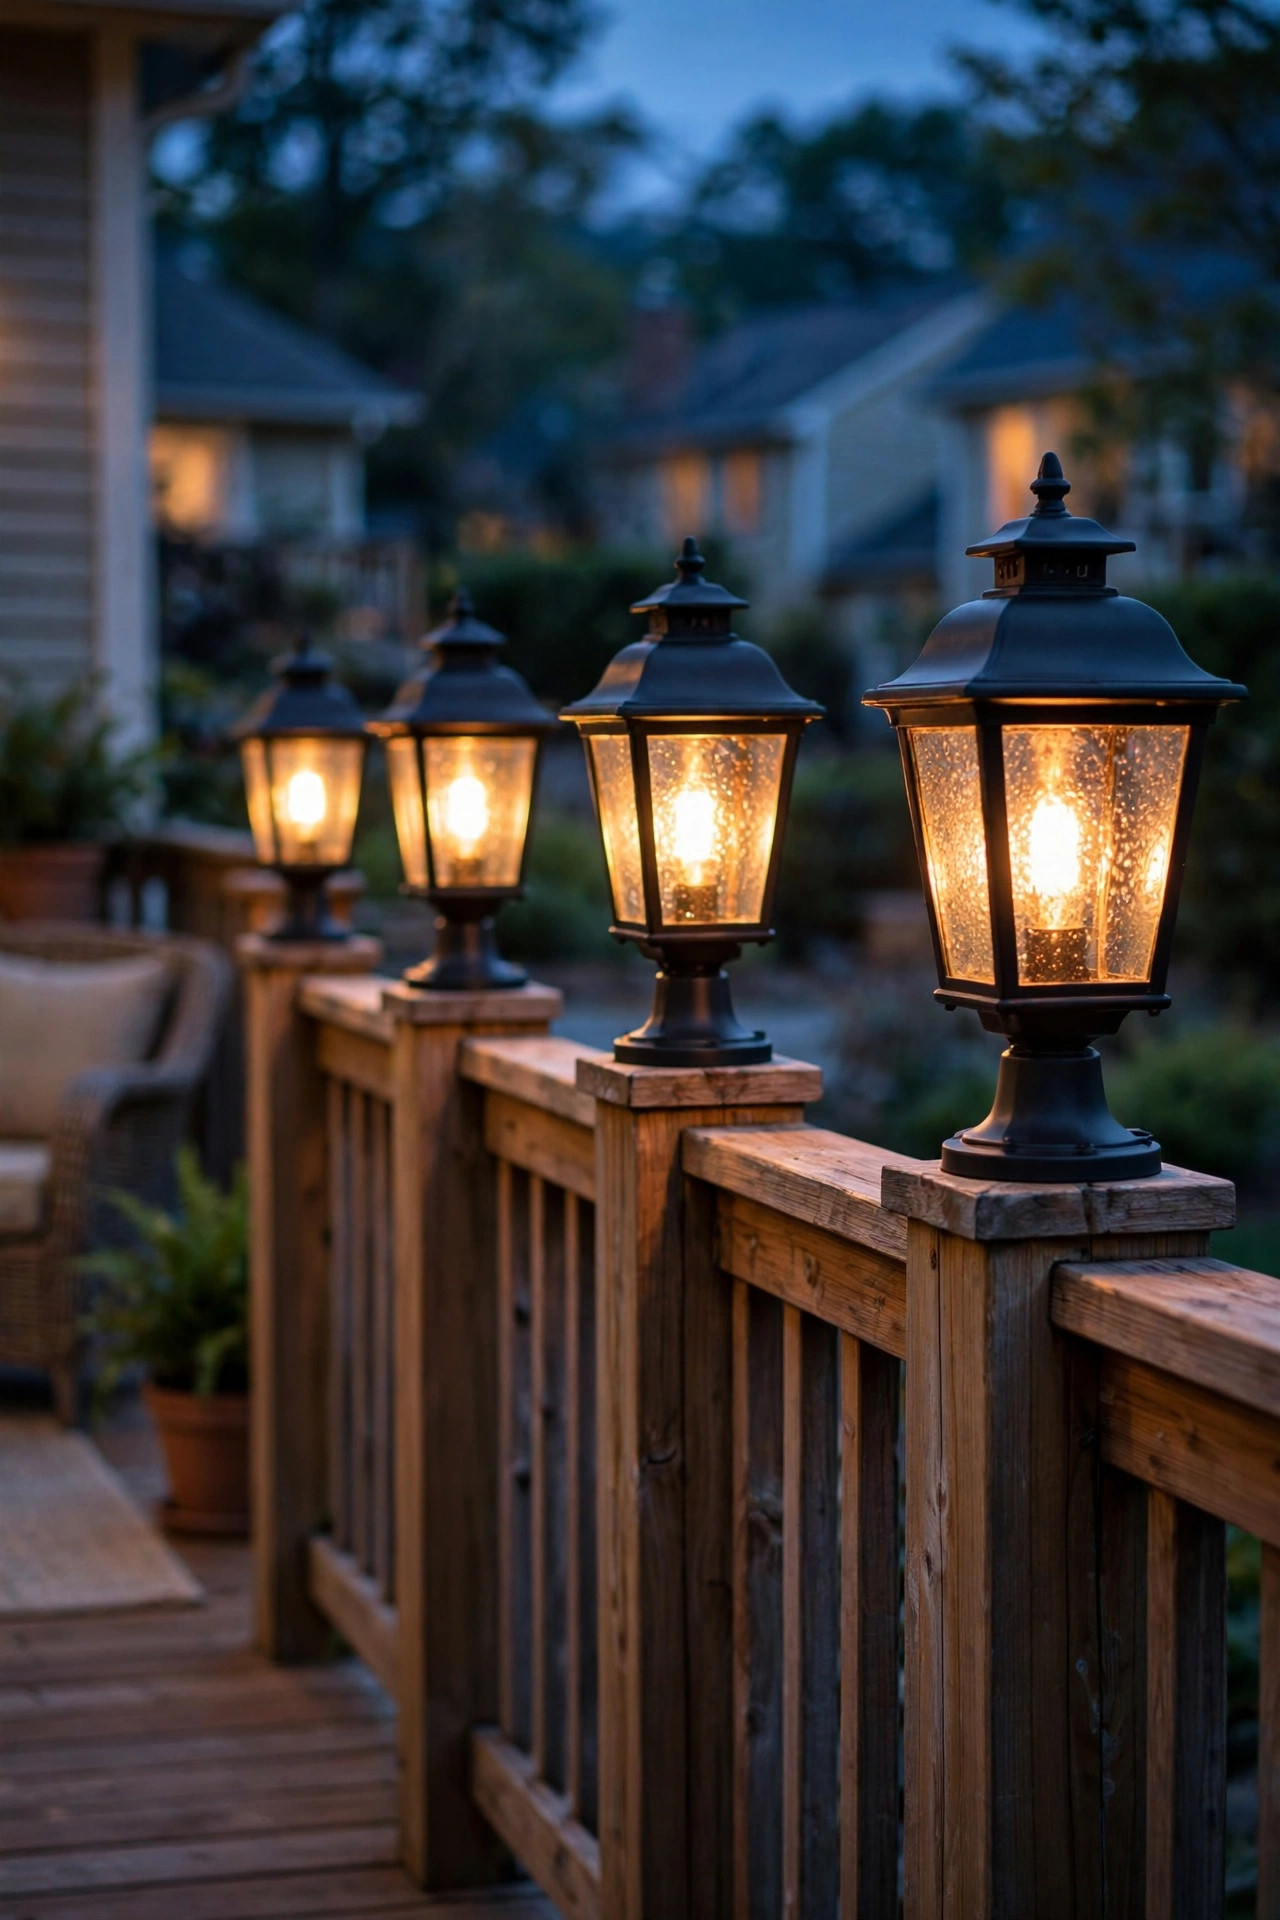
Some decks want light; others want jewelry. Lantern-style carriage caps are for the second kind — little glass lanterns that sit on each post like the carriage lights flanking a colonial front door. The look is seeded or frosted glass panels, a warm LED "flame" (filament-style LEDs nail this), and a cap base that anchors it to the post. On a traditional home, or a farmhouse-style deck, they make the railing feel like an extension of the house itself.
In my experience, the magic here is matching. If your house already has wall lanterns by the front door or garage, echo their finish on the post caps — matte black with black, oil-rubbed bronze with bronze. That repetition is what makes a home look designed rather than decorated. These come in both solar and low-voltage versions; the low-voltage ones burn a touch brighter and read better from the street, which matters if curb appeal is part of your goal.
One practical note: lantern caps are taller than flat caps — typically 6 to 9 inches — so keep sightlines in mind. Don't put a tall lantern cap on the posts where you sit and watch the sunset, or you'll be peering around little lanterns all evening. Save them for perimeter posts and corners.
Suggested budget range: $120 – $320.
4. Copper Pyramid Caps That Patina Beautifully
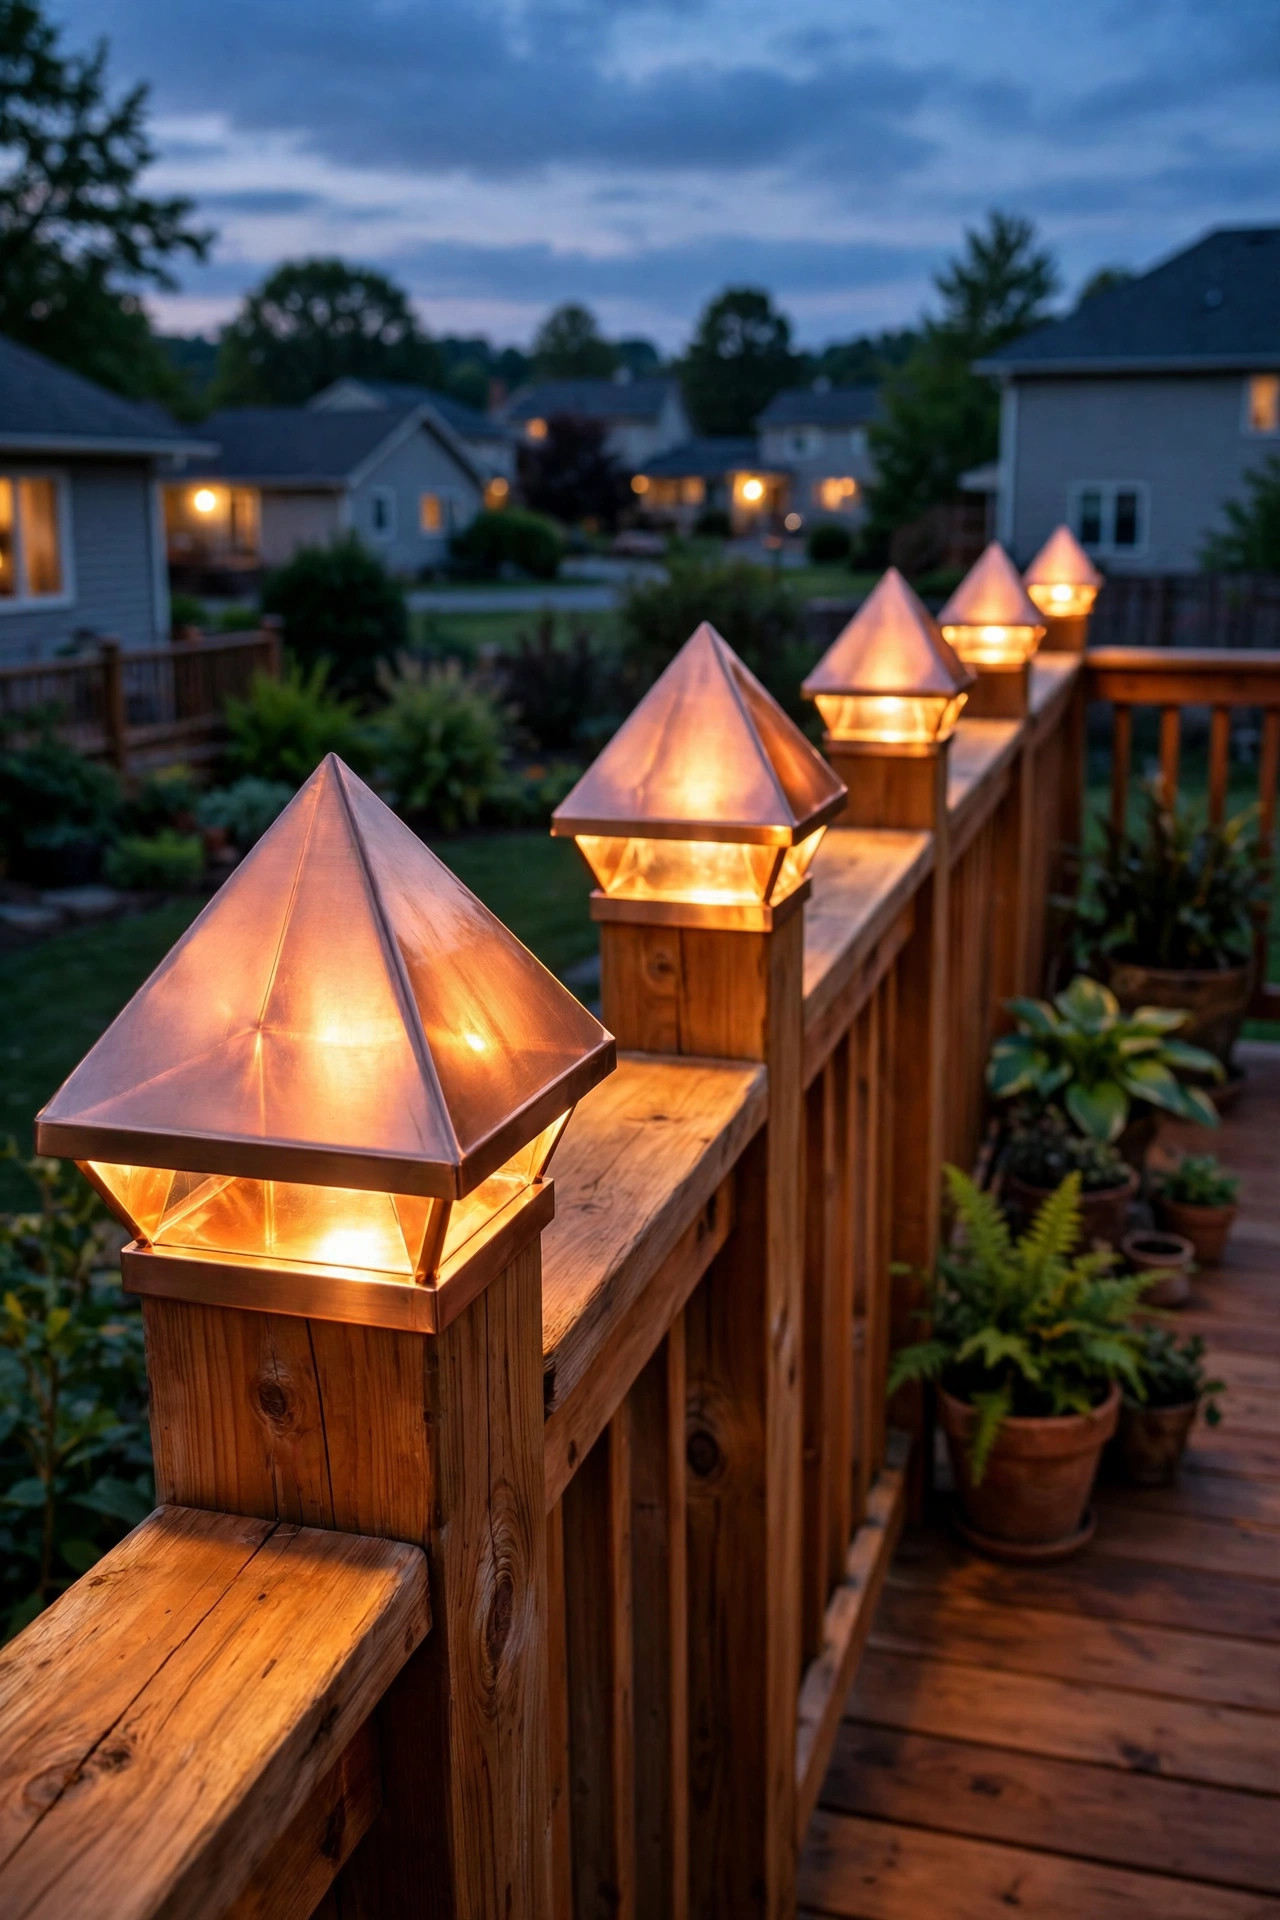
Honestly? This is my favorite look on a natural wood deck. Copper pyramid caps start out shiny-penny bright and slowly weather into that soft brown-green patina that makes cedar and redwood look even richer. The pyramid shape sheds rain and snow better than flat caps, and at night the warm LED inside bounces off the copper interior for a glow that's deeper and more golden than any plastic cap can manage.
You can buy them pre-lit (usually low-voltage) or as plain copper caps and add a small LED puck underneath — the DIY route is cheaper and lets you pick your own color temperature. If you love the bright copper look, a quick wipe with a vinegar-salt paste once a season keeps it polished; if you'd rather let nature take over, just leave them alone and enjoy the show over two or three years. One caution: copper and pressure-treated lumber can react over time, so look for caps with a protective inner sleeve, or set the cap on a thin composite shim to keep the metals separated from the treatment chemicals.
Space them on every post for a mountain-lodge feel, or just the corners and stair posts for a lighter touch.
Suggested budget range: $140 – $380.
5. Downlight Ring Caps That Wash the Post
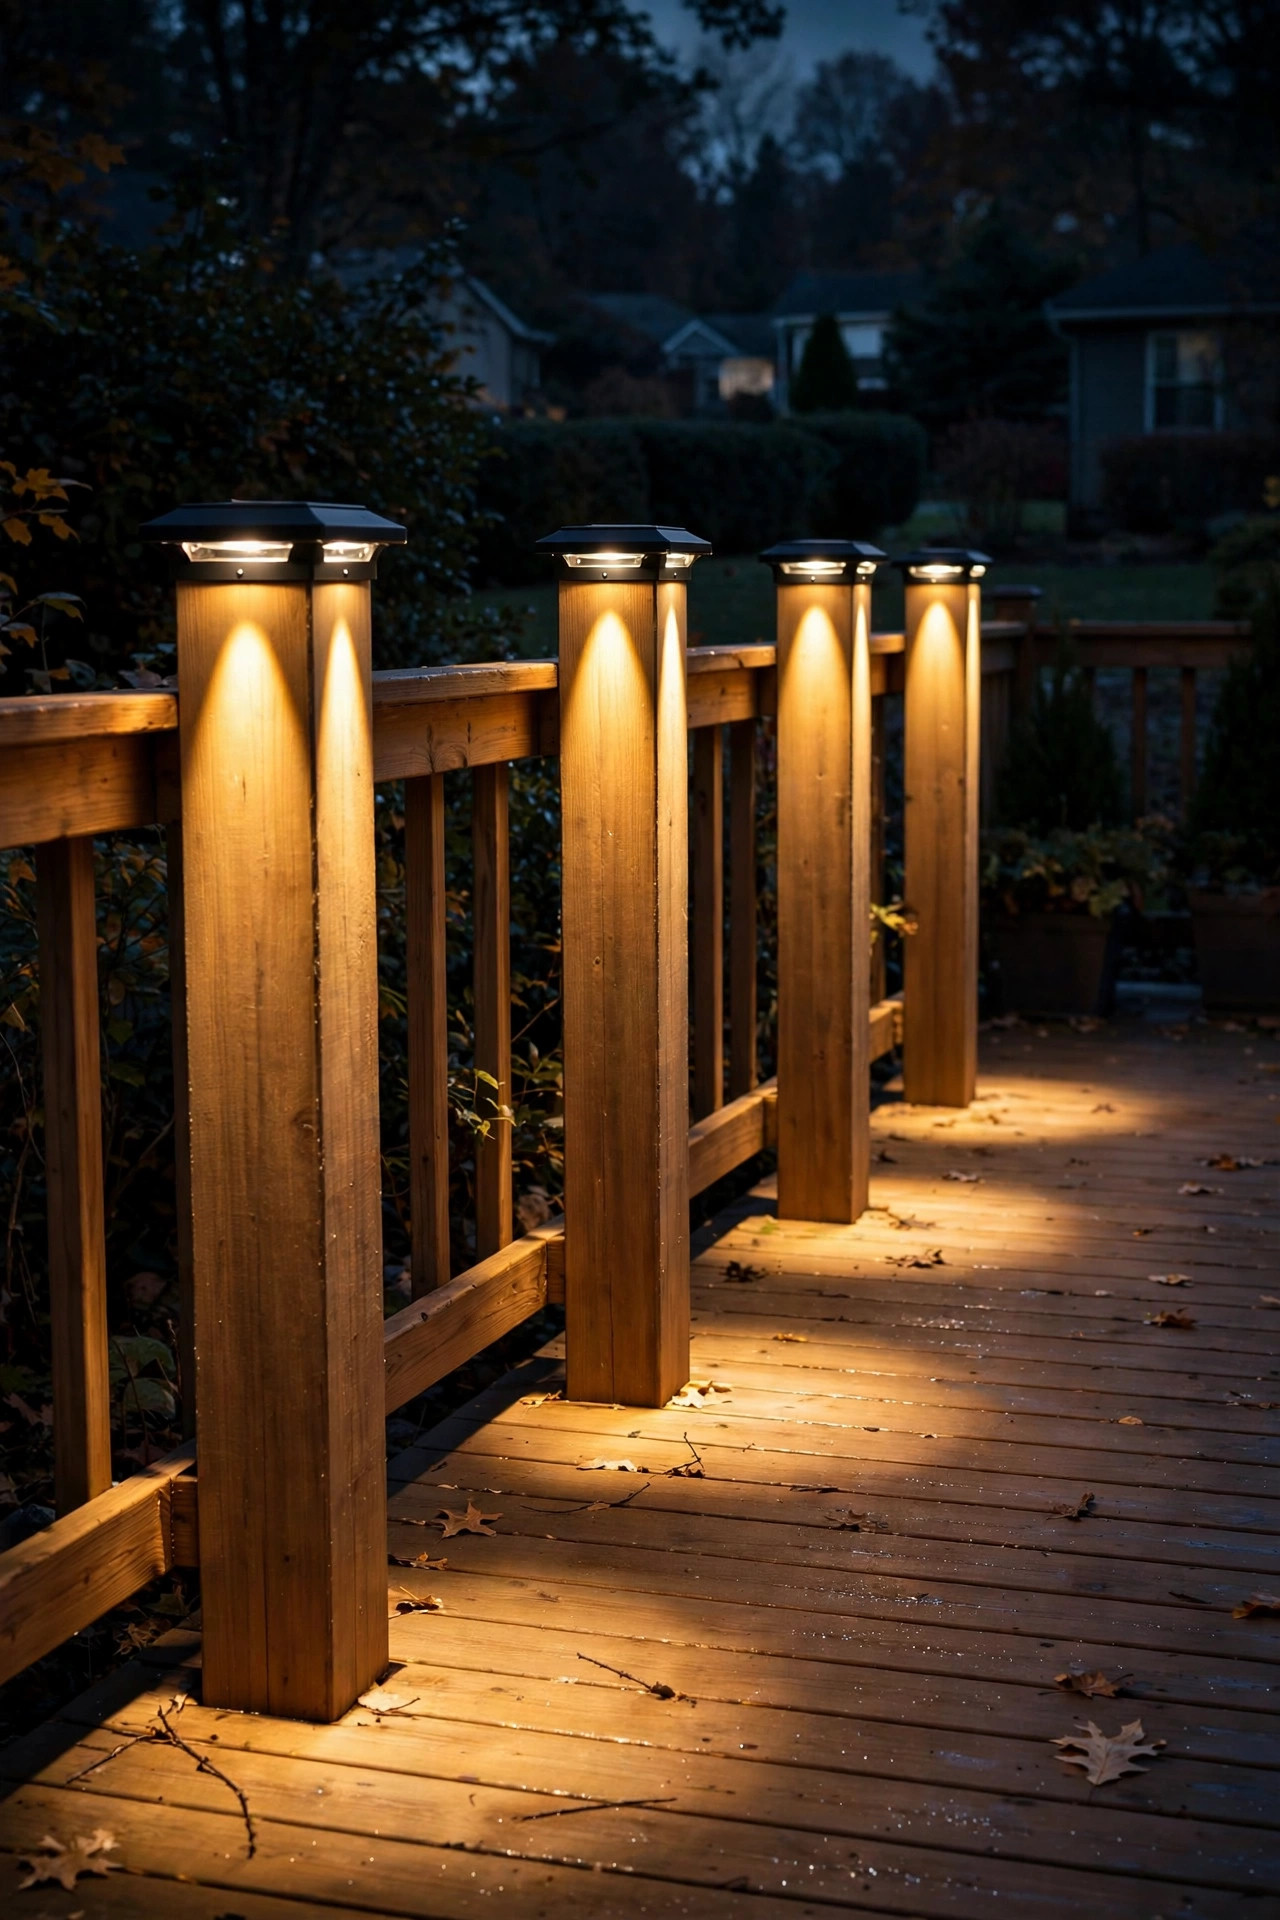
Here's a clever twist most people haven't seen: instead of glowing outward in all directions, downlight caps hide the LED in a ring under the cap's lip and wash light straight down the post face and onto the deck boards. The result is dramatic in the best way — each post gets a soft cone of light pooling at its base, like moonlight decided to be helpful. And because no light shines up into your eyes, these are the kindest caps for a dining deck where you actually want to see your companions' faces, not squint past glare.
Installation is the same as any cap — they slip over the post top — but placement matters more here. I always recommend downlight caps on the posts nearest seating areas and along stair runs, where the downward wash doubles as step safety lighting. Pair them with a 2700K bulb temperature for that candlelit-dinner feel; anything cooler starts to feel commercial. Most are low-voltage wired, which makes sense — downlights this purposeful deserve the steady brightness wired power delivers.
If your deck boards are a lighter composite, the wash effect is even prettier, since pale boards bounce more light back up. On dark-stained wood, plan on every post rather than every other so the pools of light connect.
Suggested budget range: $160 – $400.
6. Color-Changing Caps for Holidays and Game Days
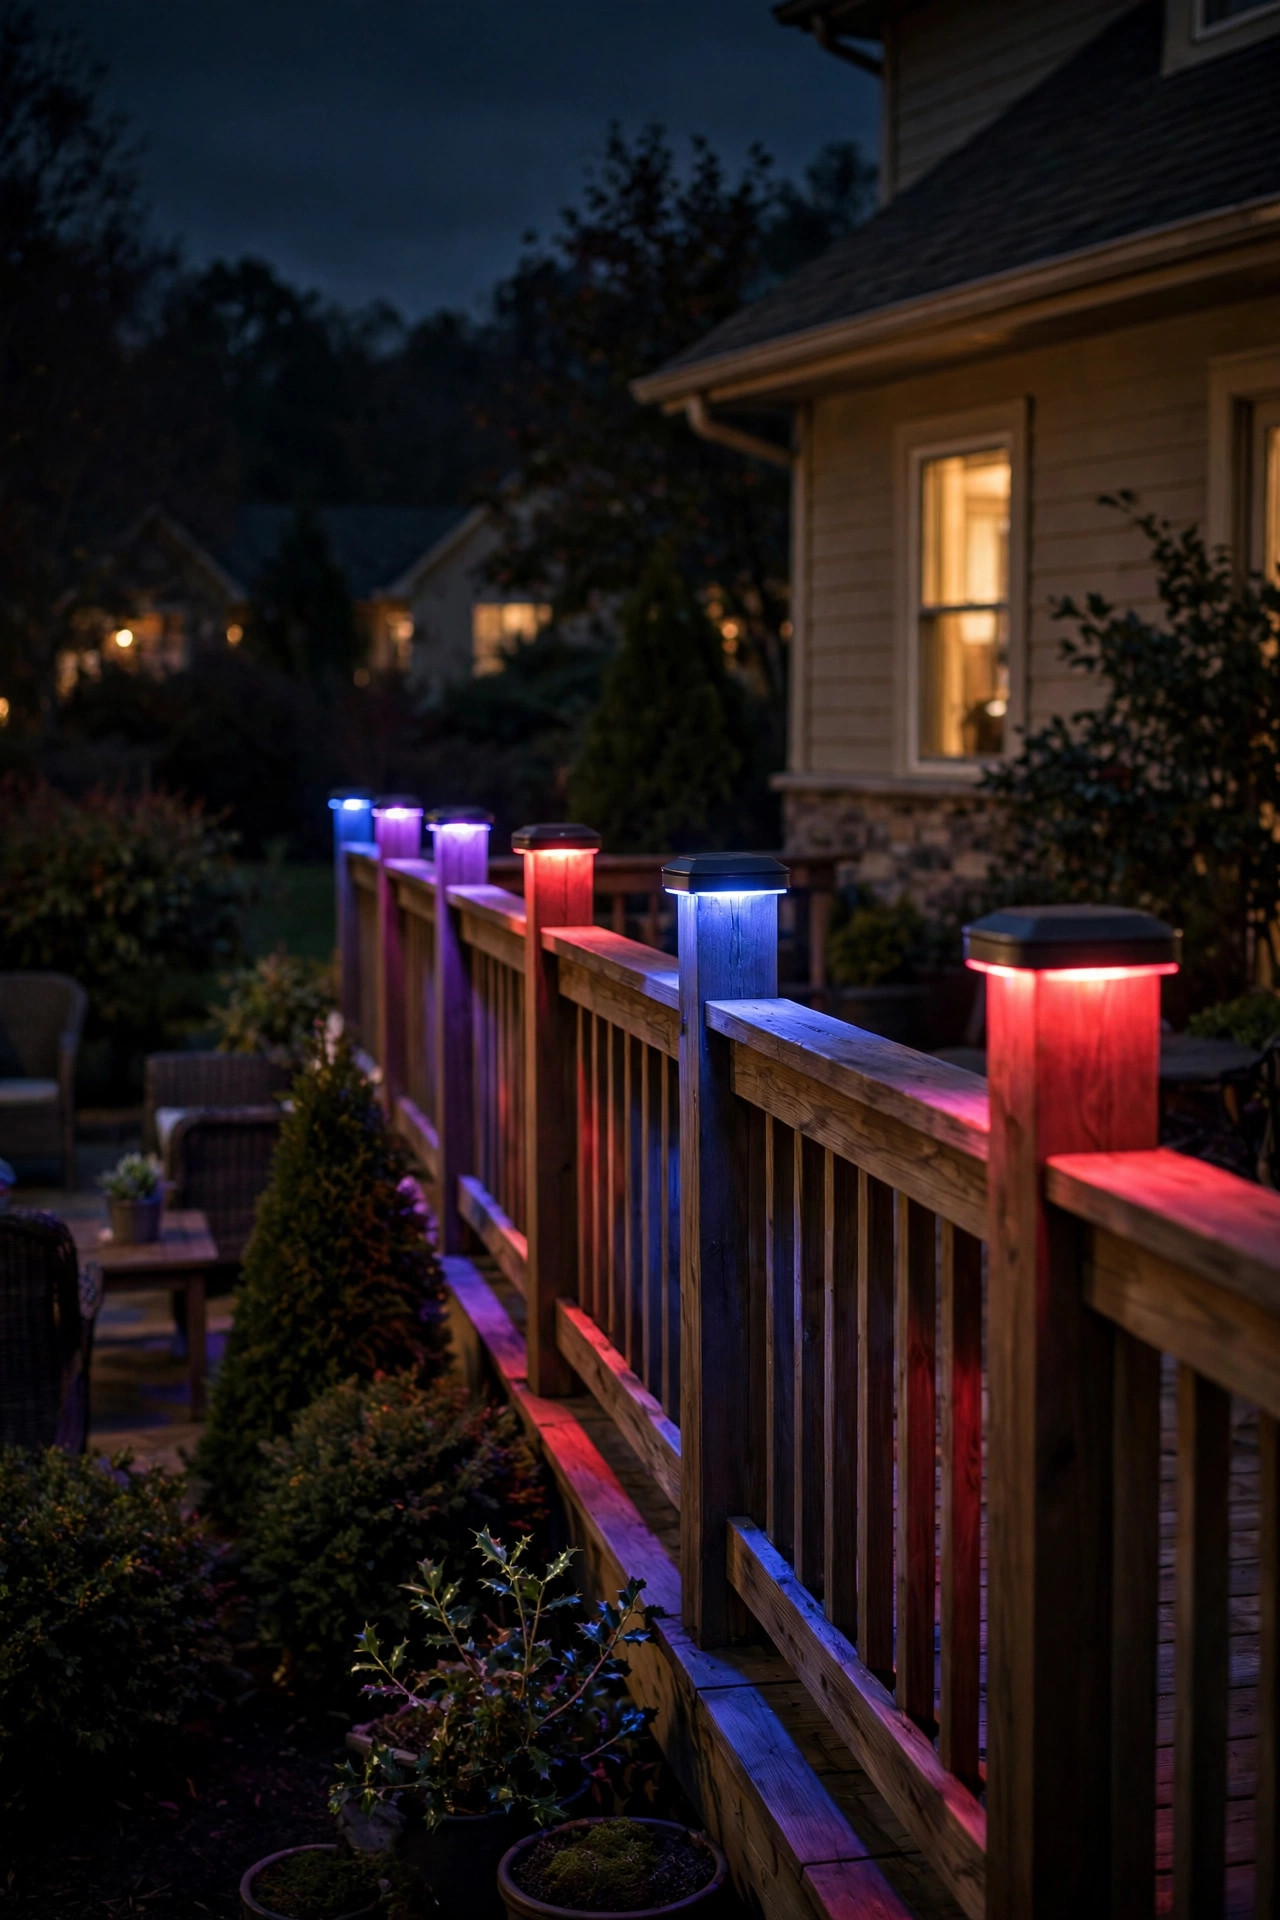
Okay, confession: I keep my own deck at warm white 360 days a year. But those other five days — the Fourth of July, Halloween, the big game — color-changing deck post cap lights are pure joy. These caps cycle through colors via a little remote or a phone app, so your railing can glow team colors on Sunday and switch to spooky purple-orange for trick-or-treat night. Kids absolutely lose their minds over this, in the best way.
The honest buying advice: pick caps whose default power-on color is warm white, not the last color used. You do not want to fumble with an app in the dark every evening just to get your normal glow back. Also check the app reviews before buying — a gorgeous cap with a janky app becomes a very expensive warm-white cap within a month. Most color-changing caps are solar with a rechargeable battery, so treat them like idea #1: they need real sun to run the color LEDs, which draw more power than plain white.
My rule for tasteful use: warm white as the everyday setting, color only for occasions. A deck that cycles rainbow every night stops feeling like a retreat and starts feeling like a mini-golf course.
Suggested budget range: $90 – $250.
7. Dusk-to-Dawn Sensor Caps for True Set-and-Forget
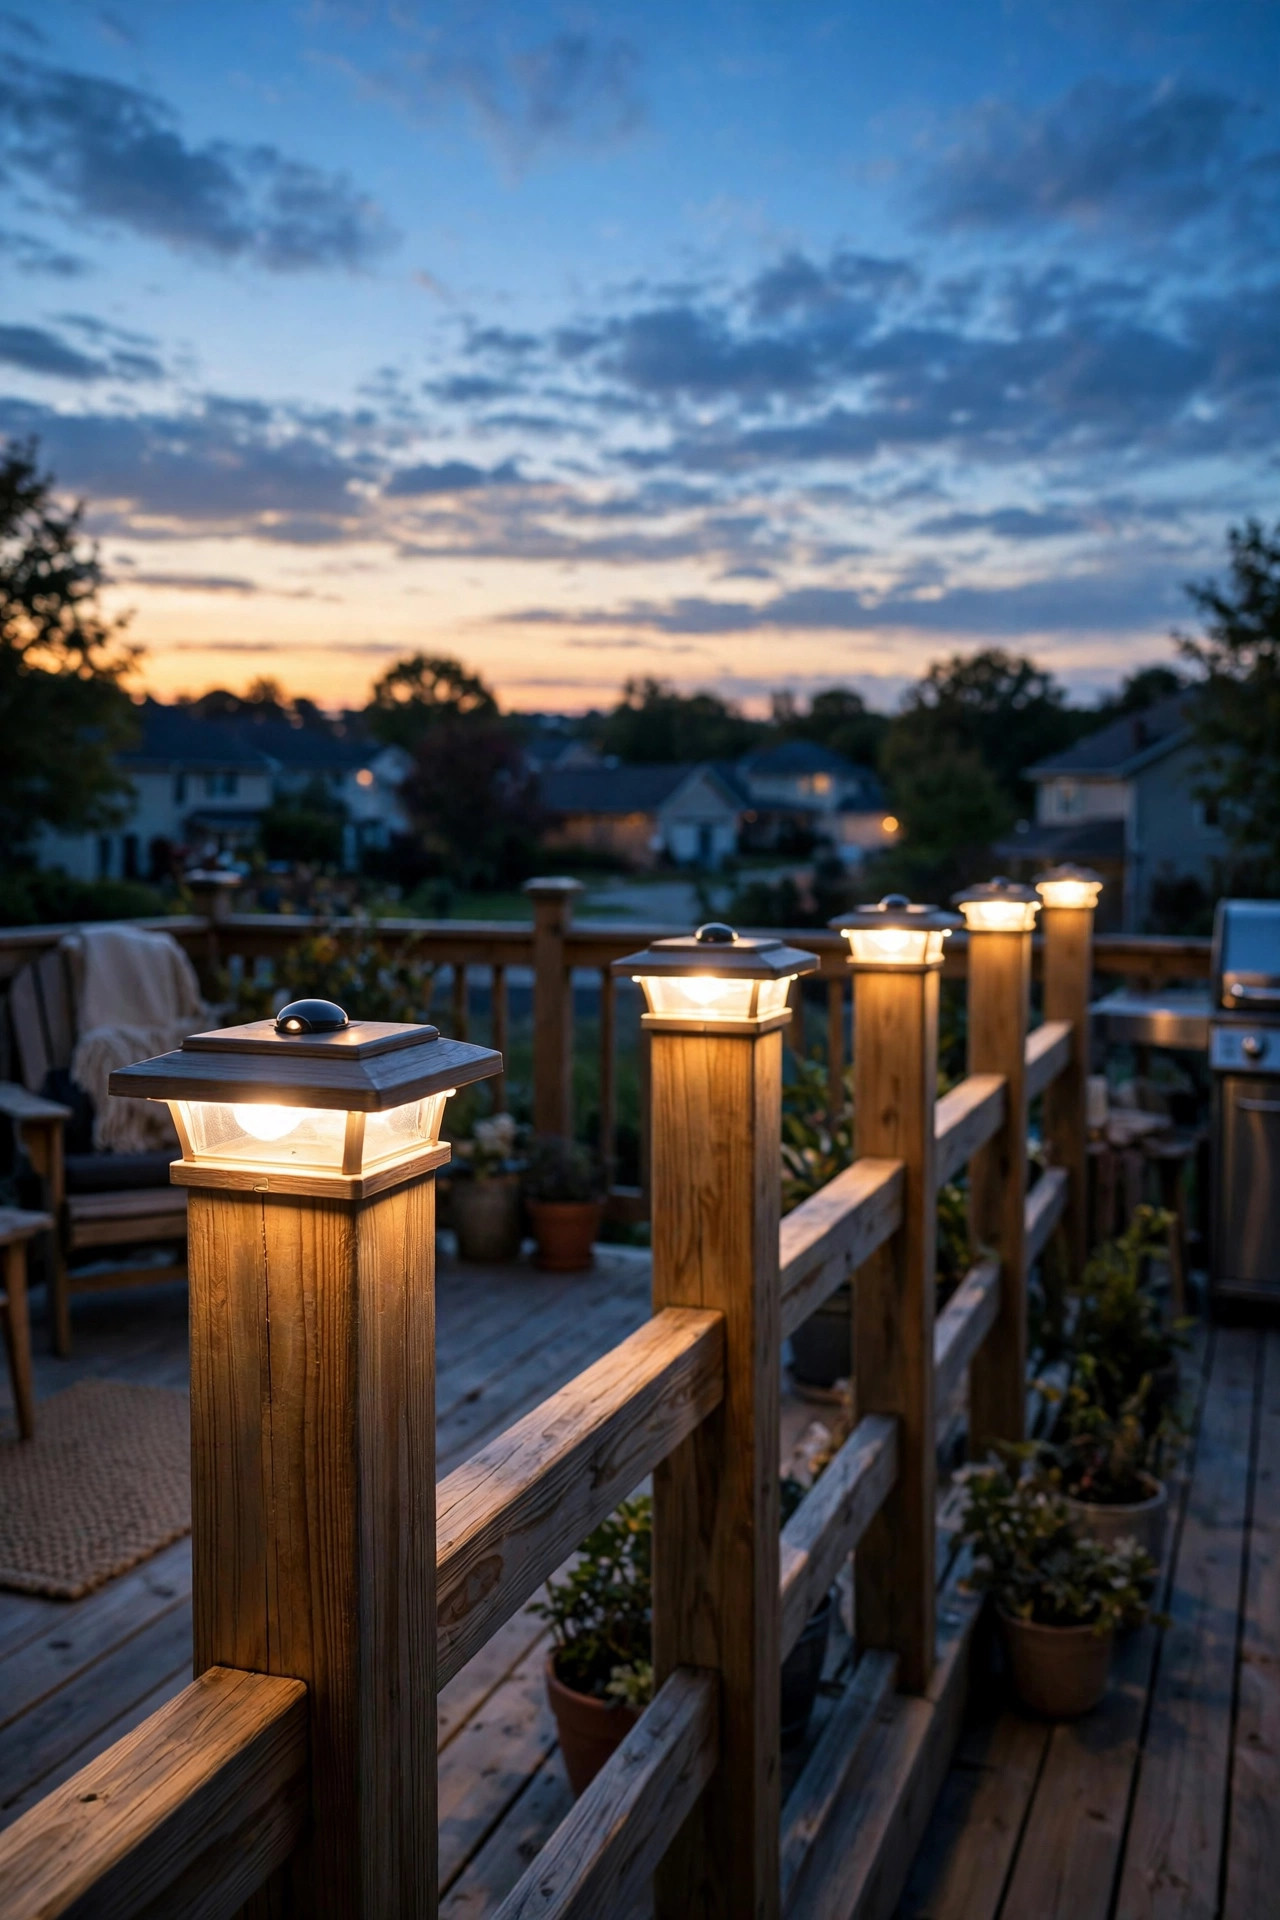
Raise your hand if you've ever bought outdoor lights with a timer and then never touched the timer again after daylight saving time scrambled everything. Dusk-to-dawn photocell caps solve this completely: a tiny sensor on the cap reads the ambient light and switches on at sunset, off at sunrise, 365 days a year. No timers, no apps, no remembering. In my experience, this is the feature that separates the caps people love from the caps that end up dark by August.
Nearly all solar caps include a photocell by default, but it's worth confirming on wired caps too — some low-voltage kits expect you to buy a separate timer or photocell module for the transformer. If yours does, spend the extra few dollars; a photocell on the transformer gives every cap on the circuit automatic dusk-to-dawn behavior in one move. One placement tip: keep sensor caps away from bright competing light — a cap sitting six inches under a blazing floodlight will think it's daytime and never turn on. Give sensors at least a few feet of darkness to work with.
This is also the best pick for a vacation home or rental property, where nobody's around to flip switches.
Suggested budget range: $60 – $160.
8. The Every-Other-Post Pattern (the Budget-Saver)
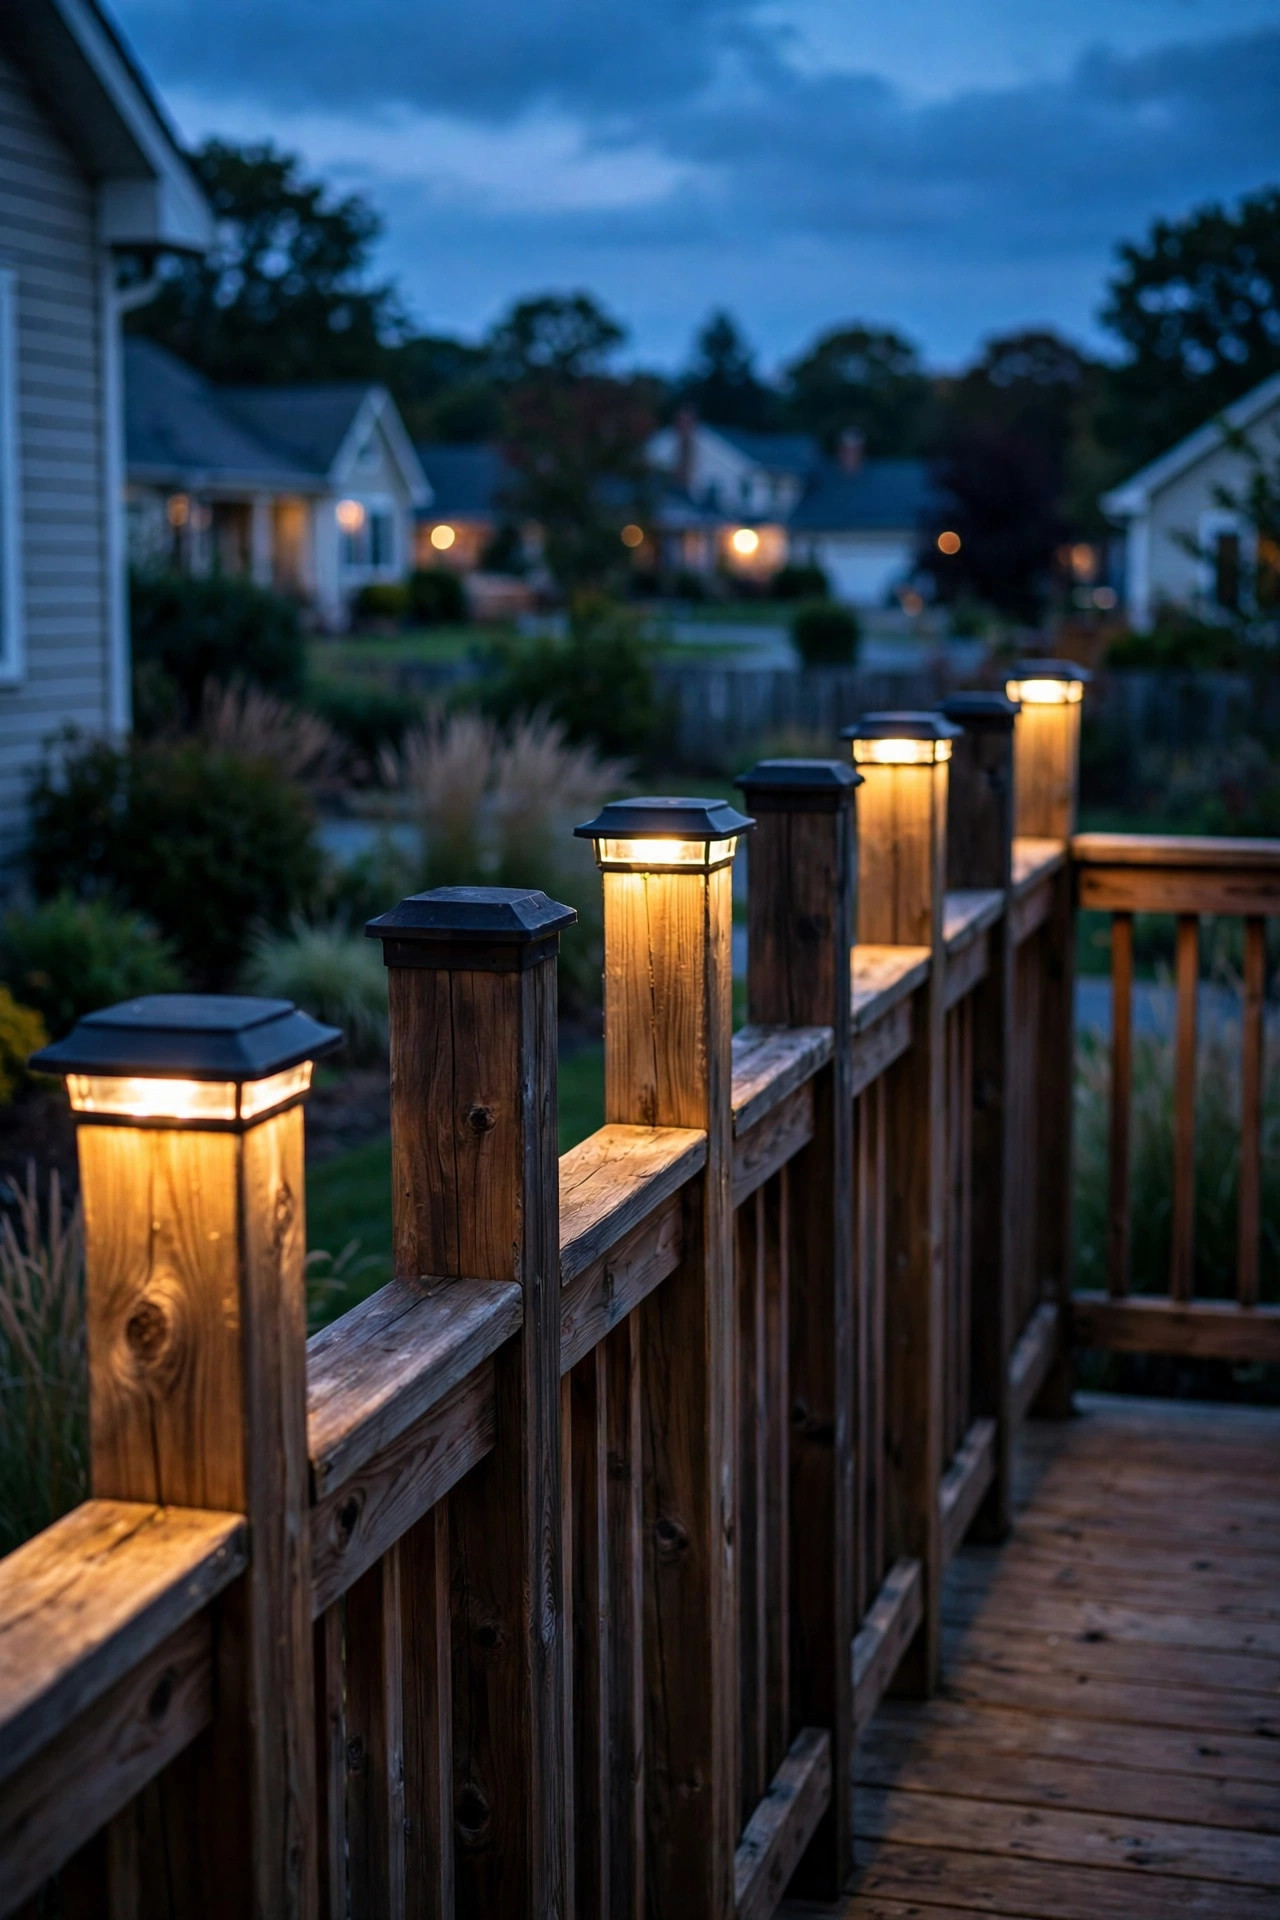
Here's the open secret of deck lighting: you almost never need a cap on every single post. Lighting every other post still traces the railing's line beautifully, cuts your fixture cost nearly in half, and — this surprised me the first time I tried it — often looks more elegant, because the rhythm of light-dark-light feels intentional rather than blinding. It's my go-to recommendation when someone loves the post-cap look but winces at outfitting fourteen posts.
The trick is committing to the pattern cleanly. Start at a corner or stair post and alternate from there, so the rhythm reads deliberately from every angle. And light the posts that matter most regardless of pattern: both sides of every stair opening, the posts flanking a gate, and any post at a level change or drop-off. Safety first, rhythm second. If you go solar, put the lit caps on the sunniest posts — the pattern only works if every lit cap actually lights.
One more budget trick within the trick: buy the same cap style in a two-pack or contractor pack rather than singles. The per-cap price often drops 20 to 30 percent, and you'll have spares when one eventually gives out. For more ways to stretch a lighting budget, I love these outdoor lighting hacks — small moves, big glow.
Suggested budget range: $30 – $80.
9. Low-Profile Flush Caps for Modern Decks
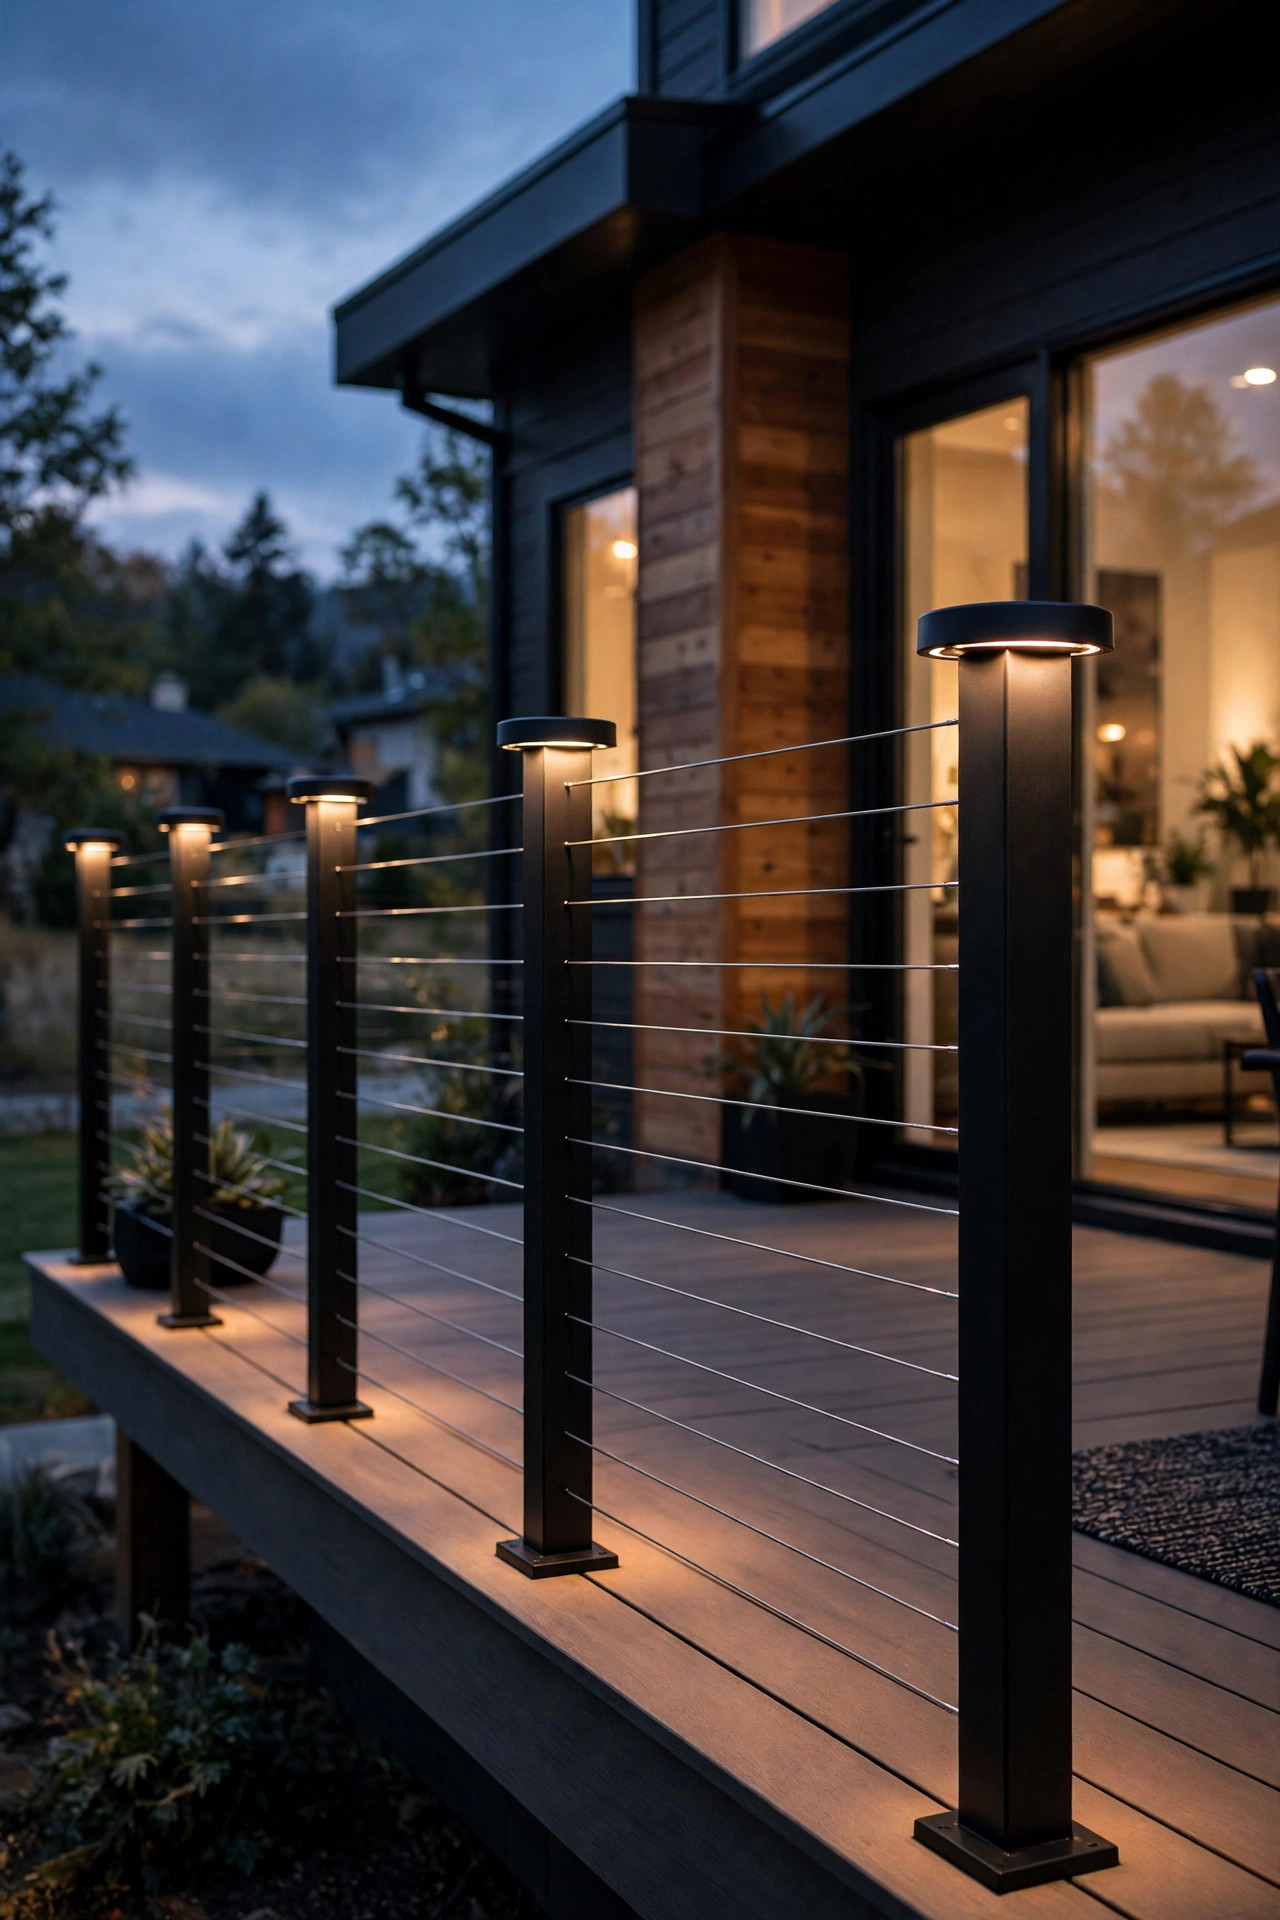
Not every deck wants a lantern on top. If your railing is all clean lines — cable rail, glass panels, slim metal balusters — a chunky cap looks like a top hat on a minimalist. Low-profile flush caps solve this: they're slim discs or low pyramids, often just an inch or two tall, in matte black or brushed nickel, with the LED tucked underneath so the light seems to come from nowhere. The deck keeps its sleek silhouette by day and glows with quiet precision by night.
These are almost always low-voltage wired, since the slim housing leaves no room for a meaningful solar panel and battery. That means planning the wire run before you fall in love — but the payoff is a system that looks custom and architectural. I always recommend matching the cap finish to your railing hardware: black caps with black cable-rail fittings, nickel with stainless. That one detail is what makes it look like the deck and the lights were designed together.
Keep the color temperature at 3000K or below. Modern doesn't have to mean cold — warm light against dark metal and pale deck boards is one of the prettiest combinations in exterior lighting.
Suggested budget range: $150 – $380.
10. Wood-Grain Finish Caps That Disappear by Day
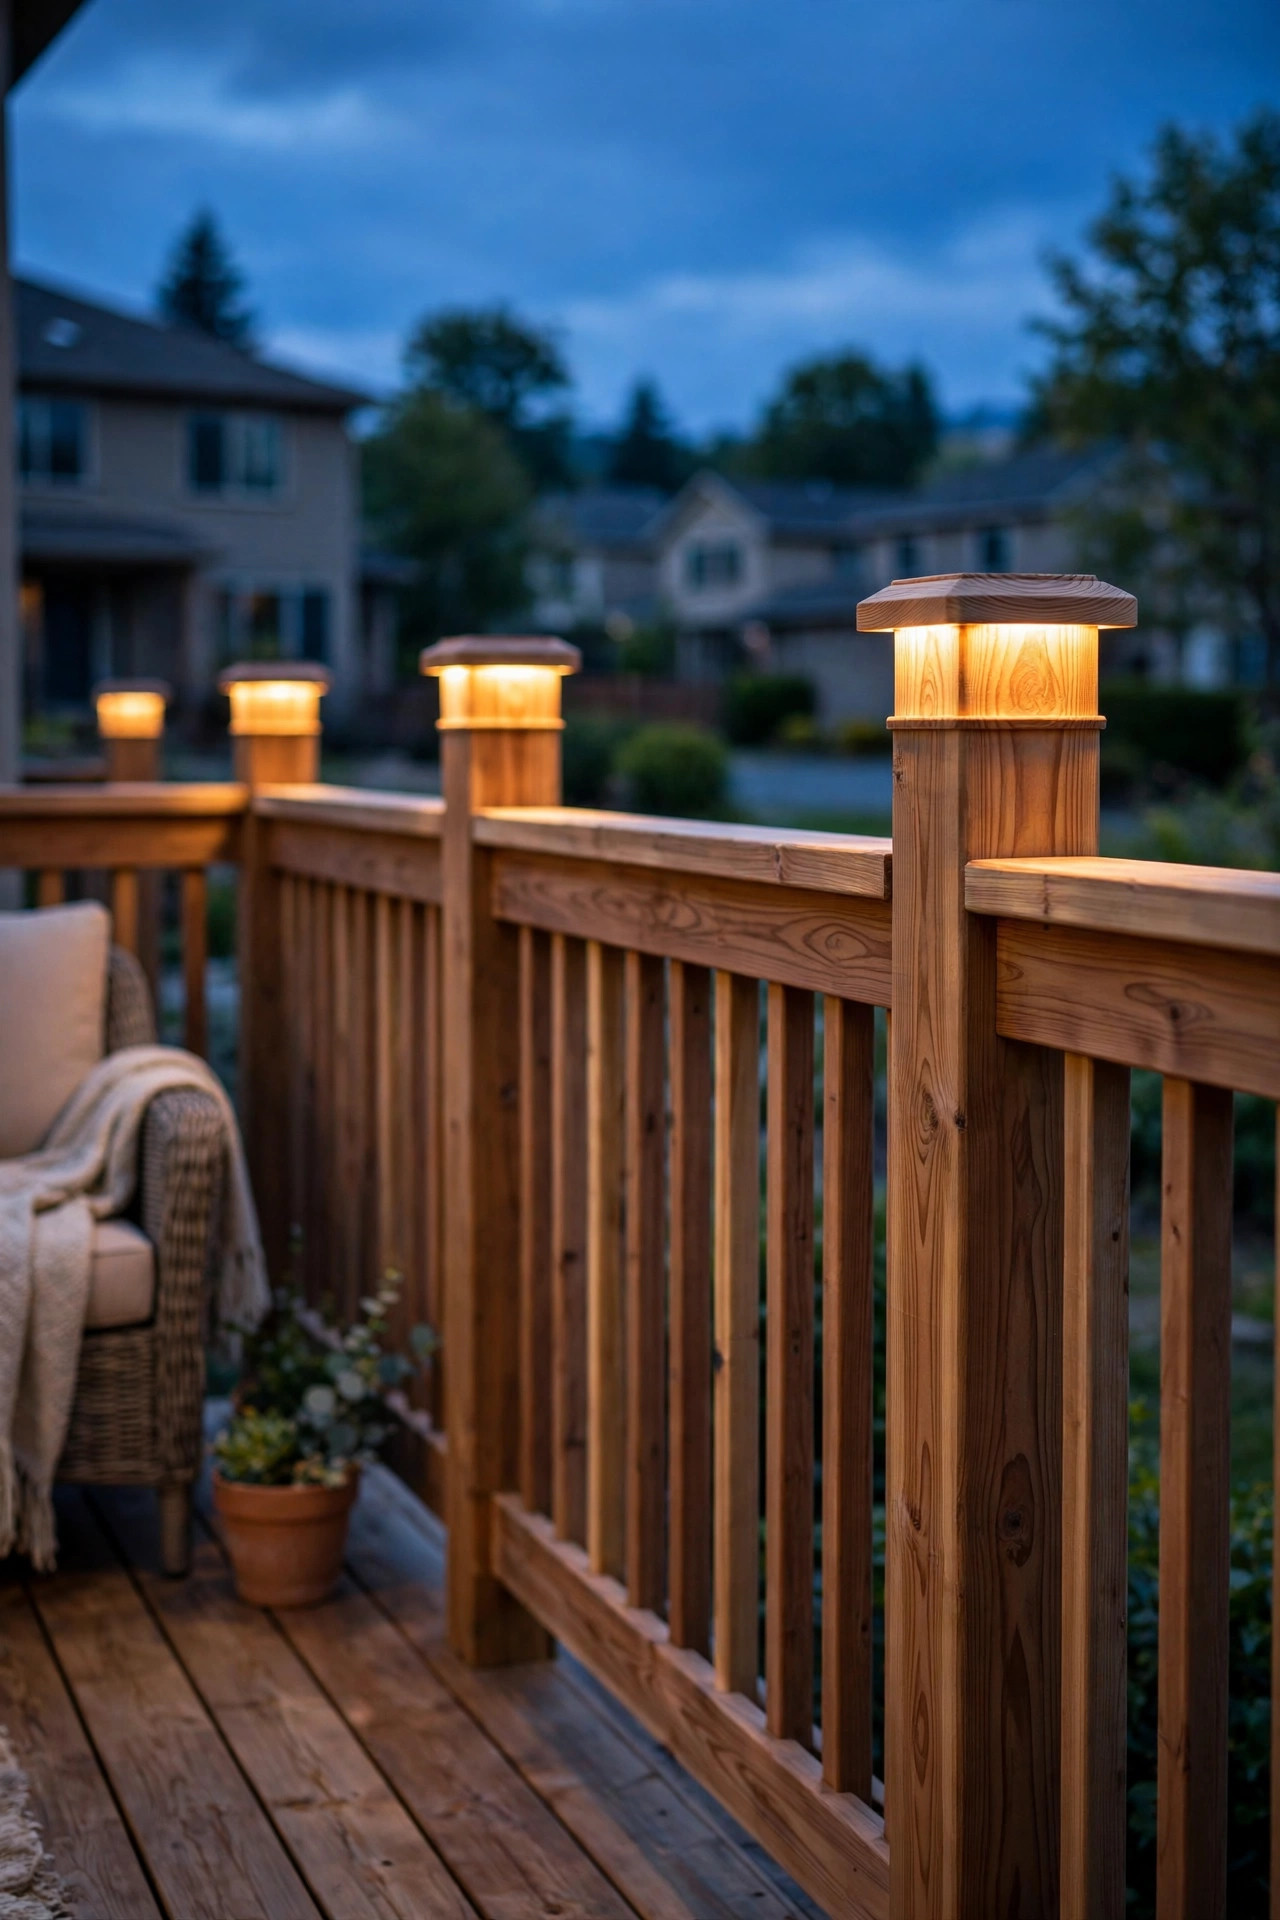
Sometimes the best lighting is the lighting you don't notice until it turns on. Wood-grain finish caps are molded or wrapped to mimic cedar, redwood, or weathered gray lumber, so by daylight they blend right into your railing — no black plastic dots breaking up a beautiful wood run. Then dusk hits, and each "wooden" cap glows from within. It's a lovely little magic trick, and guests always ask how you did it.
These are a natural match for natural-material decks: cedar railings, redwood posts, log-style or timber-frame looks. Hold a sample against your actual railing before buying a dozen — wood tones vary wildly, and a cap that's perfect for fresh cedar can look orange against gray weathered wood. Most wood-grain caps are solar, which suits the low-key vibe: no wires, no fuss, just quiet glow. And a practical bonus: the textured finish hides pollen, dust, and water spots far better than glossy black plastic, so they look cleaner between cleanings.
If your railing is painted or stained a solid color, skip this style — the faux grain will fight the paint. But on natural wood? Chef's kiss.
Suggested budget range: $70 – $180.
11. Caps Plus Stair Riser Lights (the Safety Layer)
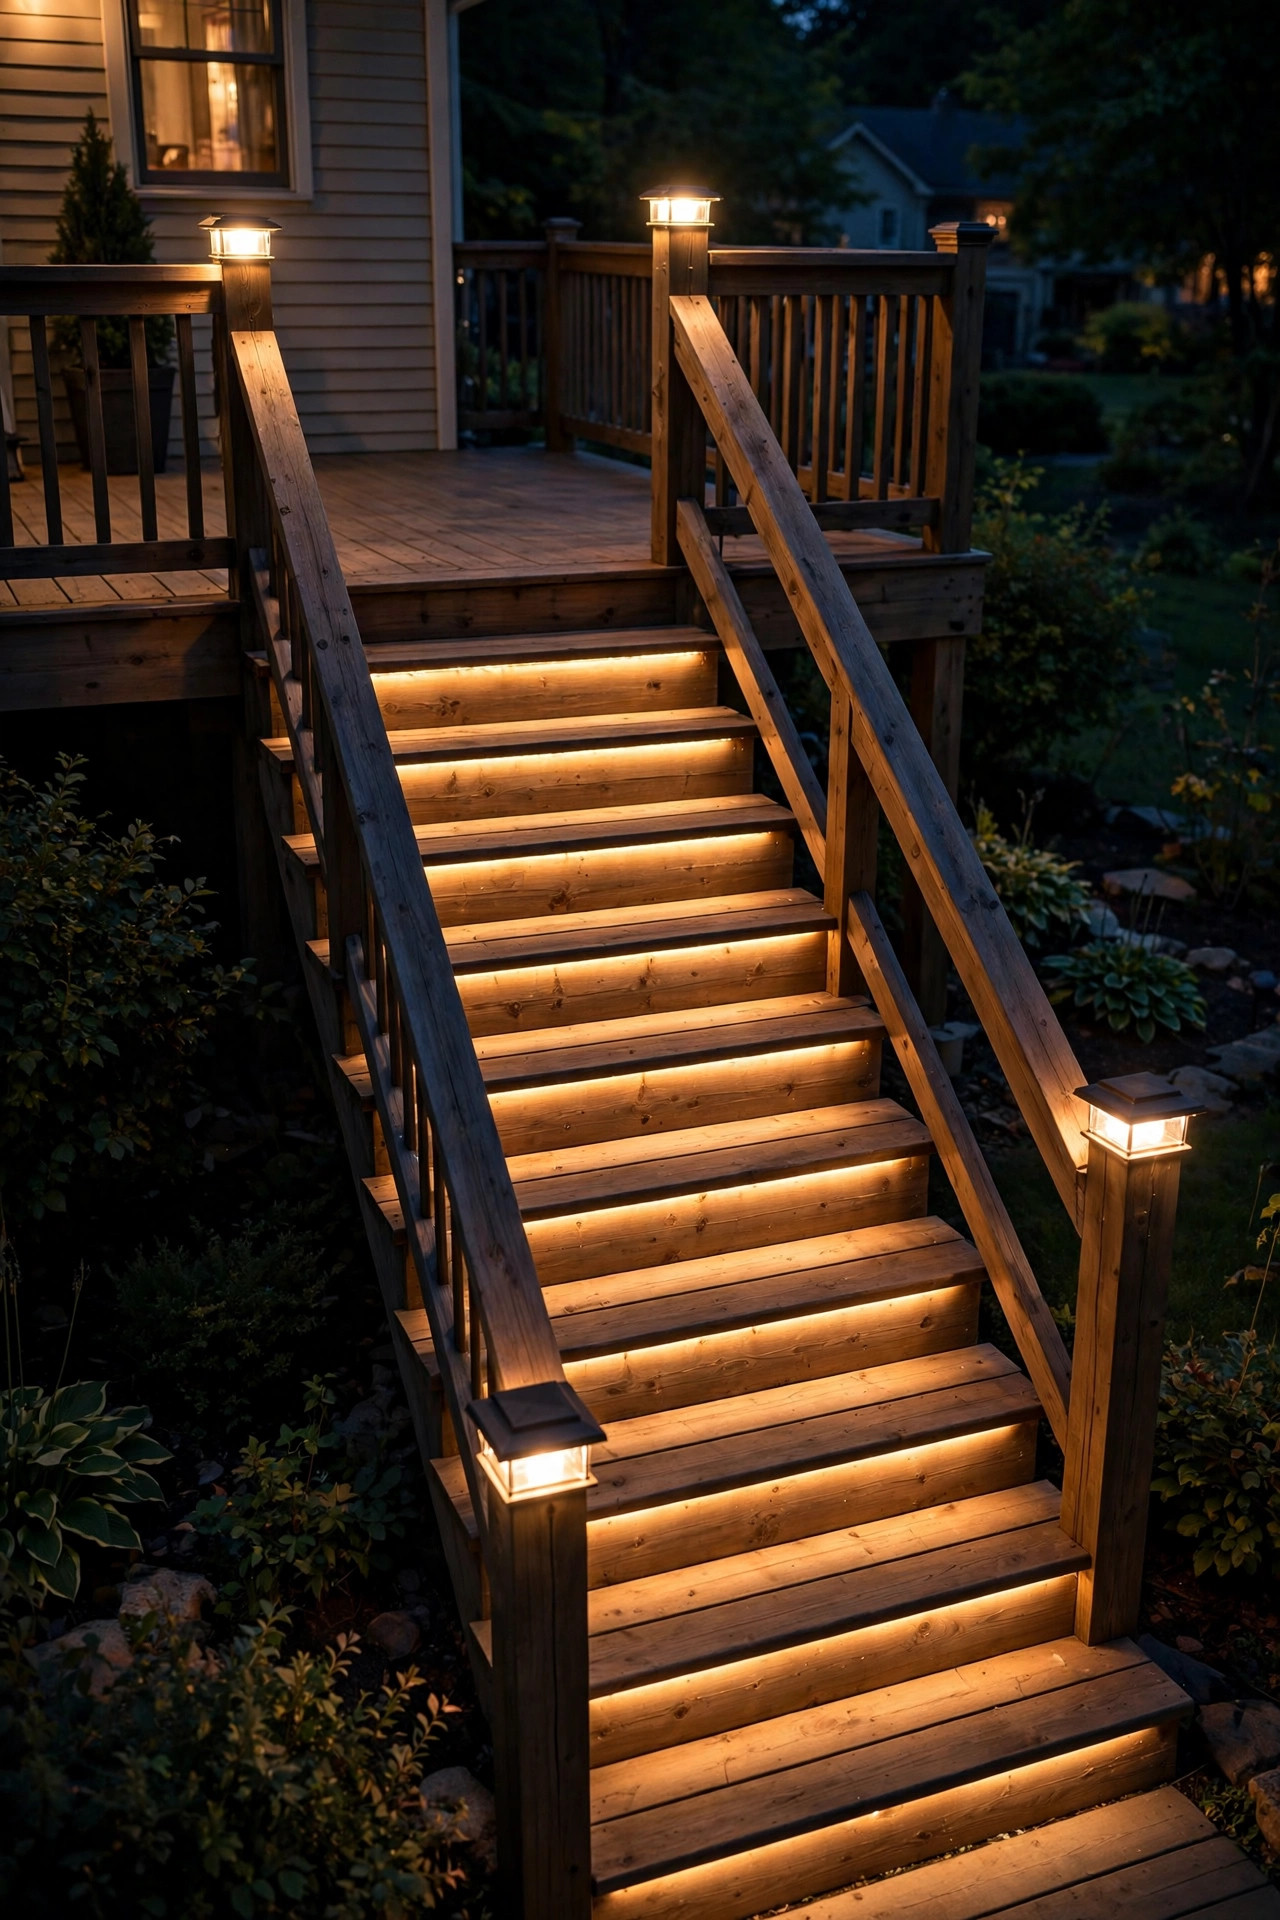
Pretty matters, but let me talk safety for a minute — because deck stairs are where outdoor lighting earns its keep. Post caps at the top and bottom of your stair run mark the transition beautifully, but the real safety win is pairing them with small lights on the stair risers themselves, so each tread edge is visible. In my experience, it's the combination — glowing posts framing the stairs plus lit treads — that lets guests navigate confidently with a drink in hand.
The simplest approach: put caps on the newel posts at the top and bottom of the stairs (every stair opening gets both sides, no exceptions), then add low-voltage LED strip or small recessed step lights under each tread nosing, wired to the same transformer as your caps if you went the wired route. Keep everything the same color temperature — 2700K throughout — so the stairs feel like part of the deck's glow, not an airport runway. If your local code requires a certain light level on exterior stairs, a quick call to your building department beats guessing; most are happy to answer a five-minute question.
This pairing is the single highest-value lighting move on any raised deck, full stop.
Suggested budget range: $120 – $350.
12. Caps Plus Under-Rail LED Strips (the Double Glow)
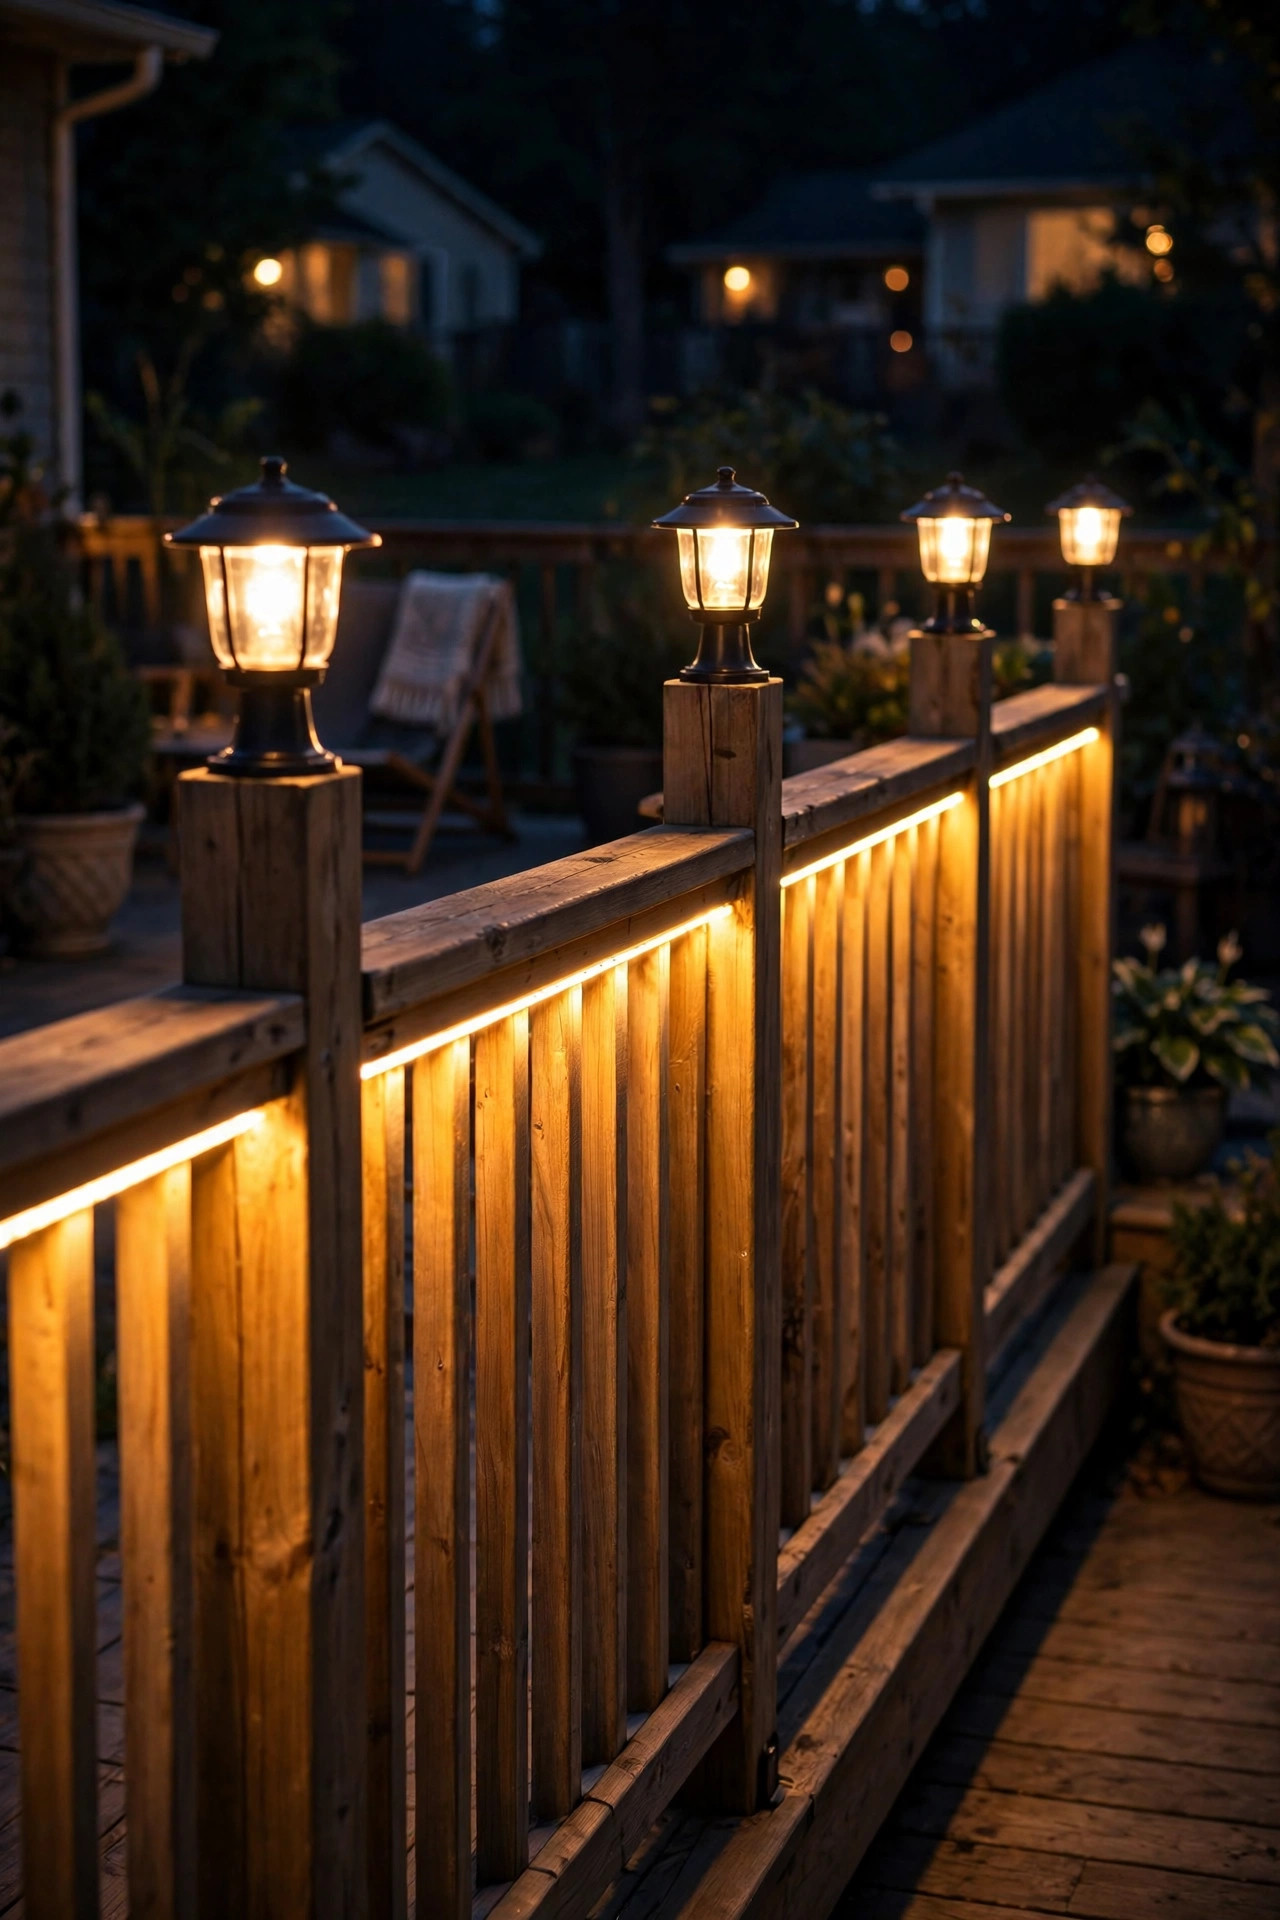
Want the deck that makes neighbors slow down? Layer post caps with a warm LED strip tucked under the top rail, and you get two kinds of light doing two jobs: the caps punctuate the railing's rhythm overhead while the strip washes a continuous ribbon of light down the balusters and deck boards. It's the layering philosophy in miniature, and honestly, it's the most "designed" a deck can look for the money.
Here's the practical playbook. Use a 2700K outdoor-rated LED strip (IP65 or better) with an adhesive backing plus a few clear mounting clips — adhesive alone gives up in summer heat eventually. Mount it on the underside of the top rail, set back about an inch from the front edge so the diodes themselves stay hidden and you only see the wash. Wire it to the same low-voltage transformer as wired caps, or use a plug-in driver on its own outdoor timer. The one mistake to avoid: mixing color temperatures. A 2700K cap next to a 5000K strip looks broken, not layered — check the Kelvin rating on both before you buy.
This combo photographs beautifully, too, if you're the type to share your deck glow online.
Suggested budget range: $140 – $380.
13. Taller Pillar Caps for Deck Entry Posts
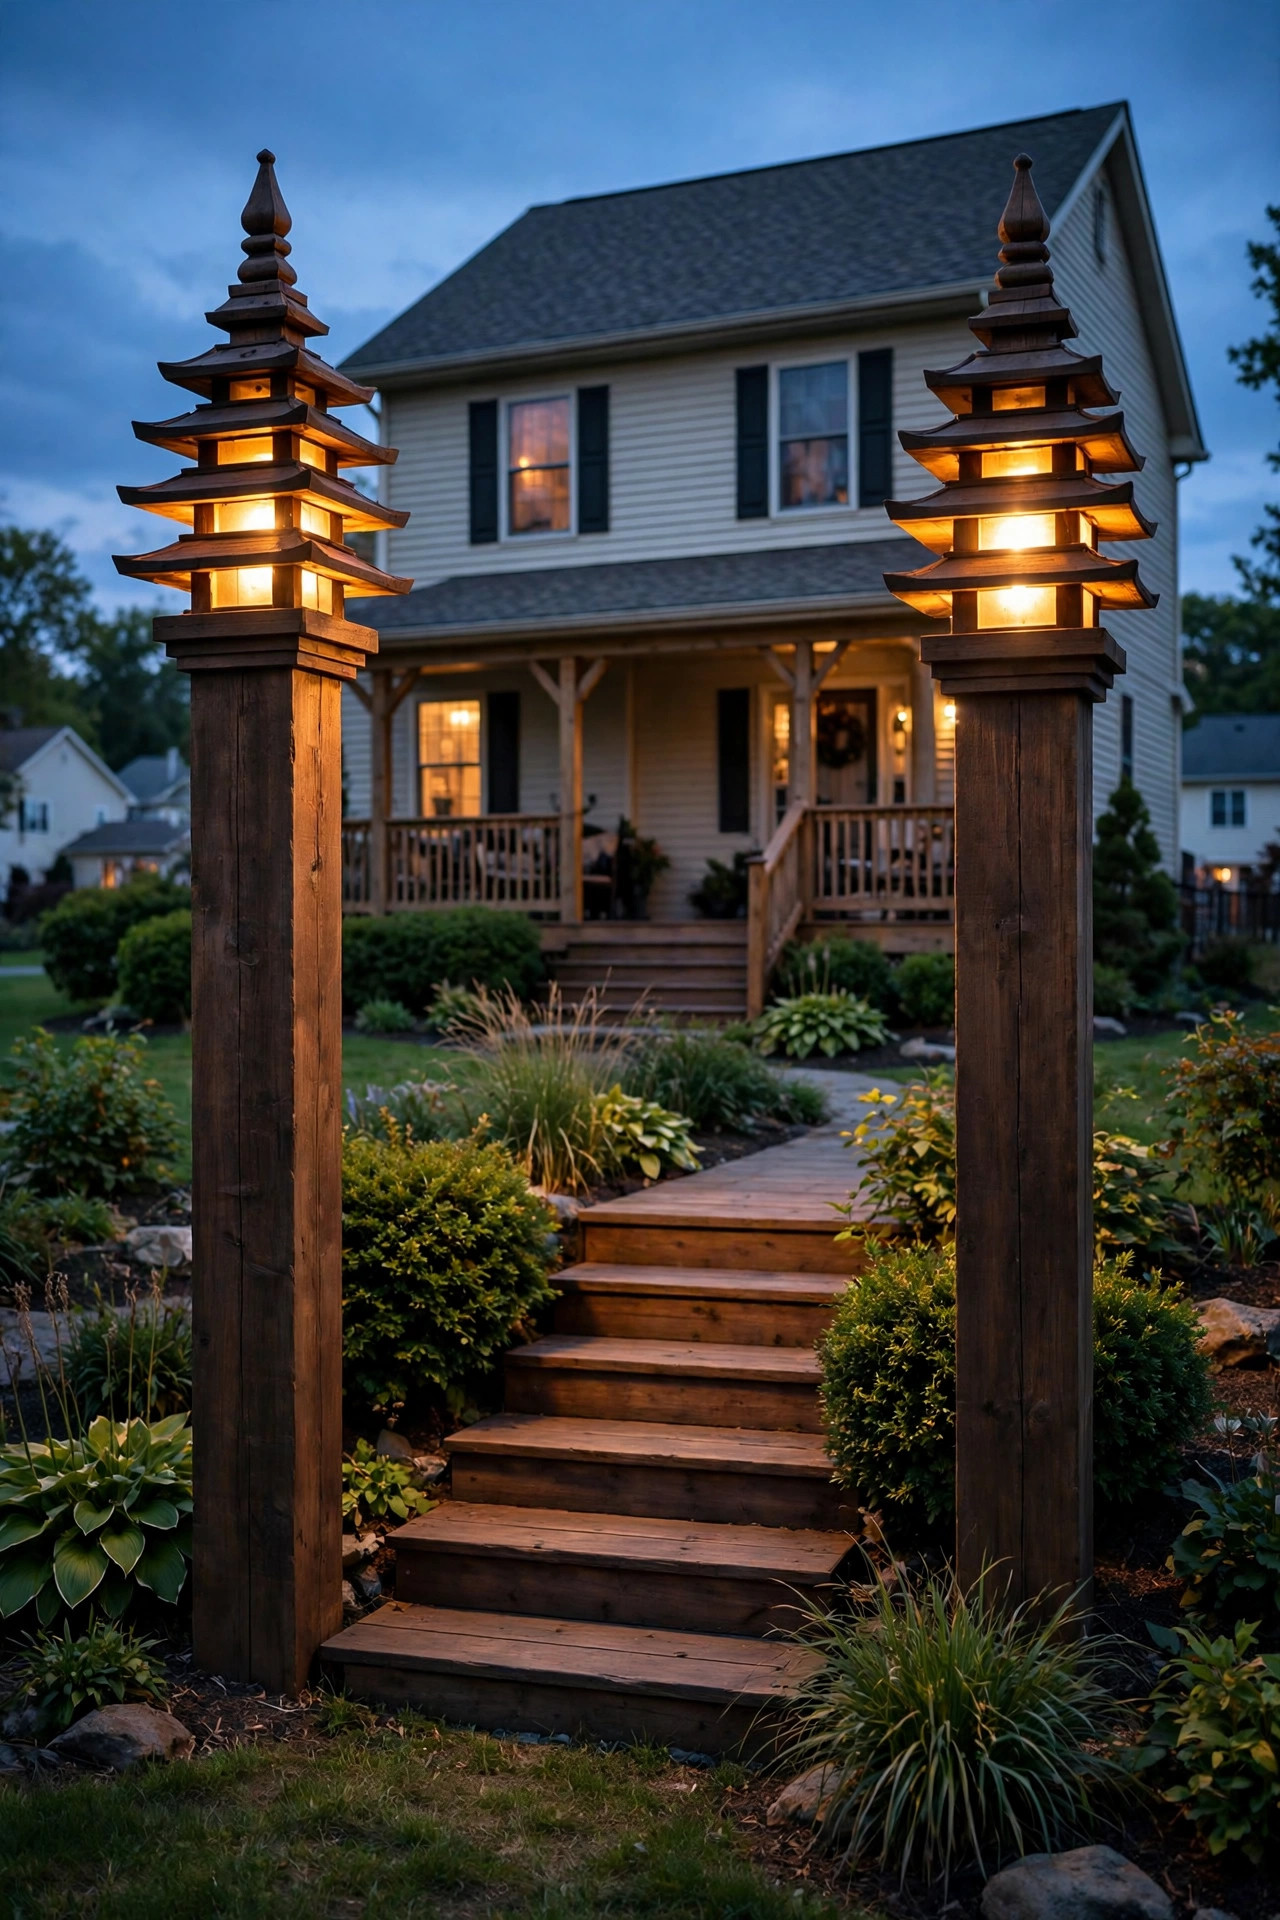
Every deck has hierarchy — and the posts flanking the steps up from the yard, or the gate into the deck, deserve a little extra ceremony. Taller pillar caps (think 8 to 12 inches, sometimes with a stacked or pagoda profile) mark the entrance the way gateposts mark a driveway. They say "come on up" in light. I always recommend sizing up at entries even when the rest of the railing wears standard caps; the contrast makes the entrance feel intentional and welcoming.
Because these are statement pieces, this is where I'd spend on materials: real copper, powder-coated aluminum, or a substantial lantern style rather than thin plastic. They'll be the first thing guests see up close, so the daytime look matters as much as the nighttime glow. If you go wired for the rest of the deck, wire these too — entry pillars with dead solar caps on a cloudy night is the one place a dark cap really shows. And keep them symmetric: matching pairs flanking the steps read as architecture; mismatched singles read as an accident.
One sizing note: entry posts are often beefier 6x6s (actually 5.5 by 5.5 inches), so measure before ordering — standard 4×4 caps will swim on them.
Suggested budget range: $80 – $260.
14. Frosted-Glass Deck Post Cap Lights
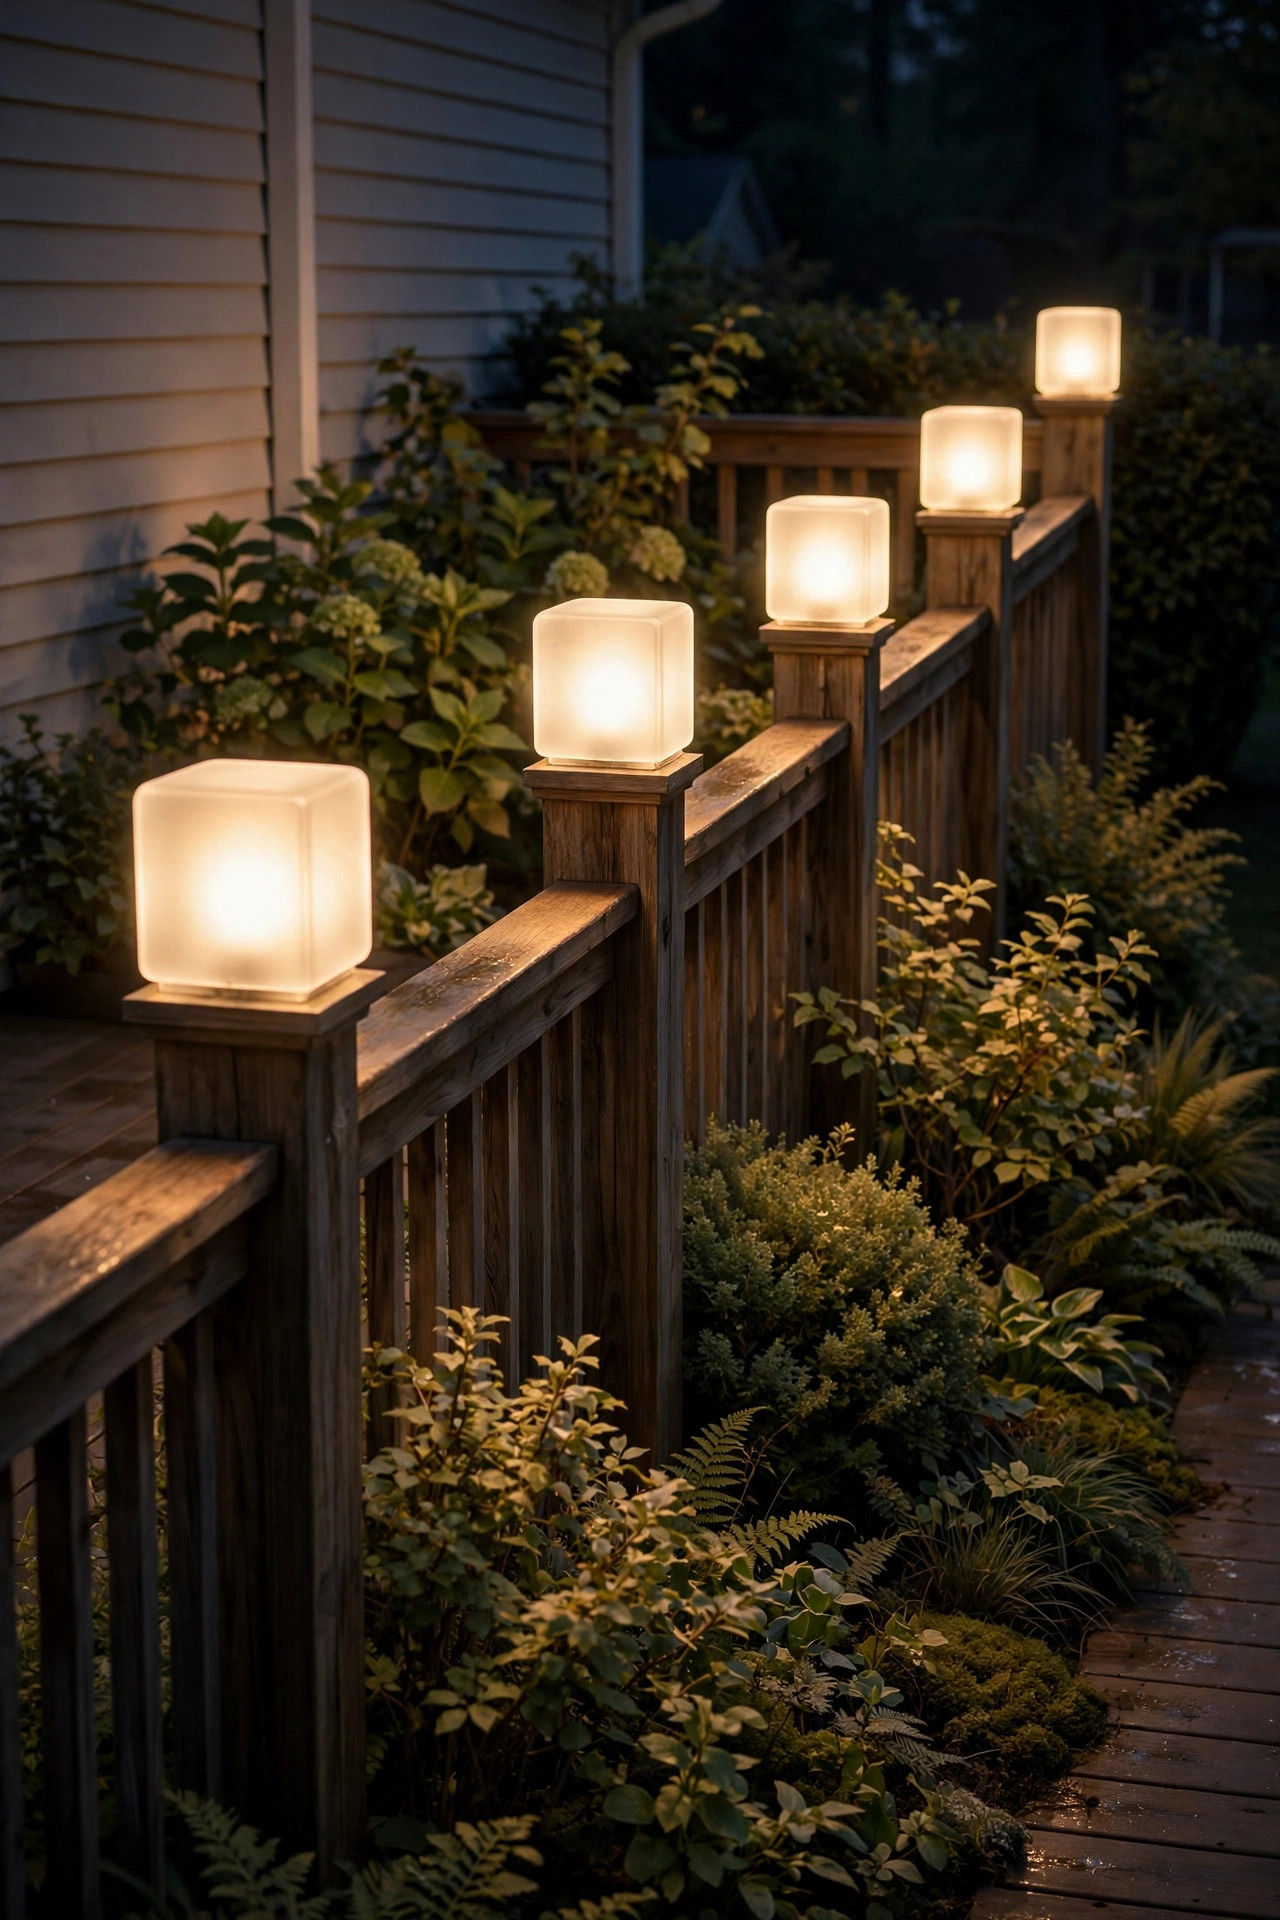
Here's a small detail that makes a big difference: bare LED dots create harsh little hotspots that your eye catches every time you glance at the railing. Frosted-glass deck post cap lights fix this with a diffusing glass or polycarbonate shade that spreads the LED's output into one soft, even glow — no dots, no glare, just a calm orb of warm light on each post. If you're sensitive to bright points of light (or you just want the most relaxing deck possible), this is your style.
The diffusion also flatters the surroundings: frosted caps throw a gentler wash onto nearby plants, furniture, and the house siding, which makes the whole scene feel cohesive. Look for real glass rather than frosted plastic if your budget allows — glass stays clear for years, while cheap plastic yellows and hazes in the sun. These come in solar and wired versions; either way, choose 2700K for maximum coziness. And give the glass a wipe when you clean the solar panels — fingerprints and grime dull the diffusion effect faster than you'd expect.
Pair frosted caps with frosted path or step lights elsewhere in the yard for a beautifully consistent glow.
Suggested budget range: $90 – $240.
15. Seasonally Dressed Caps (Wreaths, Greenery & Mini Lanterns)
My favorite December trick costs almost nothing: dress your post caps for the season. A small greenery ring or mini wreath slipped over each cap, a plaid bow wired to the post below it, a battery tea light tucked inside a lantern-style cap — suddenly your everyday deck lighting becomes holiday decor without buying a single new fixture. The caps you already love do double duty, and the warm glow shining through fresh cedar or pine boughs smells as good as it looks. Almost.
A few practical rules so this stays pretty instead of hazardous. Use LED only — never real candles — near or inside any cap, and keep dried materials like wheat bundles or faux leaves a few inches from the light source even with LEDs, since enclosed fixtures trap heat. For solar caps, remember that a wreath ring can shade the panel; either skip the ring on solar caps or use an open vine-style ring that lets light through to the panel. Secure everything with floral wire or zip ties rated for outdoor use — a wreath sliding down a post in a windstorm is funny exactly once.
Come January, strip the greenery and your caps are back to their everyday selves. Year-round fixtures, seasonal personality — that's smart decorating.
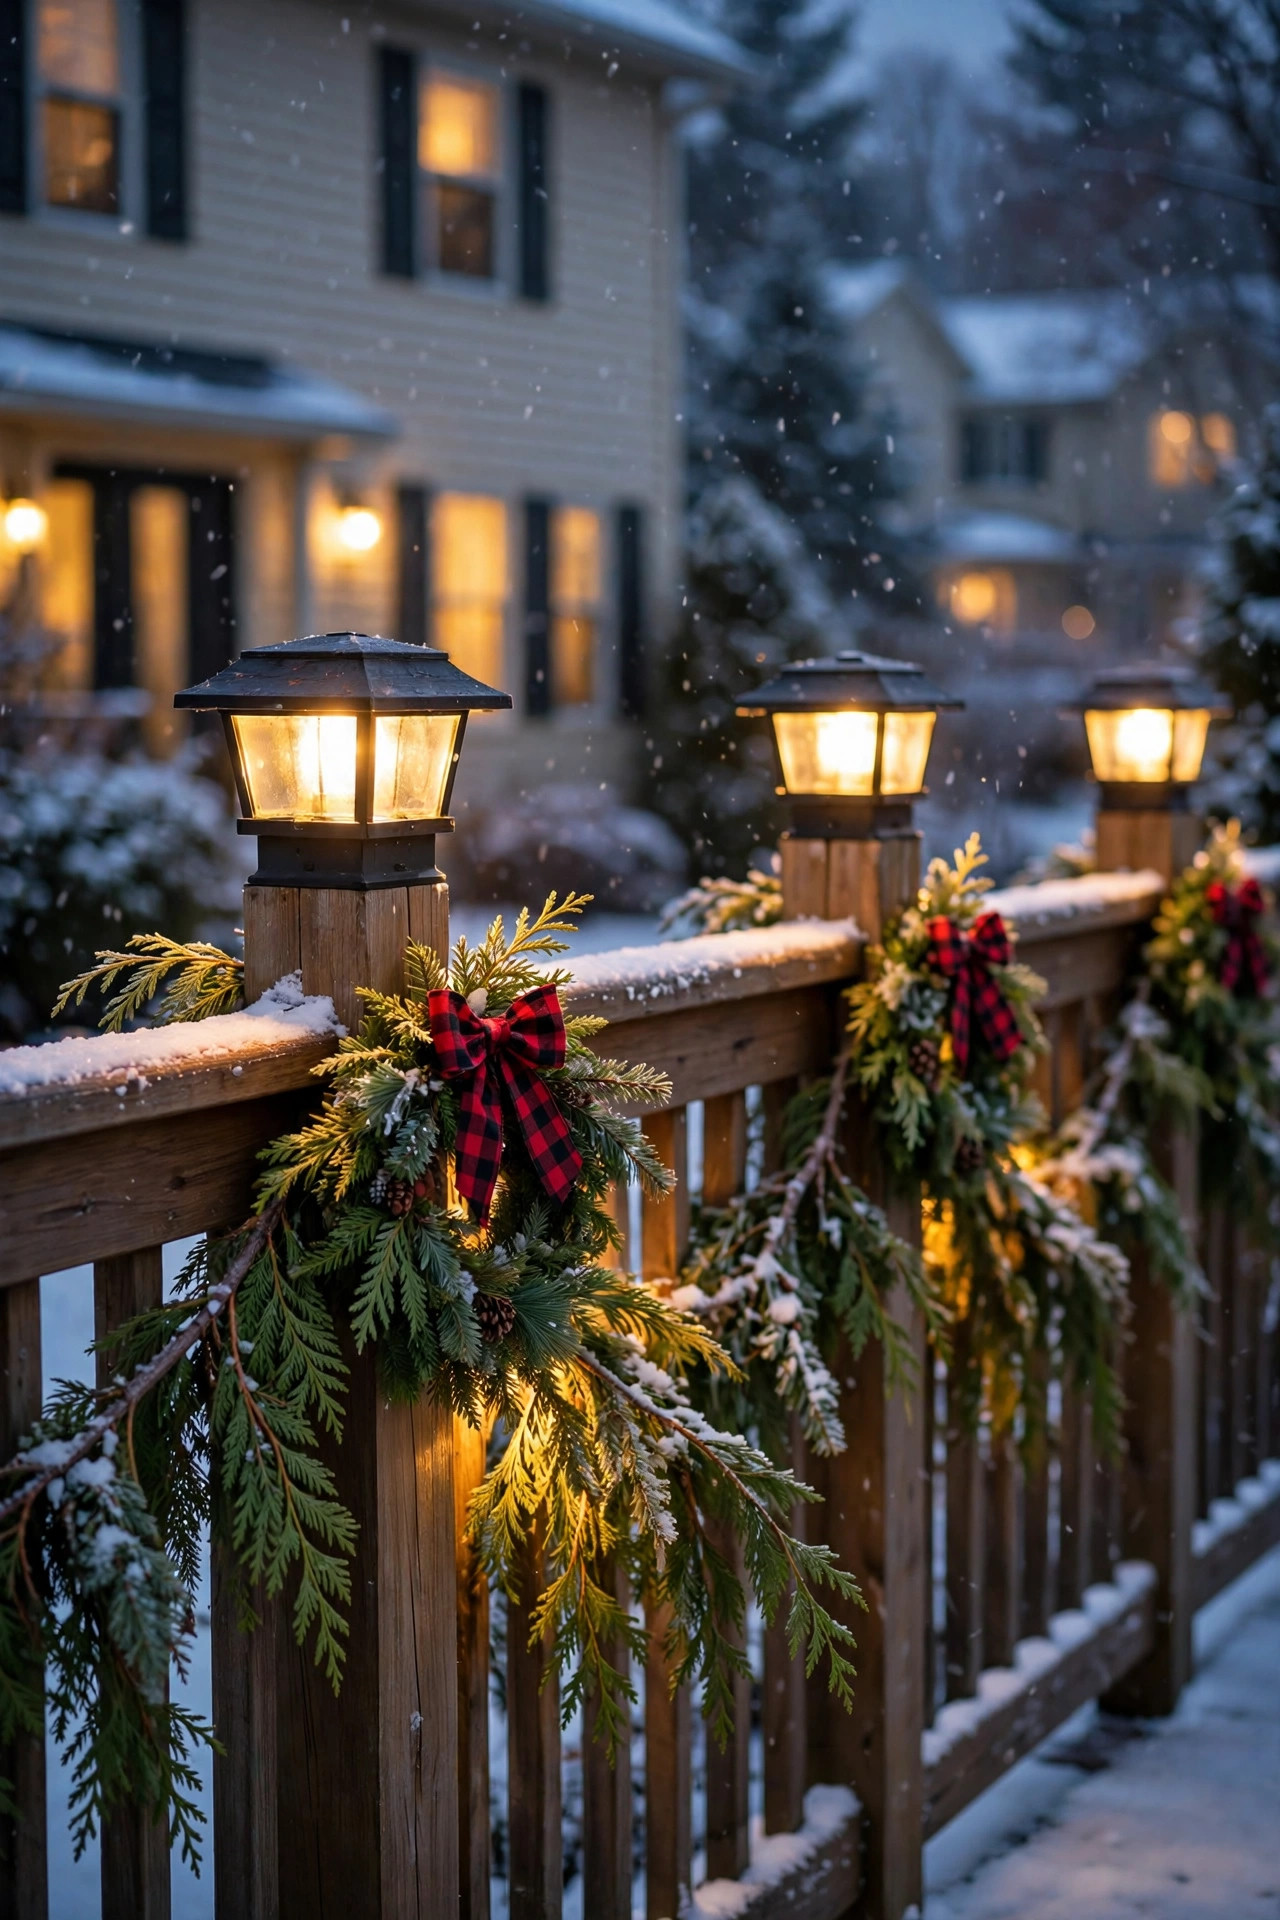
Suggested budget range: $20 – $60.
Frequently Asked Questions
How many deck post cap lights do I need?
Count your railing posts, then decide between every post or every other post. Every post gives the full lantern-row effect and the most light — best for decks you use nightly or with lots of stairs. Every other post cuts costs nearly in half and still traces the railing beautifully. Either way, always light both sides of every stair opening, gate, and level change for safety, even if it breaks your pattern.
Are solar or wired deck post cap lights better?
Solar caps win on ease — no wiring, no electrician, install in an afternoon — and they're perfect for sunny decks and tight budgets. Wired low-voltage caps win on brightness and consistency, glowing strong all night even after a week of clouds. If your deck sits in shade or you entertain outdoors most nights, go wired. If your railing gets 6-plus hours of direct sun and you want the simplest project possible, solar is honestly great.
What color temperature is best for deck post cap lights?
Stick with warm white: 2700K to 3000K. It's the range that flatters wood, skin tones, and food — everything you actually do on a deck. Cool white (4000K and up) makes wood look gray and sterile, and it attracts more insects on summer nights. Match the temperature across all your deck lighting (caps, strips, step lights) so the glow feels like one scene instead of a patchwork.
Will post cap lights fit my posts?
Most caps are sized for standard nominal posts: 4×4 (actually 3.5 by 3.5 inches), 5×5, and 6×6 (actually 5.5 by 5.5 inches). Measure the true dimensions of your post tops with a tape measure before ordering — a cap that's even a quarter-inch too small won't seat, and one that's too big will wobble in wind. Many caps include adapter rings for slightly smaller posts, and some styles screw down through pre-drilled holes for extra security in windy spots.
Conclusion
If there's one principle behind all 15 of these ideas, it's this: deck post cap lights work because they finish what your railing started. They trace the frame of your outdoor room, mark the edges that matter after dark, and turn a structure into a place — the place everyone drifts toward when the sun goes down. Start with the style that fits your deck and your budget, keep everything warm white and weather-rated, and let the layering do the rest.
Ready to keep going? Browse our lighting ideas for the rest of the yard — path lights, string lights, and landscape glow that pairs beautifully with a freshly capped railing. Your deck's best evenings are ahead of it.