There is a moment, right at dusk, when a circular driveway either looks like a small parking lot or like the front court of a boutique hotel — and honestly? The difference is almost always the lighting. Circular driveway lighting ideas are my favorite kind of project because the shape does half the design work for you: a circle begs for rings, layers, and one beautiful glowing center. In my experience, the secret is layering. You want a soft wash of light low to the ground, a mid-height ring that guides both tires and eyes around the loop, and one taller feature that gives the whole court a focal point. Get those three layers working together and even plain asphalt feels grand. Below are the 17 ideas I recommend most, from a $40 weekend solar refresh to full low-voltage rings, with an honest budget range on every one. If you are starting from a straight drive, my guide to driveway lighting ideas covers the basics — this post is all about making the circle sing.
1. Uplight the Center Island Tree
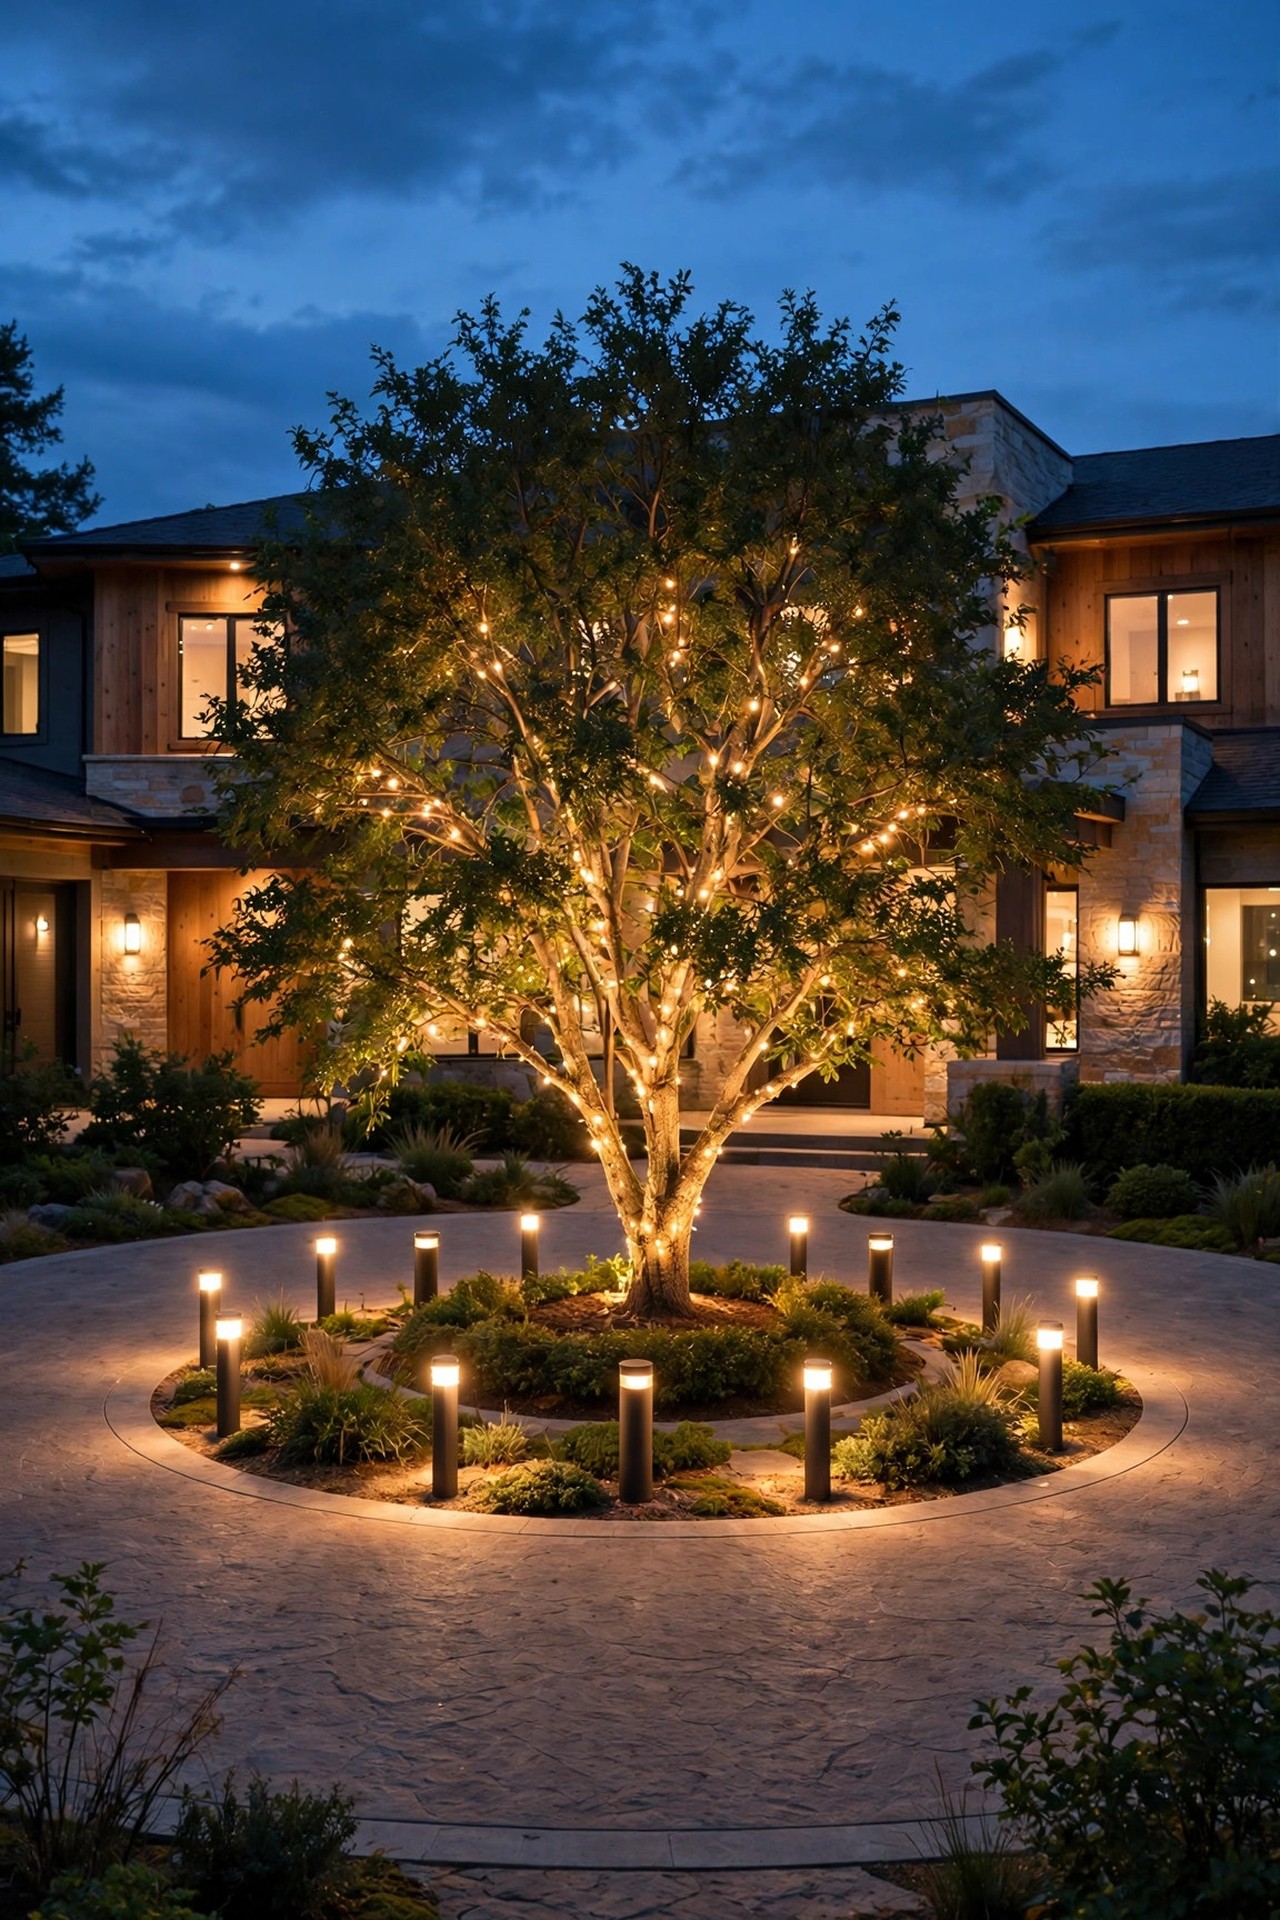
If your island has a tree — or room to plant one — this is the single highest-impact move you can make. I place two or three LED uplights in the mulch ring at the base of the trunk, angled up into the canopy at roughly a 36-degree beam spread, in a warm 2700K. The trunk becomes a sculptural column of light and the canopy glows like a soft lampshade over the whole court. Position the fixtures on the sides facing away from approaching drivers so nobody stares straight into a lens, and bury the cable a few inches under the mulch. A small ornamental tree — a crape myrtle, Japanese maple, or serviceberry — works beautifully at this scale. No tree yet? A cluster of three large shrubs uplighted the same way gives you about eighty percent of the effect this season.
Suggested budget range: $60 – $180.

2. Ring the Outer Edge With Low Bollard Lights
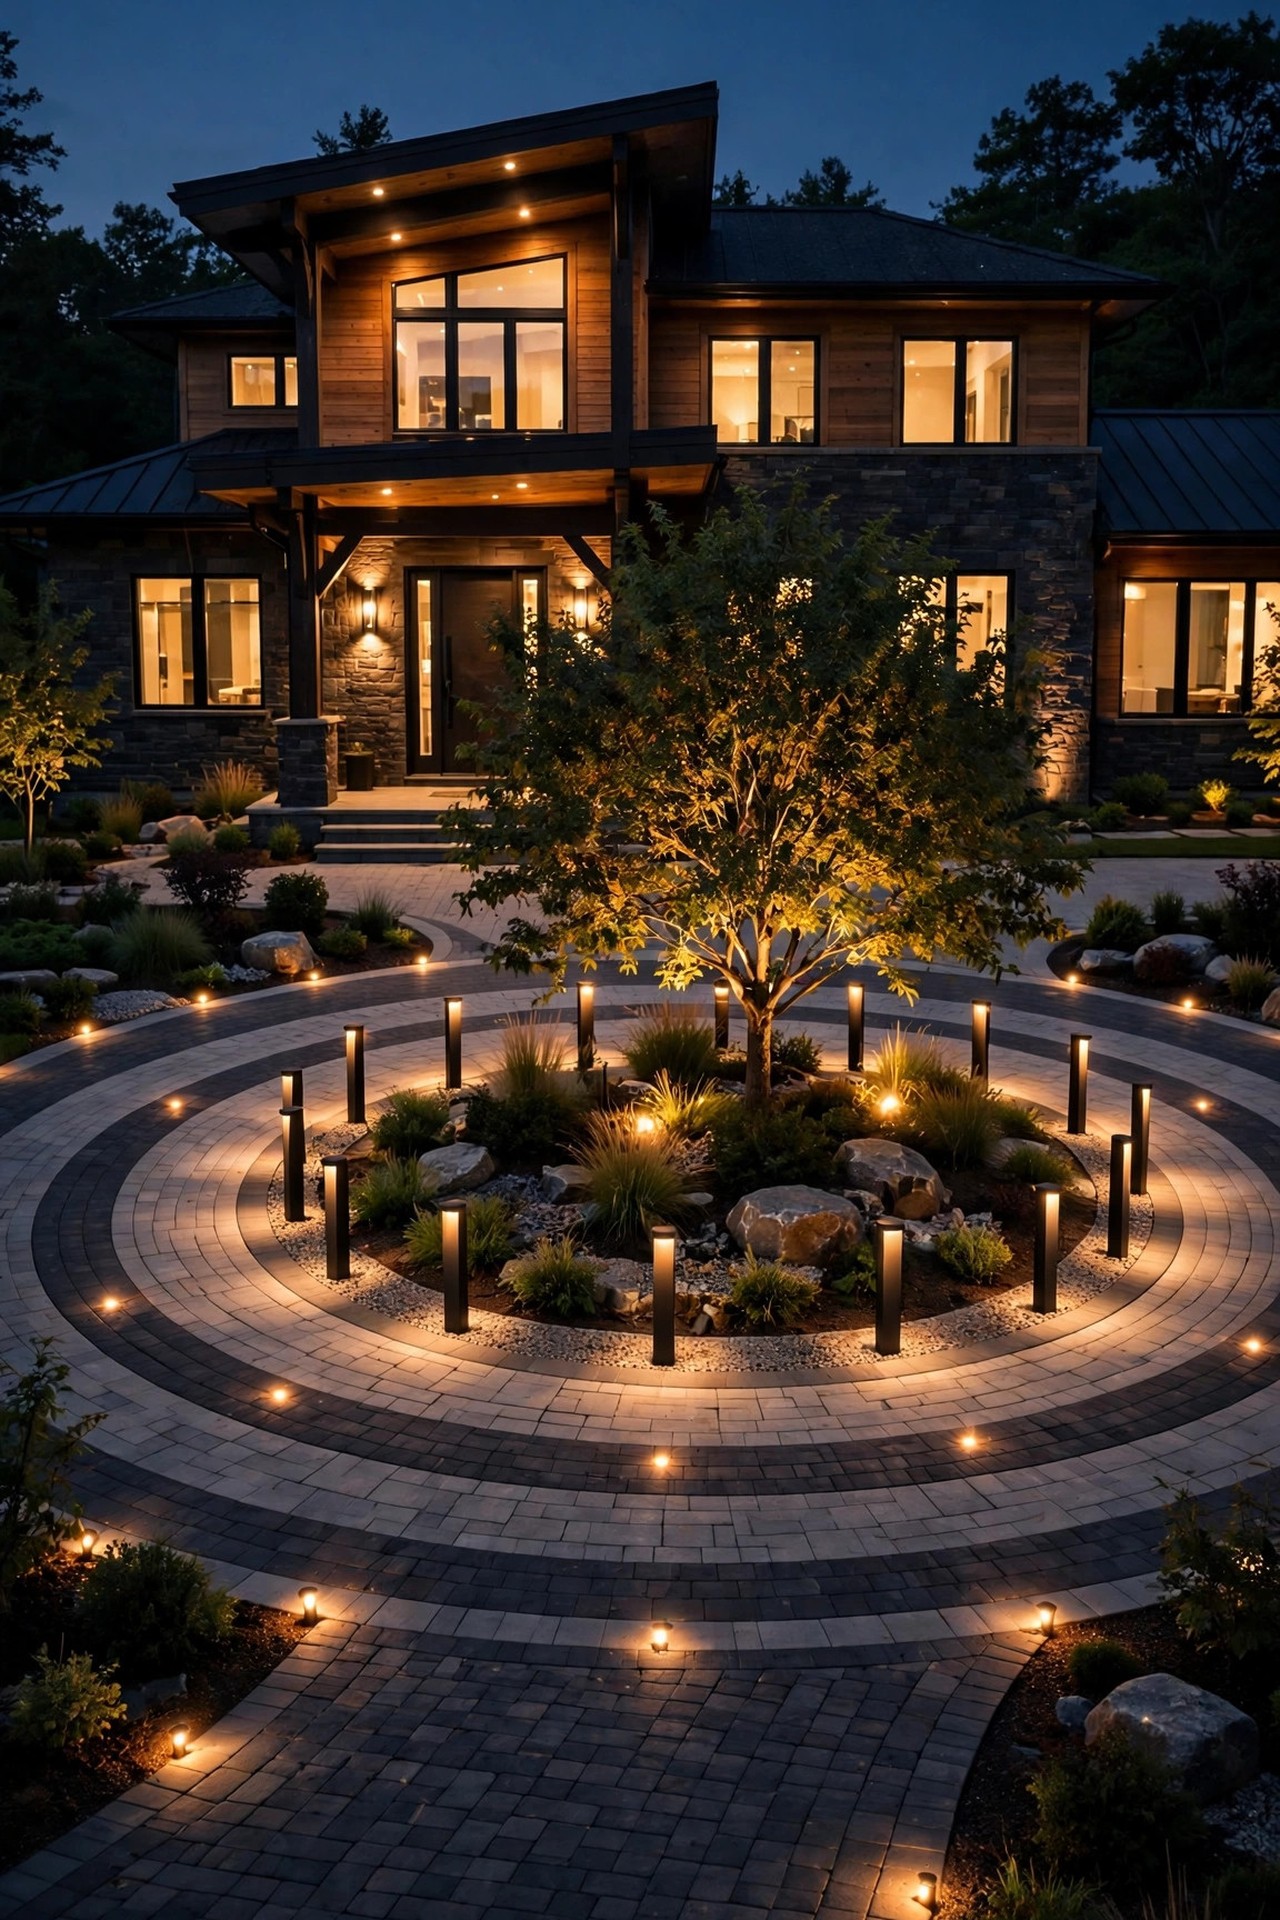
Bollards are the workhorses of circular driveway lighting: they mark the driving edge, keep guests off the lawn, and draw that satisfying glowing ring you can see from the street. I like short, louvered bollards, 18 to 24 inches tall, spaced every 10 to 14 feet around the outside of the loop. The louvers push light down onto the pavement instead of into drivers' eyes, which matters a lot on a curve where headlights are already sweeping around. Low-voltage wired bollards are my honest recommendation here — solar versions rarely stay bright enough through a winter evening to read as a true ring. Keep the spacing even all the way around; a circle shows every irregularity. If you want the full sizing and spacing breakdown, my driveway bollard lights guide walks through it fixture by fixture.
Suggested budget range: $250 – $700.
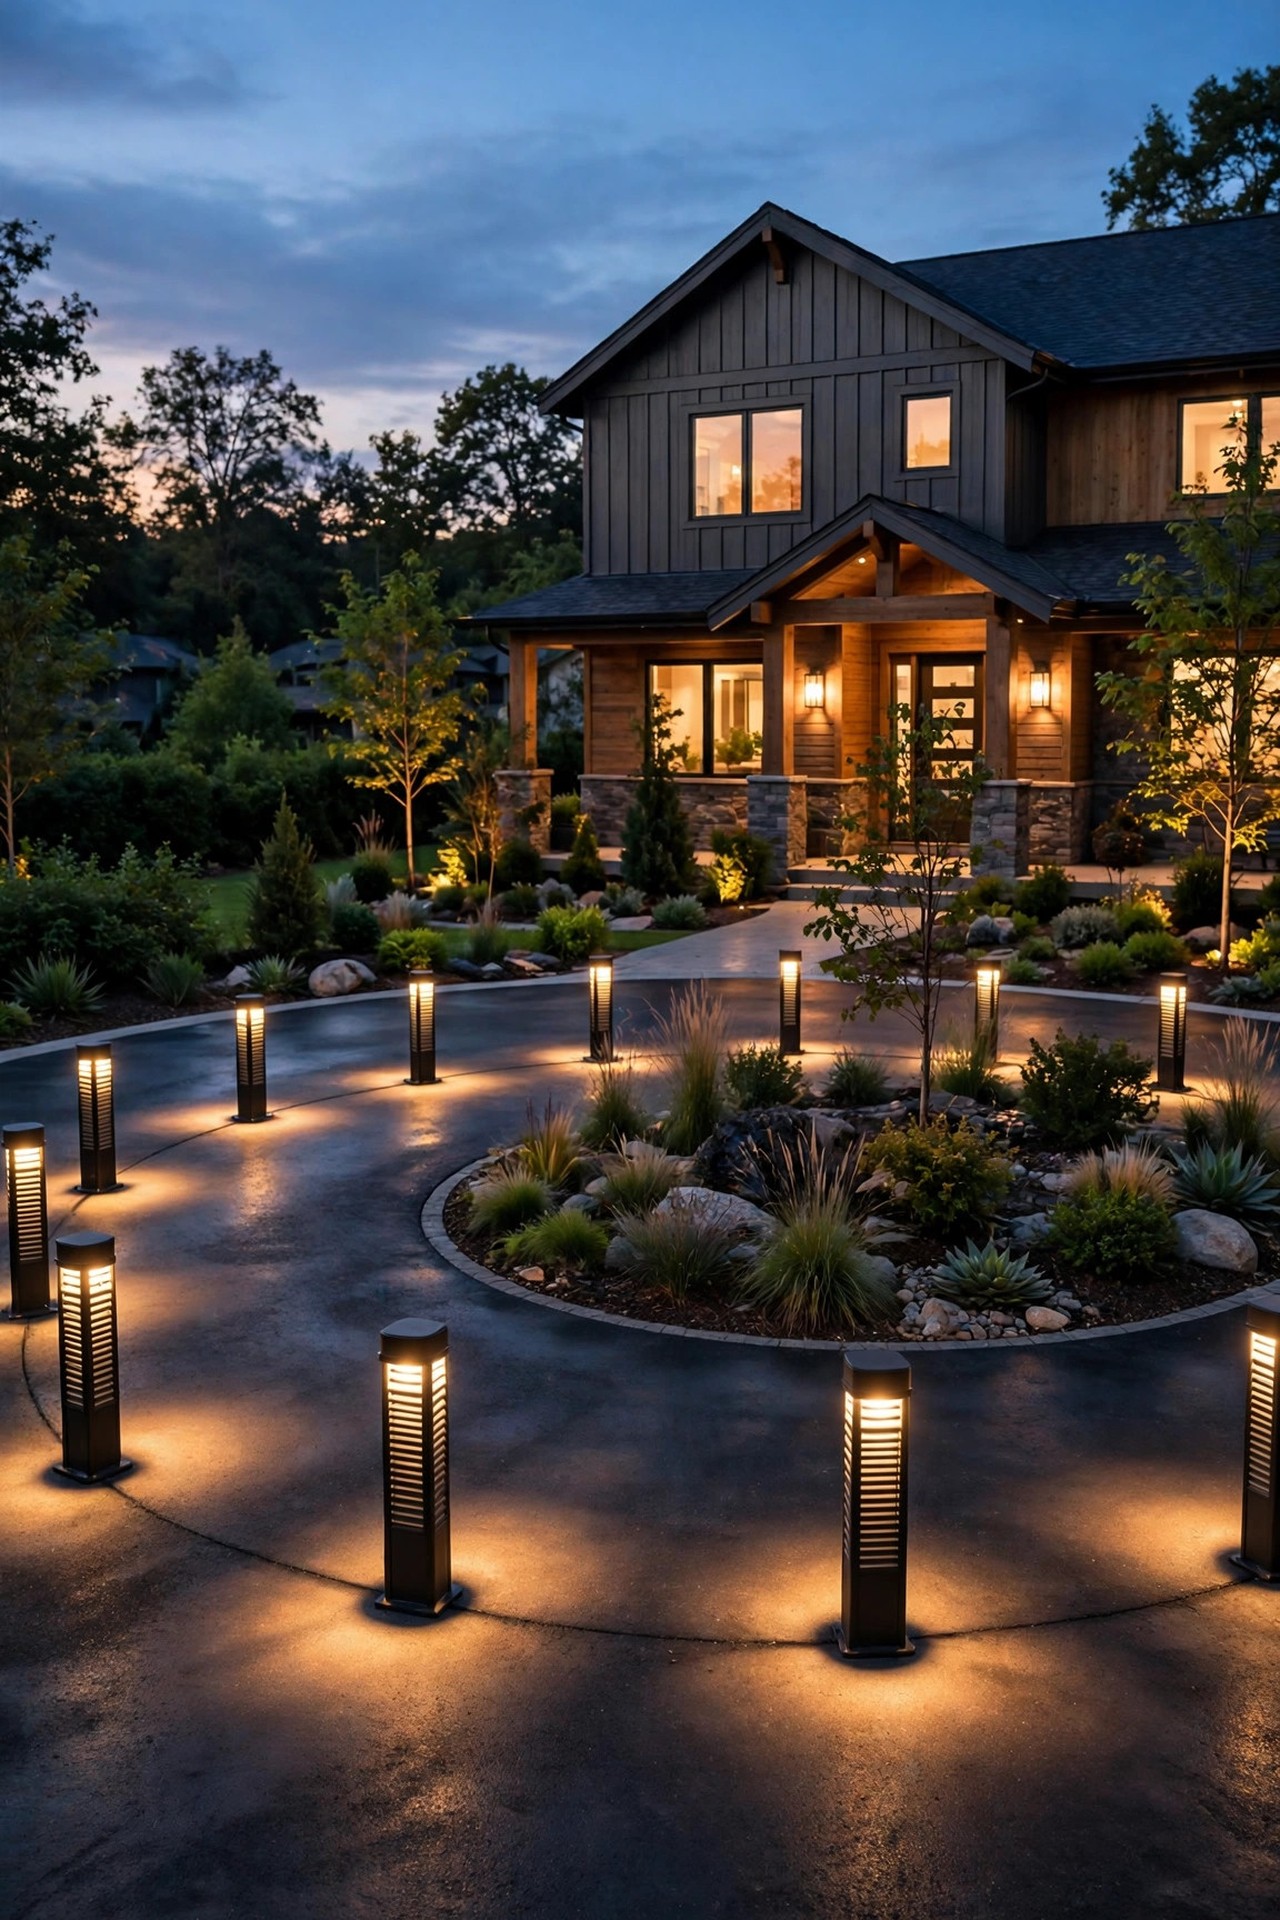
3. Trace the Inner Circle With In-Ground Marker Lights
The island edge is where guests misjudge the turn, especially backing out at night, so I almost always add a ring of flush in-ground marker lights right along the inner curb. These little puck-style well lights sit level with the pavement or the bed edge, spaced 6 to 8 feet apart, and they read as a dotted line of warm light that says "the island is here" without any glare. Choose fixtures with a frosted or recessed lens so the light grazes sideways rather than shining up into eyes. Because they sit at the bed's edge and not in the driving surface, standard landscape well lights are fine — just seat them in a gravel pocket for drainage and leave a little slack in the wire for frost heave. On a 40-foot court, expect to use eight to ten of them.
Suggested budget range: $120 – $350.

4. Make a Lit Fountain the Glowing Centerpiece
A circular court's center island is practically begging for a fountain, and a lit fountain at night is pure arrival drama. My approach is simple: a warm-white submersible LED ring or a pair of small underwater spotlights aimed up into the falling water, so the whole cascade sparkles. Stick to low-voltage fixtures anywhere near water, plug into a GFCI outlet, and put the pump and lights on a timer so everything shuts off by midnight. In my experience, 2700K to 3000K looks far better than the icy blue some fountain kits default to — warm light makes the water look like liquid gold against a dark island bed. Add a couple of uplights in the planting around the base so the fountain doesn't float in a black hole, and remember to pull submersible fixtures for a quick lens wipe every month or two; algae film dims them fast.
Suggested budget range: $200 – $900.
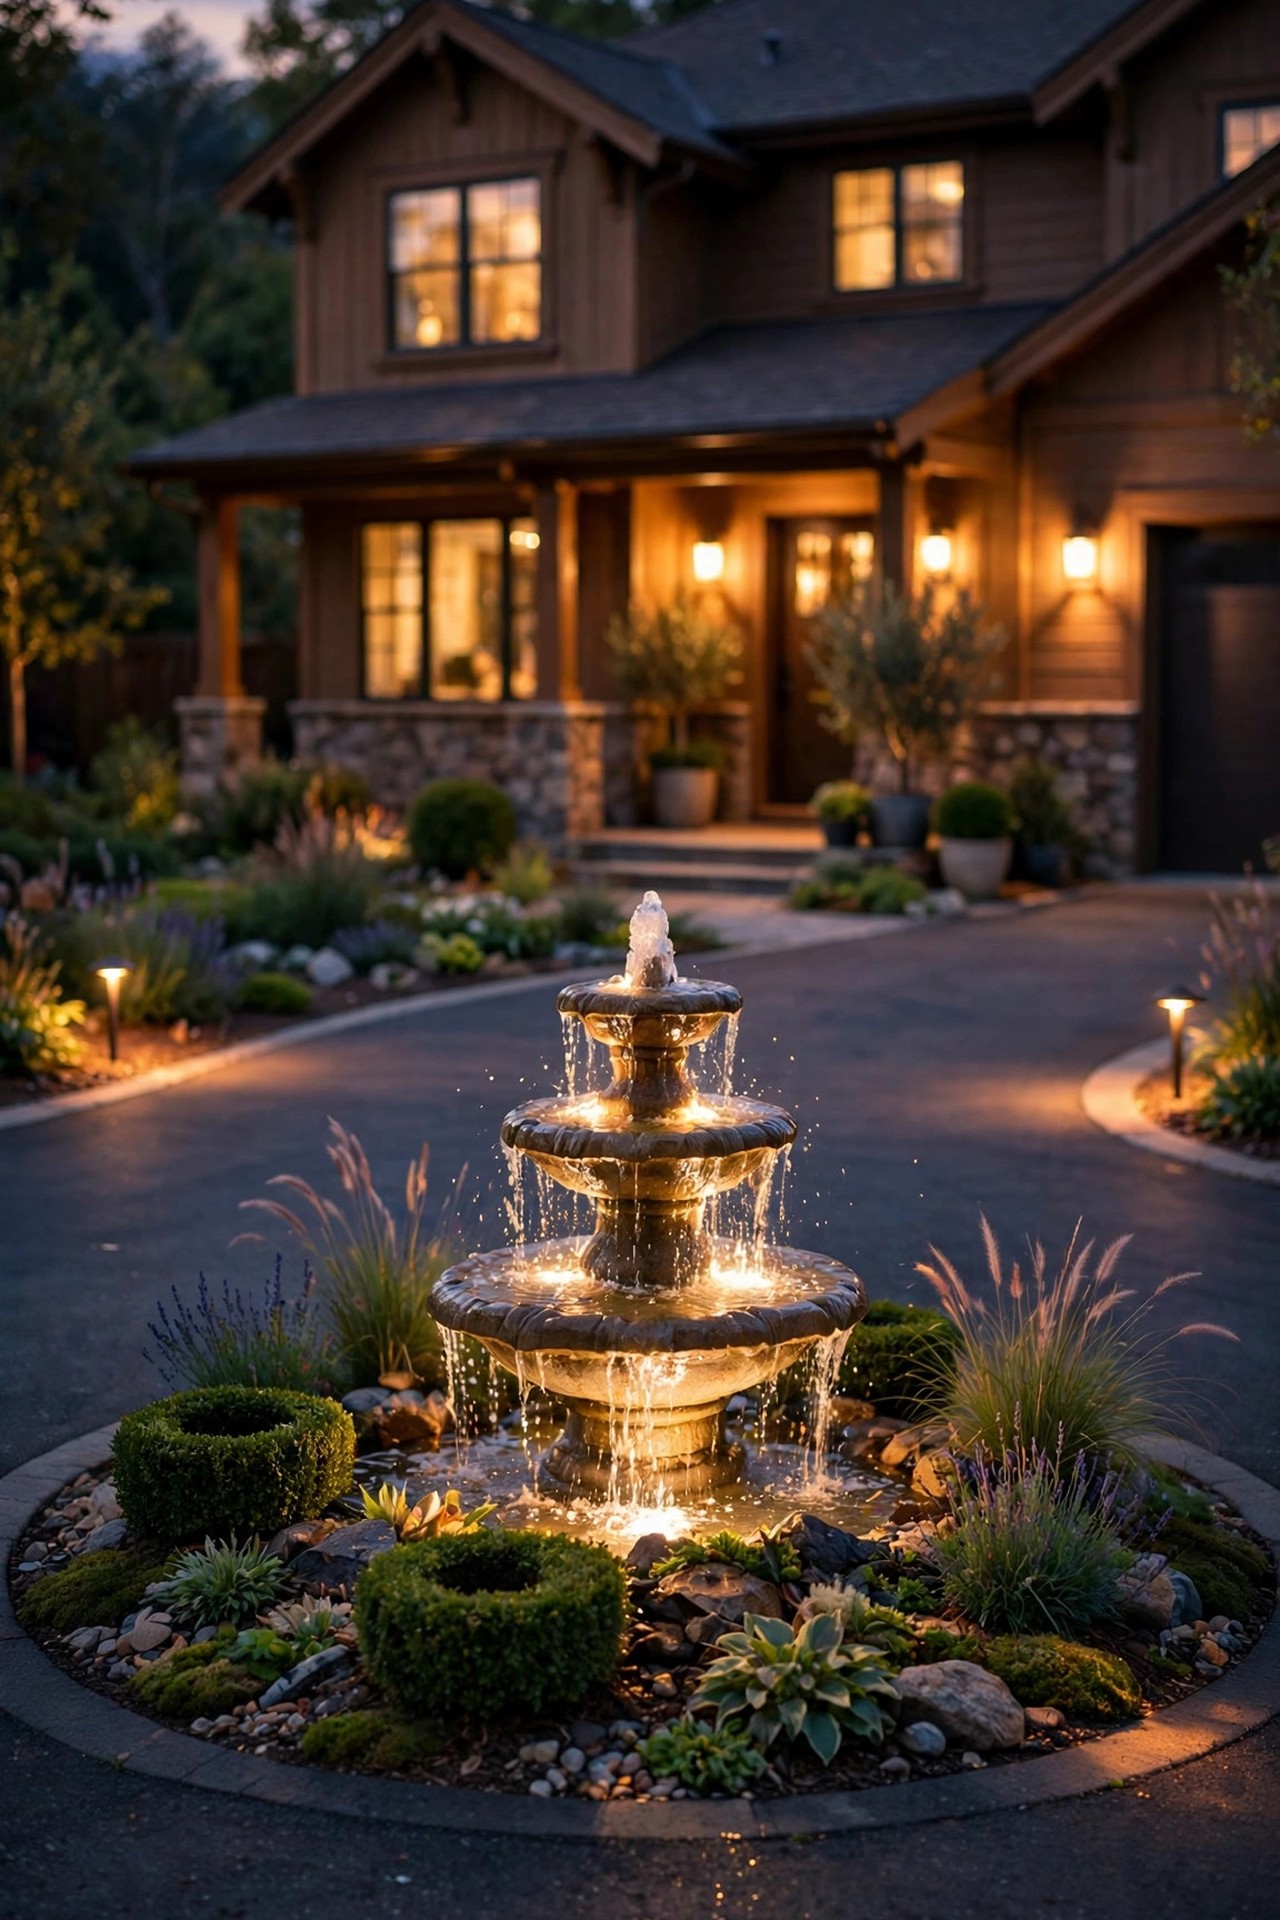
5. Add Stone Pillars With Lantern Caps at Both Entries
A motor court has two natural gateways — where the drive enters the circle and where it straightens out toward the garage or street — and a pair of low stone or brick pillars at each one frames the whole arrival. I keep pillars modest, around 3 to 4 feet tall, topped with a lantern-style cap light running an LED filament bulb at 2700K. The glow sits high enough to be seen over a car's hood but low enough to feel welcoming rather than institutional. Hardwiring is cleanest since these are permanent masonry, though good solar cap lights exist if trenching to the entry is out of the question. Match the stone or brick to your home's foundation so the pillars look original to the house, and plant something soft — lavender, ornamental grass — at each base to take the hard edge off.
Suggested budget range: $400 – $1,200.

6. Tuck Solar Stakes Through the Island Planting Bed
This is the friendliest budget refresh on the list, and I recommend it to anyone whose island already has good bones: a ring of warm-white solar stake lights tucked through the island's planting bed, spaced 2 to 3 feet apart among the shrubs and perennials. They charge all day, come on at dusk, and turn the whole island into a soft constellation that echoes the circle's shape. Honesty time: solar stakes are accent light, not driving light — they won't replace bollards for edge definition, and cheaper sets fade by 10 p.m. in winter. Buy the brightest warm-white stakes you can, with replaceable batteries, and expect to swap tired batteries every year or two. The charm-per-dollar here is unbeatable, though. On my own island I mix them between boxwoods so the light seems to come from inside the planting rather than from a row of hardware.
Suggested budget range: $40 – $120.
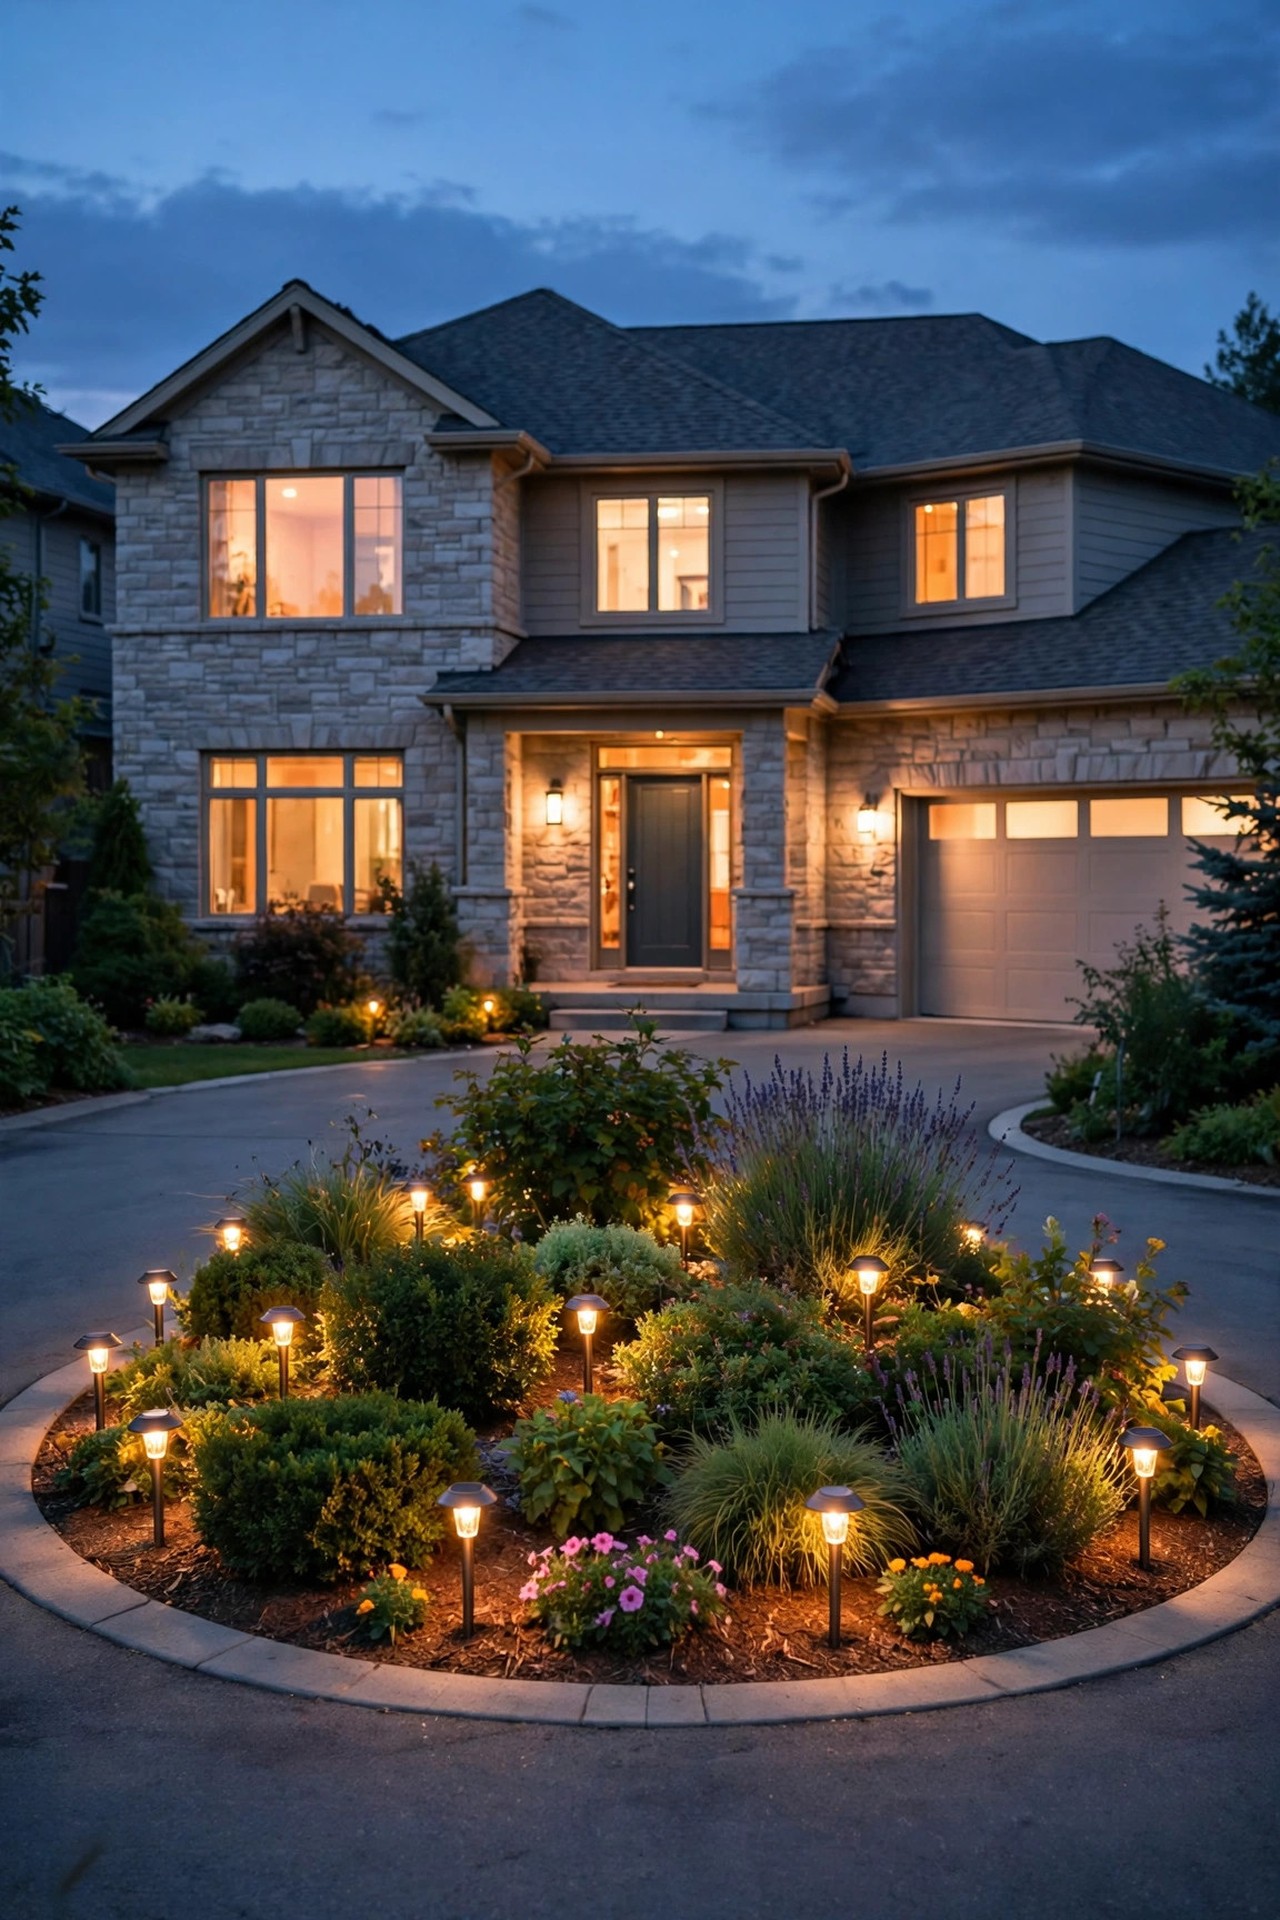
7. Wash the Front Facade From the Island
Here's a trick I borrowed from estate lighting: put two to four spotlights in the island, aimed back at the house, and let your home itself become the backdrop of the court. A gentle wall wash across brick or stone picks up all that texture, and the reflected glow bounces softly back onto the driveway, so the whole space feels lit without a single visible bright fixture near the drive. Use wide-beam floods rather than narrow spots, keep them a good 10 to 15 feet off the wall for an even wash, and angle carefully so no beam spills through a front window. Warm 2700K flatters brick, stone, and painted siding alike. This is also the layer that makes the house look occupied and cared-for from the street — wonderful for both welcome and security. It is a forgiving technique, too: a soft, even wash hides a multitude of siding sins.
Suggested budget range: $90 – $260.

8. Set Step Lights Into a Low Island Retaining Wall
Many circular-drive islands are ringed by a low retaining wall, 12 to 18 inches of stone or block — and that cap edge is perfect real estate for hardscape step lights. These slim fixtures tuck right under the capstone and wash a ribbon of light down the wall face and across the bed edge, spelling out the island's curve better than almost anything else on this list. I space them every 4 to 6 feet and wire them on the same zone as the marker lights so the whole inner ring comes on together. Choose lights with the LED tucked up under a lip so you see the glow, never the diode. If you're building the wall anyway, have the wire run behind the block as it goes up — retrofitting means pulling capstones, which is doable but fiddly. The finished look is tailored and architectural, like the driveway equivalent of a string of pearls.
Suggested budget range: $150 – $450.
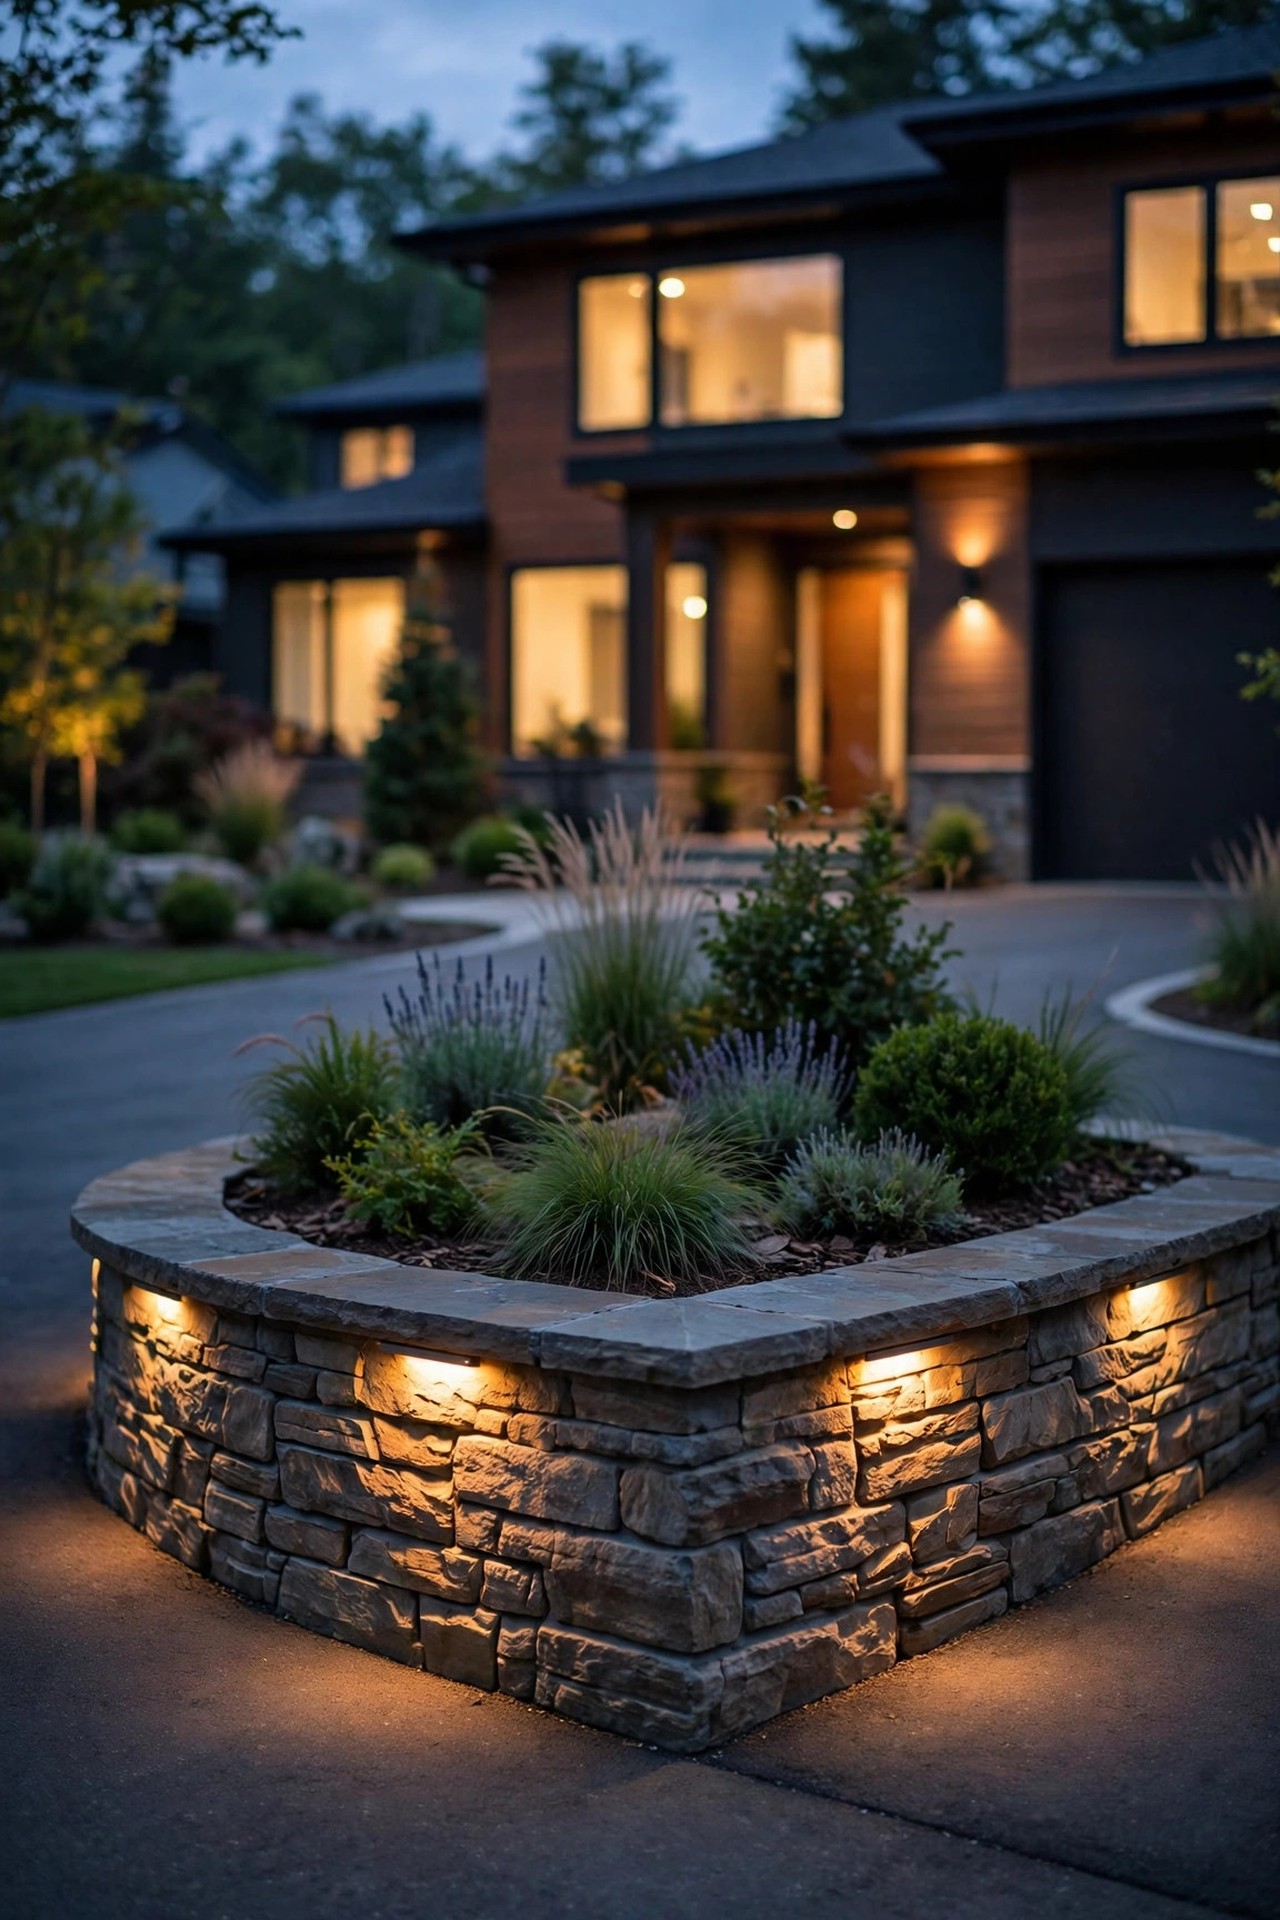
9. Run Path Lights From the Court to the Front Door
Guests park in the court, then walk — so give them a lit path from the driveway's edge to your front door instead of letting them shuffle across dark lawn. A short run of four to six path lights, spaced 6 to 8 feet apart and staggered slightly rather than lined up like a runway, connects the circle to the entry and makes the whole front of the house feel composed. Match the finish and color temperature to your bollards so the two systems read as one design; I use the same 2700K everywhere out front, always. Keep fixtures 12 to 18 inches tall so the light pools at foot level, and place them on the house side of the walk so they don't get clipped by car doors swinging open. This is also the kindest layer for older guests and anyone carrying a casserole in both hands.
Suggested budget range: $100 – $300.
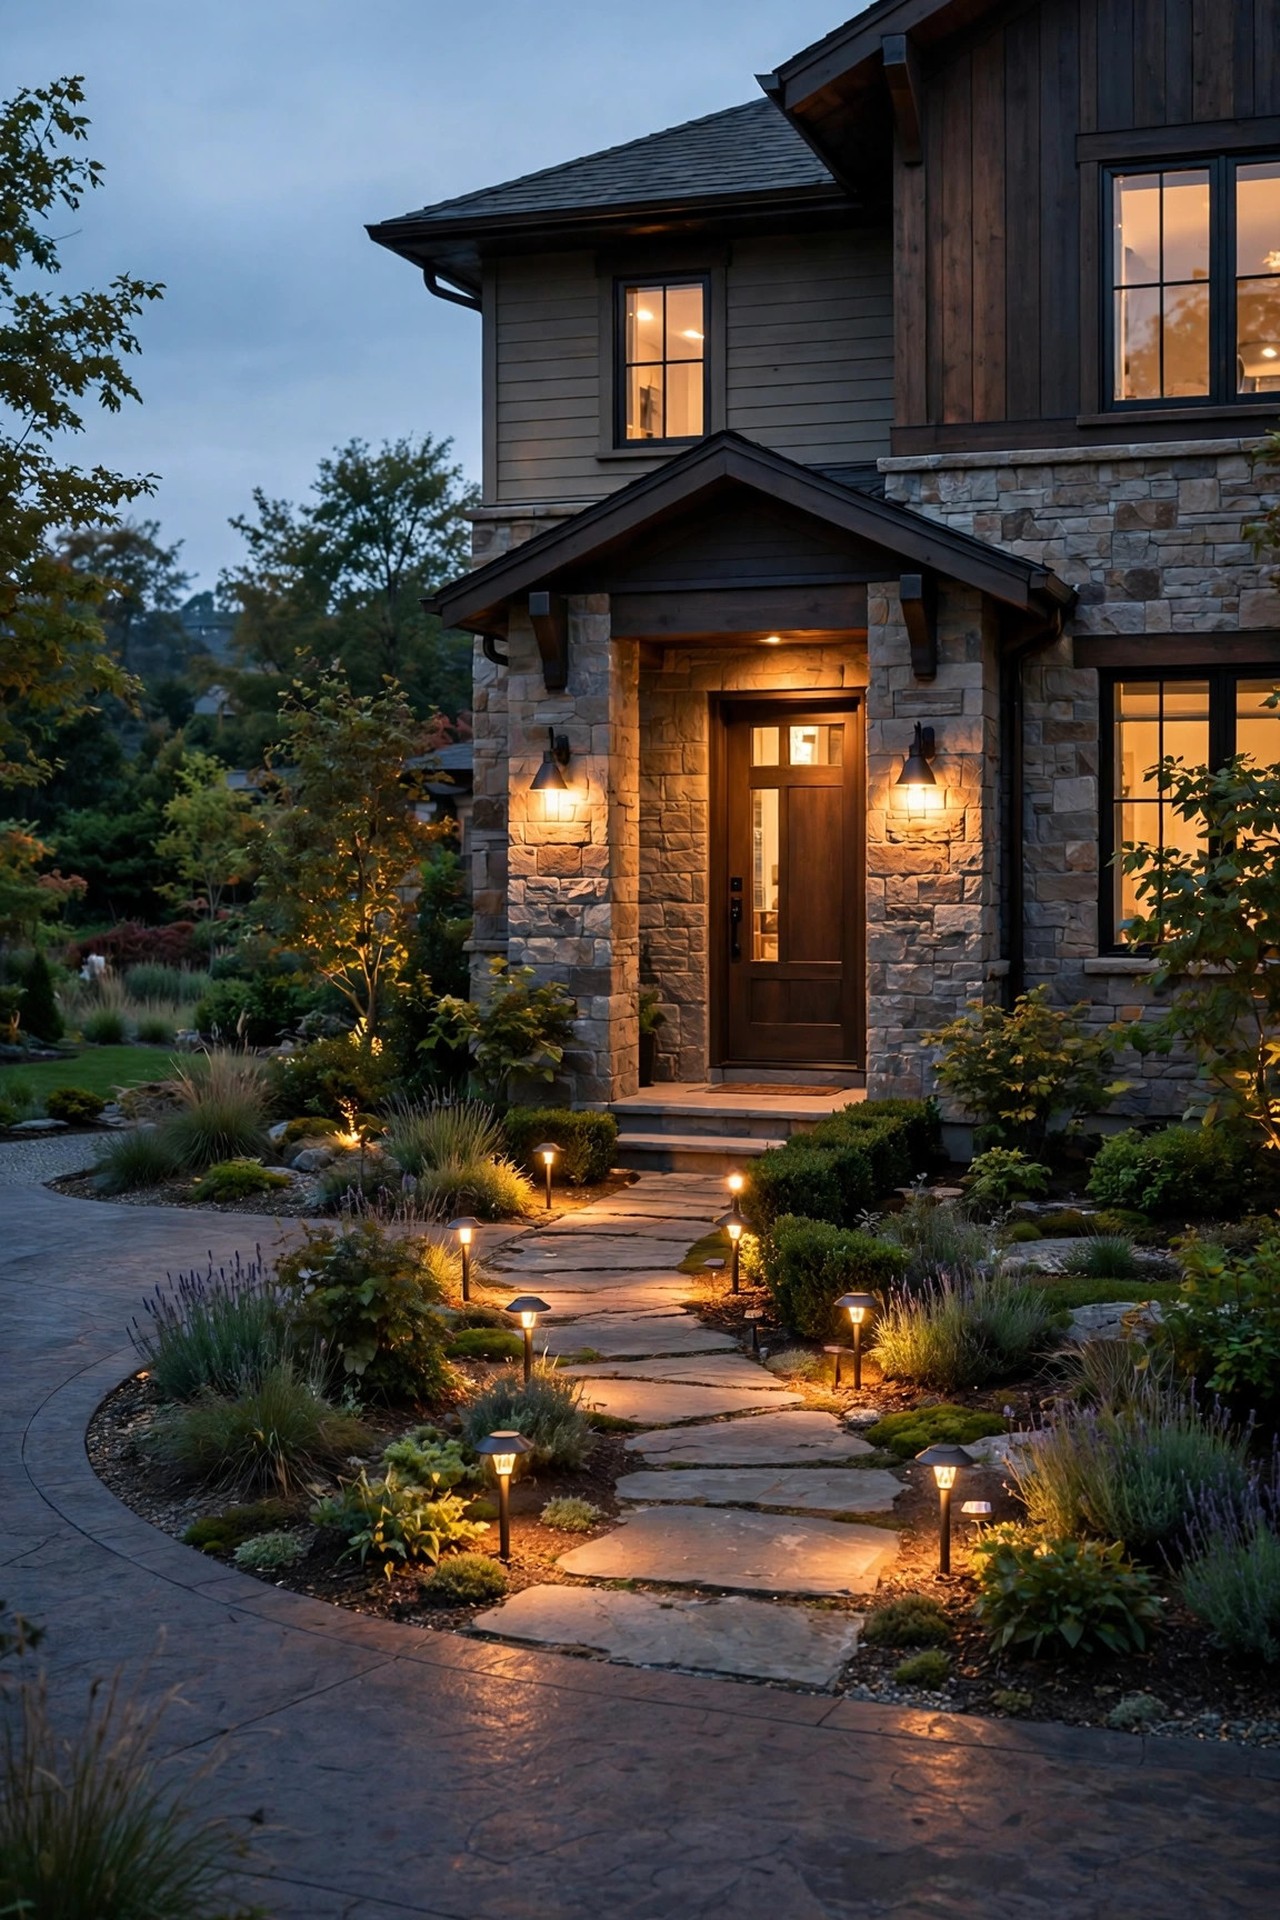
10. Moonlight Down From High in the Island Tree
Moonlighting is the most magical technique I know: a shielded fixture mounted 15 to 20 feet up in the island tree, aimed down through the branches so dappled light and leaf shadows spill across the driveway like real moonlight. It lights the whole center of the court with zero glare, because the source is hidden in the canopy, and cars pass under a soft lace of light. I use a slightly neutral 3000K here — it reads more "moonlit" than amber — with a honeycomb louver to kill any stray sparkle. This one is worth hiring out: mounting at height, aiming through branches, and running wire neatly up a trunk is arborist-and-electrician territory, and the tree needs a gentle pruning plan so growth doesn't swallow the fixture. Have the installer use stainless hardware and leave slack for the trunk to grow.
Suggested budget range: $180 – $500.

11. Add Drive-Over Rated Lights Where the Court Meets the Street
The throat of the court — where the circular drive opens to the street or meets the garage apron — is where guests hesitate on a dark night. Flush in-ground lights rated for vehicle weight solve it elegantly: set two or three into the pavement edge on each side of the opening and drivers get a clear, glowing gateway. The key word is rated — these must be proper drive-over fixtures with heavy cast housings and thick tempered lenses, installed in concrete or solid paver beds with drainage underneath, because a standard landscape well light will crack under a tire. Wired low-voltage or line-voltage both work; I lean low-voltage for DIY-friendliness everywhere except the fixture bodies themselves, which should be pro-grade. The effect is subtle in the best way: no visible hardware by day, a welcoming lit threshold by night.
Suggested budget range: $300 – $800.

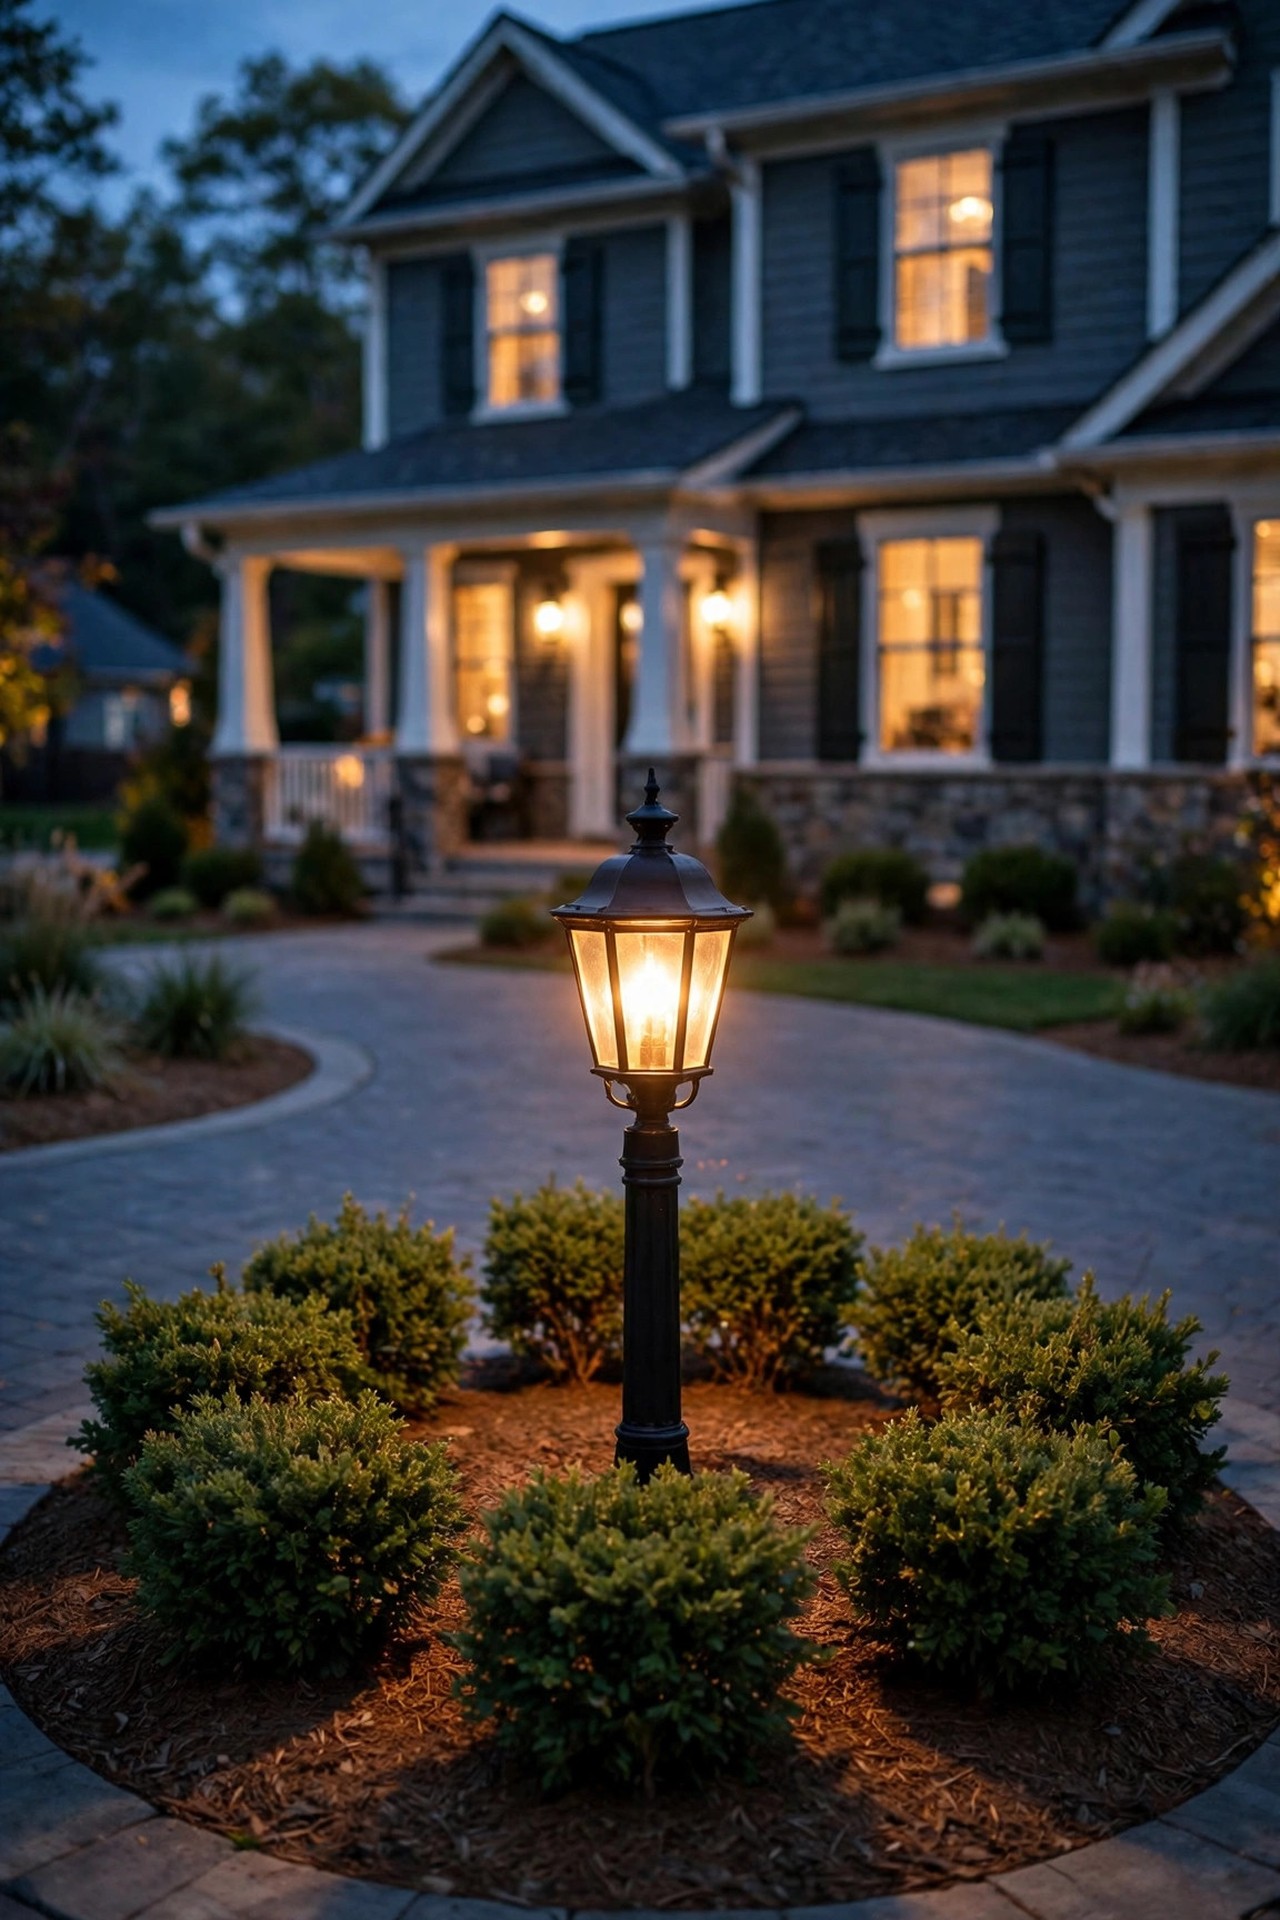
12. Crown the Island With a Lantern Post Light
No tree in the island? A classic lantern post at the center gives the court its tall layer and its focal point in one move. I like a 4- to 6-foot post — tall enough to read as a feature, short enough that it never blocks a driver's sightline across the circle — topped with a carriage-style lantern and an LED filament bulb at 2700K behind clear or lightly seeded glass. Run it on its own timer zone so you can keep the lantern glowing late while the ring dims earlier, or vice versa. Plant a low mound of shrubs and groundcover around the base so the post rises out of green rather than bare mulch. Choose a post and lantern finish that echoes your porch fixtures; when the island lantern and the front-door lanterns match, the entire front yard looks planned from the curb.
Suggested budget range: $150 – $600.
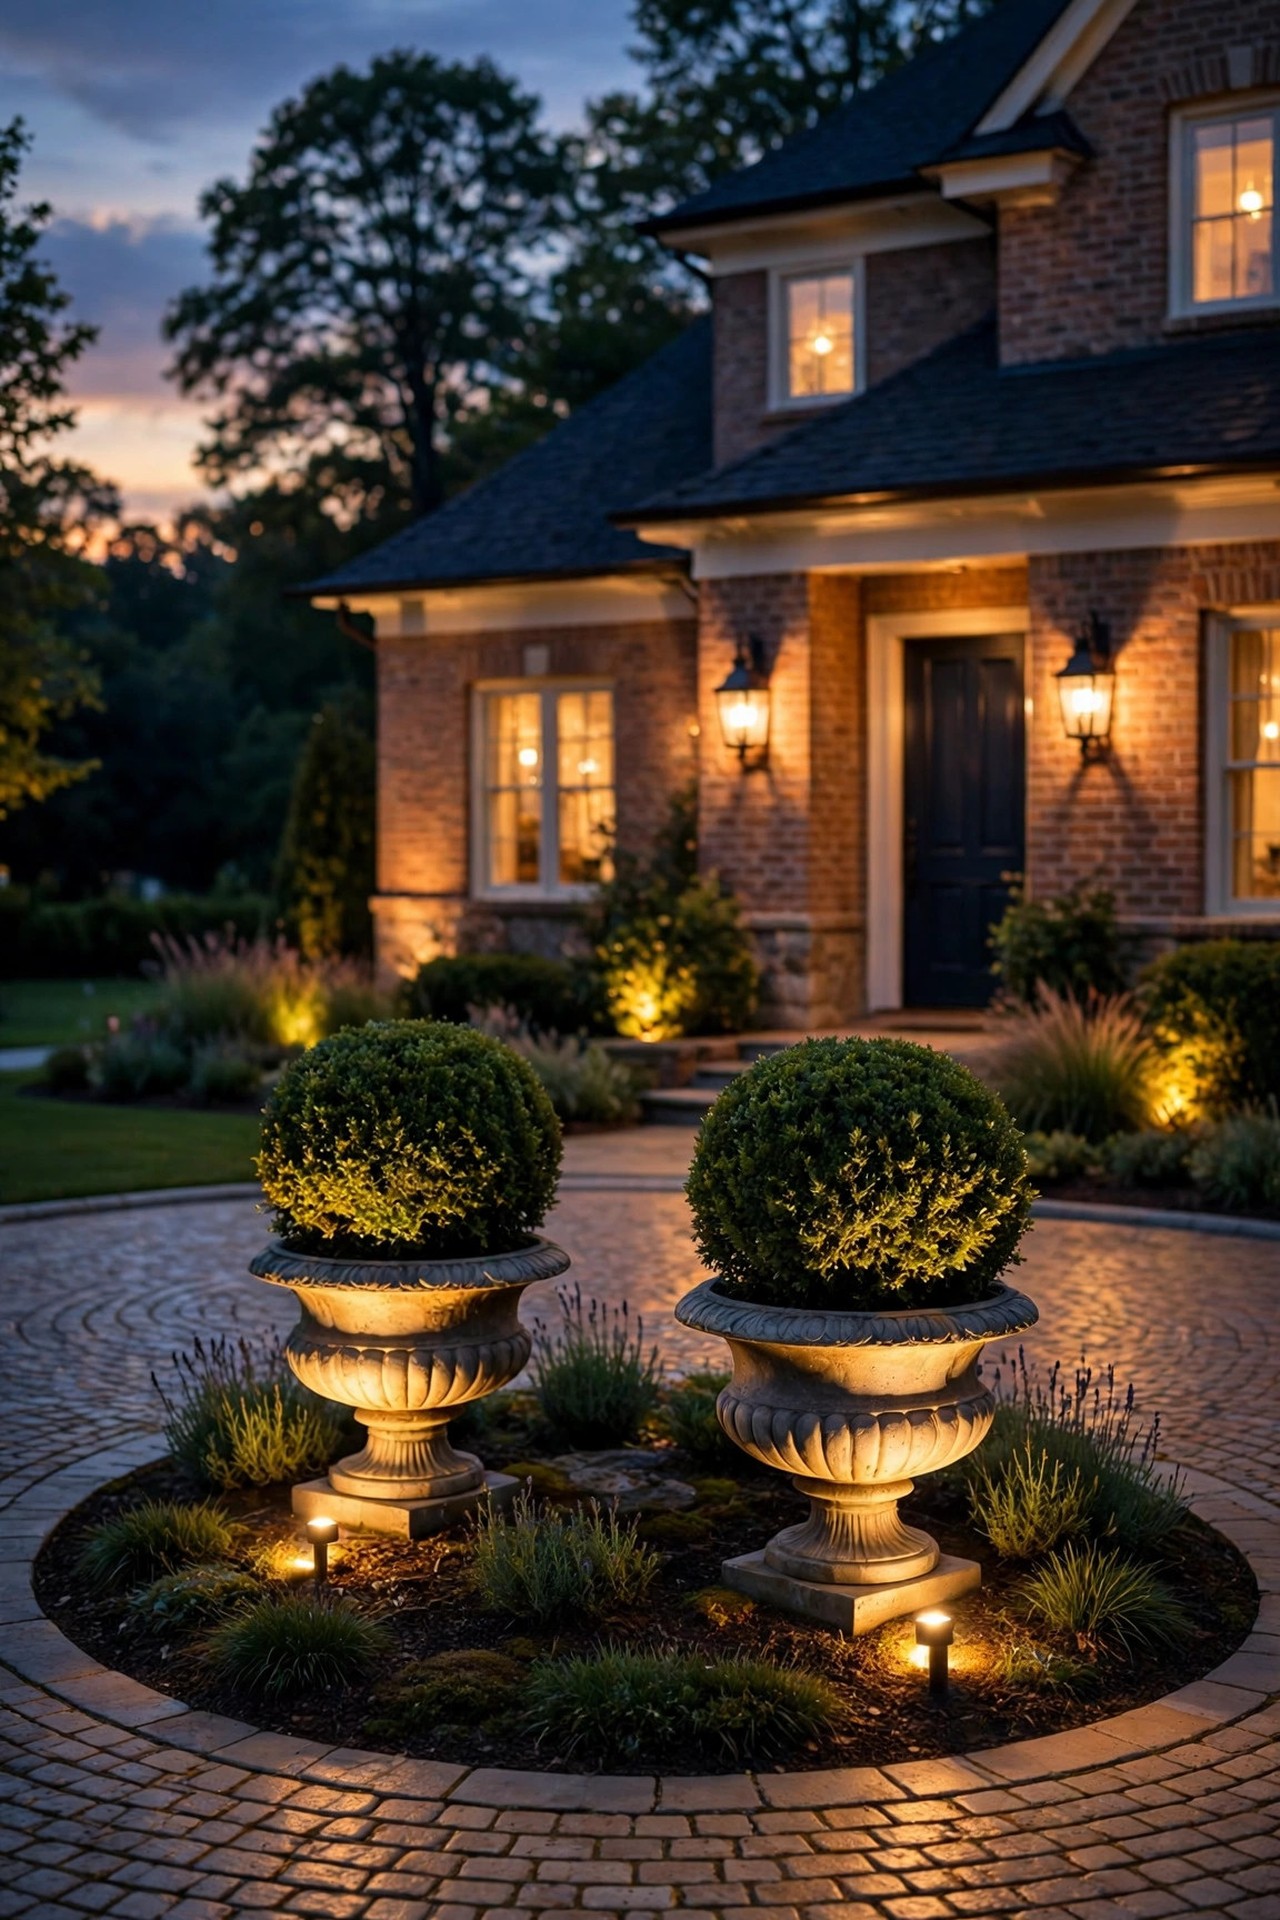
13. Uplight a Pair of Urn Planters on the Island
For a court with a formal streak, nothing beats a pair of large urn planters flanking the island's centerpiece, each with a small uplight tucked at its base. The light grazes up the urn's curves and into the planting — boxwood balls in winter, mounds of white mums in fall, trailing petunias spilling over in summer — so the island gets a fresh look every season while the lighting stays put. Symmetry is the whole game here: same urns, same plantings, same fixture angle on both sides. Keep the uplights small and close so they light the urn, not the sky, and choose frost-proof urns if your winters bite. I change my plantings with the seasons and it genuinely feels like redecorating the front yard four times a year for the price of a few nursery flats.
Suggested budget range: $80 – $240.
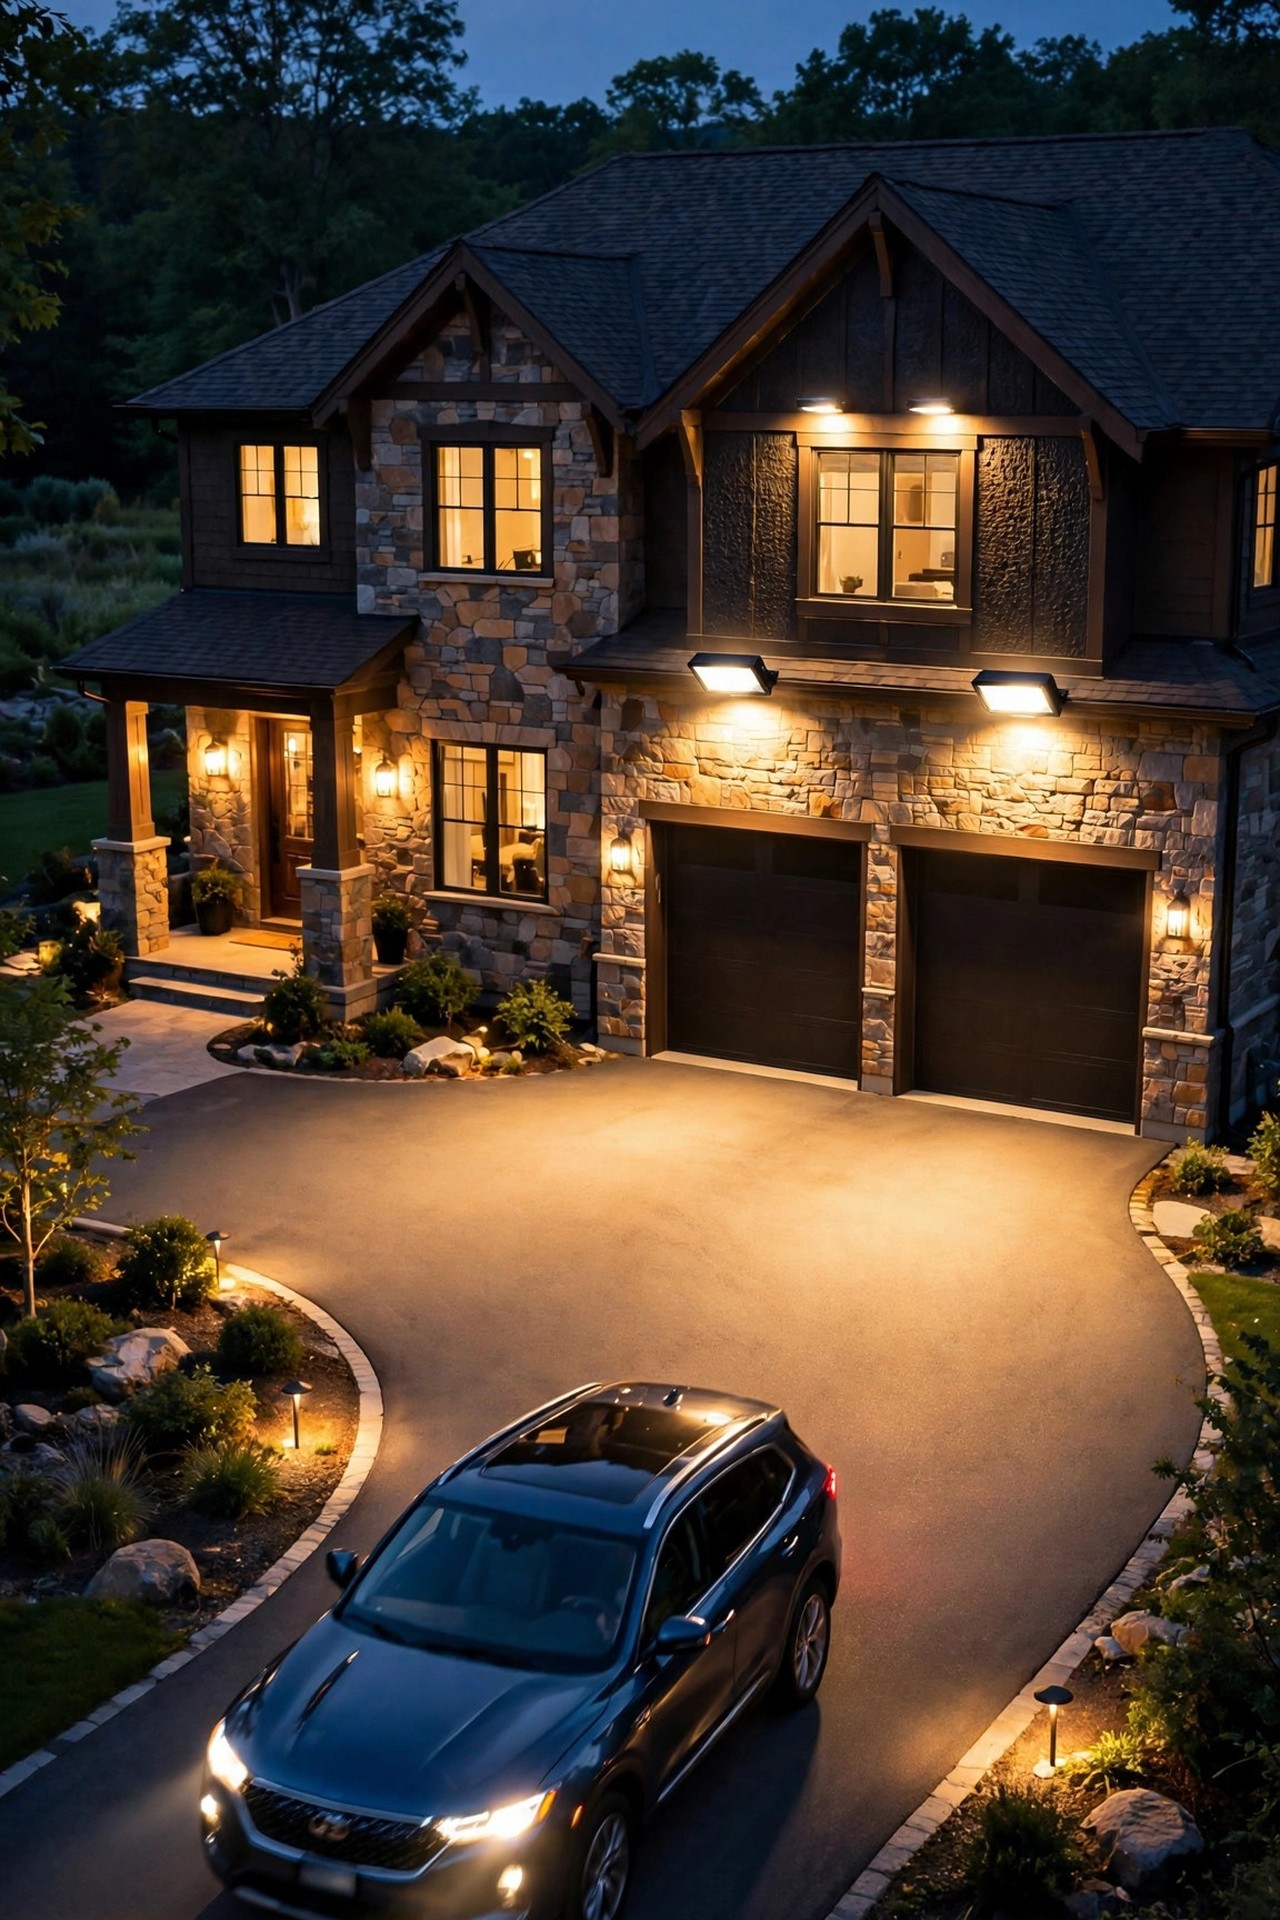
14. Welcome Guests With Motion-Activated Floods
A grand court should wake up when someone arrives. I mount two shielded, warm-white LED flood fixtures — one near the garage corner, one on the house wall facing the street entry — aimed across the court, with motion sensors tuned to trigger as a car turns in. The circle brightens to full welcome for arrivals, then settles back to the softer accent layers after a few minutes. A few setup notes from experience: use fixtures with adjustable sensitivity and aim the sensors along the drive, not across the street, or every passing car becomes a light show. Keep the "on" time to five minutes or less, and look for dusk-to-dawn-plus-motion combo modes so they stay off in daylight. LED only, and choose a fixture with a visor or barn-style shade to keep the beam neighborly and out of bedroom windows.
Suggested budget range: $60 – $200.
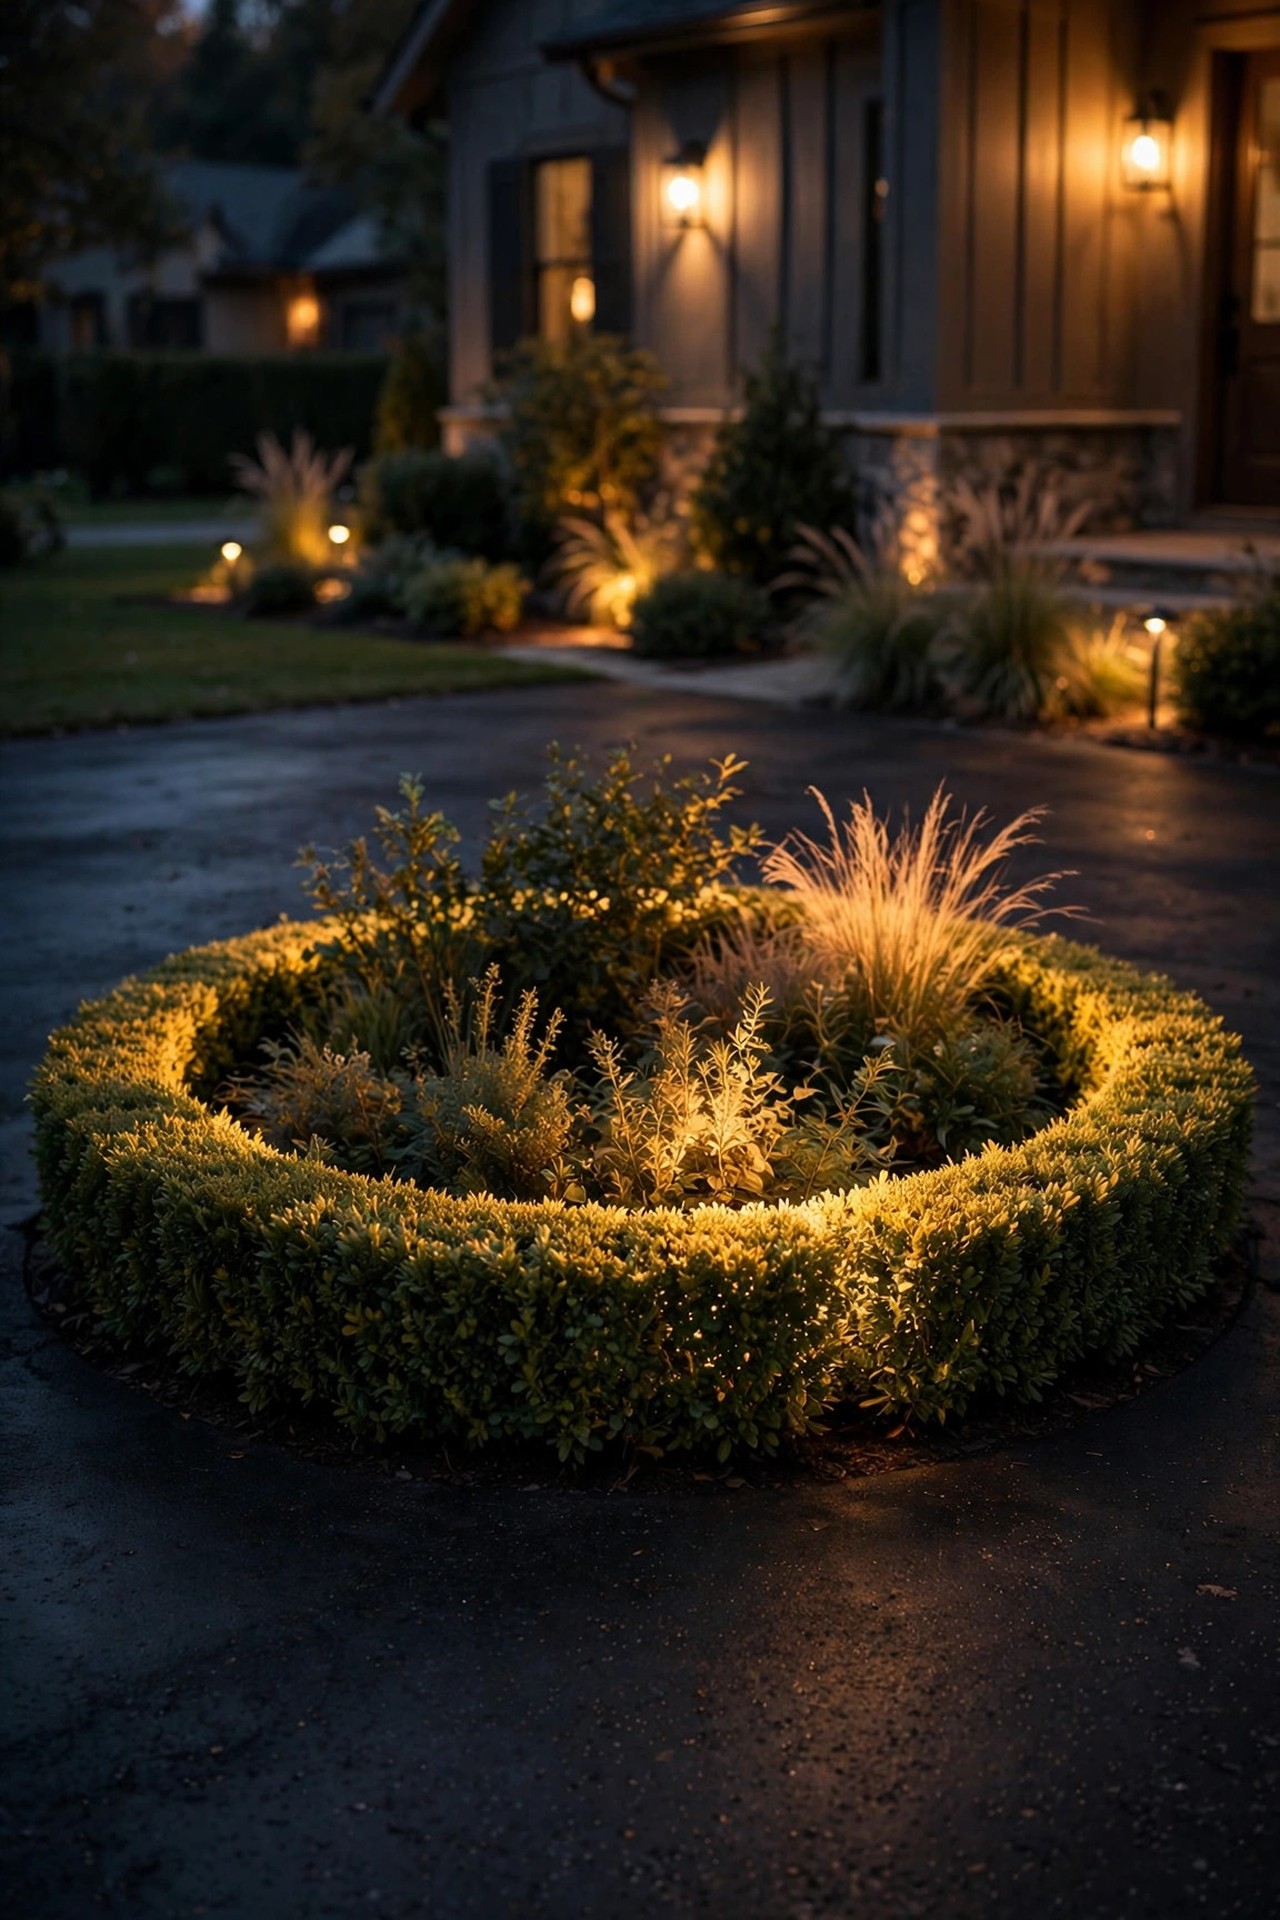
15. Backlight the Island Hedge for a Silhouette Ring
If your island is ringed with a low hedge — boxwood, holly, or yew — you can turn it into a glowing green wall with a few small spotlights. Place the fixtures low, just inside the hedge line or behind plantings at the island's center, and aim outward so the light grazes through the foliage; the hedge lights up from within while its outer edge stays a crisp dark silhouette against the drive. It's a layered, almost theatrical effect that makes the island look twice as lush at night. Grazing from the front works too and gives a brighter, more sparkly leaf texture — I prefer the backlit version for a formal court. Keep fixtures a foot or so off the foliage, trim the hedge on schedule so growth doesn't swallow the beams, and use warm 2700K to keep greens looking rich instead of swampy.
Suggested budget range: $70 – $220.
16. Put the Whole Court on Smart Timers and Zones
Even the prettiest ring of lights fails if it's dark when guests arrive or blazing at 2 a.m. I run every circular driveway on a timer or smart controller with at least two zones: the driving layers — bollards, markers, apron lights — on from dusk to around 11 p.m., and the island accents plus facade wash on a slightly later schedule for that quiet late-evening glow. A photocell handles the seasonal drift so you're not reprogramming in June and December, and an astronomic timer is even better since it computes sunset for you. Smart control adds the party trick: brighten everything from your phone when you hear a car, or set a vacation pattern so the court looks lived-in while you're away. Whatever you choose, put the transformer and controller somewhere reachable — a controller you can't get to is a controller you'll never adjust.
Suggested budget range: $50 – $250.
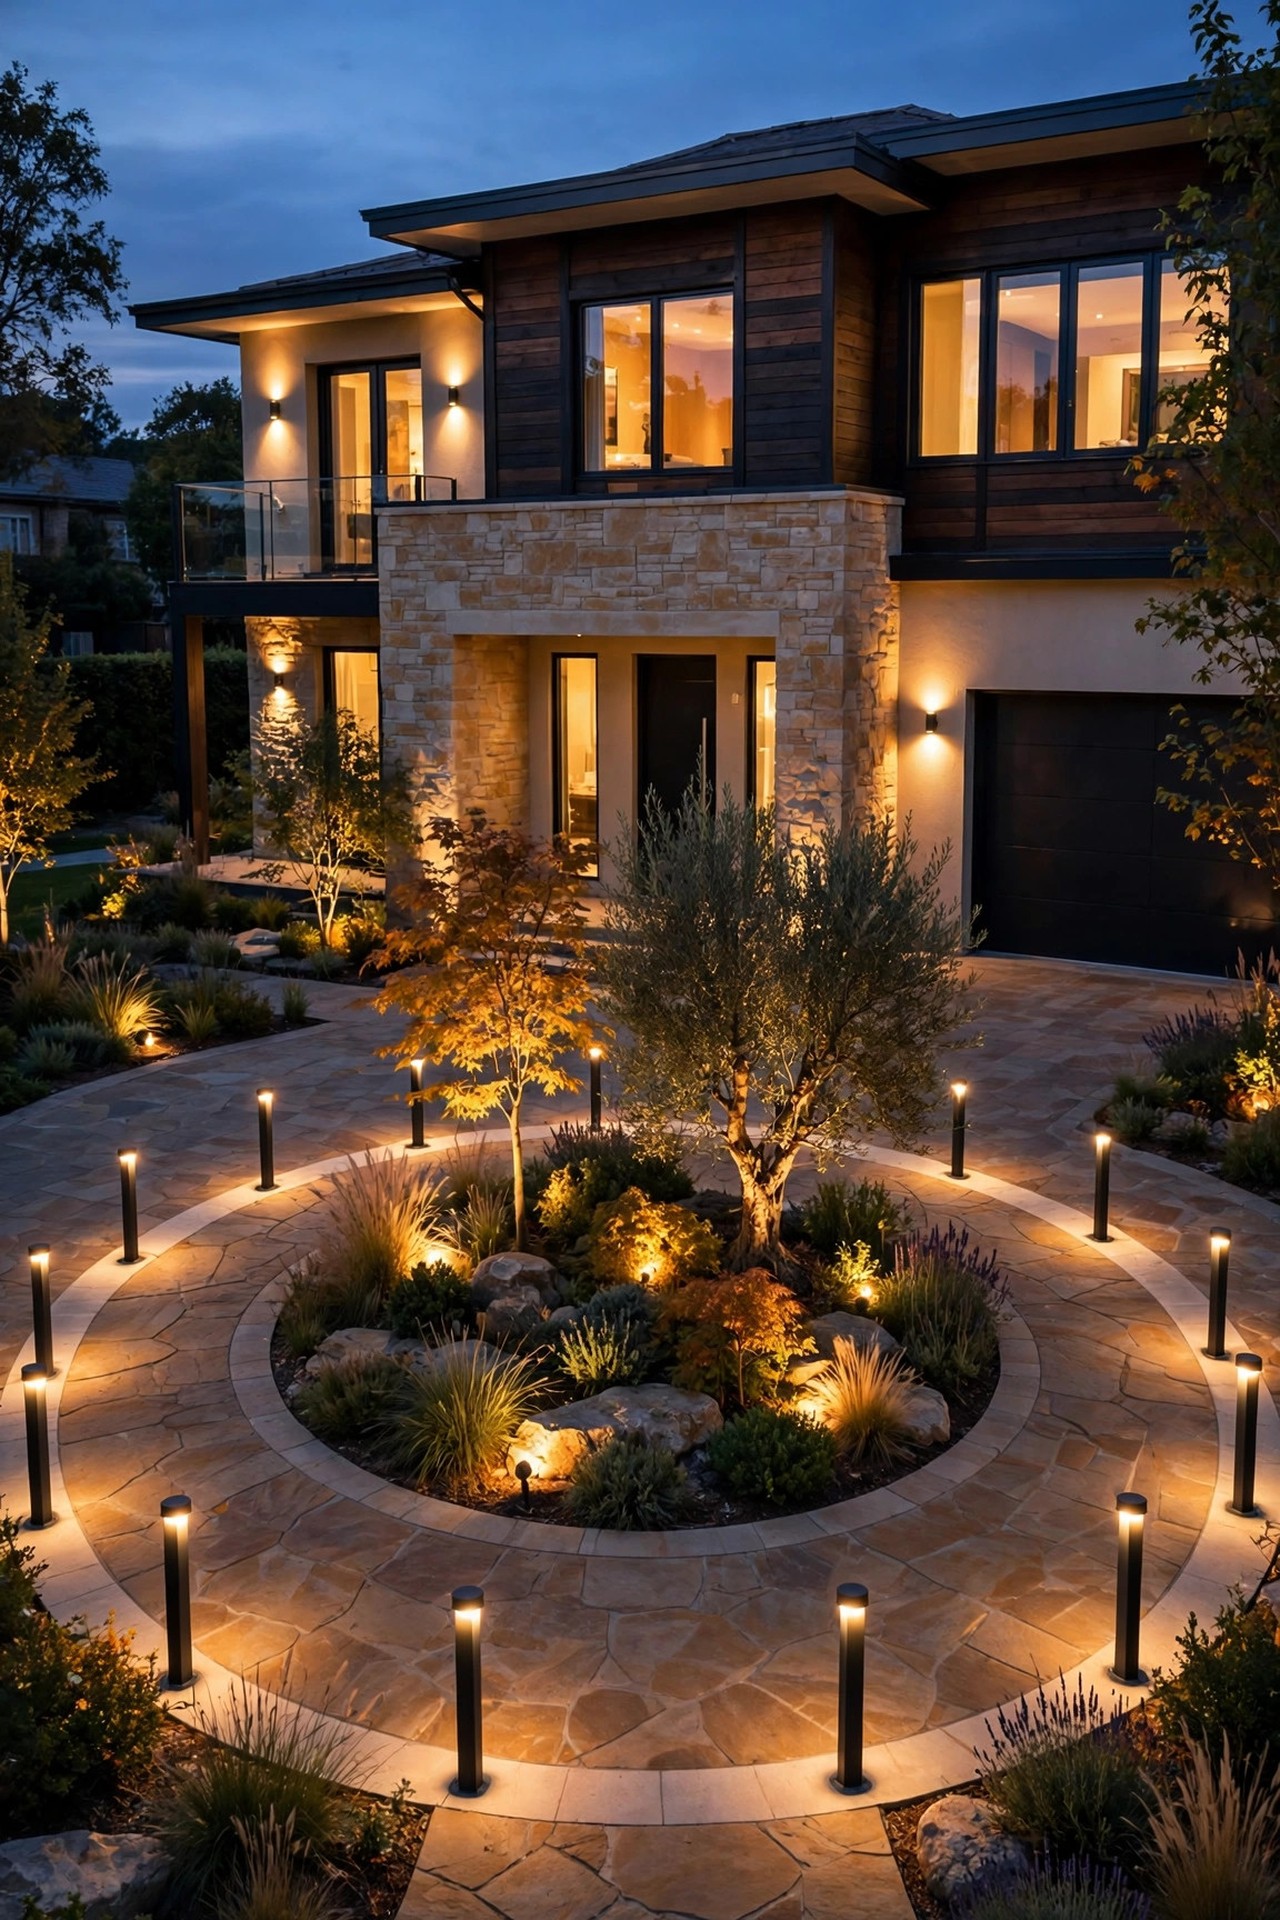
17. Layer All Three Heights for the Full Grand-Court Look
Here's the idea the other sixteen build toward: treat the court as three stacked rings of light. The ground layer — in-ground markers, wall lights, and path pools — defines every edge a tire or foot needs to find. The middle layer — the bollard ring — gives the circle its rhythm and guides drivers around. The tall layer — an uplighted tree, a lantern post, or a fountain — provides the single focal point that makes it feel like a court instead of a cul-de-sac. On a low-voltage system, size the transformer at about 125 percent of your total fixture wattage so nothing runs starved and dim at the far end of the loop, and run the cable in a full ring rather than a single line — a loop feeds voltage evenly to every fixture, which matters on a long circular run. If the transformer math is new to you, my low-voltage landscape lighting design guide explains sizing and layouts in plain English.
Suggested budget range: $600 – $2,000.
Frequently Asked Questions
How many lights does a circular driveway actually need?
For a typical 40- to 60-foot-diameter court, I plan on 8 to 12 fixtures in the driving ring (bollards or markers), 3 to 5 accents in the island, and 1 tall focal feature. Larger courts scale by spacing, not by guesswork: keep bollards 10 to 14 feet apart and markers 6 to 8 feet apart, and count what the circle asks for.
What color temperature looks best for a front court?
Warm white, 2700K to 3000K, almost every time. It flatters stone, brick, and plantings and feels like candlelight rather than a gas station. Cool 5000K daylight bulbs make even beautiful courts look stark and bluish, so I save those for work areas and keep the front court warm and consistent across every fixture.
Should I choose solar or wired lights for a circular driveway?
A hybrid, honestly. Low-voltage wired fixtures win anywhere a driver depends on the light — bollards, markers, apron lights — because they're bright, even, and on every single night. Solar earns its place as island-bed accent sparkle where trenching wire is a pain. Just don't build your edge definition out of solar; a cloudy December week will leave your circle half-drawn.
How do I keep driveway lights from blinding drivers?
Shielding and aim, in that order. Choose louvered bollards, recessed markers, and visored floods; aim spotlights away from approach lanes; and do the driver's-seat test — sit in a car at each entry after dark and look around the loop. If you can see a bare lens or diode anywhere, adjust that fixture before you call it done.
Conclusion
A circle is the most generous shape a driveway can have — it wants to be a front court, and lighting is what lets it become one. The circular driveway lighting ideas that matter most all come back to layering: ground light to define the edges, a mid-height ring to guide the way around, and one glowing centerpiece to give the whole scene a heart. Start with whichever layer your court is missing, keep everything warm at 2700K to 3000K, and add a ring at a time as budget allows. Before long, pulling in at dusk will feel like arriving somewhere special — because it is. Browse the rest of our driveway and landscape lighting ideas here on the site for the next layer whenever you're ready.