Our backyard drops away behind the house in one long, stubborn slope, and for years I treated it like the yard's problem child — too steep to mow gracefully, too dark to enjoy after dinner. Then I started experimenting, and honestly? A hill is a gift once you light it right. Flat yards get one flat level of glow; a hillside gives you tiers, depth and drama for free. These sloped backyard lighting ideas are the ones that actually worked on our grade: lights that make steep steps safe, terraces feel like outdoor rooms, and the whole slope read as one layered picture instead of a black hole beyond the patio. My philosophy is the same as always — layer low, warm light at several heights rather than blasting one bright fixture uphill. You'll find a mix of low-voltage wired staples and solar quick wins below, with notes on anchoring fixtures so nothing slides, tips for hiding cable on a grade, and honest budgets for every single idea. Pick two or three to start, stand at the bottom of the hill at dusk, and build from there.

1. Retaining Wall Wash Lights: Where All Good Sloped Backyard Lighting Ideas Begin
Every sloped yard I admire starts with its walls. If your hill is held back by timber, stone or block retaining walls, grazing them with light turns hard structure into the backbone of the whole design. I use compact low-voltage wash lights or small well lights tucked 6 to 12 inches out from the wall base, aimed straight up so the beam rakes across the texture — stacked stone and rough timber look incredible lit this way, honestly. Space them 4 to 6 feet apart, and stagger them if you have two or three terraces so each level glows independently. On our middle wall, I switched to 2700K LED modules at about 3 watts each; the warmth makes the stone read golden instead of gray. Two practical notes: first, bury the cable in a shallow trench along the base before you backfill your planting bed, because exposed wire on a slope migrates downhill every time it rains. Second, choose fixtures rated for direct burial or at least IP65, since wall bases collect runoff. Start here, and even before you add another light, the yard will look intentional.
Suggested budget range: $180 – $450.

2. Recessed Step Lights for Safe Hillside Stairs
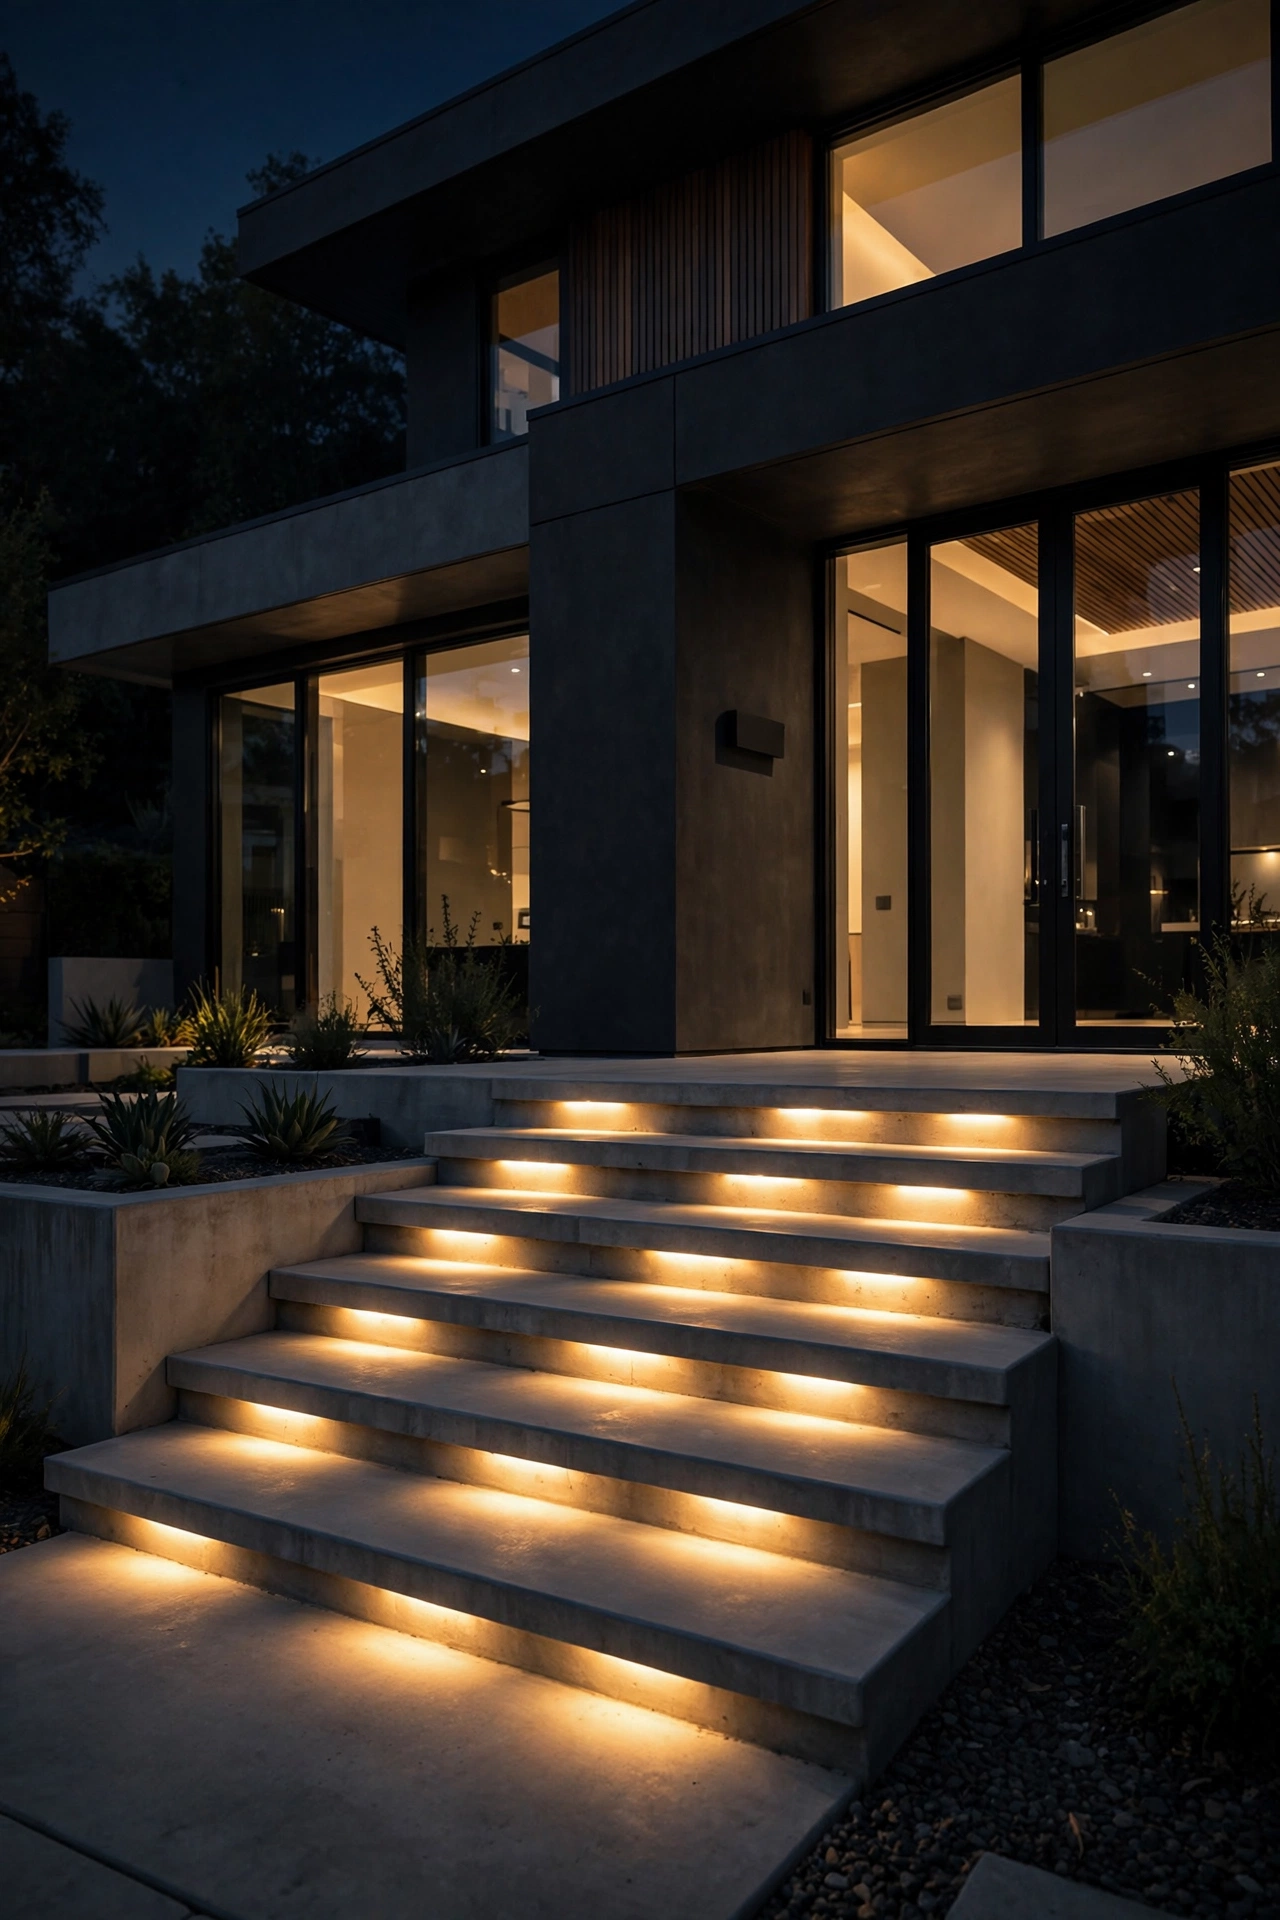
Nothing makes a hillside yard usable at night like safe stairs, and recessed step lights are the cleanest way to get there. These little fixtures mount flush into the riser of each step — or into the retaining wall cheeks beside the staircase — so they wash the tread below without tripping anyone or sticking out for the mower to catch. I light every step on steep runs and every other step on gentle ones, favoring louvered or eyelid styles that push light down and keep glare out of your eyes as you climb. Warm 2700K LEDs around 1 to 2 watts per step are plenty; you want to read the edge of each tread, not land planes. If you're building new steps, run the low-voltage cable inside a conduit sleeve under each riser before the treads go down — your future self will thank you. Retrofitting existing timber steps? Surface-mount step lights under the nosing of each tread give nearly the same effect with zero demolition. I rounded up more recessed step light ideas in a separate post if your staircase is the main event. Wire them to the same transformer zone as your path lights so the whole route home comes on together at dusk.
Suggested budget range: $150 – $400.
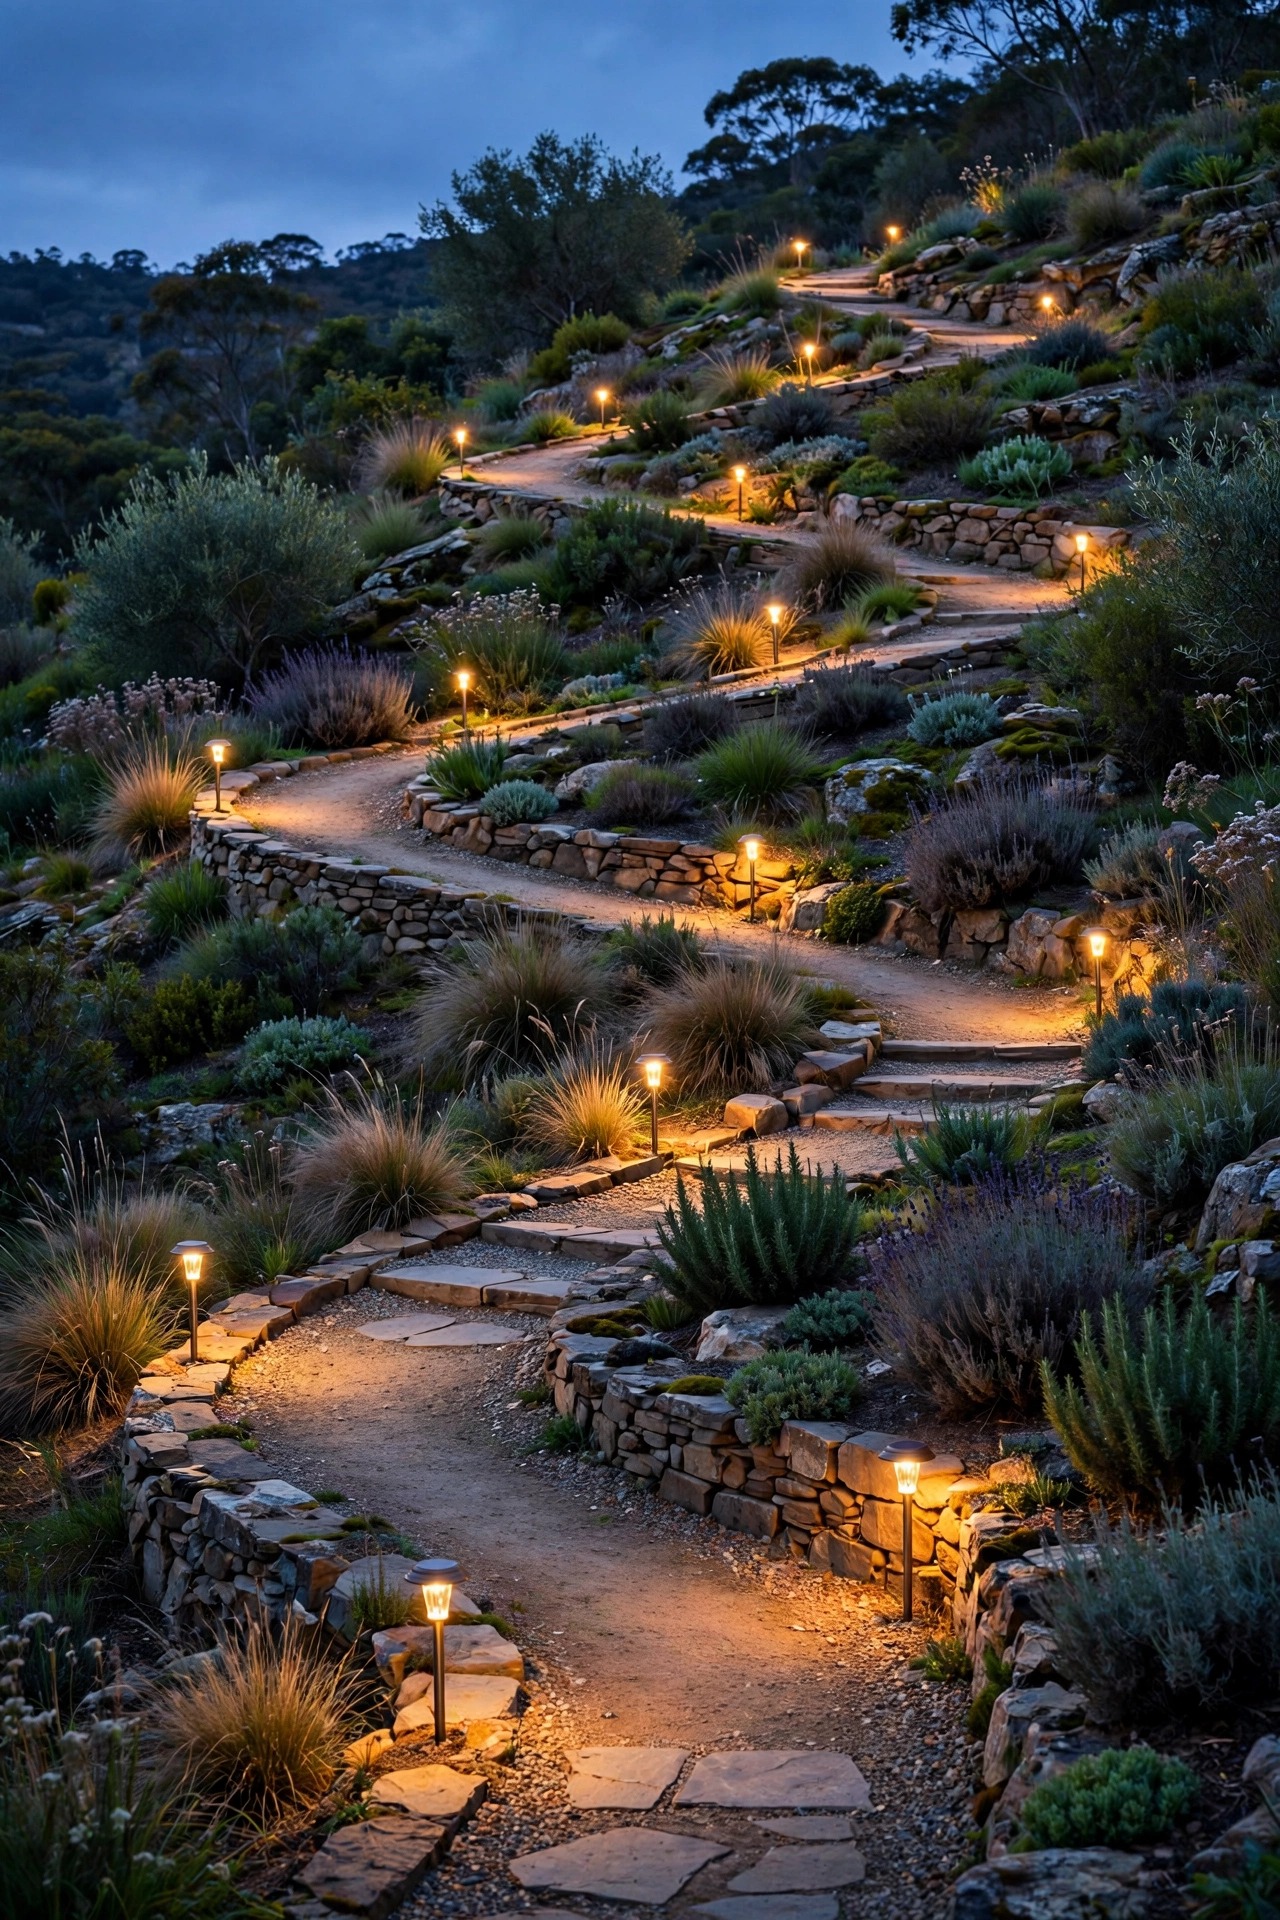
3. Solar Stake Lights Along Switchback Paths
Switchback paths are how most of us actually climb our hills — zigzagging up instead of fighting the grade — and a line of solar stake lights is the fastest, cheapest way to make that route feel magical. No cable to trench across a slope, no transformer math; you just walk the path at dusk and place a light wherever your foot wants reassurance. My rules: push stakes fully into the soil on the uphill side of the tread so runoff doesn't undermine them, space them every 4 to 5 feet rather than in a rigid runway line, and choose warm-white solar stakes with replaceable batteries, because the icy-blue cheap ones will break your heart by July. On steep sections, I angle the stake slightly so the little panel still catches midday sun. Solar won't match wired brightness — expect a gentle 10 to 40 lumens per stake — but for marking a winding route through plantings, that's honestly all you need. After heavy rain, walk the line once and re-seat any stakes the water has loosened; on a slope, gravity and runoff are always quietly rearranging your work.
Suggested budget range: $60 – $160.
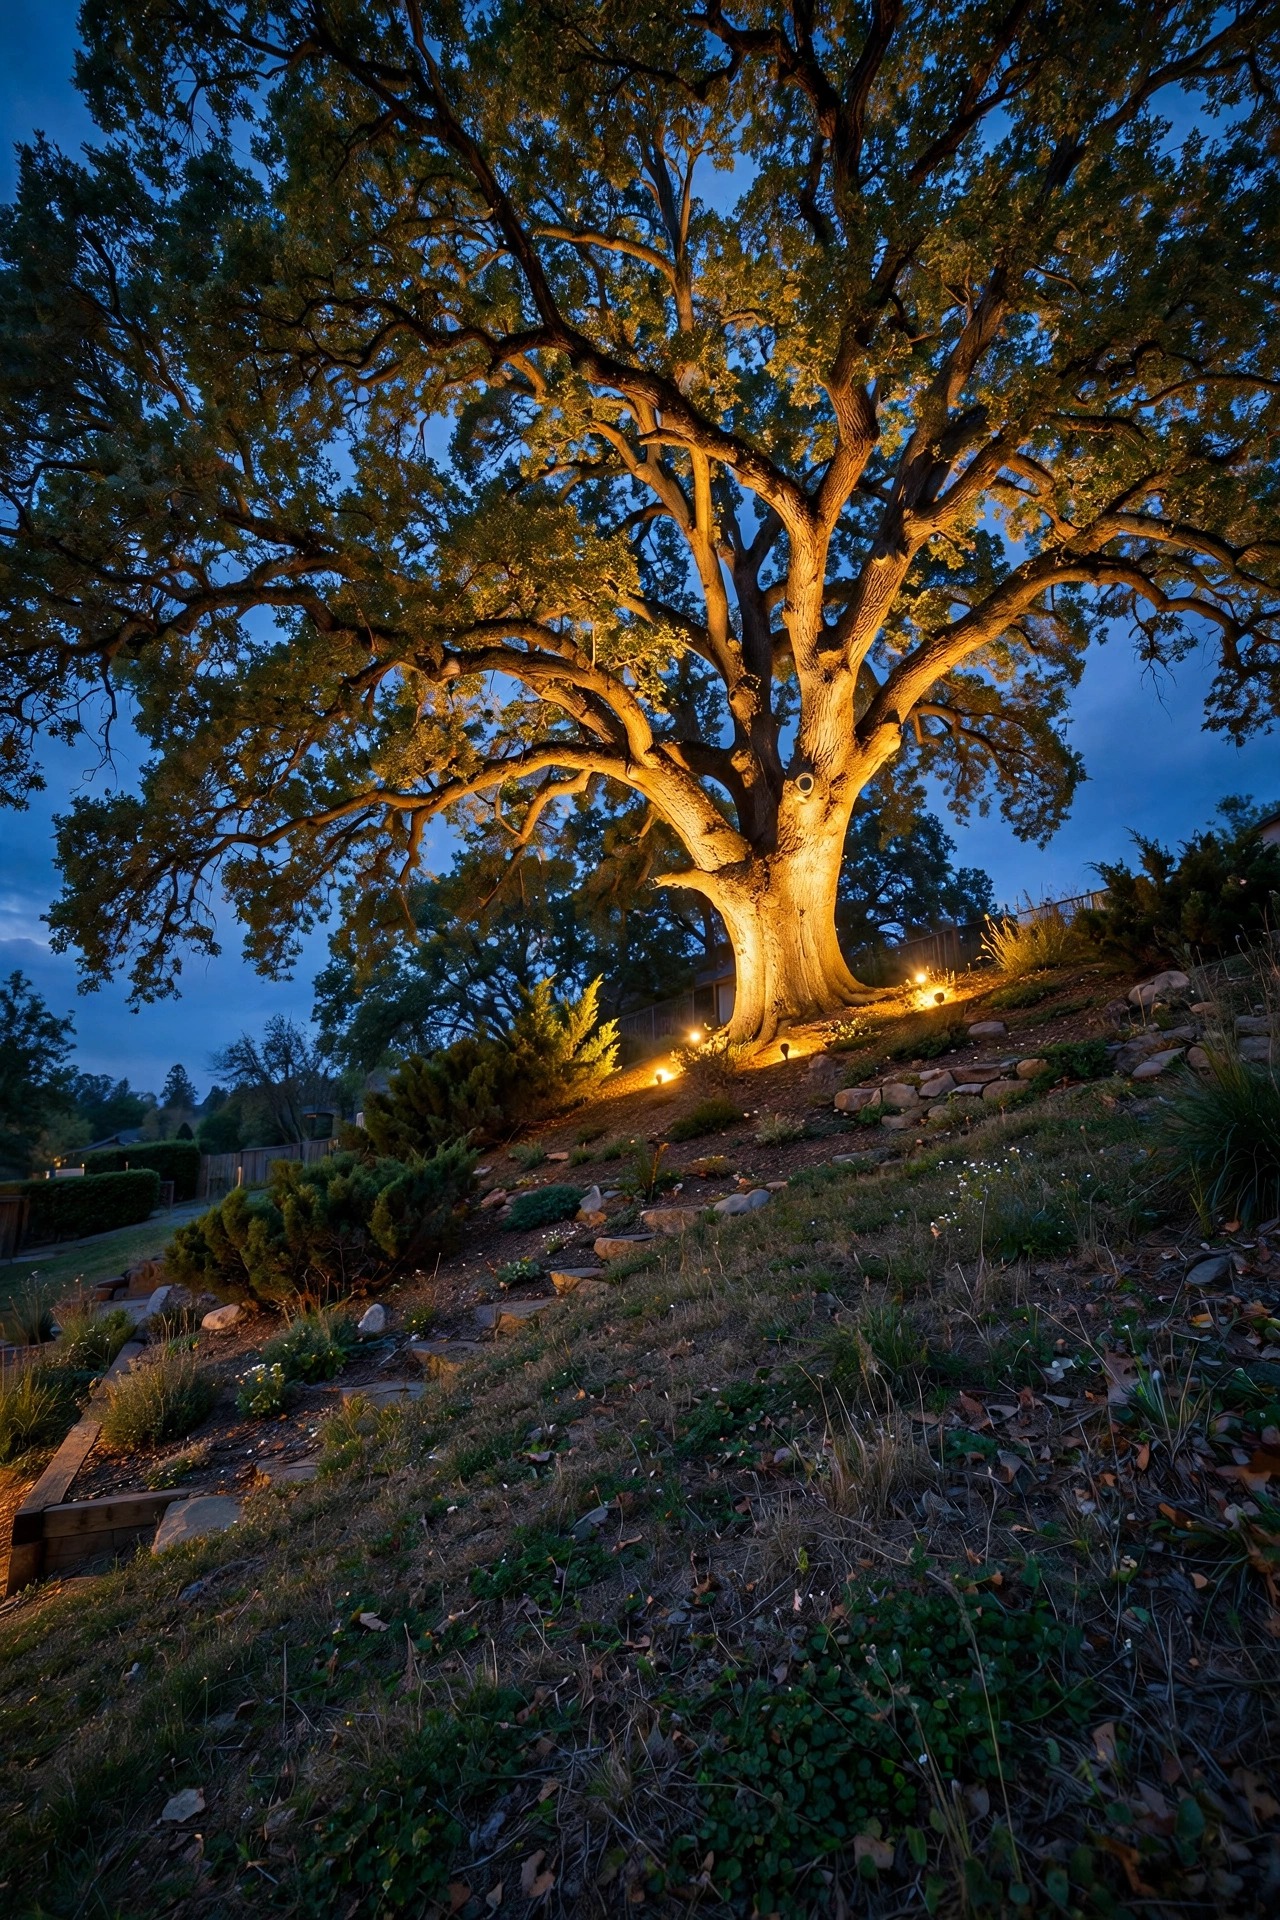
4. Uplighting the Trees at the Top of the Slope
If you're lucky enough to have a tree standing at the crest of your hill, uplighting it is the single most dramatic move in this whole list. A tree lit from below at the top of a slope becomes a beacon — it pulls the eye up, stretches the yard visually, and silhouettes beautifully against the night sky. I use one or two narrow-beam spotlights (15 to 25 degrees) placed 1 to 2 feet from the trunk, or a single wider 40-degree wash for small ornamentals. Aim for the canopy, not the trunk alone, and test from the patio: you want the foliage to glow, not a hot white stripe up the bark. LED spotlights in the 5 to 10 watt range with 2700K color keep it warm and natural. One slope-specific caution: fixtures sitting on a grade get buried by creeping mulch and leaf litter faster than on flat ground, so raise them on short riser stakes and clear the lenses each fall. From the street, our uplit maple makes the whole property look twice as deep as it is — pure theater, and it took me twenty minutes.
Suggested budget range: $120 – $350.
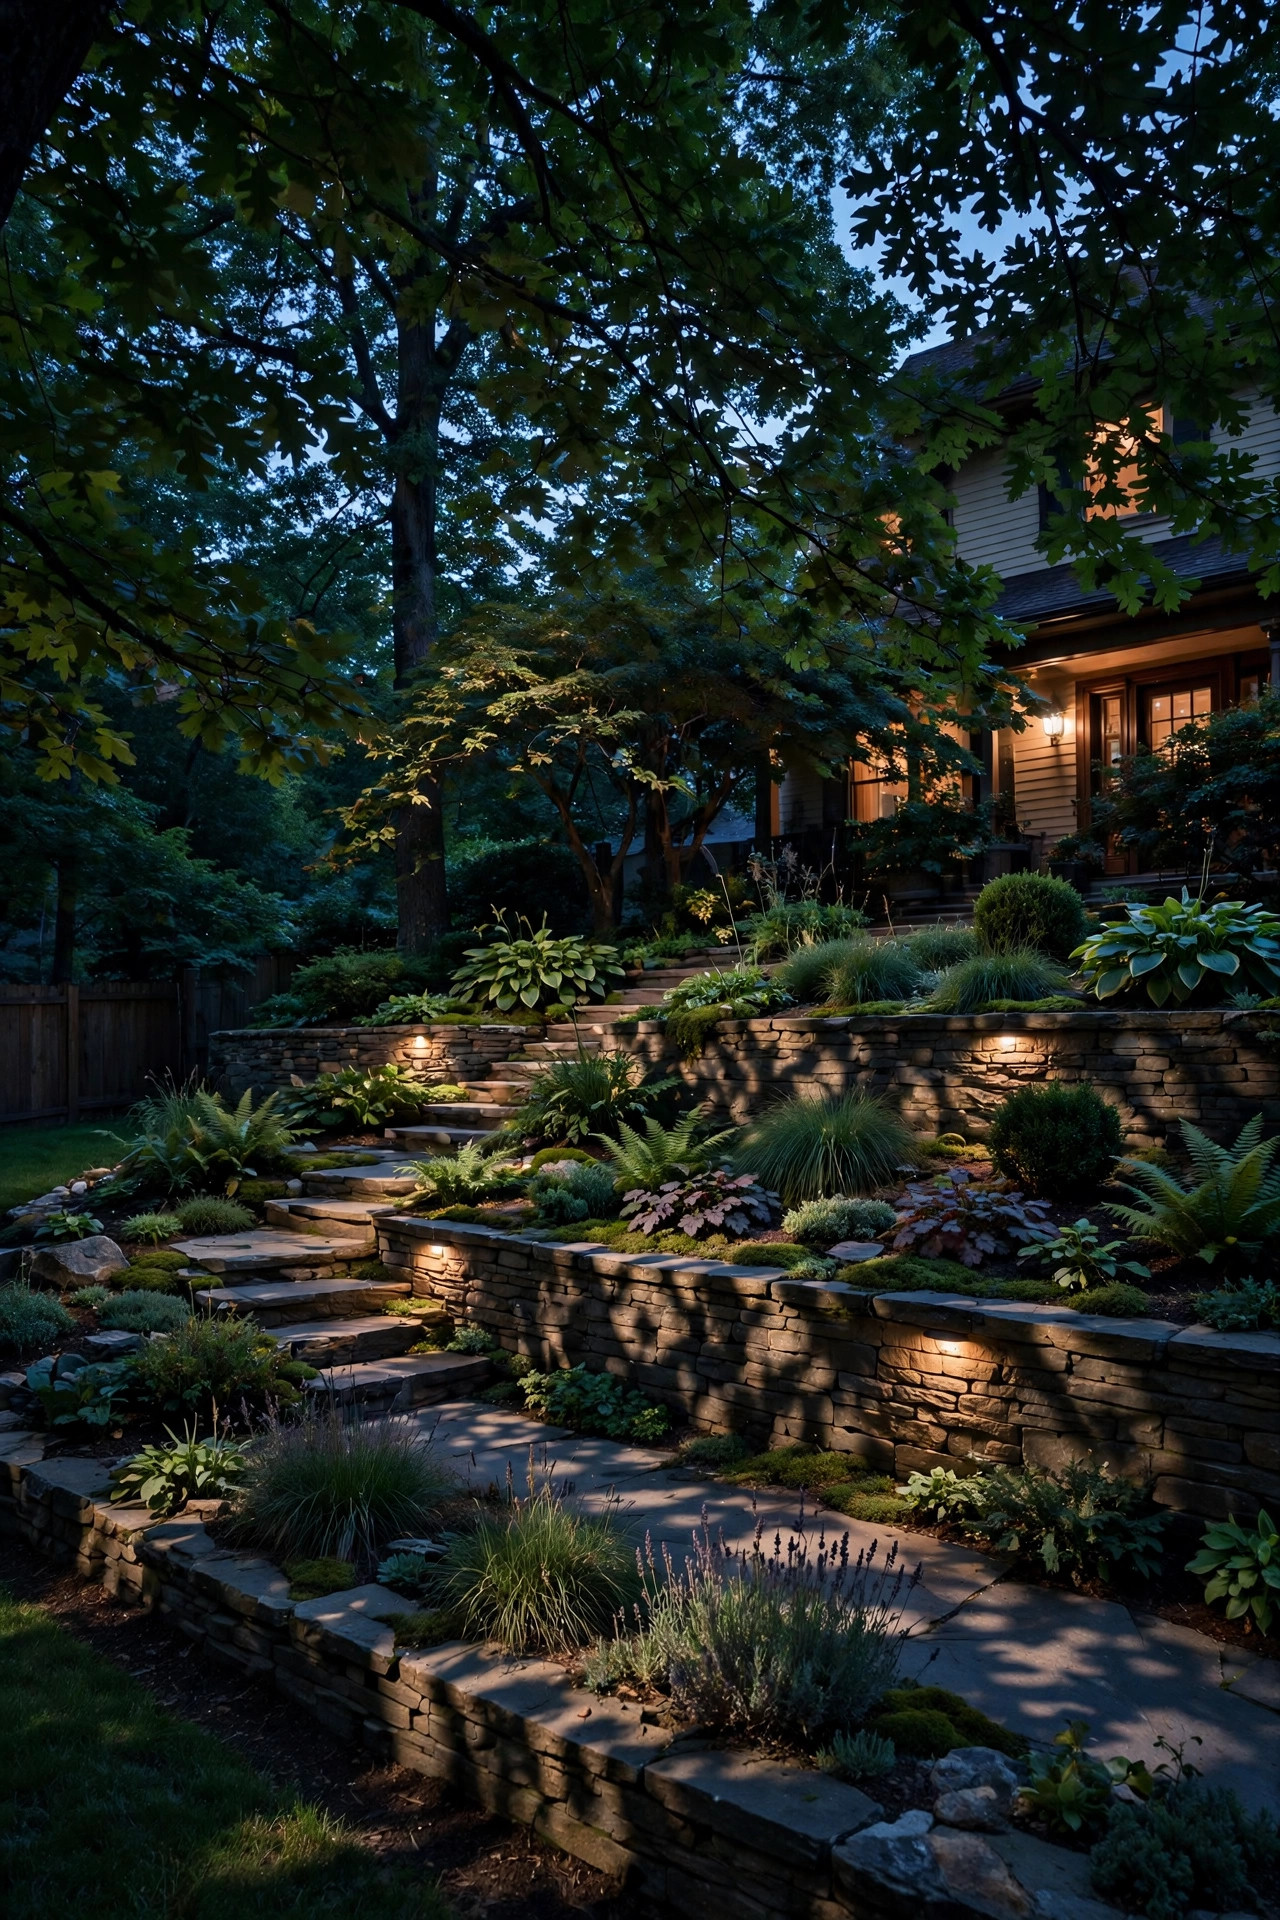
5. Moonlighting From Tall Trees on the Hill
Moonlighting is uplighting's softer, smarter sibling: instead of shining up into a tree, you mount fixtures high in its branches and let light filter down through the leaves, dappling the slope below in moving patches that mimic real moonlight. It's my favorite effect for hillsides because it lights a large area — a whole terrace, a seating nook, the bend of a path — without a single visible fixture at ground level. Use shielded downlight fixtures with 3000K LEDs (slightly cooler reads more "moonlit" here), hung 15 to 25 feet up where branches allow, and always have an arborist or confident ladder-hand do the mounting with tree-friendly straps rather than screws. On a slope, position the fixtures on the uphill side of the canopy so the dappled light falls across the grade rather than straight down the trunk. The effect is gentle enough for dining under and dramatic enough that guests always ask how we did it. Fair warning: this is the one idea on the list where I gladly pay a pro for the install — working at height on a hillside is nobody's weekend fun.
Suggested budget range: $250 – $600.
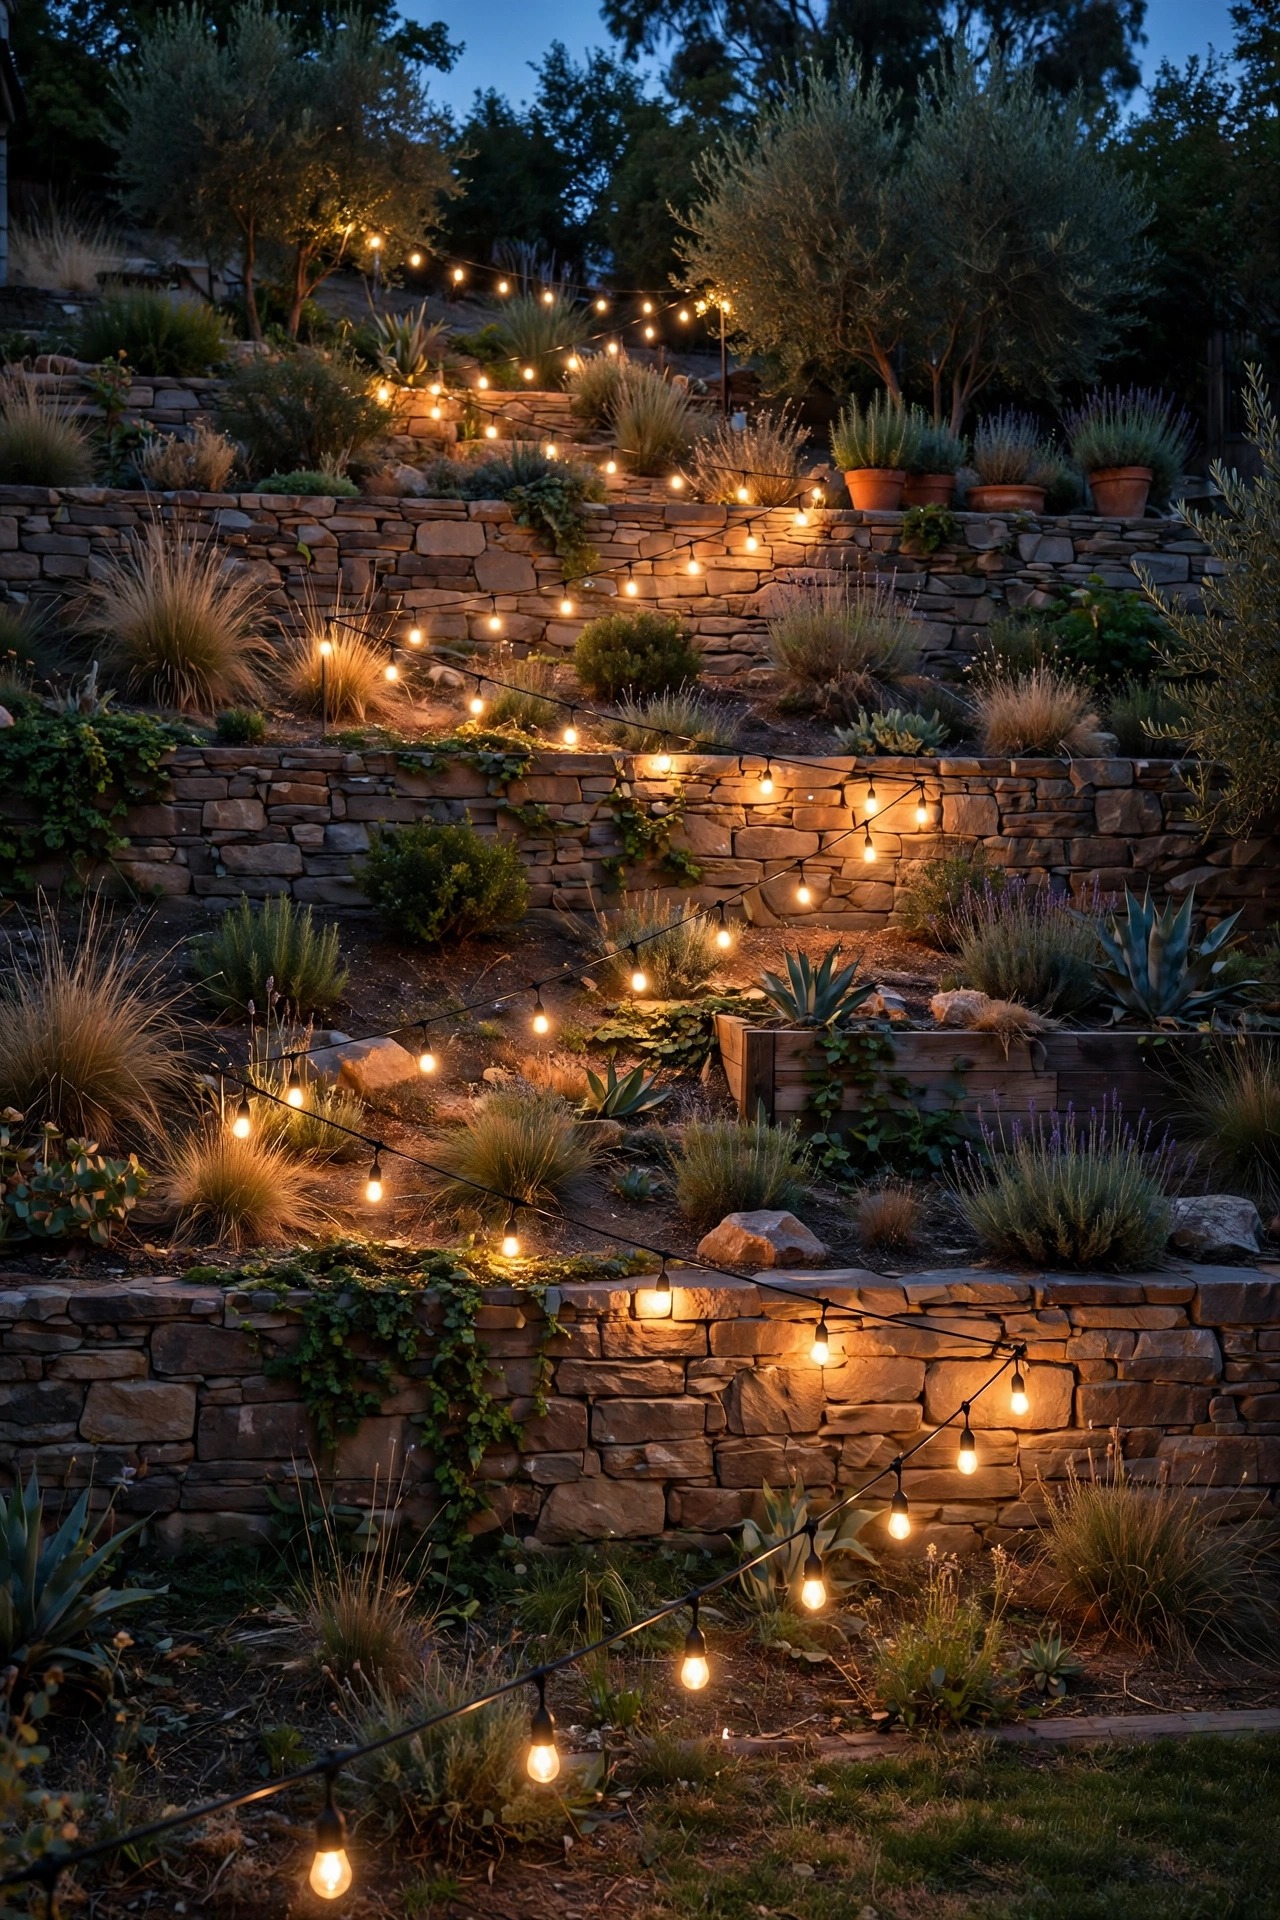
6. String Lights Zigzagged Down the Hillside
Here's the playful one. On a flat yard, string lights run in straight swags; on a hillside, you get to zigzag them down the slope between trees, posts and the deck railing, creating layers of light that float at different heights — it looks like a little mountainside festival. I anchor the high end at our deck, then run two or three strands down to sturdy guide posts set at each terrace, keeping each swag's lowest point at least 7 feet above the path so nobody clotheslines themselves carrying a tray. Use commercial-grade outdoor string lights with suspended sockets and LED filament-style bulbs; the cheap indoor sets won't survive one storm season on an exposed hill. Gravity tip: on a grade, those catenary curves pull harder on the low anchor, so use a proper steel guide wire and let the lights hang from it rather than bearing the weight themselves. Dimmable bulbs on a smart plug timer are the finishing touch — full brightness for a party, 40 percent for a Tuesday. At dusk, those floating lines of light make our steep yard feel like the coziest amphitheater in the neighborhood.
Suggested budget range: $80 – $220.
7. Bollard Lights Marking Each Terraced Level
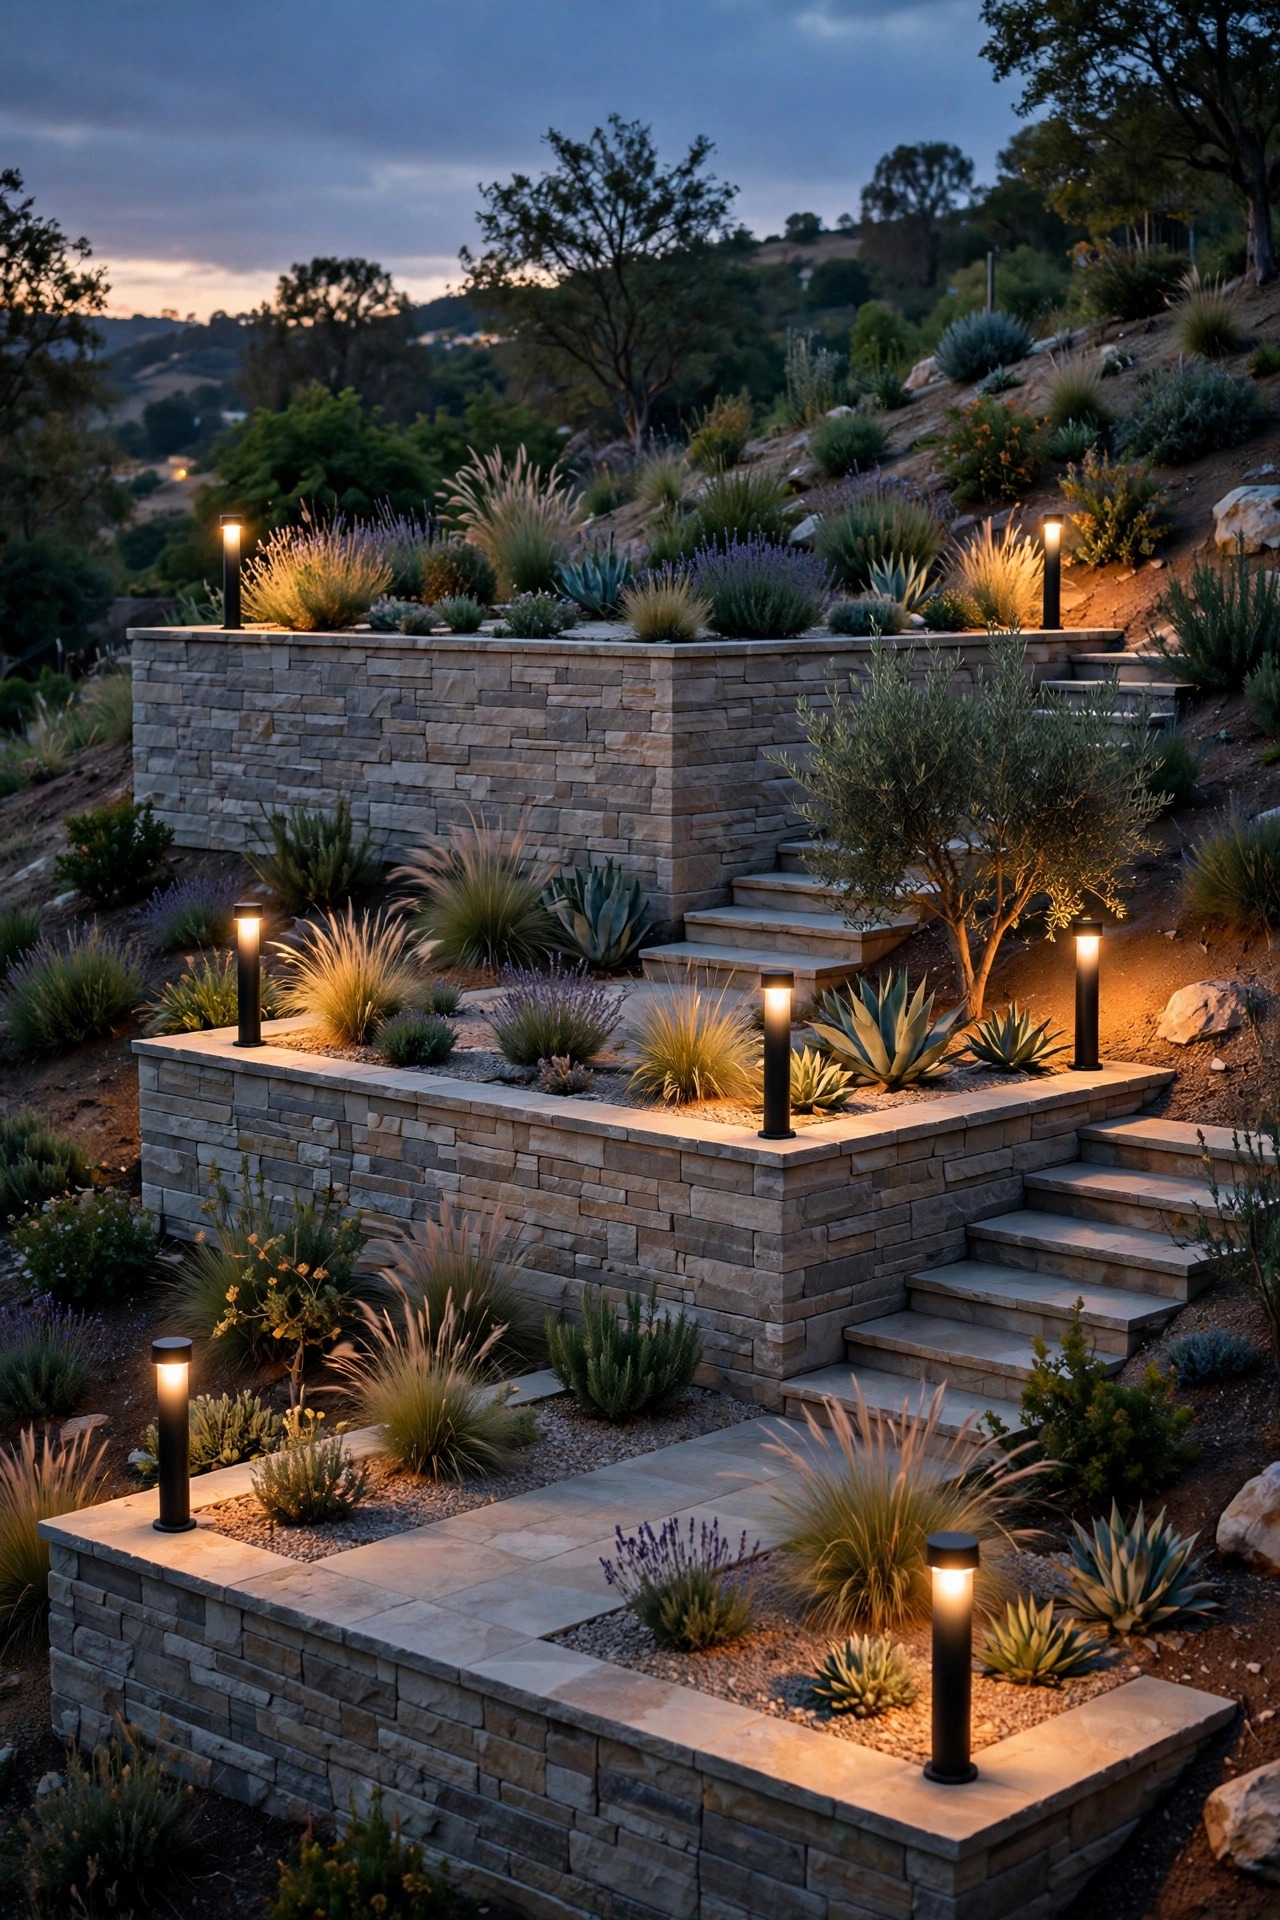
Terraces only work as outdoor rooms if you can read where one level ends and the next begins after dark, and bollard lights are purpose-built for exactly that job. These short, sturdy posts — usually 12 to 24 inches tall — throw a shielded pool of light downward and outward, so placing one at each terrace corner and beside each set of connecting steps defines the architecture of your hill without any glare. I prefer bollards over path stakes on terraces because they read as furniture rather than decoration, and their weight keeps them put on soft, sloped soil. Choose louvered or cut-off styles so the light lands on the ground plane where feet need it, in warm 2700K. Space is by function here, not rhythm: corners, step landings, and the edge of any drop-off over 18 inches get priority. Pour small concrete footings or use ground screws for the ones on terrace edges — frost heave and creeping soil will lean a casually staked bollard within two seasons, and a drunken line of lights ruins the tailored look you're paying for. (I shared my terraced front yard lighting ideas in another post if your levels face the street.) The effect at night is pure boutique hotel: calm, level pools of light stacked down the hill.
Suggested budget range: $200 – $520.
8. In-Ground Well Lights at the Base of the Slope
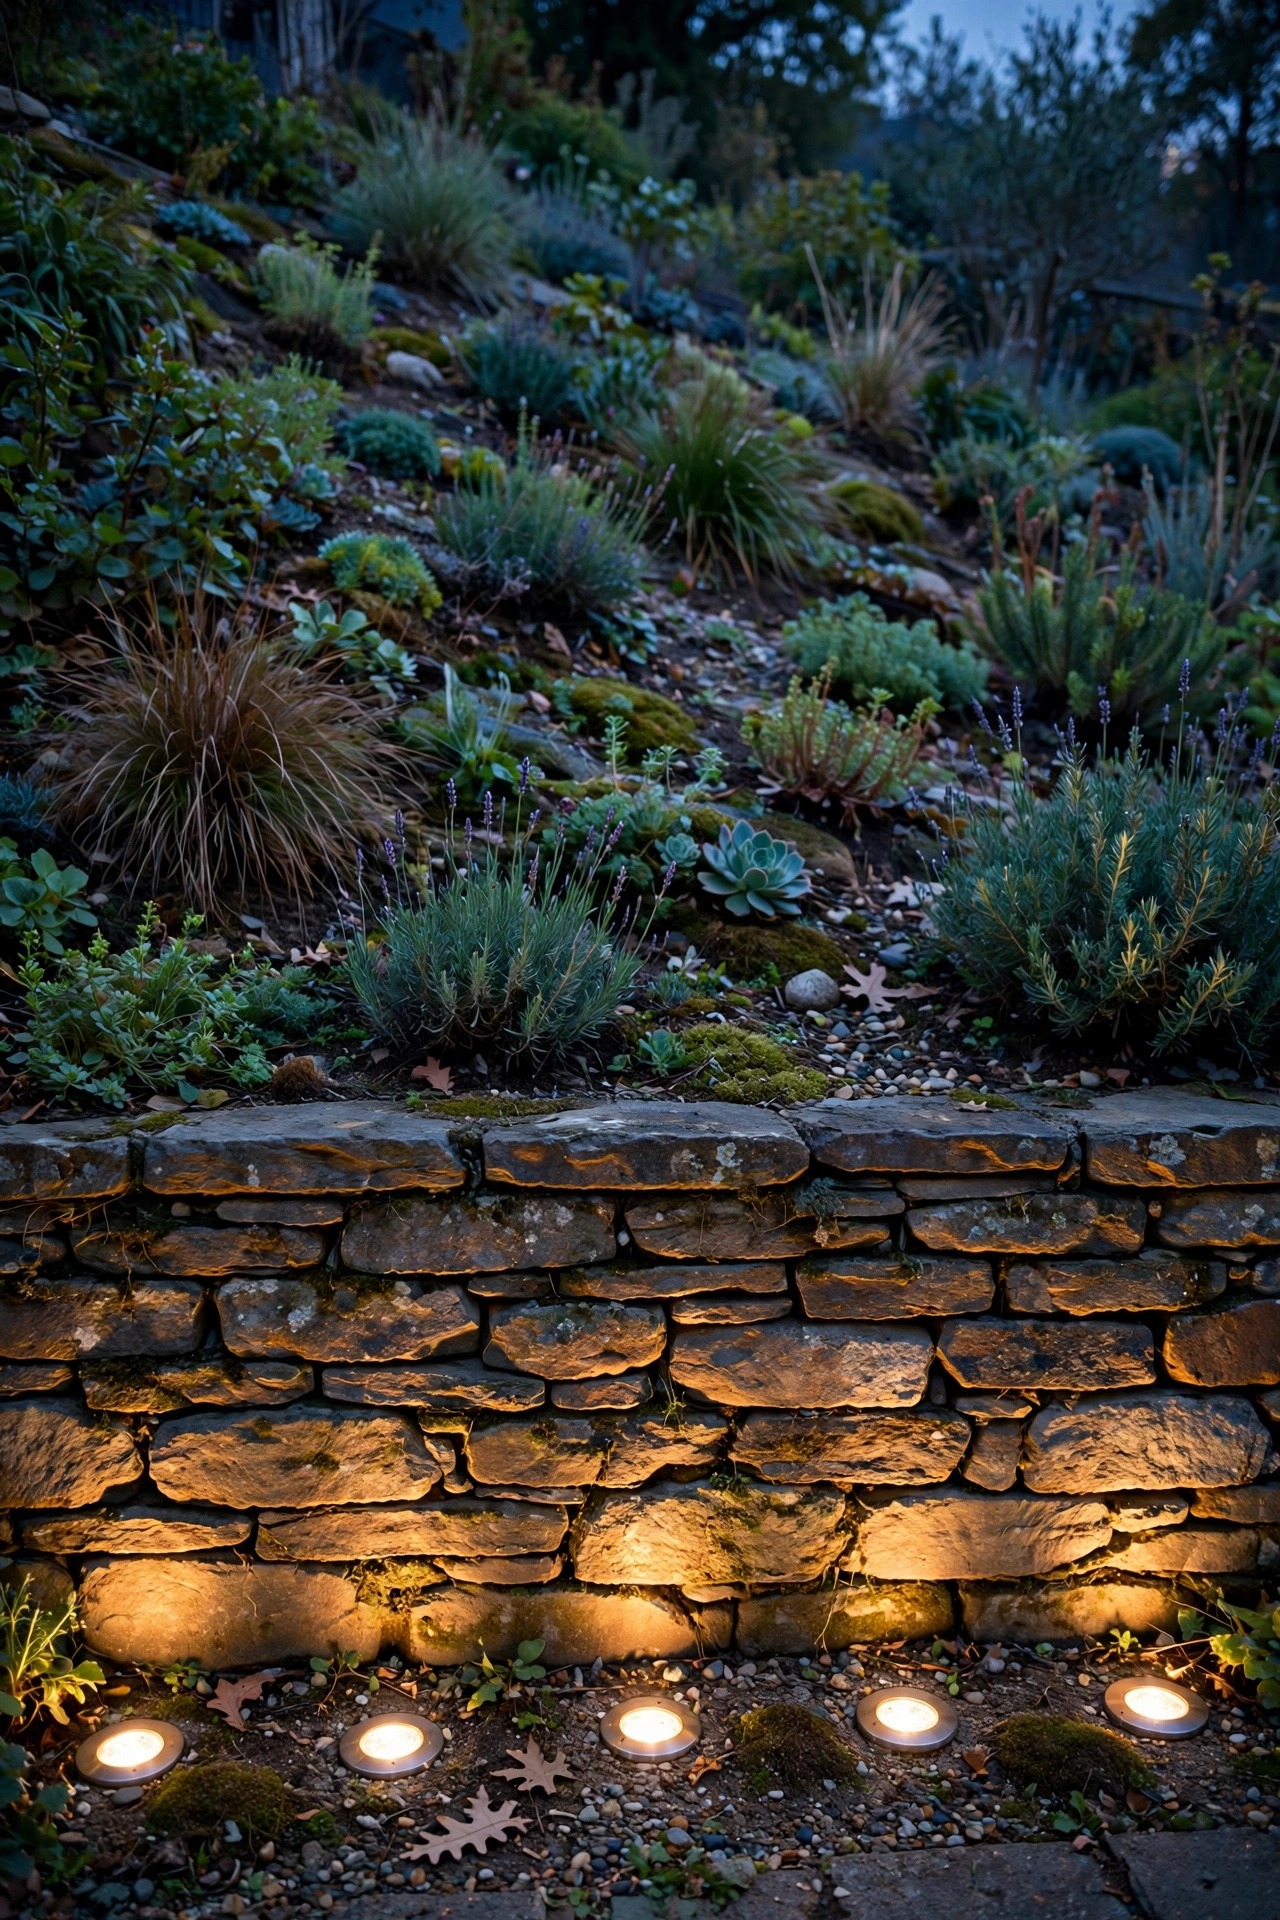
Where the slope meets the flat — the lawn at the bottom, the patio edge, the base of a big wall — in-ground well lights are the tidy professional's trick. The fixture sits flush in a buried sleeve, lens level with the soil or turf, and shoots a clean column of light straight up into whatever stands above it: a wall face, a multi-stem shrub, the underside of a Japanese maple. Because there's nothing above grade, there's nothing to trip over, knock with the mower, or watch slide downhill, which makes well lights a quietly brilliant choice for the busiest zones of a hillside yard. Look for fixtures with tempered glass lenses rated for walk-over loads, IP67 sealing, and a drainage bed of gravel beneath the sleeve — on a slope, water will find these fixtures, and a gravel sump is the difference between a decade of service and a fogged lens by spring. Keep the beam fairly narrow (25 to 40 degrees) and the wattage modest; a 4 to 6 watt LED is plenty when the target is close. I run a row of three along the base of our lowest wall, and from the house it looks like the hill itself is glowing.
Suggested budget range: $140 – $380.
9. LED Strip Lights Under Terrace Edges
The most modern look on this list costs the least effort: outdoor LED strip lights tucked under the cap of a retaining wall, beneath a bench seat built into the terrace, or under the nosing of deck stairs that spill onto the slope. The strip itself disappears completely; all you see is a floating line of warm light and the surface below it washed in glow. This trick makes a heavy timber or stone wall feel weightless, and it outlines each terrace level like architectural drawing ink. Use IP65 or IP67 silicone-sleeved strips rated for outdoor use, in 2700K, and mount them in an aluminum channel with a diffuser if you can — the channel protects the strip, hides the individual diode dots, and sheds the heat that shortens strip life. Any low-voltage strip can run off the same transformer as your landscape system with the right driver. One warning from experience: on slopes, the downhill ends of under-cap runs collect dripping water, so seal every cut end with the manufacturer's end caps and silicone, and add a tiny drip loop in the feed cable. Guests always run a hand along the wall looking for the fixture. There isn't one. Delightful.
Suggested budget range: $90 – $260.

10. Downlighting From the Deck or Pergola Above
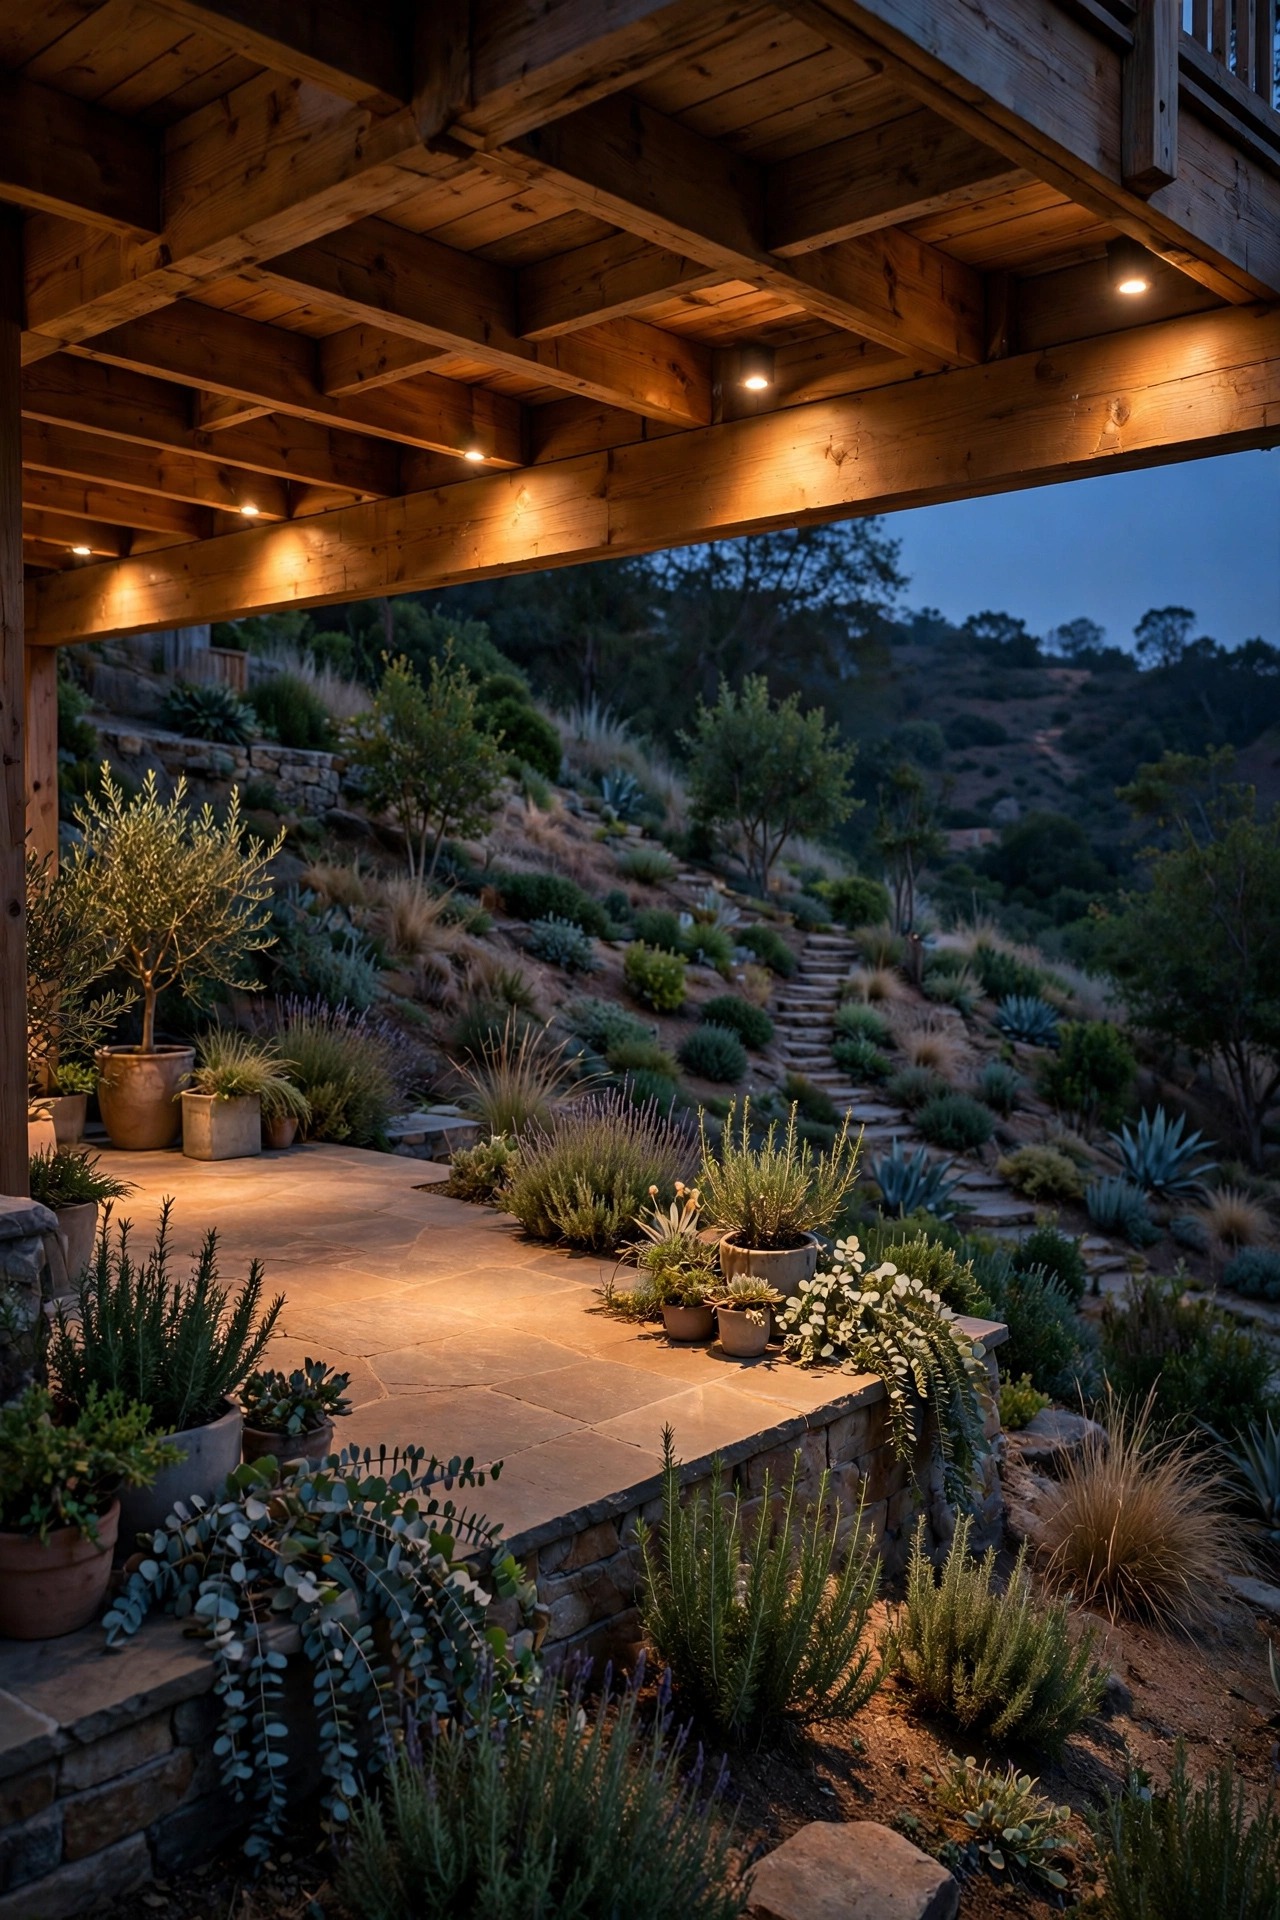
Most hillside homes have one great lighting asset already built: a deck, balcony or pergola sitting at the top of the slope. Mounting downlights under its railing, beams or eave lets you wash the first terrace and the upper slope in soft, usable light that feels like it comes from the house itself. I installed slim LED downlights under our deck rim joist, aimed outward at a gentle angle so the beam lands 8 to 10 feet out on the grade — enough to light the seating terrace and the top steps, not enough to glare into the lower yard. Fixtures mounted up high stay cleaner, drier and safer from garden tools than anything at soil level, and the wiring run is short and sheltered. Pair this zone with a dimmer: full brightness while you're grilling and carrying platters down, low and moody once everyone has settled with a drink. If your deck has a pergola, add a couple of downward fixtures on the posts instead of the usual string-light-only treatment — the combination of overhead structure light plus the string lights from idea six is the layering sweet spot on our hill.
Suggested budget range: $160 – $420.
11. Boulder and Rock Garden Accent Lighting
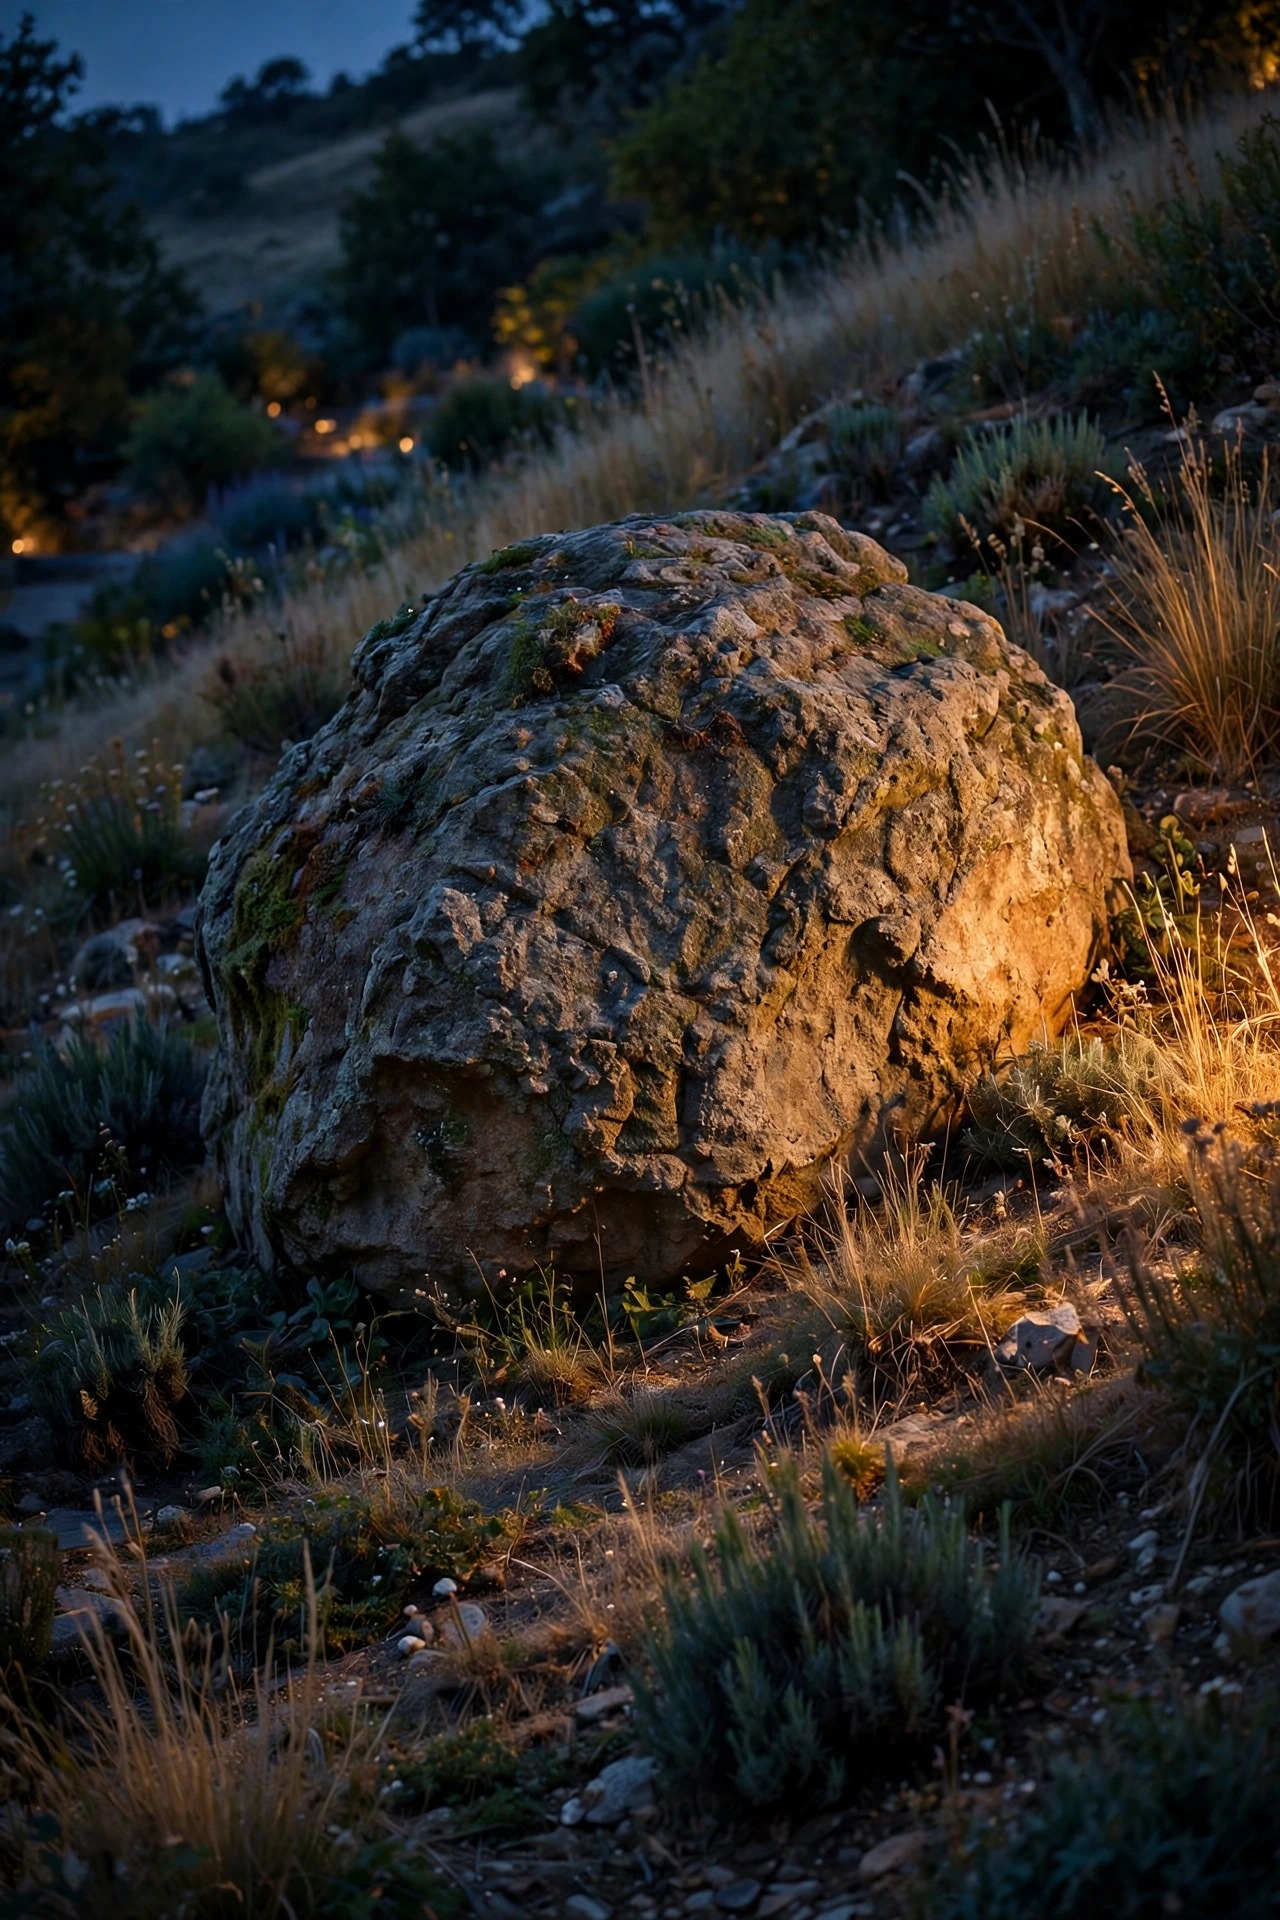
Sloped yards come with rocks — sometimes placed by a landscaper, sometimes just what the hill gave you — and a big character boulder lit at night becomes sculpture. The technique is grazing: set a small spotlight 6 to 12 inches from the rock's face, aimed across its surface rather than straight at it, so every fissure and lichen patch throws a tiny shadow. Cross-lighting with two low-wattage fixtures from either side doubles the texture. Choose 2700K to keep stone tones warm; cooler light makes granite read blue and dead. This is also the kindest lighting for a rock garden or dry creek bed running down the slope — a few low fixtures tucked between stones will make the whole feature shimmer like a stream bed after rain. Anchor fixtures in the pockets between rocks rather than in open soil; the stones shelter lenses from runoff and falling leaves, and the fixtures vanish by day. Keep wattage low, 3 to 5 watts per rock: stone reflects efficiently, and an over-lit boulder looks like a parking-lot ornament. Understated is the whole game here, and on a hill full of competing elements, the quiet accents are what make the design feel grown-up.
Suggested budget range: $100 – $300.
12. Hillside Water Feature Lighting
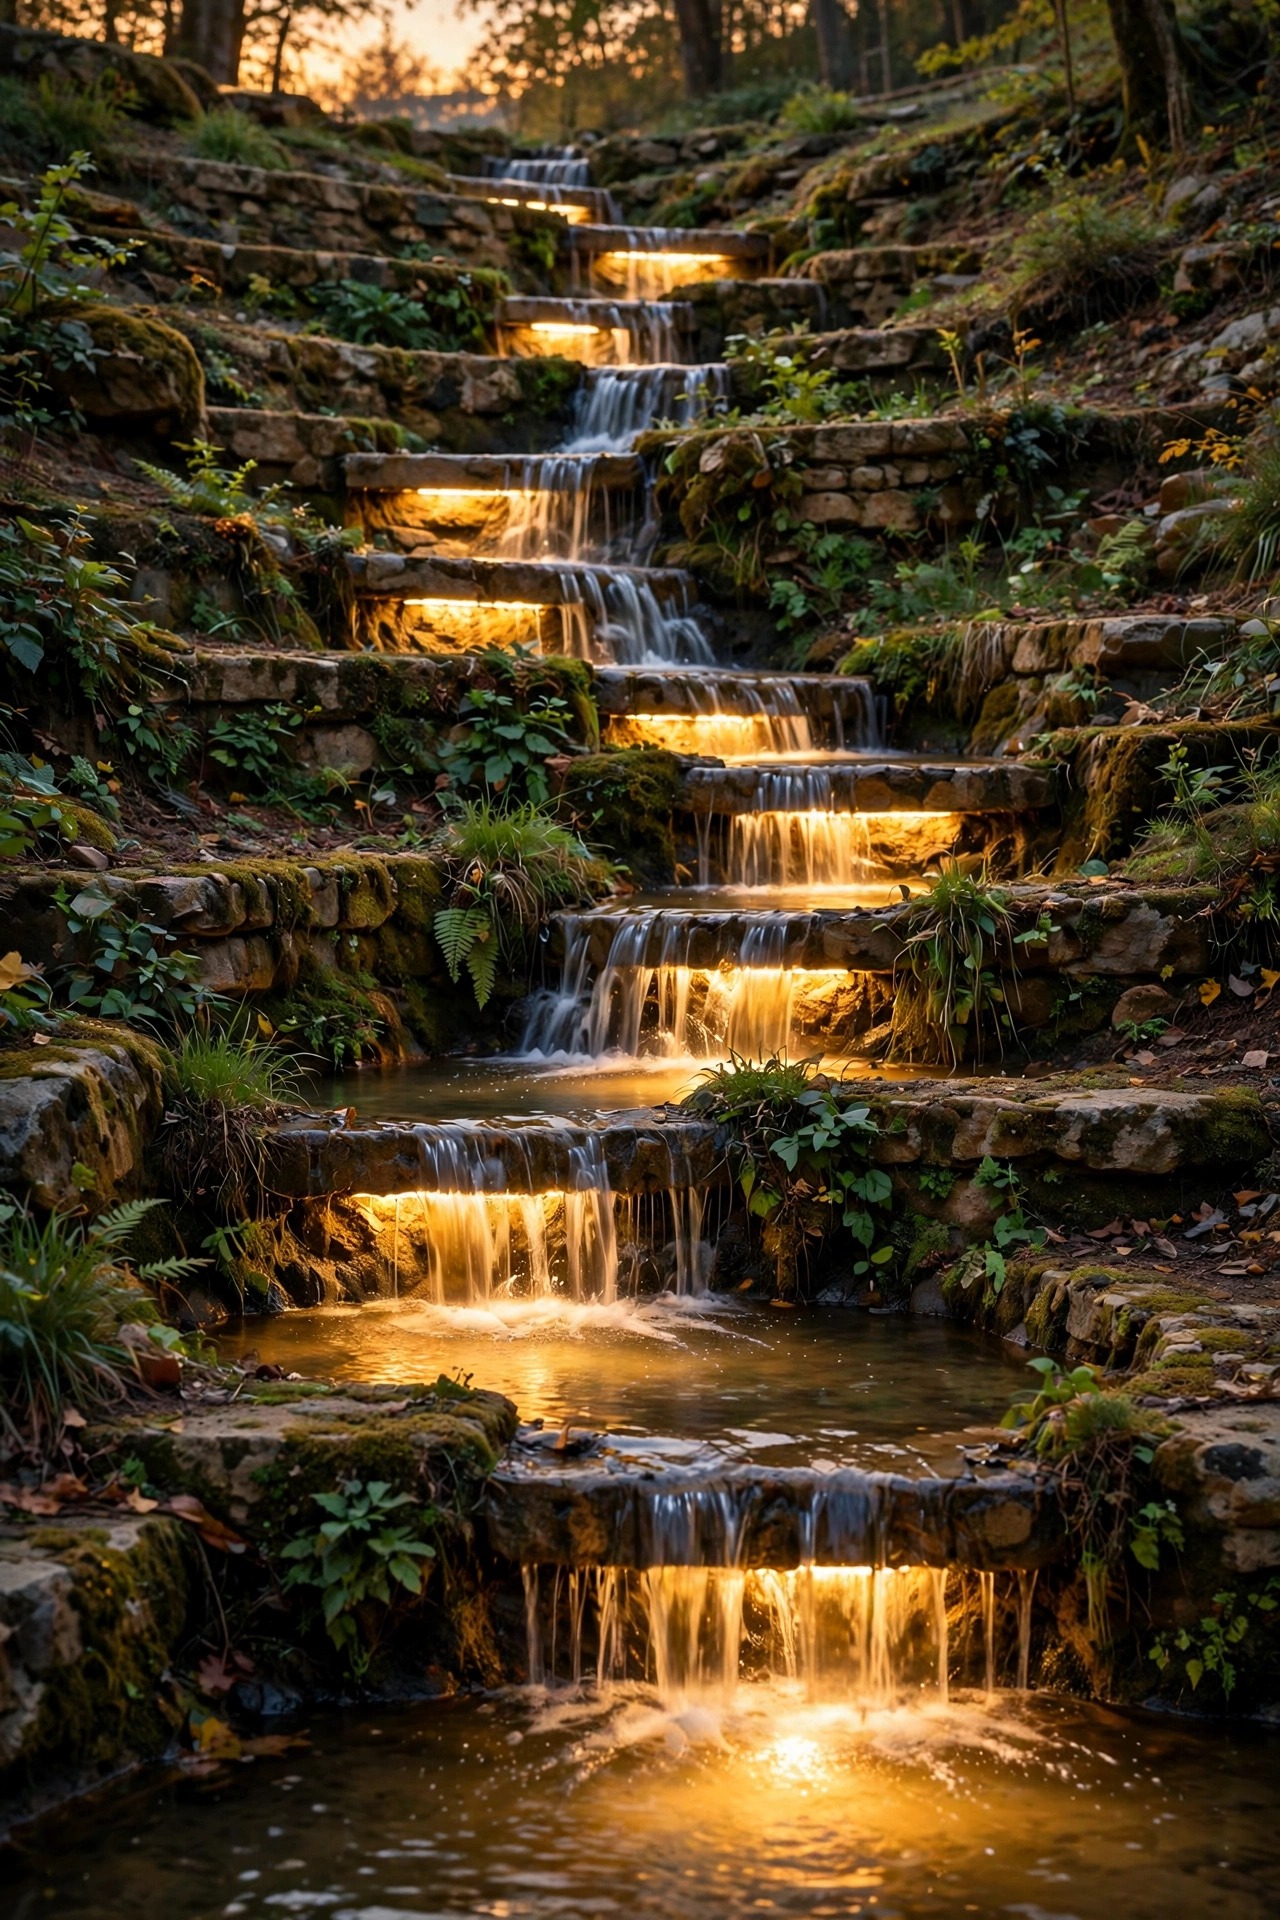
If your slope has any kind of water — a little waterfall stepping down between terraces, a pond at the base, even a recirculating stream — lighting it buys you motion, sound and sparkle in one move. Submersible LED fixtures tucked behind the fall's lip make the moving water glow from inside, and a single warm spotlight aimed at the pond surface from a low angle doubles your light through reflection. Water and slopes are natural partners because gravity does the plumbing for free, and the light show it creates becomes the yard's evening centerpiece — our neighbors' kids call ours the fairy stairs. Use only fixtures and transformers rated for submersion and water-feature use (IP68 for anything going in the water), keep all connections in accessible junction spots above the waterline, and let a GFCI-protected circuit feed everything, no exceptions. Aim light at moving water rather than still pools for the prettiest effect, and clean lenses monthly in summer — algae film is the enemy of sparkle. In winter, pull submersible fixtures before the freeze if your zone dips hard; ice expansion cracks lenses that survive everything else.
Suggested budget range: $130 – $360.
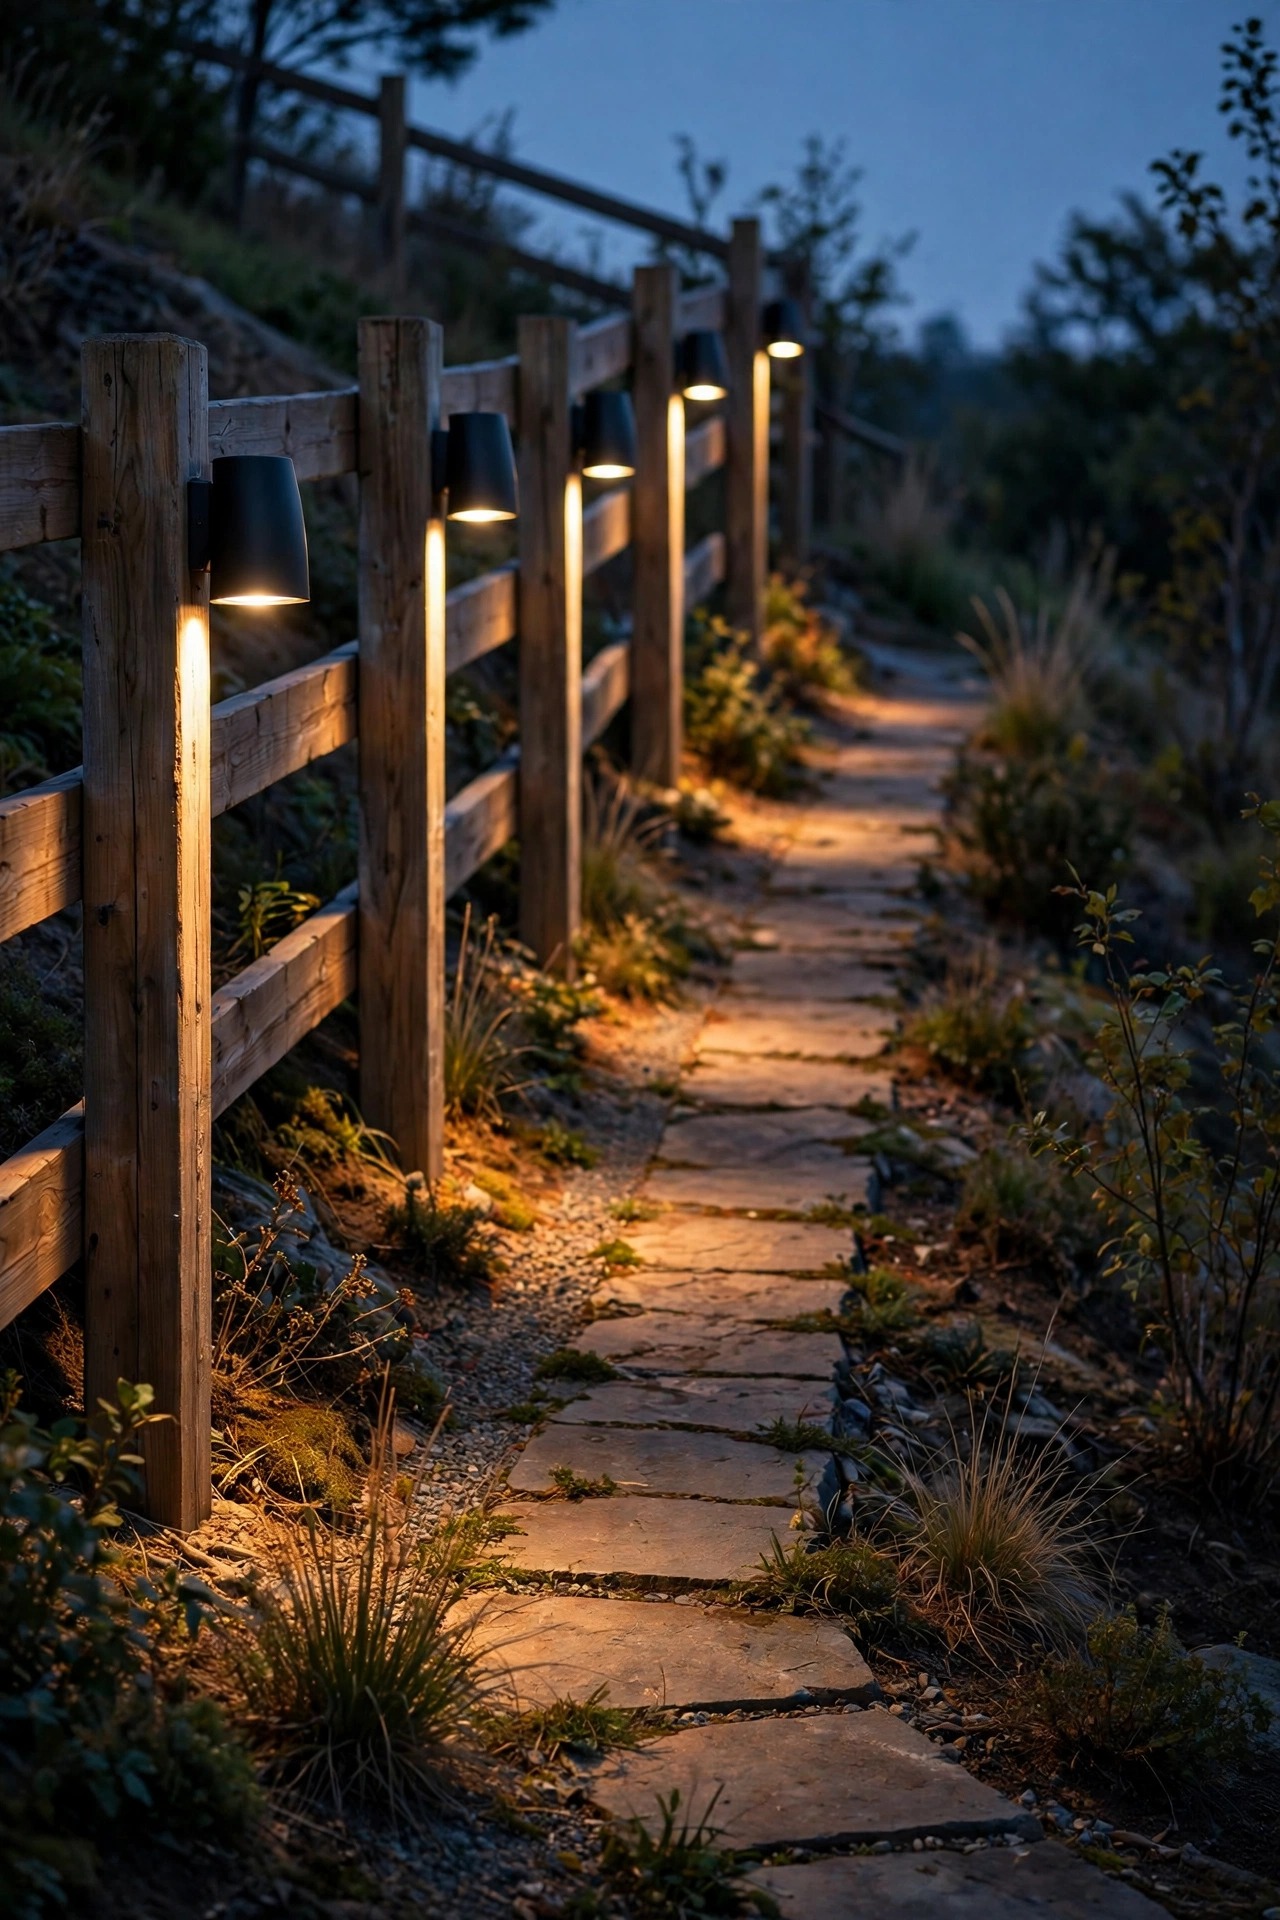
13. Fence-Mounted Downlights Along the Uphill Fence
A long fence running along the top or side of a sloped yard is a lighting opportunity most people walk right past. Mounting small shielded downlights on the fence posts — or under the top rail — at 8 to 10 foot intervals creates a gentle, even wash that follows the hill's contour, defines the property line beautifully, and lights the perimeter path without a single fixture in the ground. I use compact fixtures with a hooded design so all the light goes down, which keeps neighbors happy and the sky dark. Because the fixtures ride the fence, they step down the slope in a natural rhythm that mirrors the grade — one of those happy accidents where the practical choice is also the prettiest. Run the low-voltage cable along the back of the top rail with UV-rated clips, protected from string trimmers and weather. Solar fence-cap lights are the zero-wiring alternative and fine for marking the line, but for real usable light along a path, wired fixtures win every time on brightness and consistency. This is also the security layer of my design: a softly lit boundary makes the whole hillside feel watched over without a single harsh floodlight.
Suggested budget range: $170 – $440.
14. Follow the Contours: The Golden Rule of Sloped Backyard Lighting Ideas
Here's the rule I repeat to every friend with a hill: light the path the way water flows — along the contour, in gentle curves, never in a straight airport-runway line marching up the grade. Low path lights with wide, shielded spreads placed along the uphill edge of a curving walk let each fixture's pool overlap the next, so you walk through continuous ribbons of light instead of alternating glare and darkness. Keep fixtures low (12 to 18 inches) and hooded on slopes, because sight lines change as you climb: a path light that's perfectly shielded from the patio will shine straight into your eyes when you're three steps above it. Stagger fixtures on alternating sides of switchbacks, and shorten spacing to about 4 feet on the steep stretches and outer curves where footing gets tricky. I'll be honest — this took me two rearrangements to get right on our own zigzag path, and the trick that finally worked was testing with inexpensive solar stakes for a week before committing the wired fixtures to their spots. The same approach transformed my front slope, too; I wrote up those sloped front yard lighting ideas separately if your hill faces the street.
Suggested budget range: $110 – $290.

15. Layer It All in Zones With Timers
After fifteen ideas, here's the one that ties them together: put your hillside on zones, and let timers run the show. A slope reads best when its layers come alive in sequence — the crest tree and wall washes at dusk, paths and steps a touch later, accents and water last — and when the whole hill isn't blazing at one flat brightness. I run three zones off a single 300-watt transformer with an astronomic timer: architectural lights (walls, trees), safety lights (steps, paths, terraces), and accents (rocks, water, strips). The safety zone stays on until we go to bed; the accents bow out at 11; a photocell plus timer combo means I never touch a switch as the seasons shift. Zoning also solves the practical slope problems — you're trenching cable in logical contour-following runs instead of one giant loop fighting voltage drop uphill, and when a fixture fails you know which third of the hill to search. Start with two zones if your transformer is small, use the smartest timer you can justify, and stand at the street at dusk the first night it all runs itself. That quiet little light show, stacked down your hill, is the whole point.
Suggested budget range: $90 – $300.

Frequently Asked Questions
What is the best type of lighting for a steep backyard slope?
Low-voltage wired lighting wins on steep slopes. It's safe to trench on a grade, the fixtures anchor firmly, and brightness stays consistent from the top of the hill to the bottom. Use solar for marking gentle paths, but rely on wired step lights, wall washes and bollards anywhere footing and safety actually matter.
How do I keep landscape lights from sliding or tilting on a hillside?
Anchor everything like the hill is trying to steal it — because it is. Use longer stakes, ground screws or small concrete footings for bollards, tuck fixtures into pockets between rocks, and re-seat solar stakes after heavy rain. Runoff and frost heave do the damage, so a five-minute check each spring keeps the whole design standing straight.
Are solar lights bright enough for a sloped backyard?
For ambiance and route-marking, yes — modern warm-white solar stakes and spotlights handle switchback paths and accents beautifully. For stairs, terraces and anywhere someone could miss a step, no. Mix both: solar where it's decorative, wired low-voltage where it's functional. That hybrid is exactly how our hill is set up.
How much does it cost to light a terraced or hillside backyard?
A tasteful start — one wall wash run plus step lights — lands around $300 to $850 in fixtures and a transformer. Lighting three terraces fully with zones, timers and accents typically runs $900 to $2,500 DIY. Slopes add labor, not exotic parts, so doing it yourself in stages is where the real savings live.
Conclusion
Here's what I've learned after three seasons of lighting our stubborn, beautiful hill: a slope isn't a problem to hide, it's three yards stacked in one. Wash the walls, make every step honest and safe, float a little light in the trees, and let the layers take turns. If you take nothing else from these sloped backyard lighting ideas, take the layering — low, warm light at several heights will always beat one bright blast. Start with the steps and one wall this weekend; the hill will do the rest. And when you're ready for more, browse the rest of my outdoor lighting ideas here on the site — your front yard deserves the same treatment.