<h2>Intro</h2>
There's something about the first warm evenings of spring that makes me want to linger outside a little longer — and honestly, that's when your home's first impression matters most. Spring front yard lighting is the easiest way I know to make everything look fresh and intentional, from the tulips you planted last fall to the new paint on the front door. After months of dark winter evenings, the right glow doesn't just add curb appeal; it makes your home feel alive again.
My whole philosophy comes down to layering: no single fixture should do all the work. Instead, combine three kinds of light — ambient glow for the big shapes, accents that spotlight the details you love (a flowering tree, a textured brick wall), and task lighting that keeps paths and steps safe. When those layers work together, the effect is seamless.
In this post, I'm sharing 21 of my favorite spring front yard lighting ideas, each with real how-to details — bulb types, spacing, timers, placement measurements — plus the budget you can expect. Whether you're refreshing one walkway or reimagining the whole yard, there's something here for you.
1. Refresh the Walkway With Solar LED Path Stakes
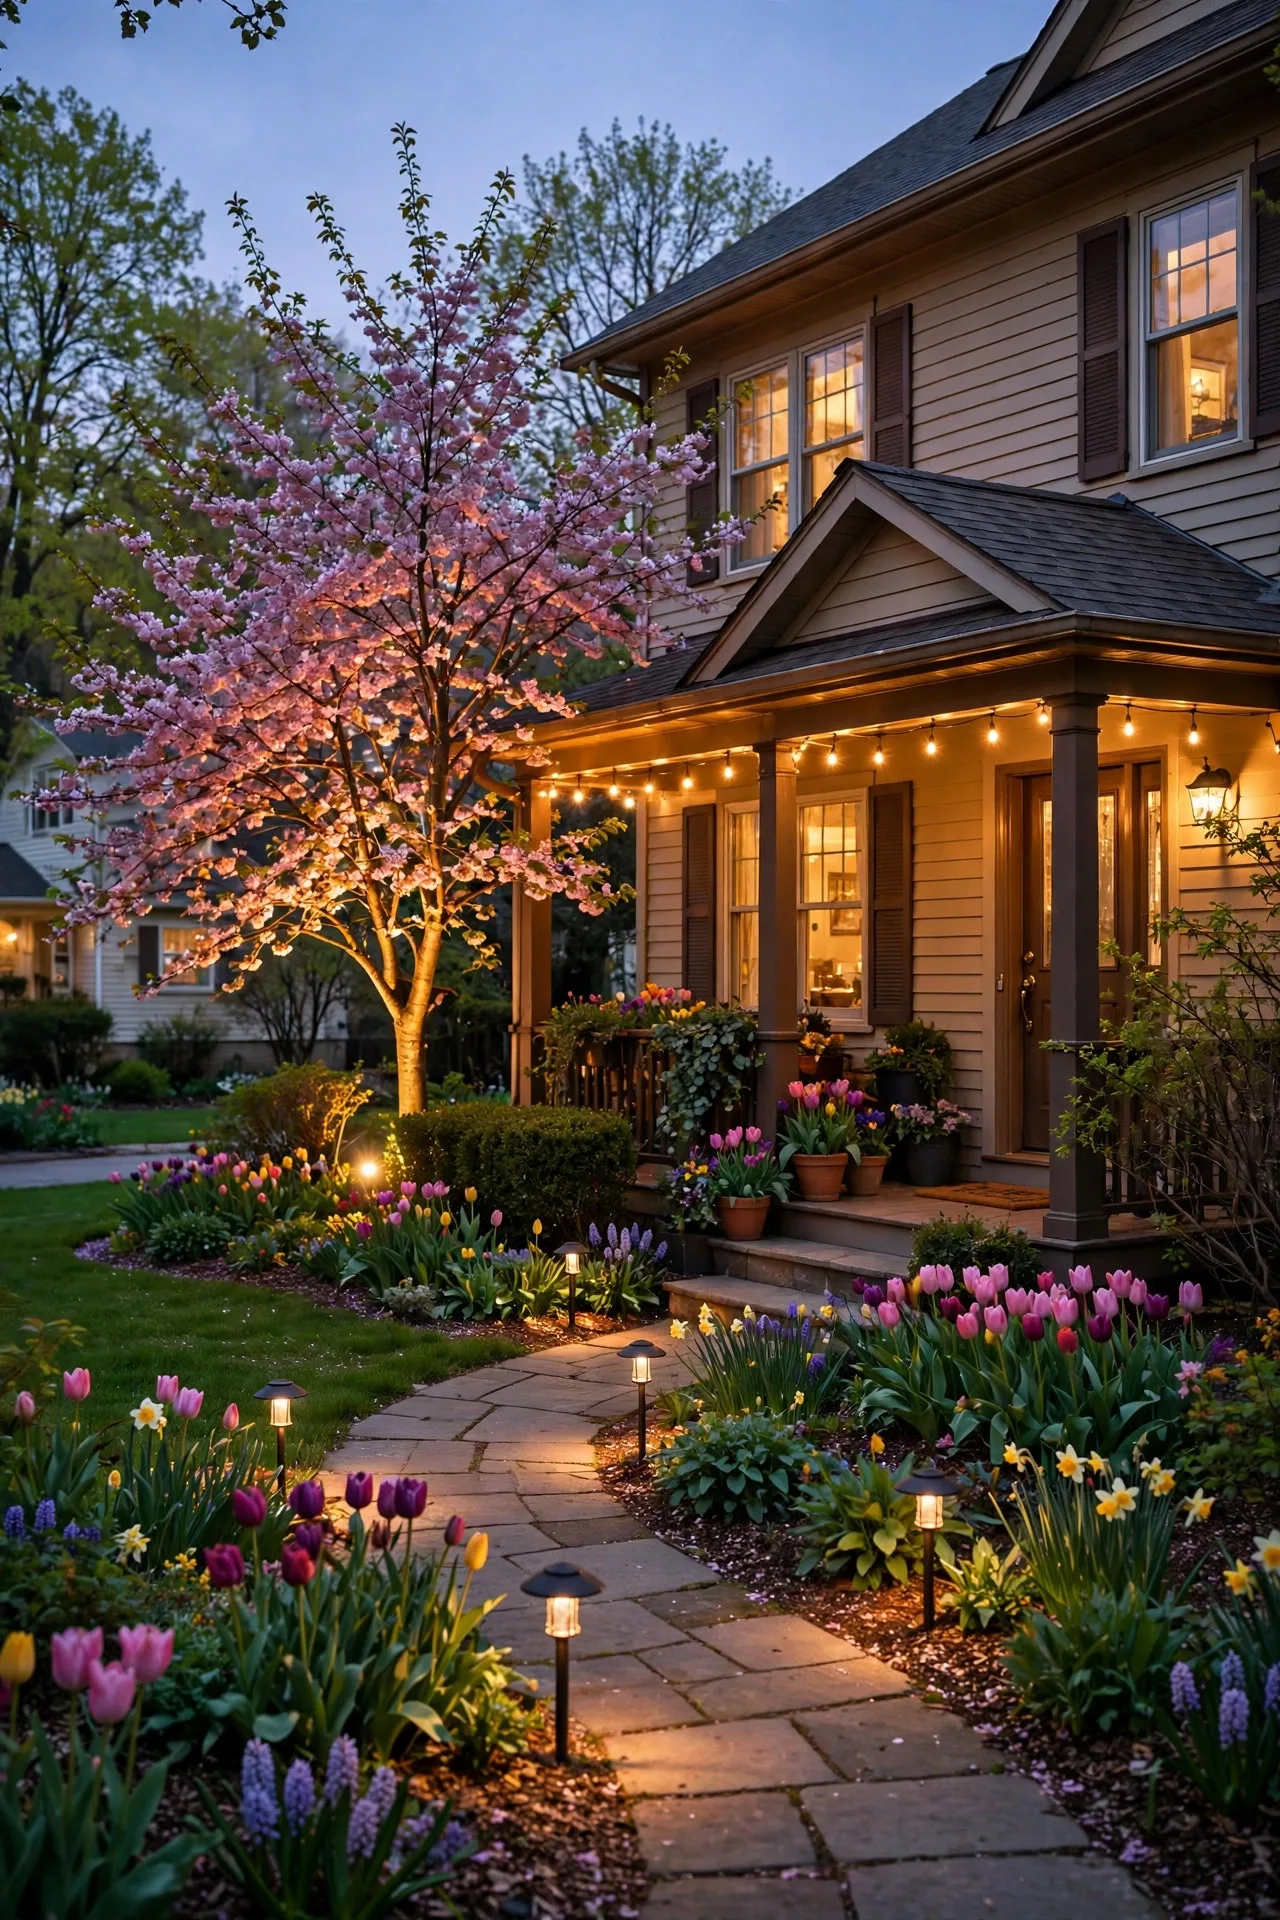
After winter, I always start at the walkway — it's the literal red carpet to your front door, and it's where spring front yard lighting makes the biggest first impression. Solar LED path stakes are my go-to here because there's no wiring involved: just push them into the soil and let the sun do the work. Place them 6 to 8 feet apart along the walkway, alternating sides for a natural, zigzag rhythm rather than a runway look. Stick with warm white (around 2700K–3000K); cool white makes your yard look like a parking lot. In my experience, stakes with a photocell sensor are worth the extra few dollars — they switch on automatically at dusk and off at dawn. Keep the solar panels clear of mulch and leaf litter in spring, and give them full sun for at least 6 hours a day so they last through the night. If a stake looks dim, try moving it before you replace it — shifting even a few feet into better sun often fixes it.
Suggested budget range: $30 – $80.
2. Uplight Your Flowering Tree
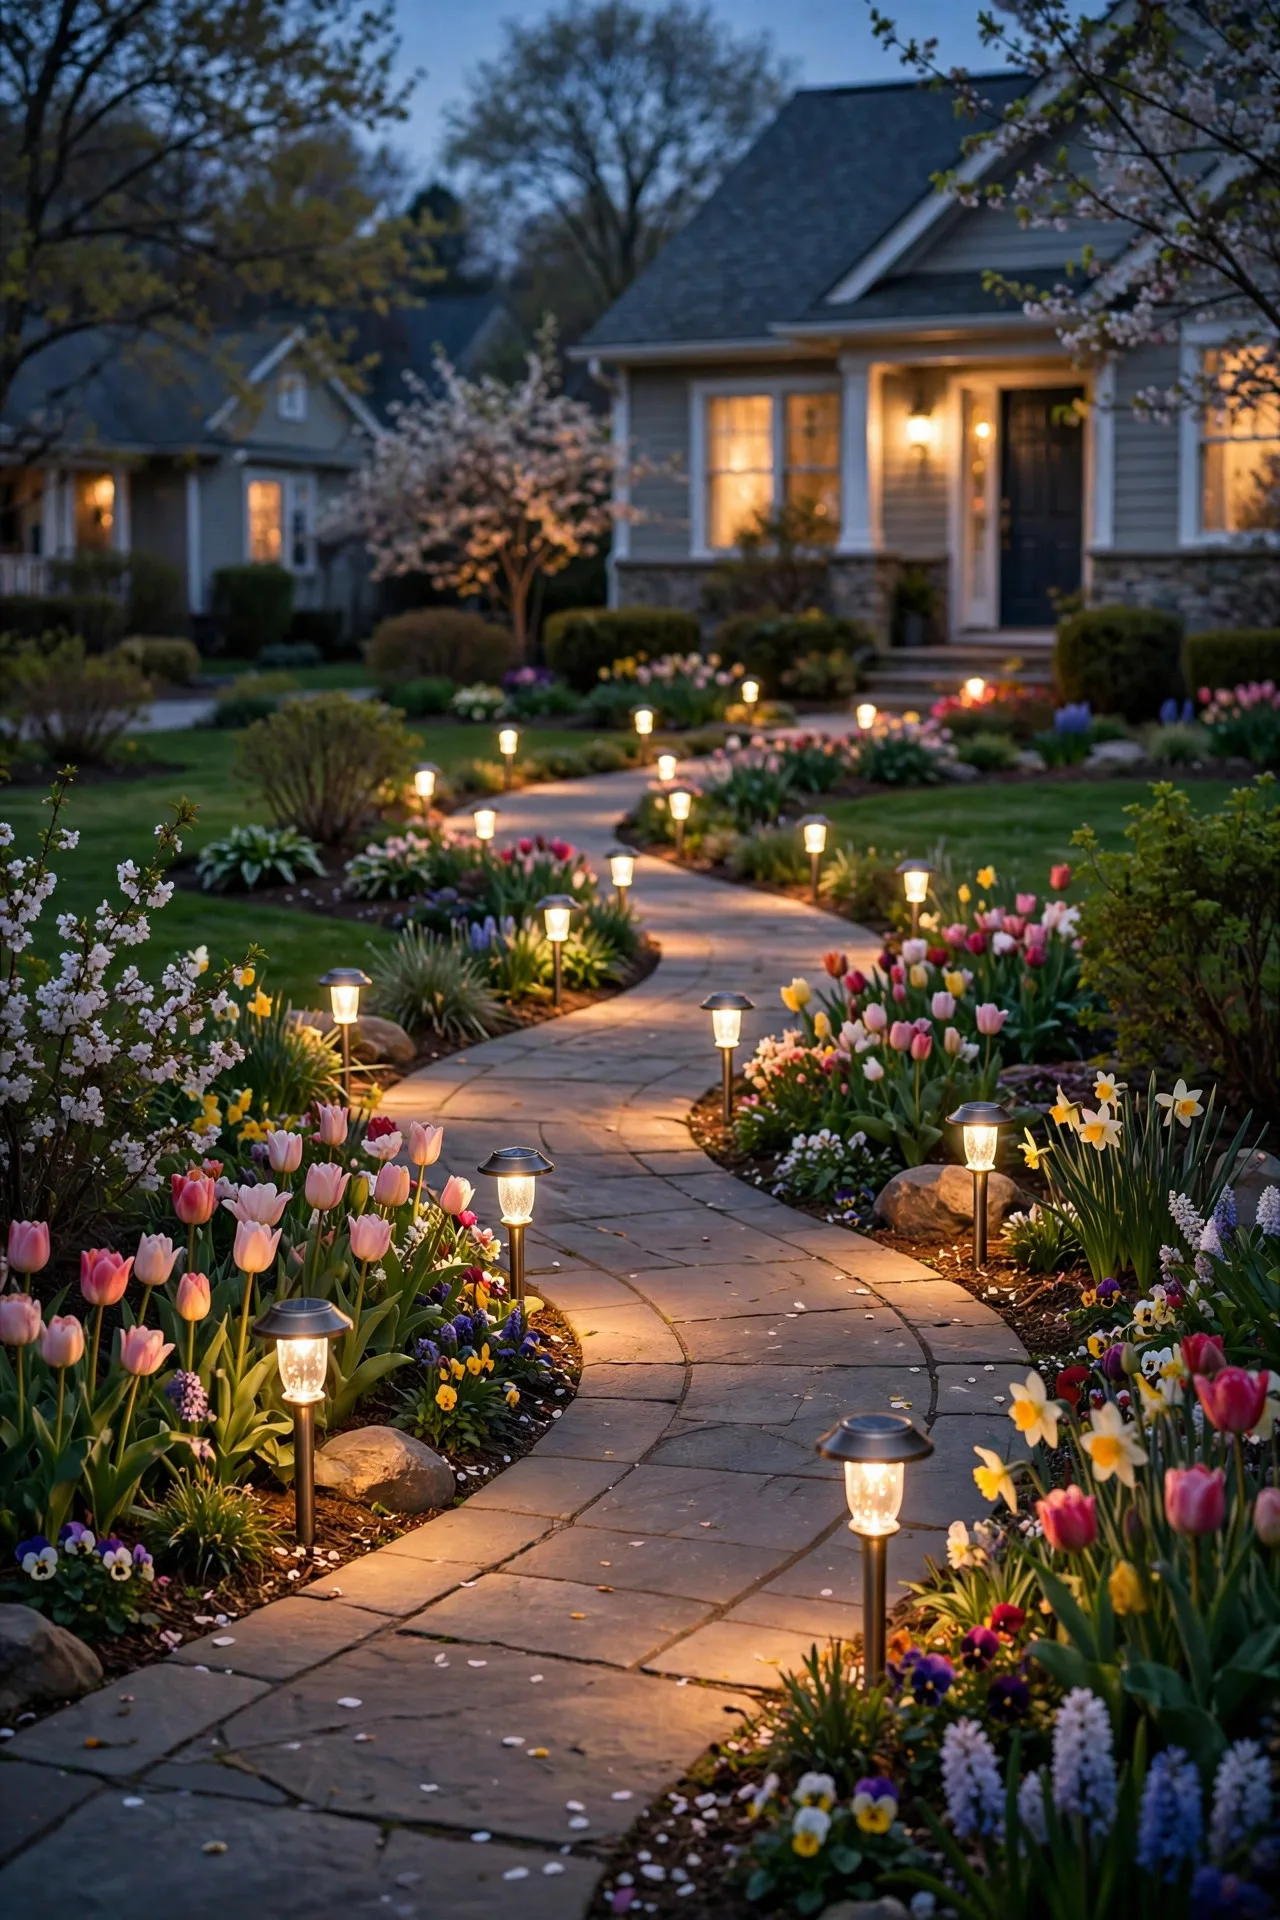
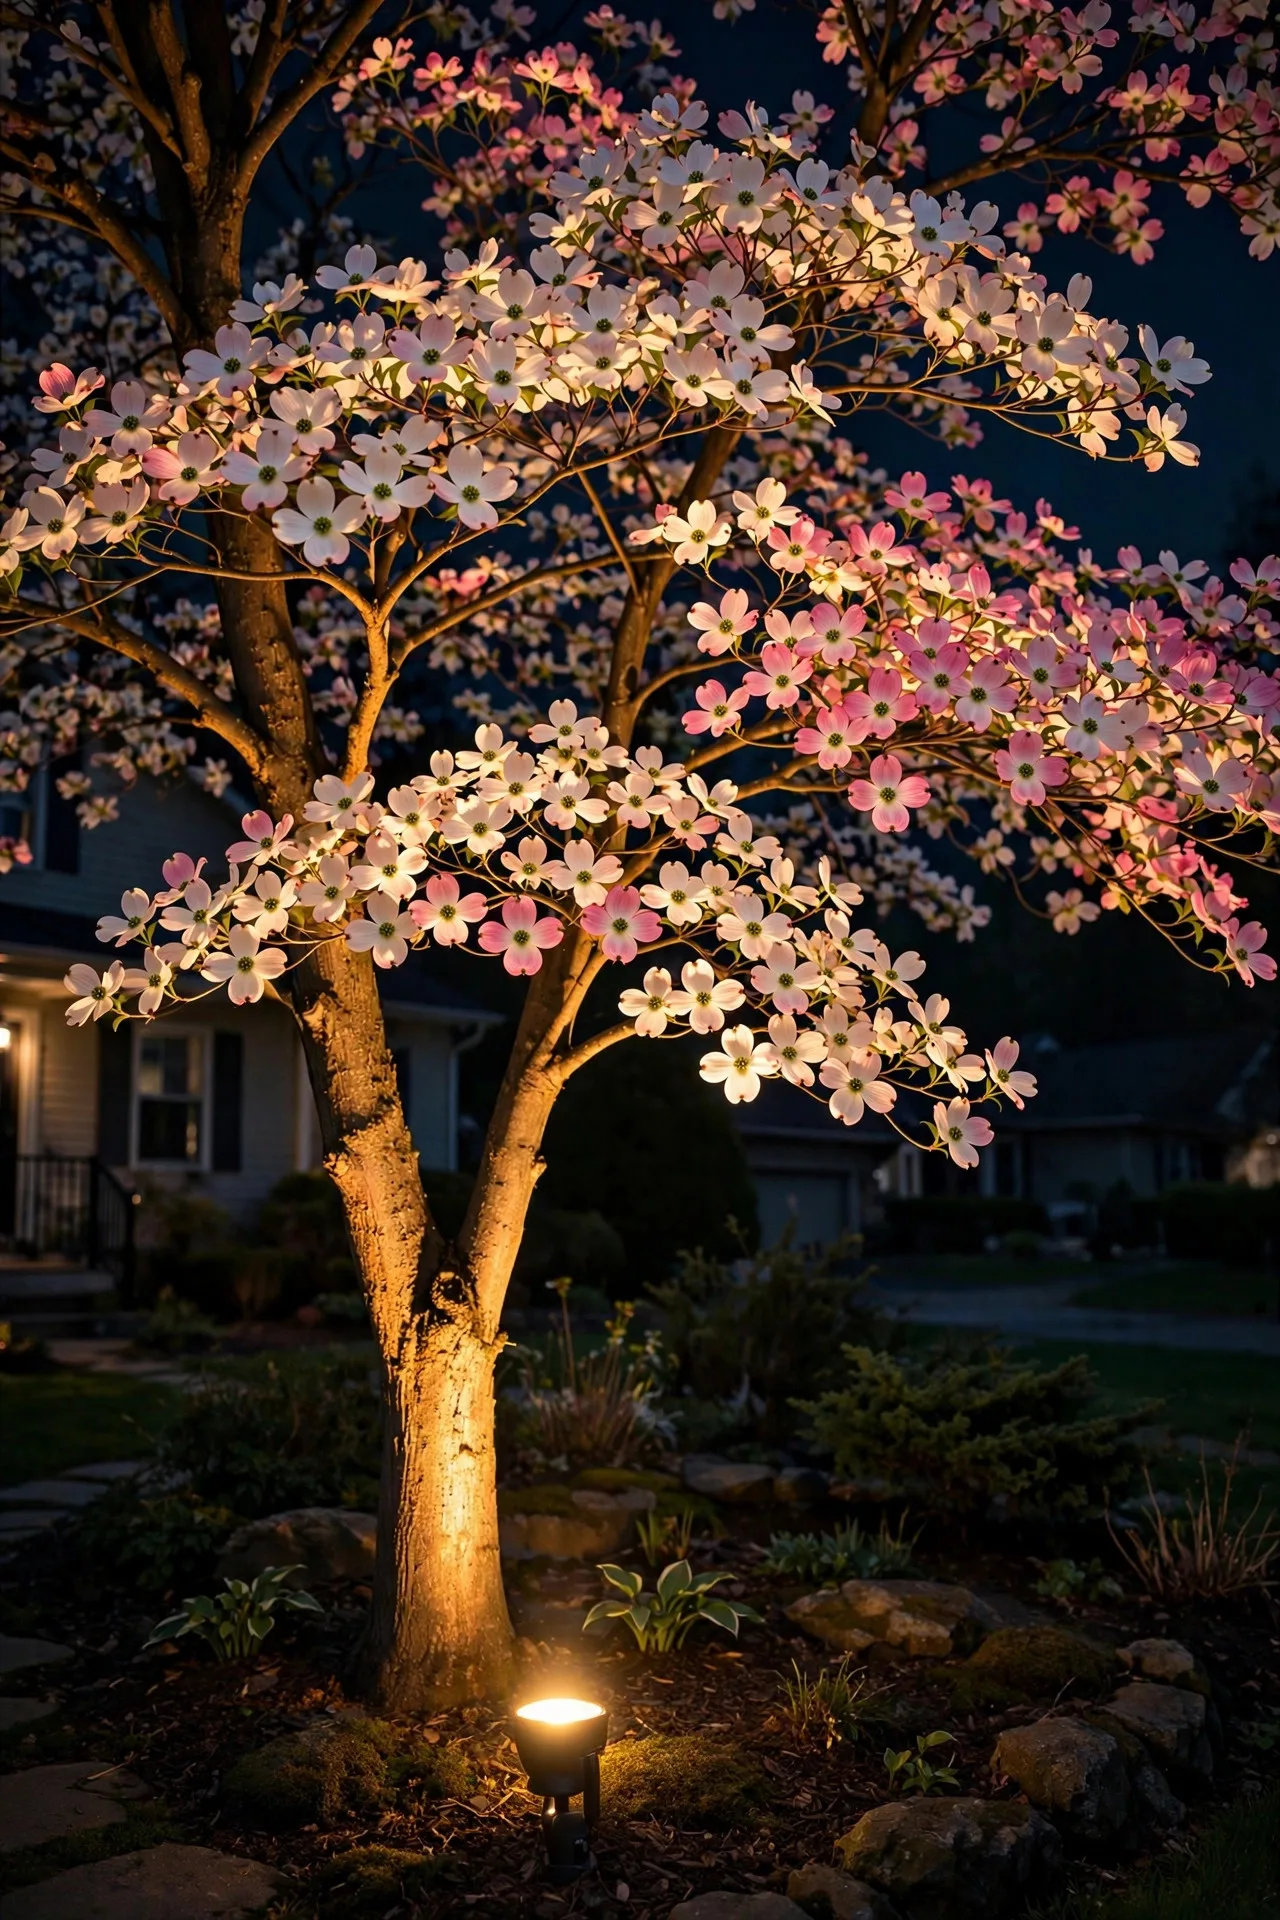
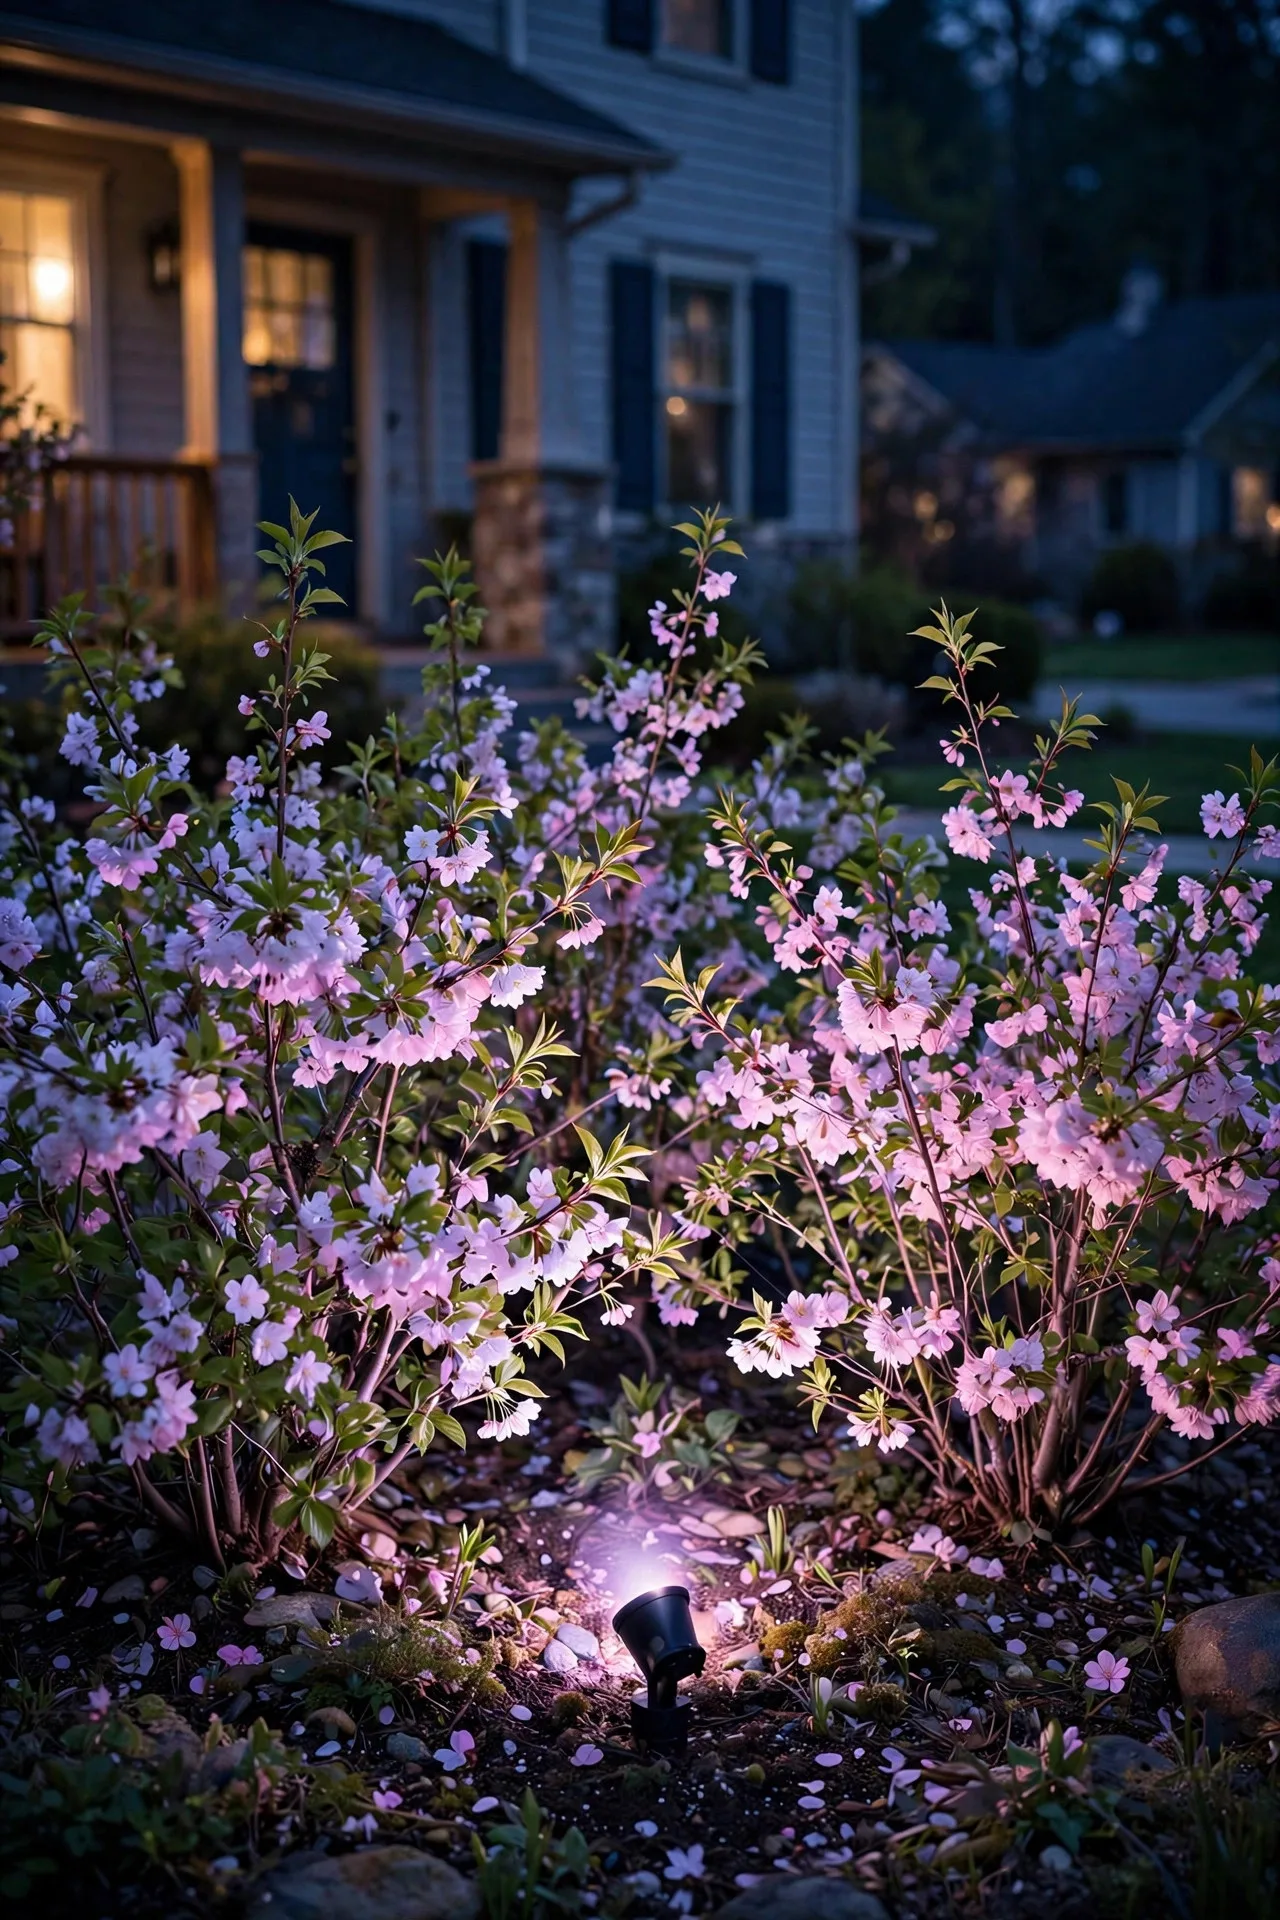
A flowering dogwood, cherry, or magnolia is basically spring's red carpet moment, and an uplight at its base turns that show into an after-dark feature. Place a low-voltage LED spotlight 12 to 18 inches from the trunk, aimed up into the canopy at a slight angle so the light grazes the branches and blossoms. One well-aimed fixture is plenty for a tree with a 6- to 8-foot canopy; go for two only if the trunk is thick or the canopy is very wide. Choose a fixture with a shroud or adjustable hood to keep the beam tight and avoid glare spilling into your neighbors' windows. I always recommend warm white LEDs here — around 2700K — because they make blossoms look creamy and full instead of flat. Low-voltage (12V) systems are safe for DIY and cheap to run, and a single fixture draws only 3 to 5 watts. Bury the cable a couple of inches under mulch to protect it from mowers and curious squirrels.
Suggested budget range: $40 – $120.
3. Wash Flower Beds With Well Lights
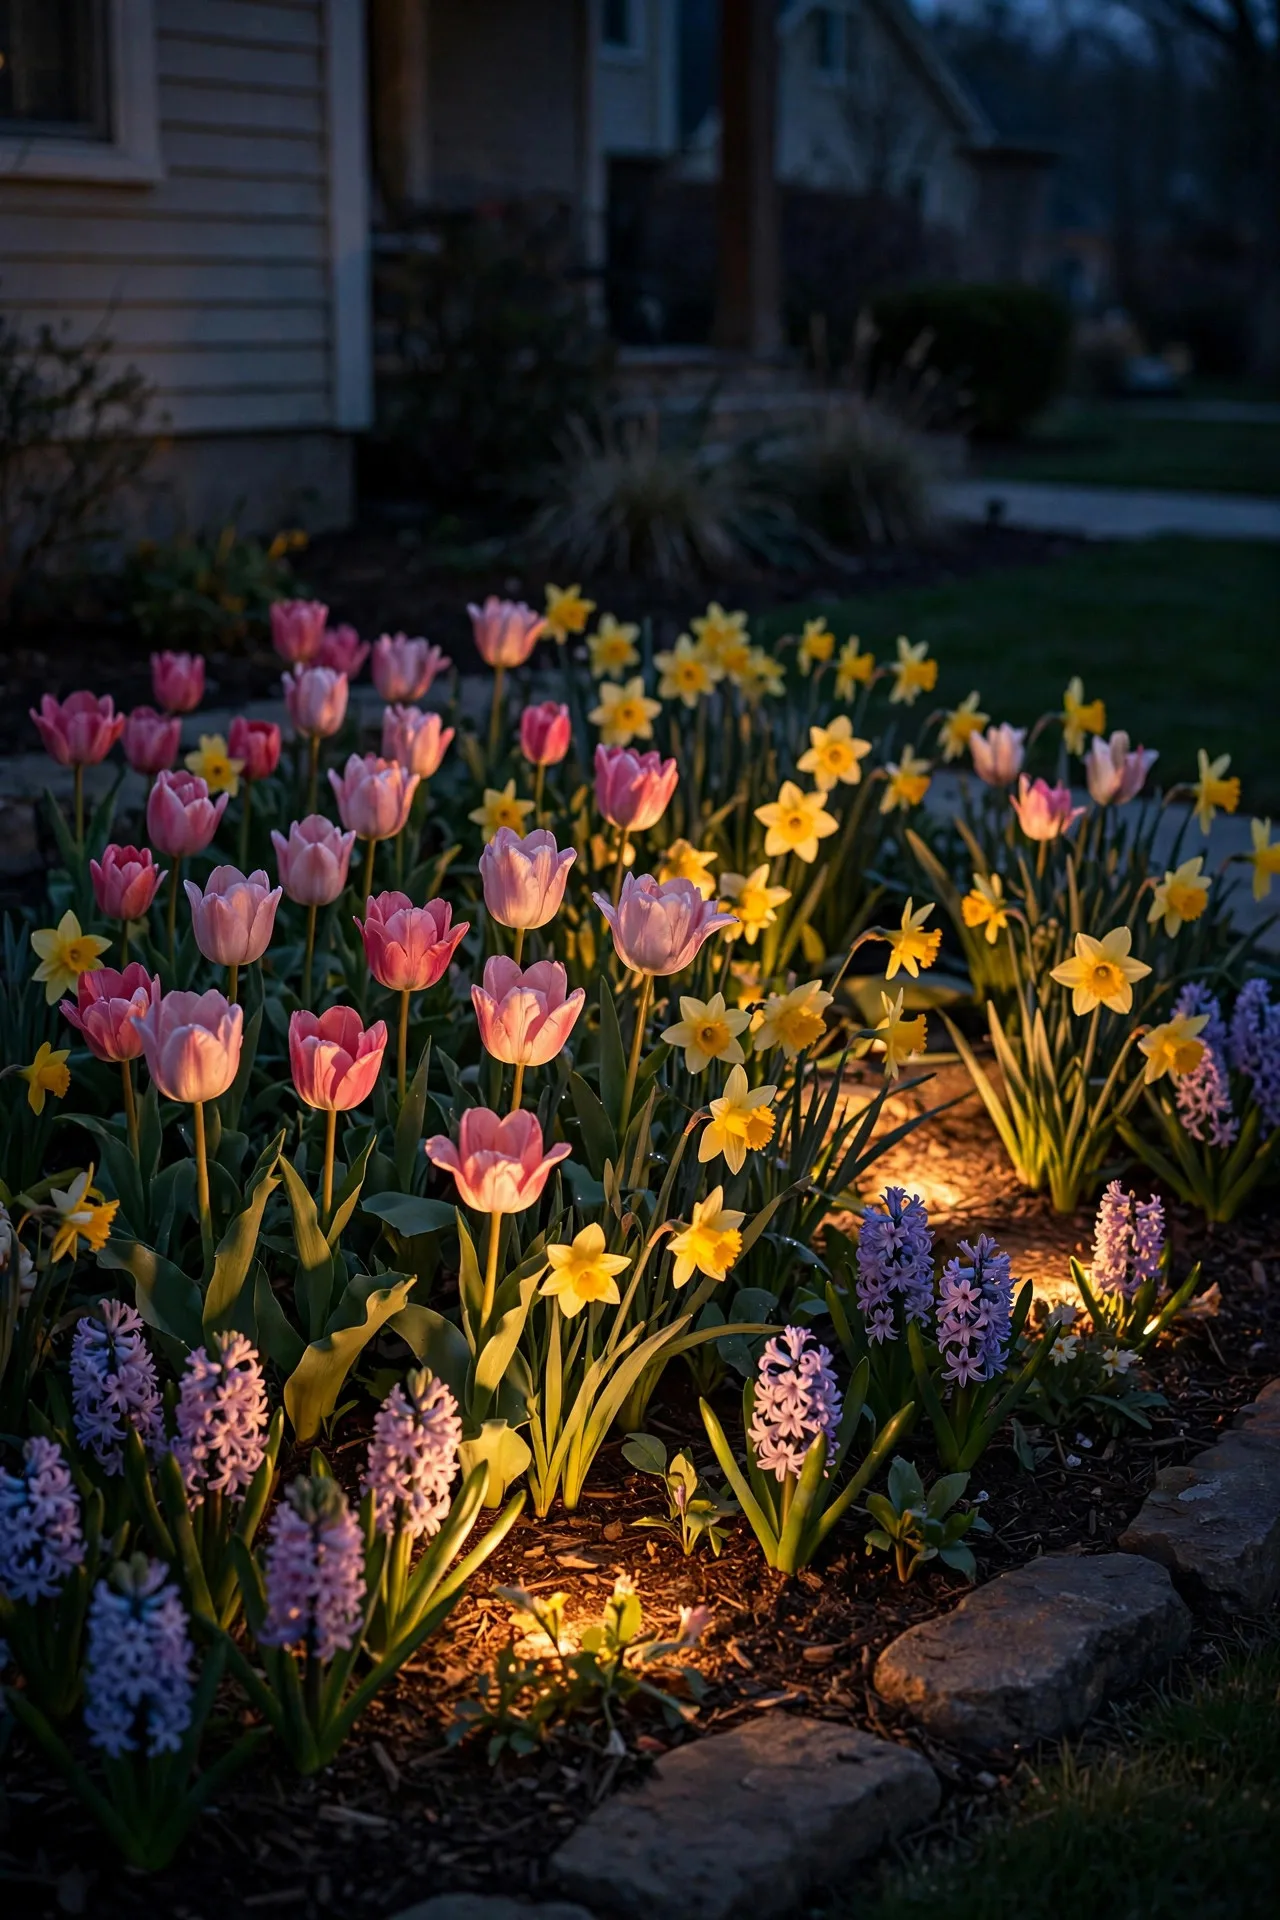
Spring bulbs are a short-lived miracle, so give them the spotlight they deserve. Low-voltage LED well lights — the kind that sit flush in the ground — create a soft wash of light across tulips, daffodils, and hyacinths without any visible fixture clutter. Install them just behind the front row of plantings, aimed slightly forward so the glow catches the petals and casts gentle shadows on the lawn or facade behind. Spacing matters: one fixture every 3 to 4 feet gives you an even wash; too far apart and you get dark gaps. Look for adjustable beam angles so you can widen the spread for broad beds or narrow it for a single cluster of showy blooms. Because they sit at ground level, make sure the fixtures are rated for outdoor use and that the lens sits slightly above the mulch line — spring rains can flood a fixture that's buried too deep. These tuck so cleanly into beds that even in daylight, nobody notices them.
Suggested budget range: $60 – $150.
4. Pair Up Front Door Sconces
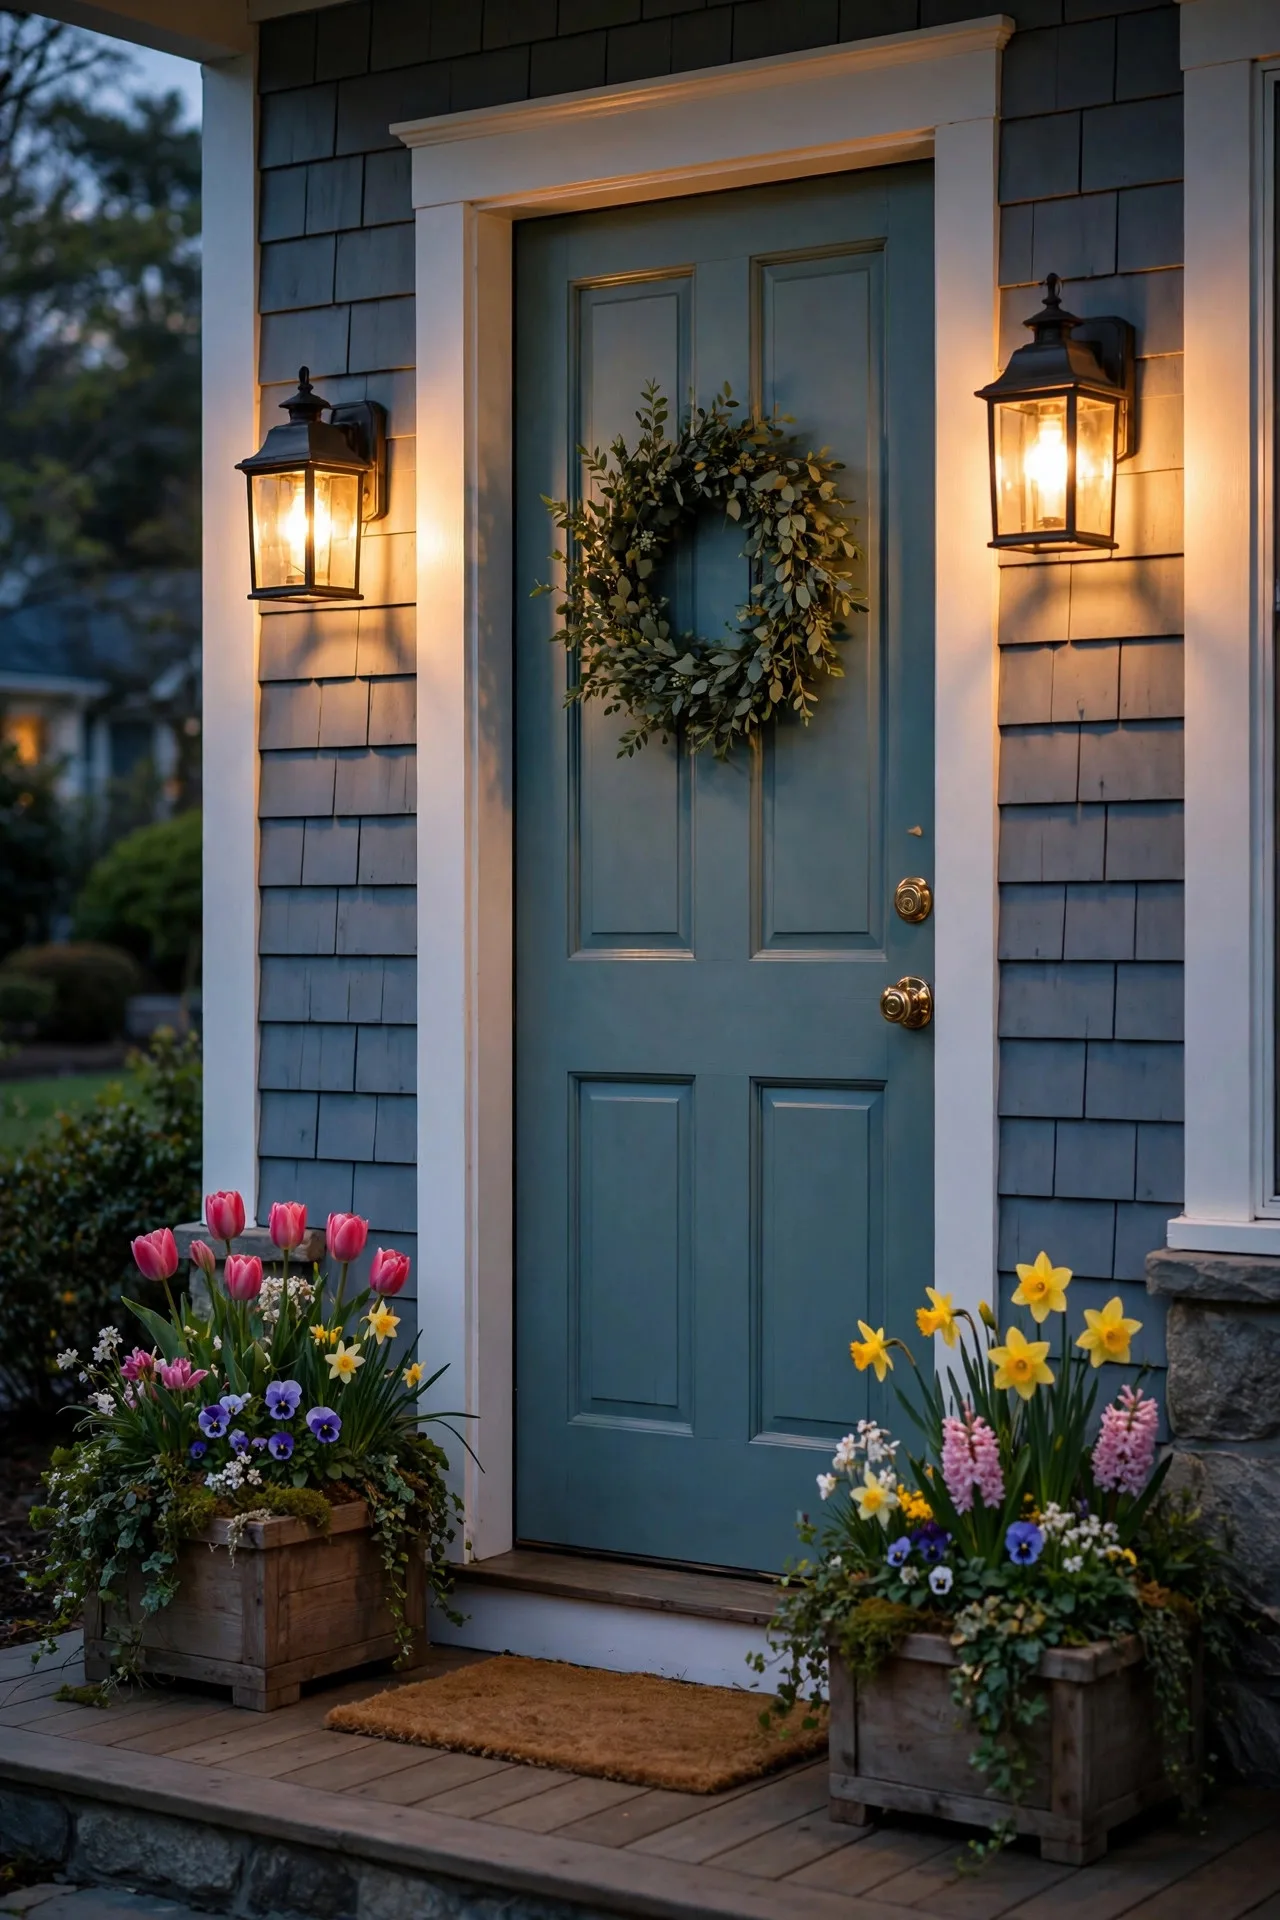
Nothing says "welcome home" like a balanced pair of warm sconces flanking the front door. If your entry only has one overhead light, upgrading to two matching lantern-style sconces instantly doubles the charm. Mount them 5 to 6 feet off the ground (measured to the center of the fixture) and at least 10 inches wide so they feel proportional — tiny fixtures get lost on a wide entry. I always recommend 2700K LED bulbs with a filament style; they throw a golden glow that flatters the door paint and makes the whole entry feel intentional. Check that your fixtures are damp- or wet-rated depending on how exposed your porch is, and if you're swapping fixtures yourself, turn off the breaker first — basic electrical safety, but worth repeating. A pair of matching sconces also photographs beautifully, which is a nice bonus if you're listing your home this spring.
Suggested budget range: $80 – $220.
5. Drape a String Light Canopy Over the Porch
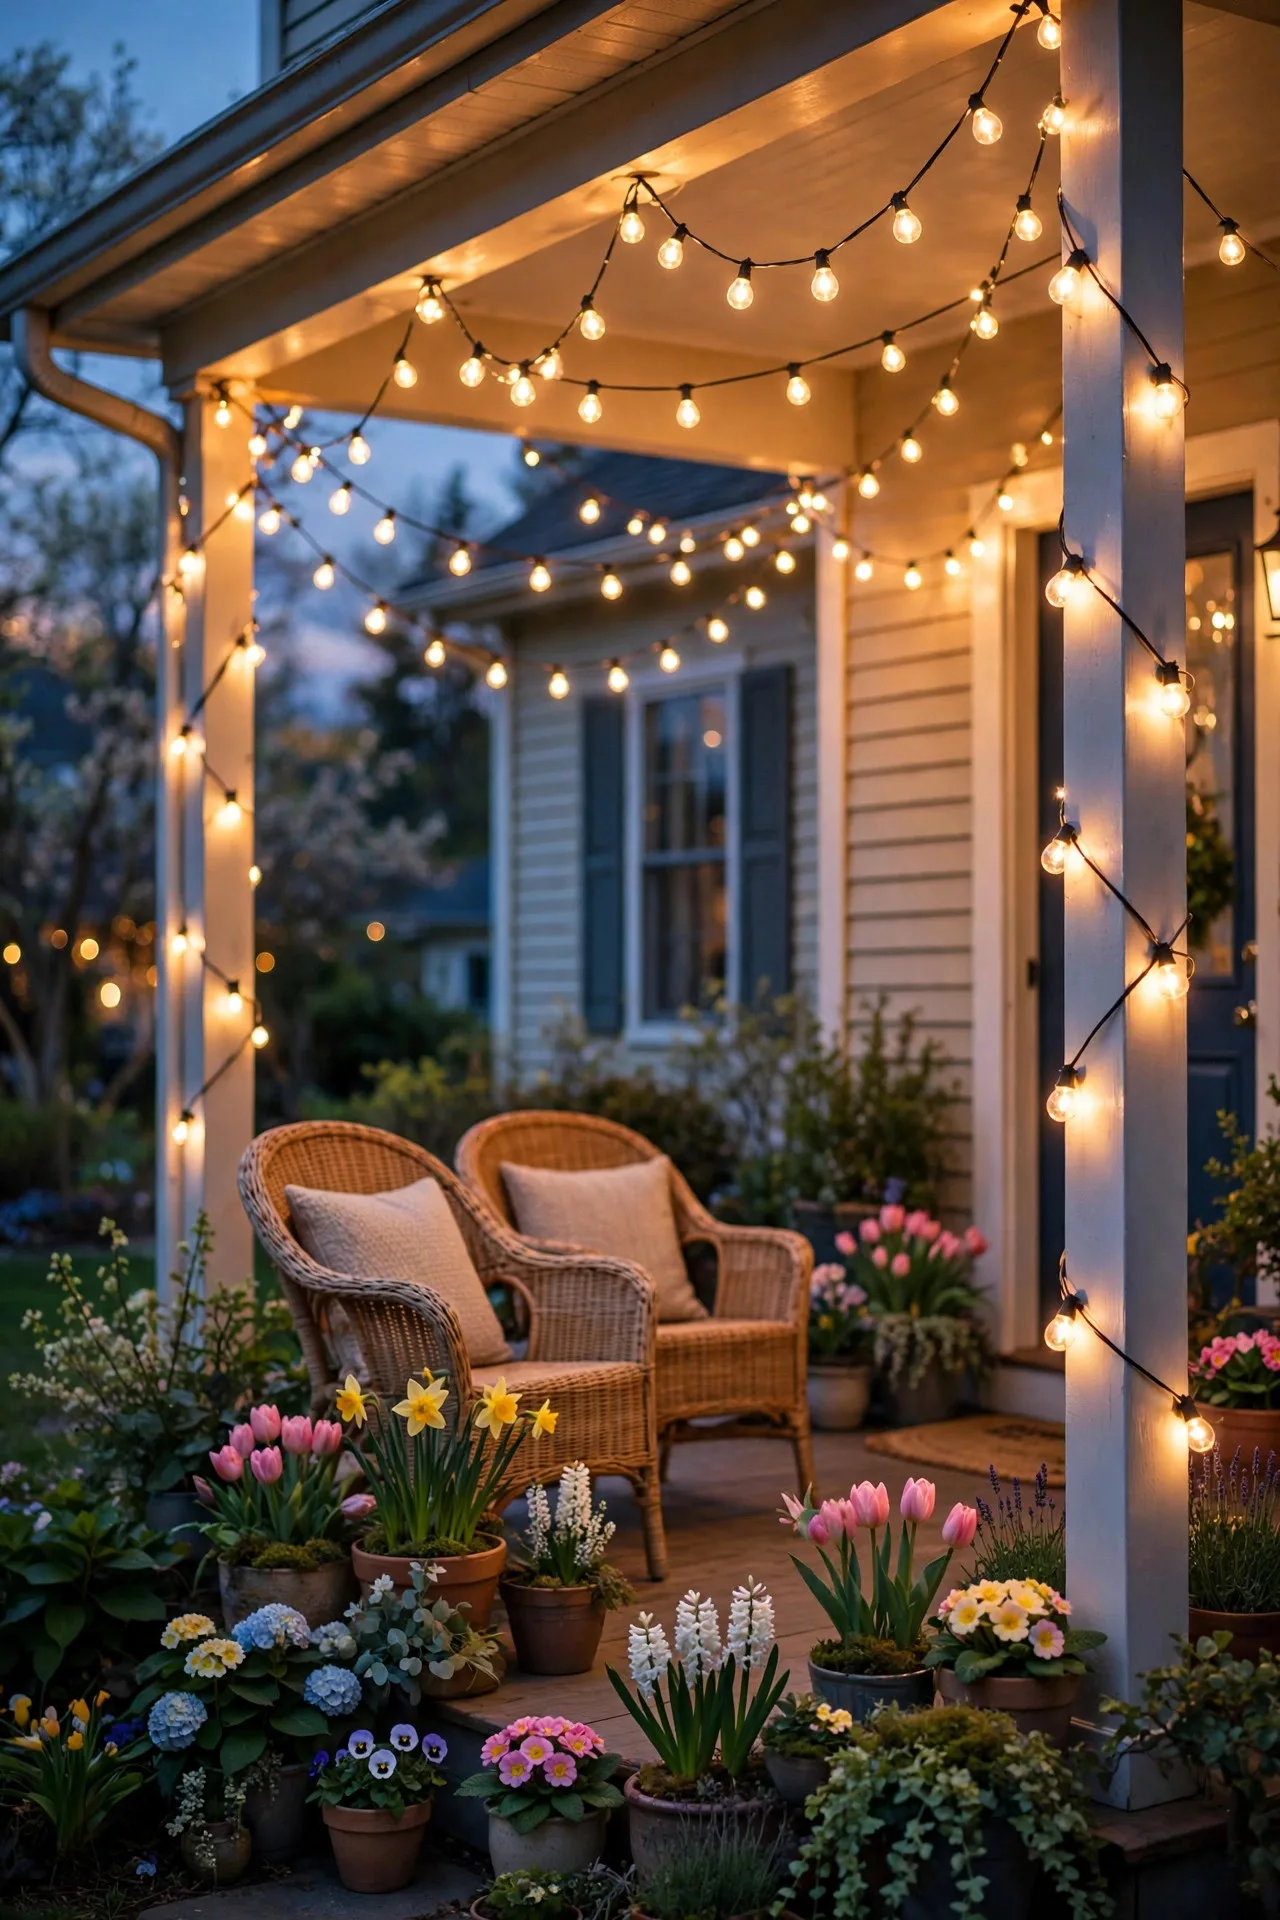
A porch ceiling or open porch roof draped with warm white string lights is pure magic in spring — it turns your sitting area into the coziest corner of the neighborhood. Run the strands in gentle swags, 6 to 8 inches of sag between anchor points, and keep the pattern even so the glow reads as one continuous canopy rather than random loops. Use commercial-grade LED string lights with shatterproof bulbs; they're brighter, last longer, and won't rain glass on the porch if a bulb fails. For a standard 8-by-10-foot porch, two to three 48-foot strands usually do it. Secure them with stainless cup hooks screwed into the ceiling or fascia — never staple through the wire, which damages insulation and creates a hazard. Plug the strand into an outdoor-rated smart plug or timer so it clicks on at dusk. And keep LED-only bulbs near anything flammable like dried wreaths or fabric bunting.
Suggested budget range: $45 – $110.
6. Weave Fairy Lights Into Spring Garland on Railings
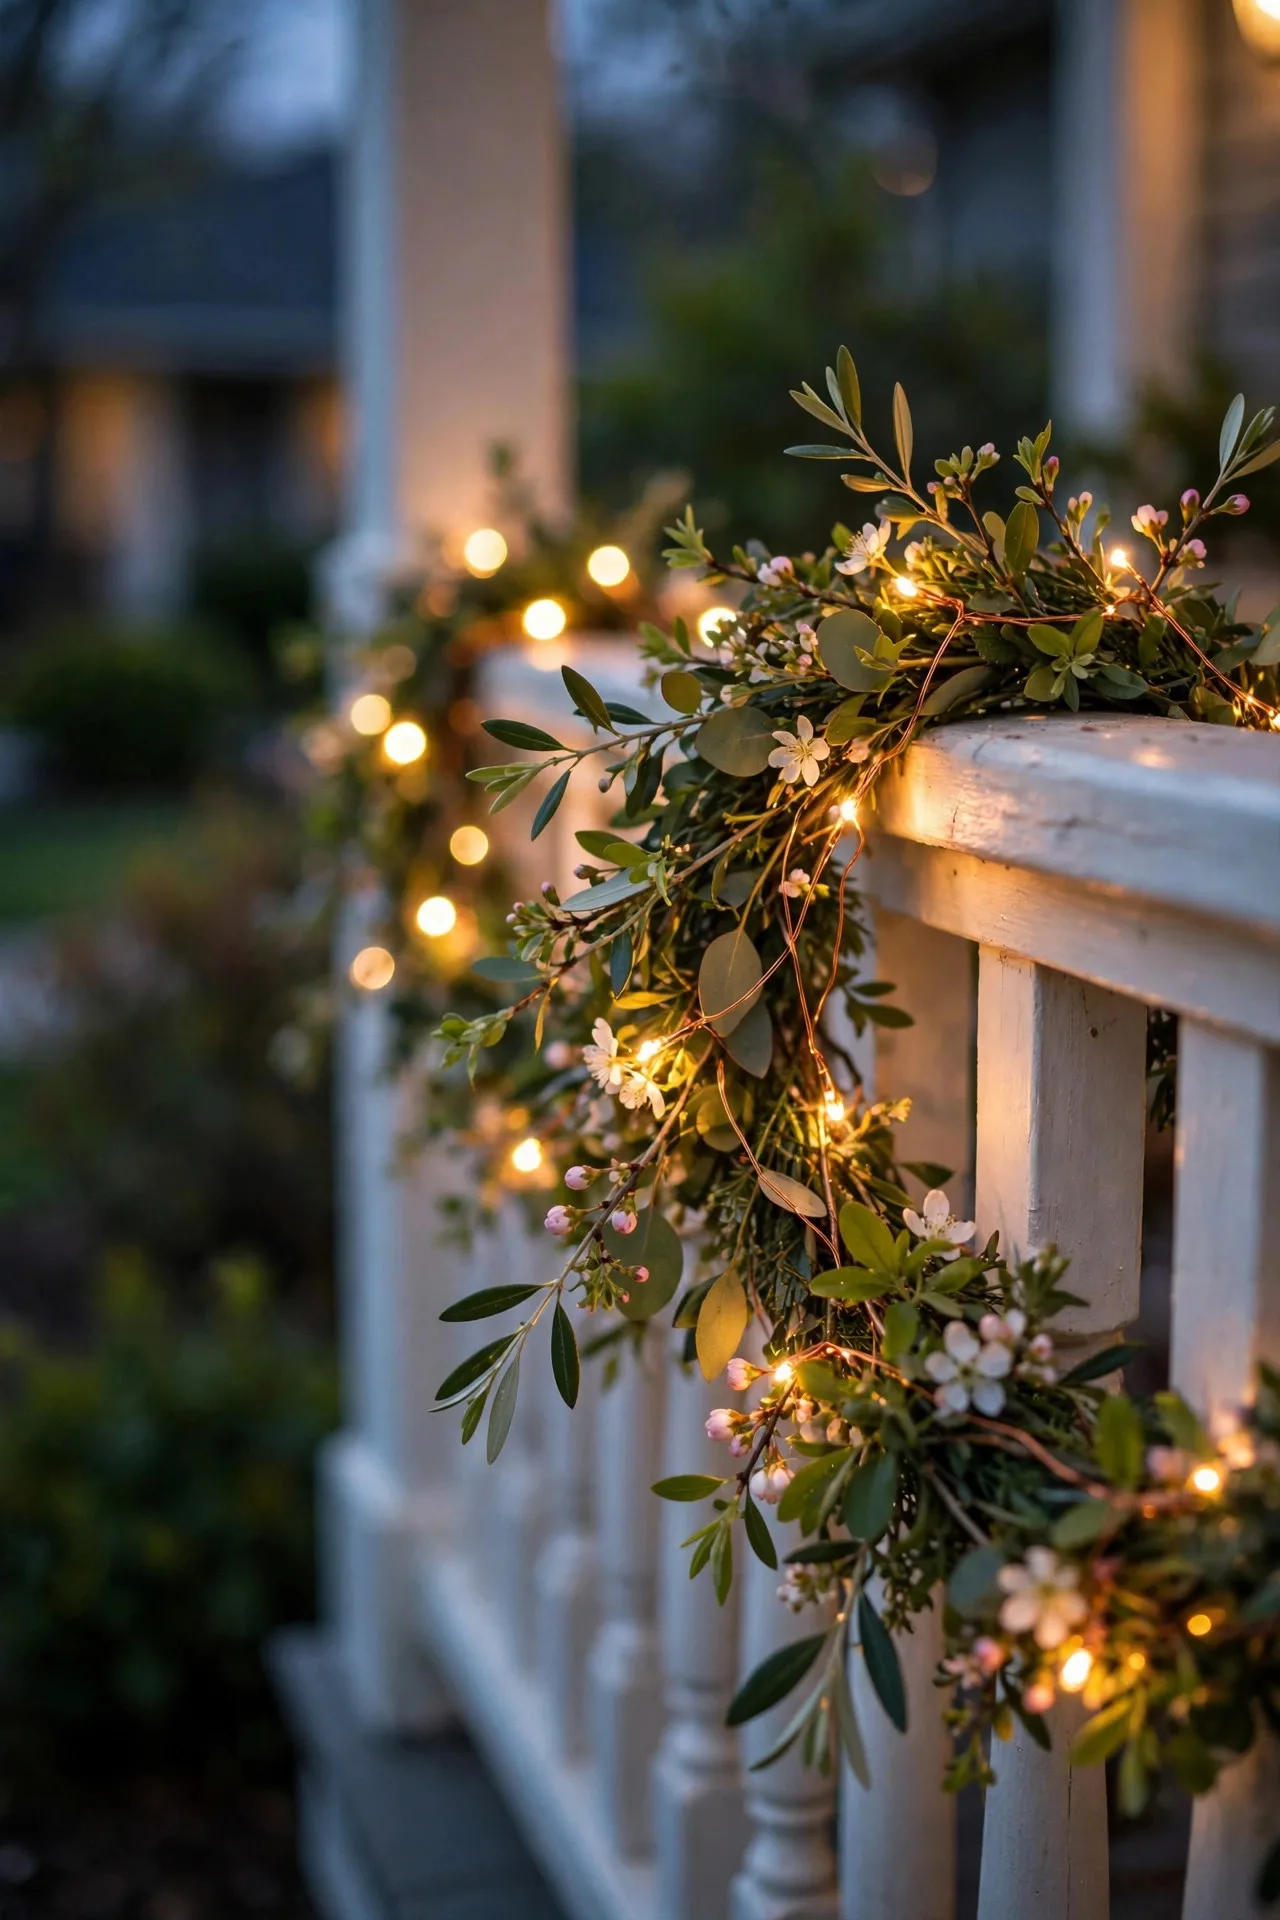
Porch railings are prime real estate, and weaving copper-wire fairy lights through a spring garland is one of my favorite low-effort upgrades. Start with a simple faux or fresh greenery garland along the railing, then spiral the fairy lights through it so the tiny bulbs peek out between leaves and blossoms. Copper-wire strands with 50 to 100 micro LEDs are perfect — the wire disappears into the greenery, and the battery pack tucks behind a post or planter. Use warm white, and look for strands with a built-in 6-hours-on/18-hours-off timer so you never have to remember. Fresh garland looks gorgeous but dries out fast in spring sun; I usually switch to high-quality faux after the first week and save fresh for special occasions. Keep the battery packs sheltered from rain — even "outdoor" strands last longer when the electronics stay dry. It's a five-minute project that reads like a magazine shoot.
Suggested budget range: $25 – $60.
7. Make Your House Numbers Glow
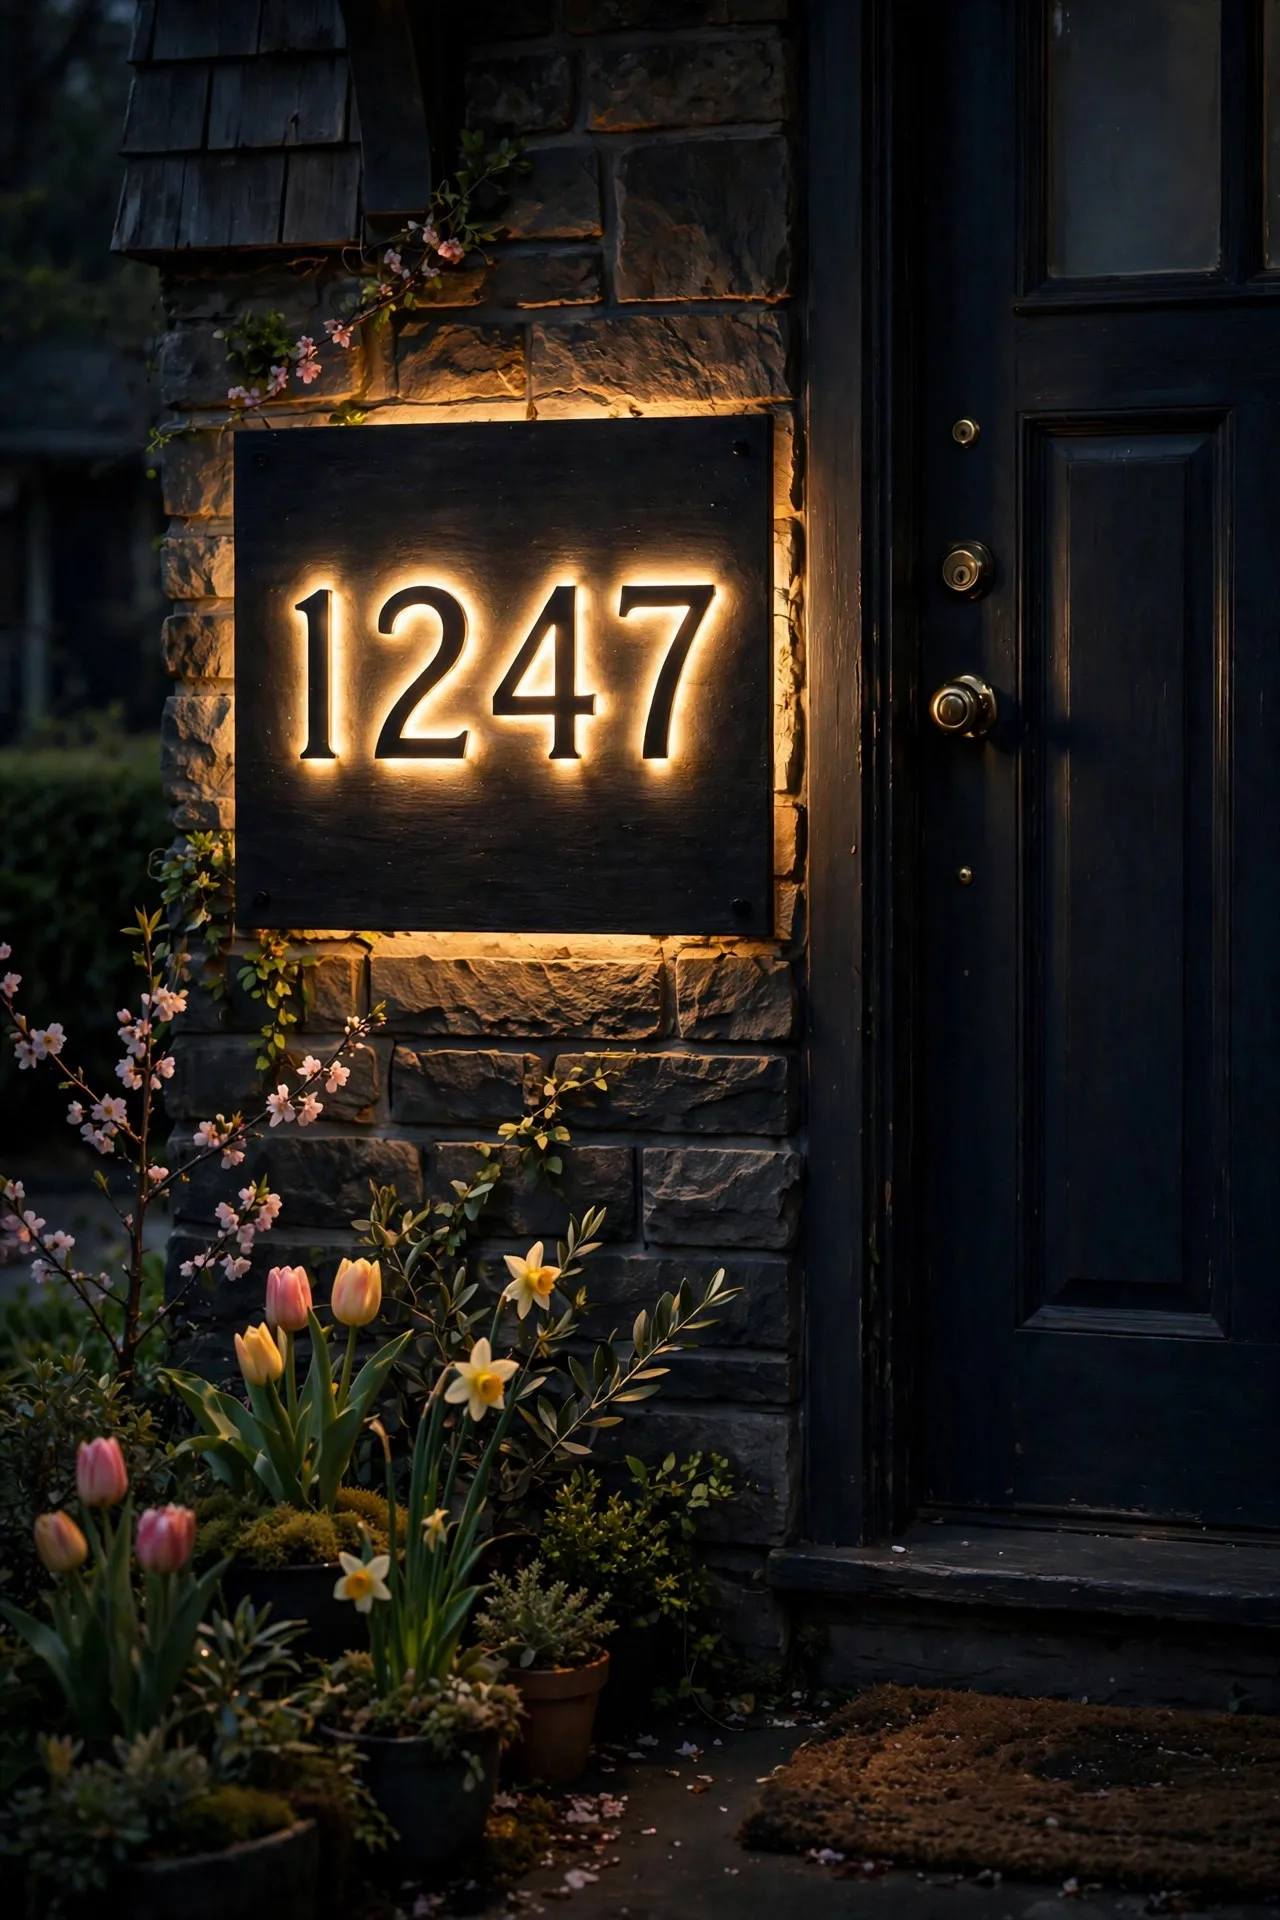
Curb appeal is practical too — visitors, delivery drivers, and emergency responders all need to find you. Backlit or front-lit LED house numbers are a small upgrade with outsized impact. Mount backlit numbers on a contrasting plaque beside the door, or install a slim LED bar light above existing numbers to wash them in a soft glow. Aim for numbers at least 4 inches tall, and keep the light warm white so it matches the rest of your entry lighting. Solar-powered number plaques exist, but in my experience wired low-voltage versions are brighter and more reliable through cloudy spring weeks. If your numbers face the street from more than 30 feet away, consider bumping up to 6-inch characters. It's a weekend project — most kits mount with two screws — and it makes your entry look finished in a way people notice without knowing why.
Suggested budget range: $35 – $90.
8. Cluster Lanterns on the Porch Steps
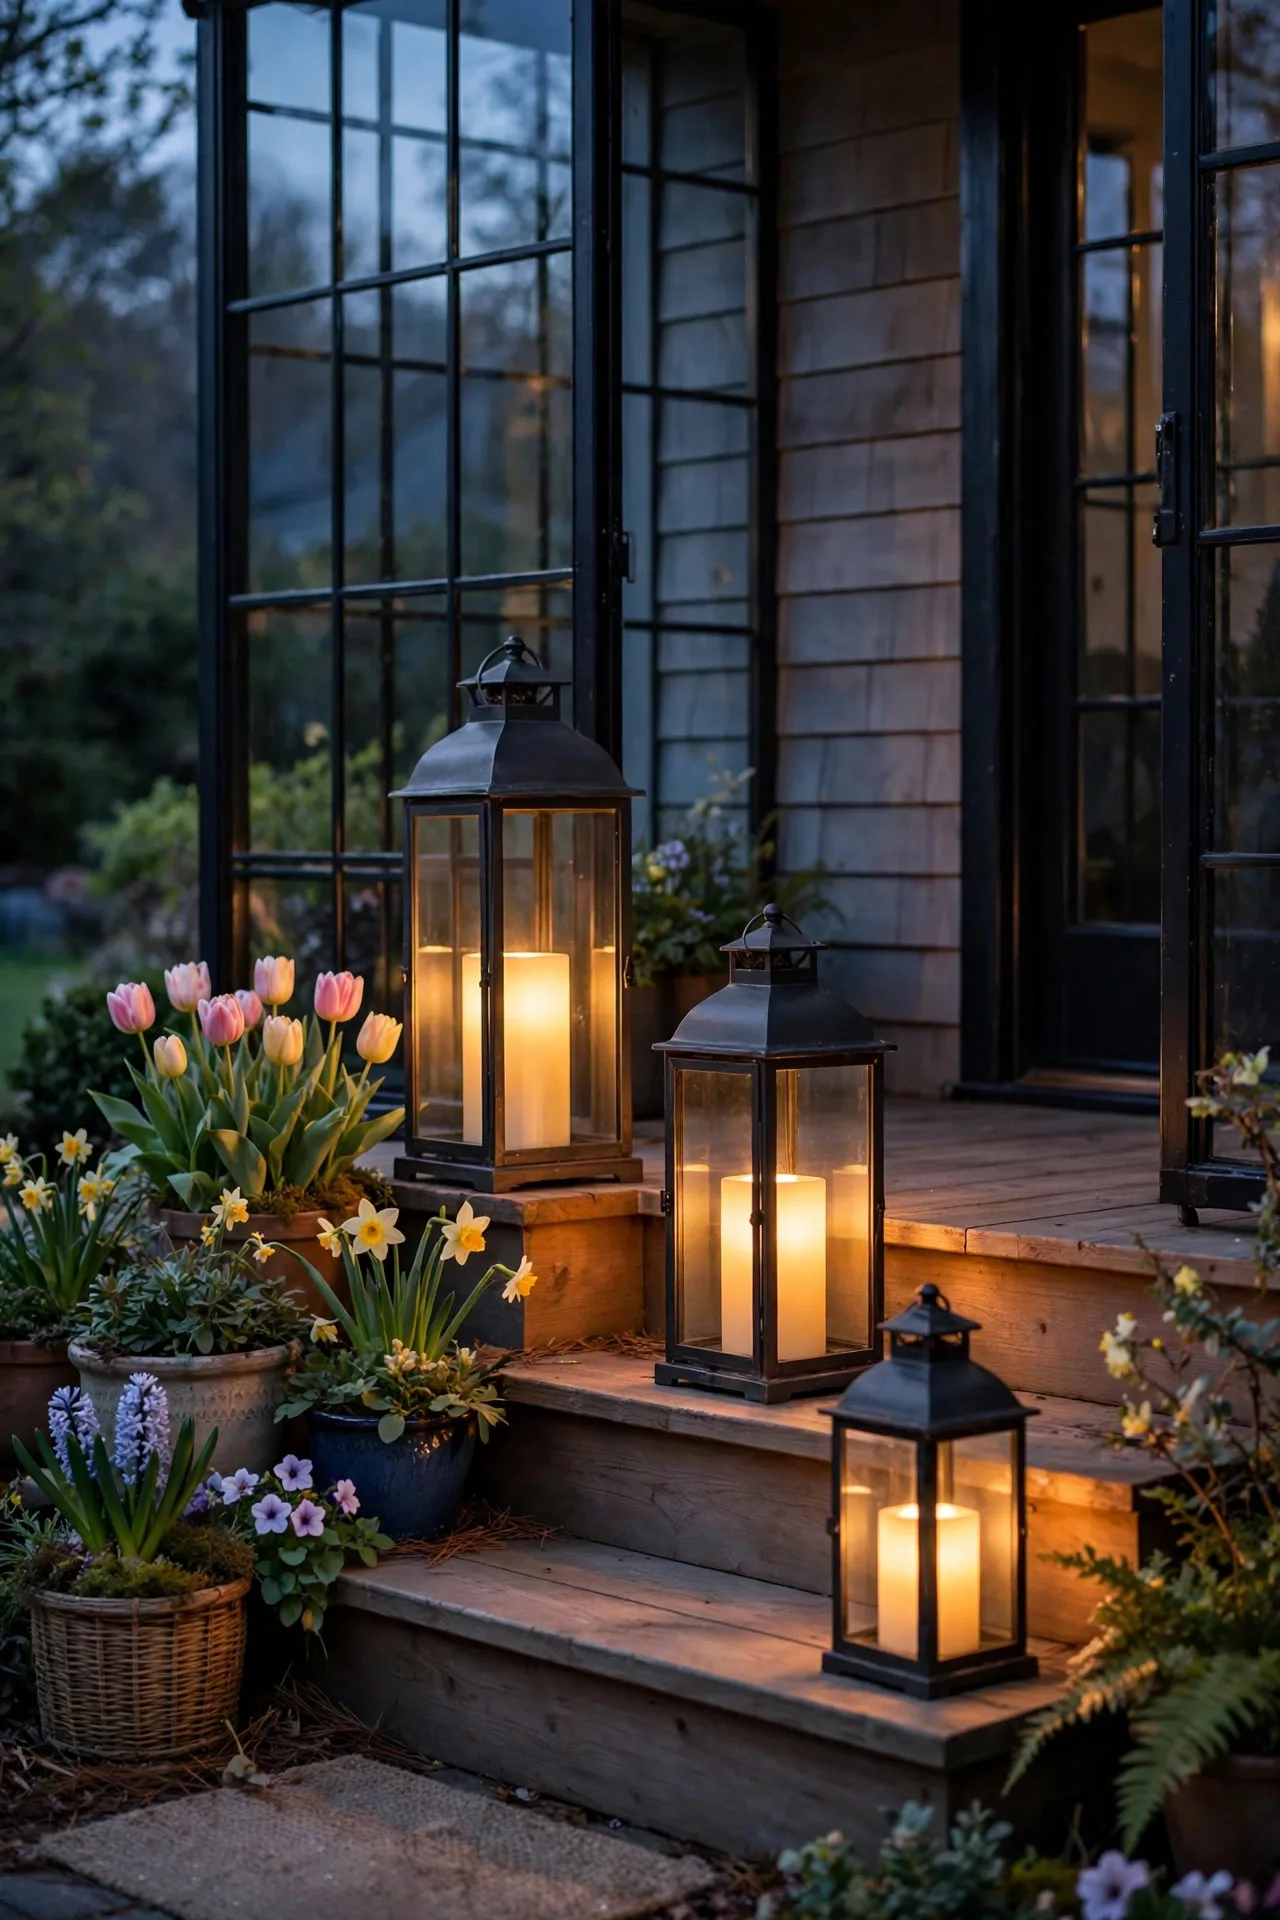
A little grouping of lanterns on the steps or beside the door adds instant spring charm — I think of them as jewelry for your entry. Use three lanterns in varying heights (small, medium, tall) rather than a matched pair; the staggered heights look collected and natural. Battery-operated LED candles or flameless pillar candles go inside — real flame near steps, pets, and windy spring evenings is asking for trouble, and LEDs give you a steady warm flicker with zero risk. Stick with LED-only near anything flammable like doormats or dried floral arrangements. Cluster the lanterns on one side of the steps so the other side stays clear for foot traffic, and choose lanterns with glass panels and a metal frame in a finish that echoes your sconces or hardware. If your steps are narrow, move the cluster to a side planter or the top landing instead. A small timer on each candle keeps them lit at dusk without any fuss.
Suggested budget range: $40 – $100.
9. Add Moonlighting Downlights in the Trees
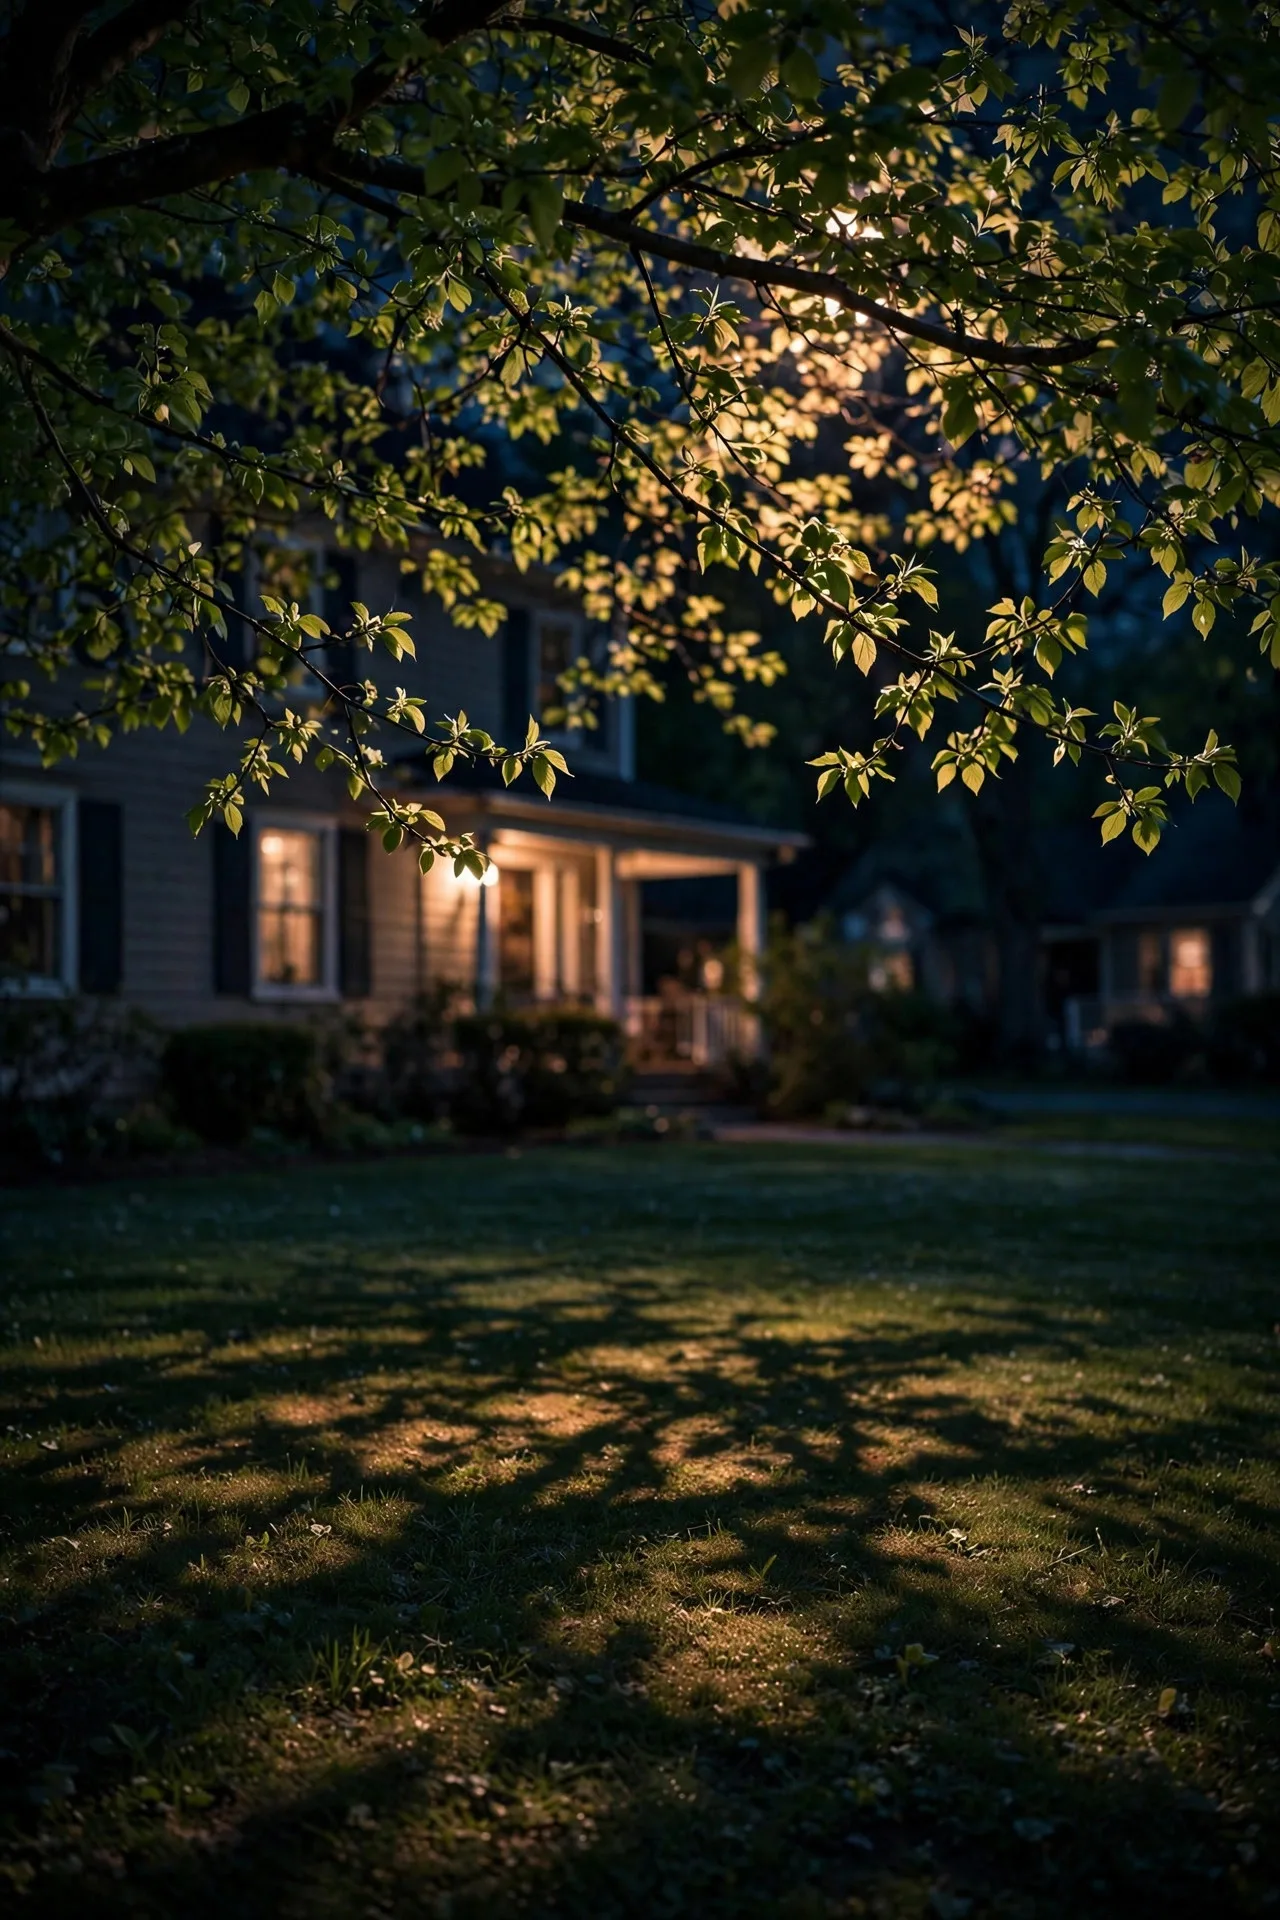
Moonlighting is one of those pro tricks that looks effortless once you see it — a downlight mounted high in a tree branch, aimed at the ground, so the yard below glows like it's lit by moonlight. Mount a low-voltage LED downlight 12 to 20 feet up in a sturdy branch, positioned so the beam filters through the leaves and throws dappled, natural-looking patterns on the lawn or patio. The magic is in the shadows: the leaves break up the light the way real moonlight does. Use a soft 2700K to 3000K bulb and a fixture with a wide beam so the coverage feels gentle, not theatrical. Secure the fixture with an adjustable strap rather than screws to protect the tree, and check the strap yearly as the branch grows. One fixture covers a 15- to 25-foot circle below, so a single tree can light your whole sitting area. It's subtle, romantic, and honestly my favorite technique on this list.
Suggested budget range: $50 – $130.
10. Go Playful With Smart Color-Tunable Spring Front Yard Lighting
Here's where spring front yard lighting gets fun: smart color-tunable accent lights let you shift from classic warm white for everyday curb appeal to soft spring pastels — blush pink, pale lavender, mint — for Easter, garden parties, or just because. Place one or two color-tunable spotlights at the base of a flowering shrub or along the facade, and control them from a phone app. I recommend keeping the palette subtle — pastels at reduced brightness read as elegant, while saturated neon colors read as a nightclub. Most smart fixtures run on standard low-voltage landscape wiring, so you can mix them into an existing 12V system. Set scenes in the app ("Everyday Warm," "Easter Pastel") so you're not fiddling with sliders every night. A quick safety note: keep smart fixtures and their transformers on GFCI-protected circuits, same as any outdoor lighting. It's a small investment that makes your yard feel festive all season long.
Suggested budget range: $60 – $160.
11. Graze the Facade With Low Floodlights
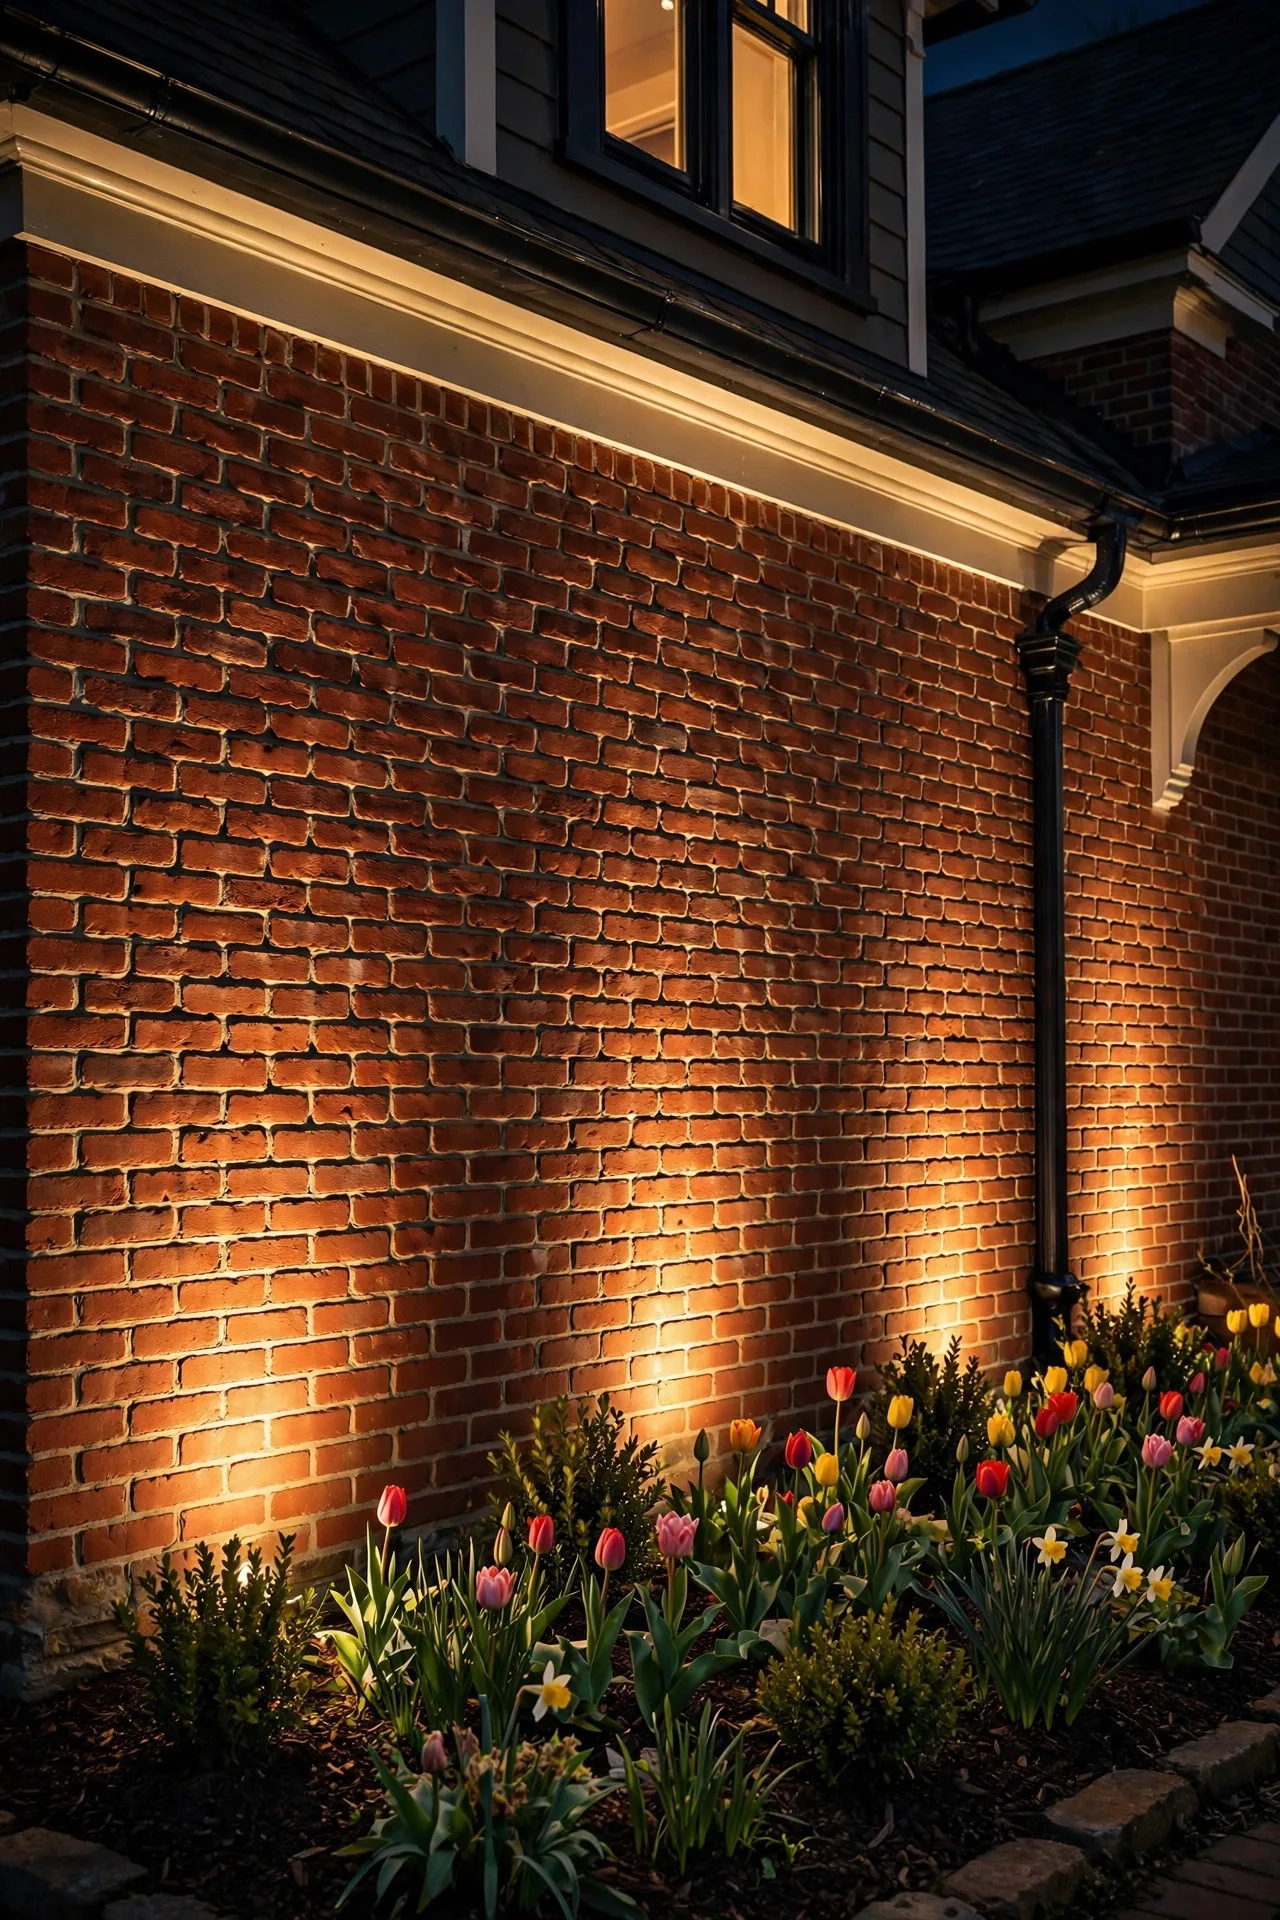
If your home has brick, stone, or textured siding, grazing it with light is the single best way to show it off after dark. Position low-voltage LED floodlights 12 to 24 inches from the wall, aimed straight up, so the light skims the surface and every texture pops — mortar lines, stone edges, all of it. Because grazing exaggerates texture, it's also unforgiving of patchy paint or rough patches, so it's worth a quick look in daylight first. Use a narrow beam and shielded fixtures to keep the light on your wall instead of in your neighbor's bedroom, and aim for 2700K warm white for brick and stone (it deepens the tones beautifully). Two to four fixtures across a typical 30-foot facade section creates a rhythm without hot spots. Bury the cable under mulch or along the foundation, and connect everything to a low-voltage transformer with a photocell so the whole display runs itself.
Suggested budget range: $80 – $200.
12. Light Under the Wall Caps and Planter Edges
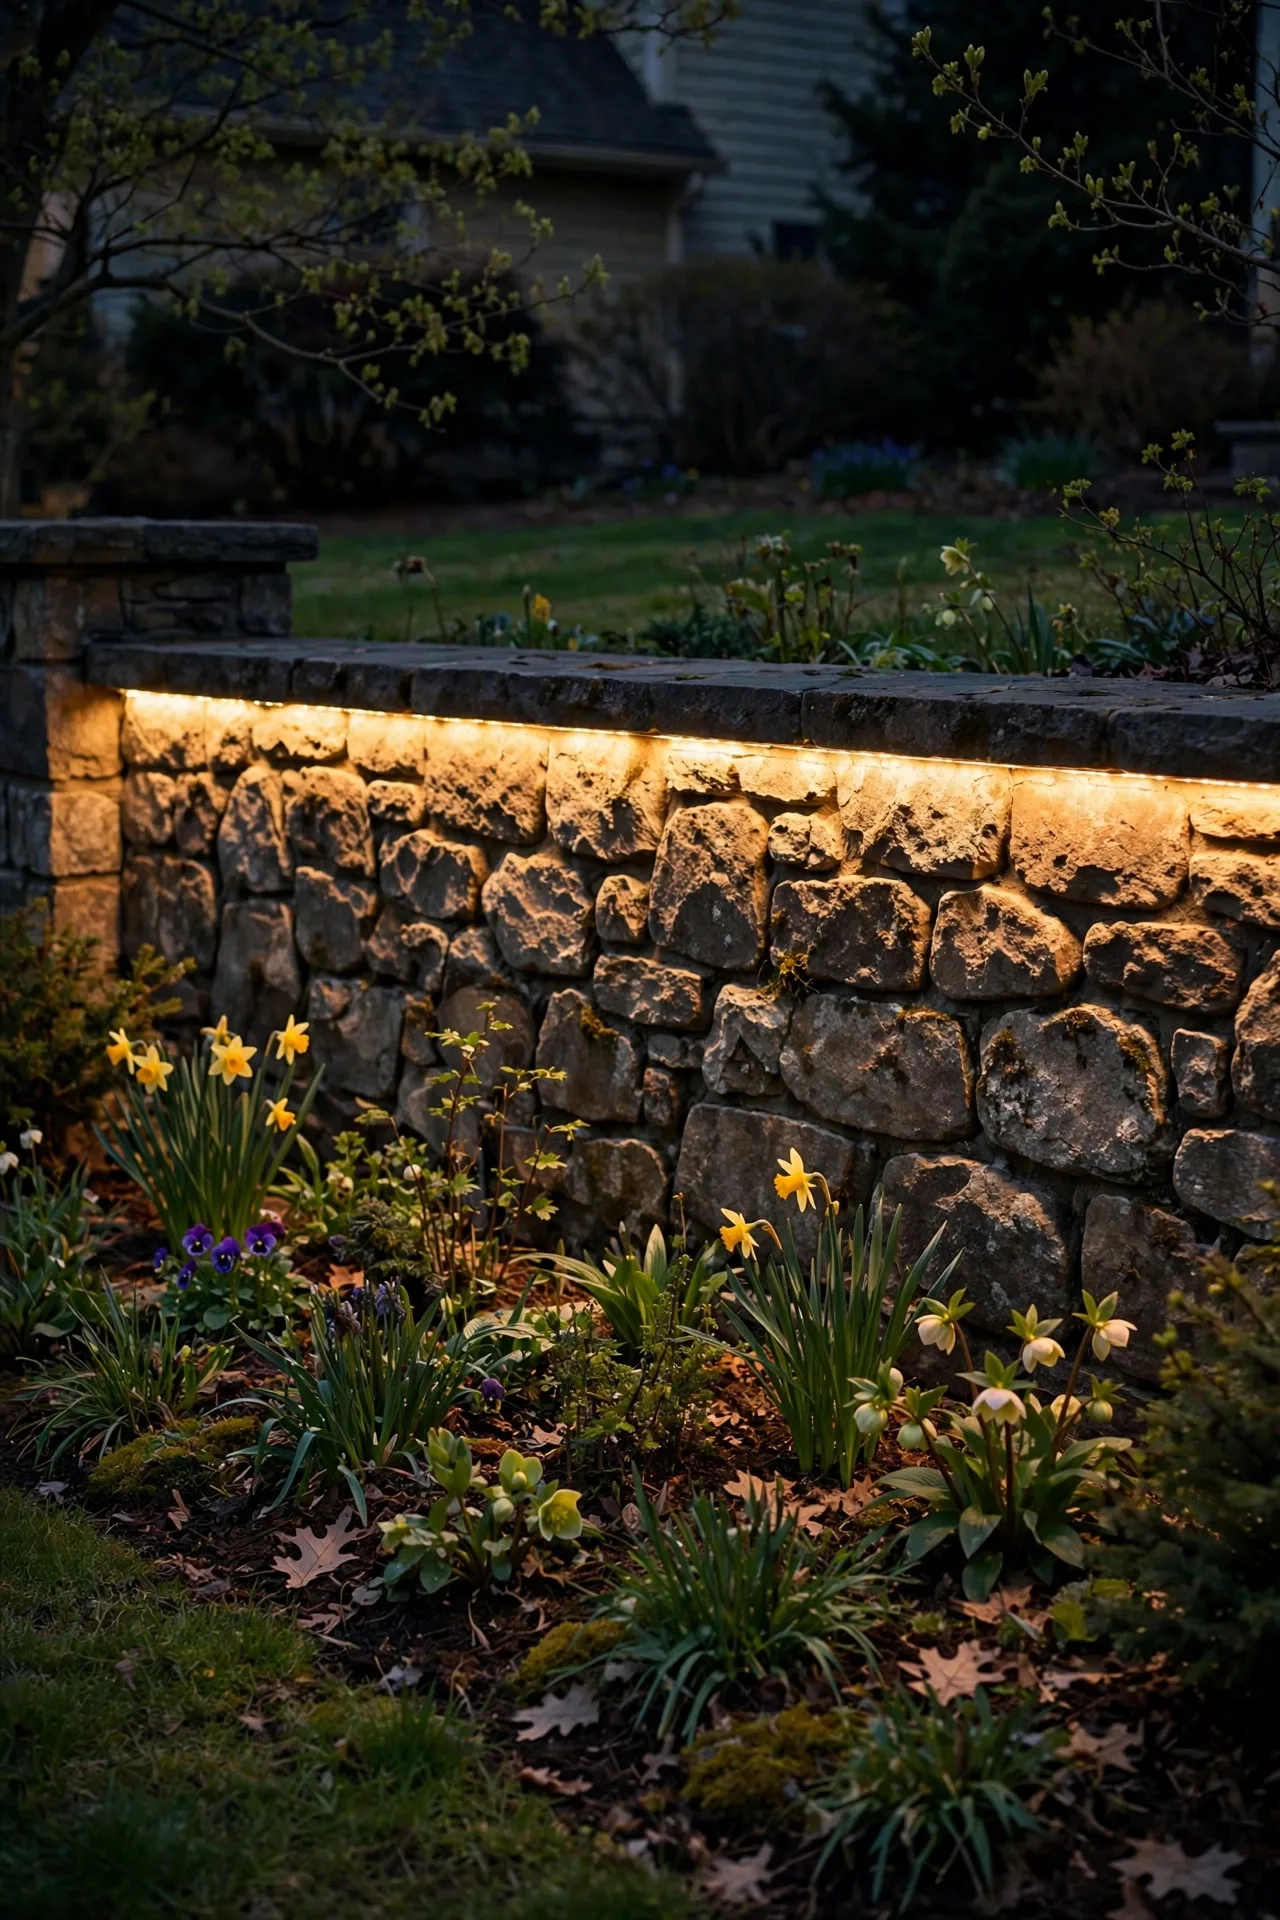
Under-cap lighting is a designer detail that costs less than you'd think. If your front yard has a retaining wall, raised bed, or stone planter with a cap, mount slim LED strip lights or puck lights on the underside of the cap so a soft ribbon of light spills down the wall face. It outlines your garden beds at night, adds depth, and makes the whole yard read as designed rather than assembled. LED strip lights in a warm 2700K to 3000K work beautifully — choose an outdoor-rated, waterproof strip (IP65 or higher) and mount it with aluminum channel and a diffuser so you see a smooth glow, not individual dots. Power it from a low-voltage transformer, and hide the wiring behind the wall. Spring rain is the enemy here, so double-check that every connection is sealed with waterproof connectors. The effect is subtle from the street but absolutely gorgeous from the sidewalk.
Suggested budget range: $50 – $140.
13. Fill Planters With Solar Mason Jars
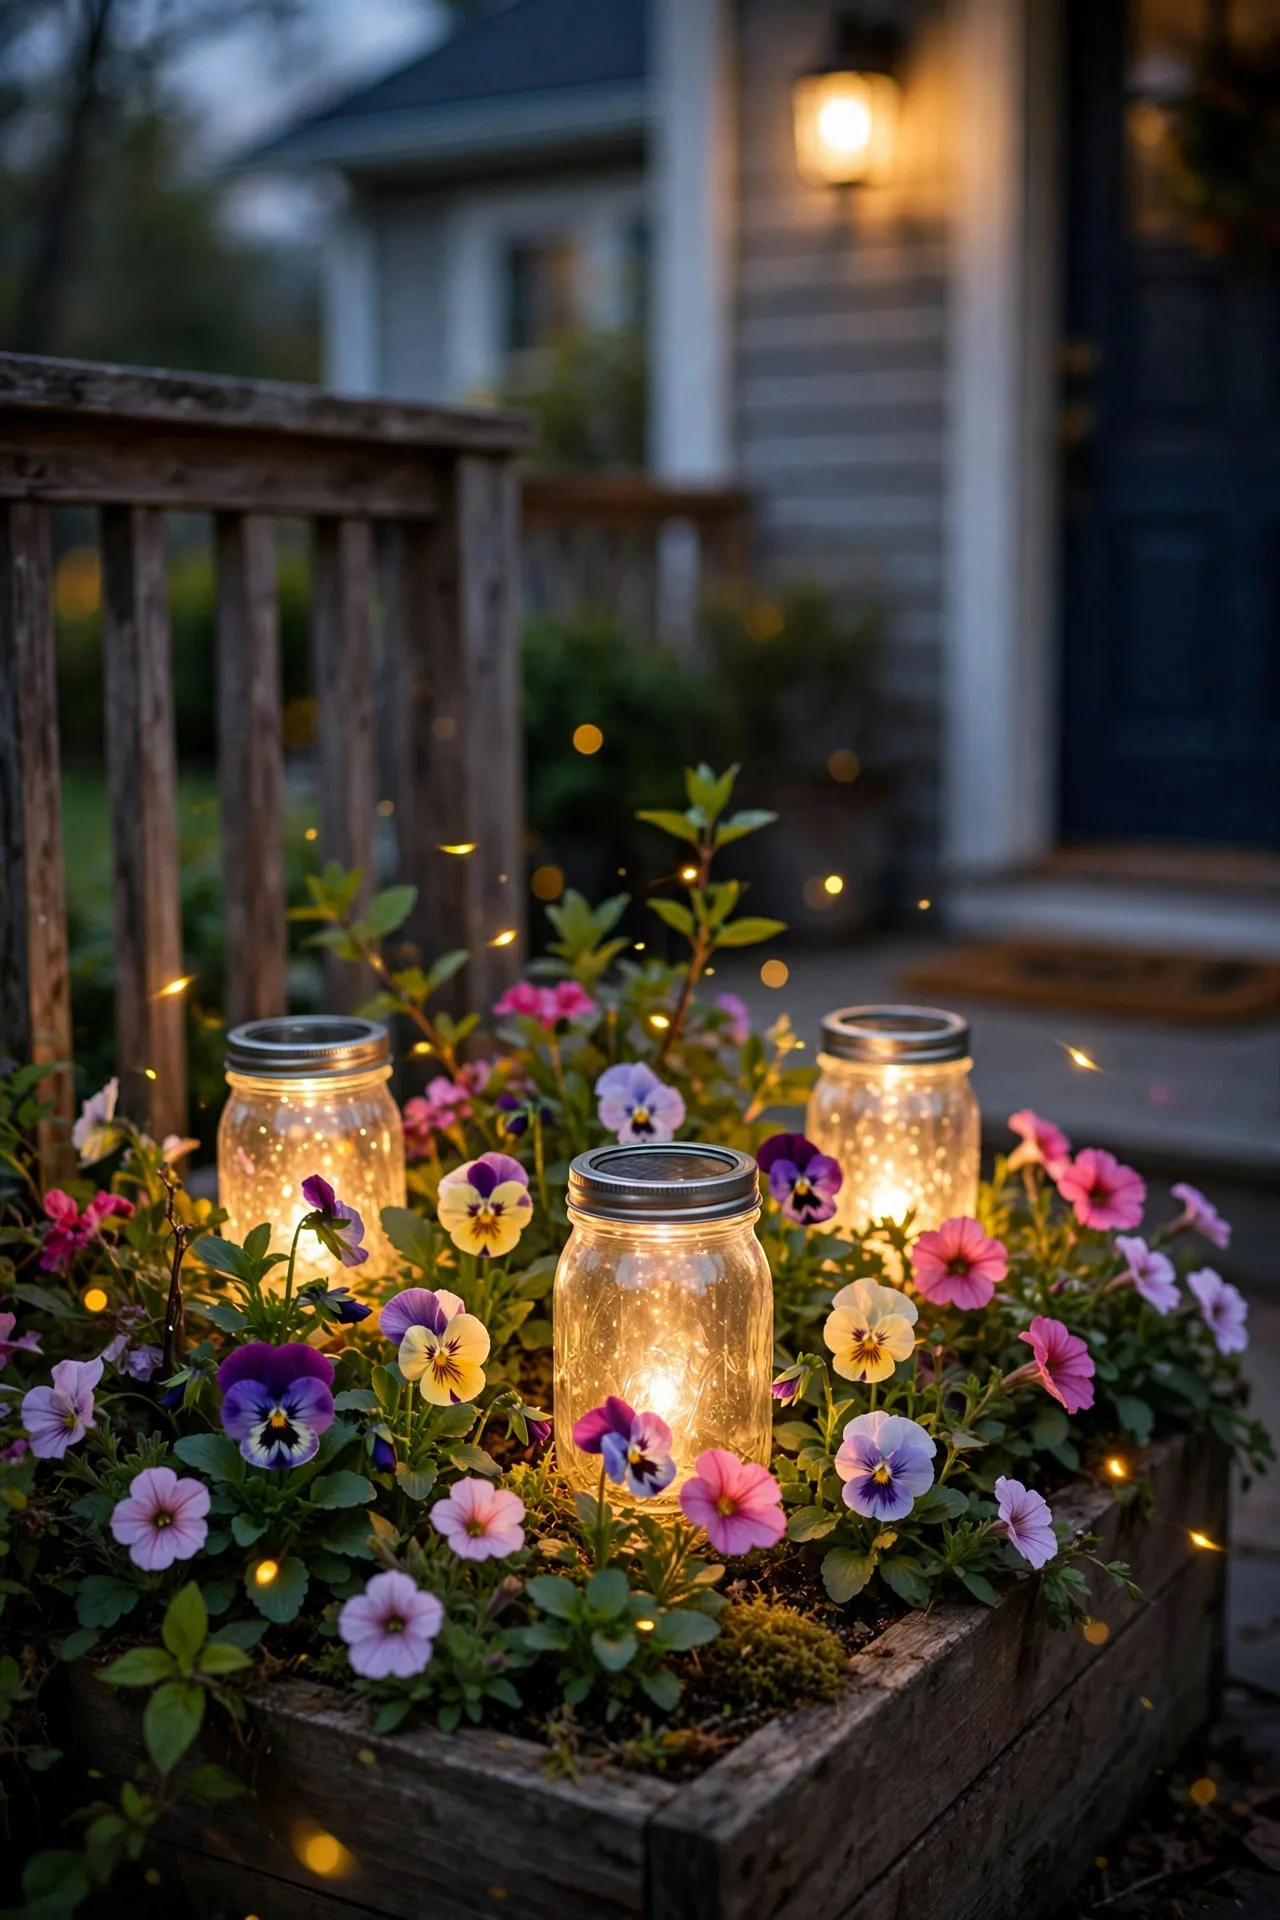
This is the project I recommend to anyone who wants spring front yard lighting on a Saturday budget: fill your porch planters with solar mason jar lights. Tuck the jars among the pansies or petunias in your spring containers — two or three jars per 14-inch planter — so the glow peeks through the foliage at dusk. The classic solar lid replacements fit standard mason jars, and the warm white LED inside casts a lovely firefly-like glow. They need 6 to 8 hours of direct sun to charge fully, so keep the jars near the top of the planter rather than buried under foliage. Clear jars give the brightest light; frosted or tinted jars give a softer, moodier effect. Because they're solar and wireless, you can rearrange them all season — I've moved mine from porch planters to the dining table for spring dinners more than once. Weatherproof by design, they handle spring rain without a second thought.
Suggested budget range: $20 – $50.
14. Brighten Window Boxes With Fairy Light Twists
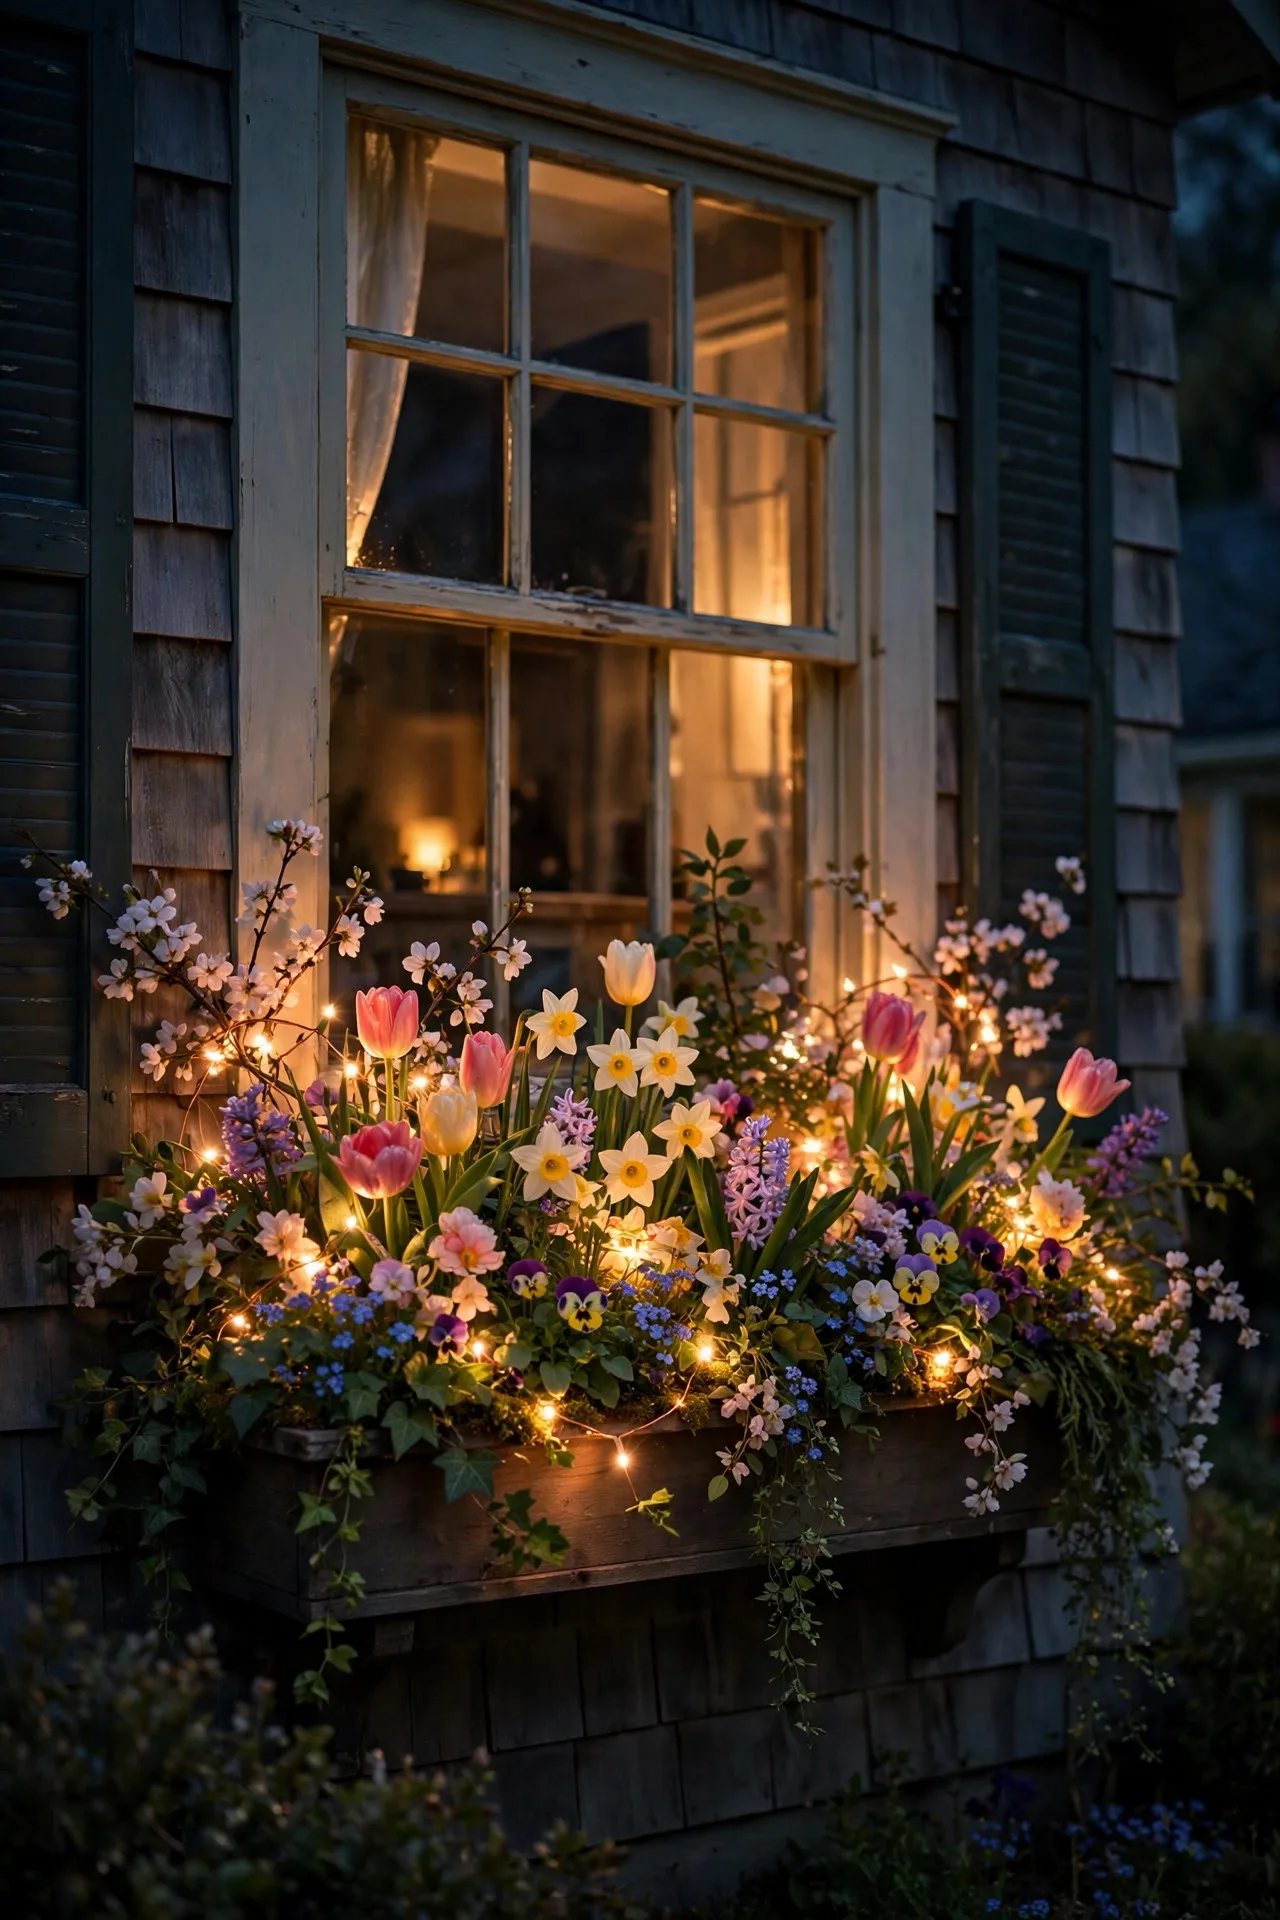
Window boxes full of spring blooms are already a curb-appeal win — adding a twist of fairy lights makes them glow after dark too. Weave a warm white copper-wire strand through the greenery of each window box, letting the tiny bulbs nestle among the flowers so the whole box looks lit from within. A 33-foot strand with 100 micro LEDs is usually enough for two window boxes; hide the battery pack behind the box or under the window ledge where it's sheltered from rain. Use the timer function (most strands have a 6-hour on/off cycle) so they glow through the evening without you touching them. In my experience, this works best with trailing plants like ivy or sweet potato vine — the lights thread naturally through the cascade. Keep the strand away from direct contact with soil to protect the wiring, and refresh the strand each season since spring weather is hard on the fine copper wire.
Suggested budget range: $15 – $45.
15. Add a Motion-Sensor Light by the Driveway
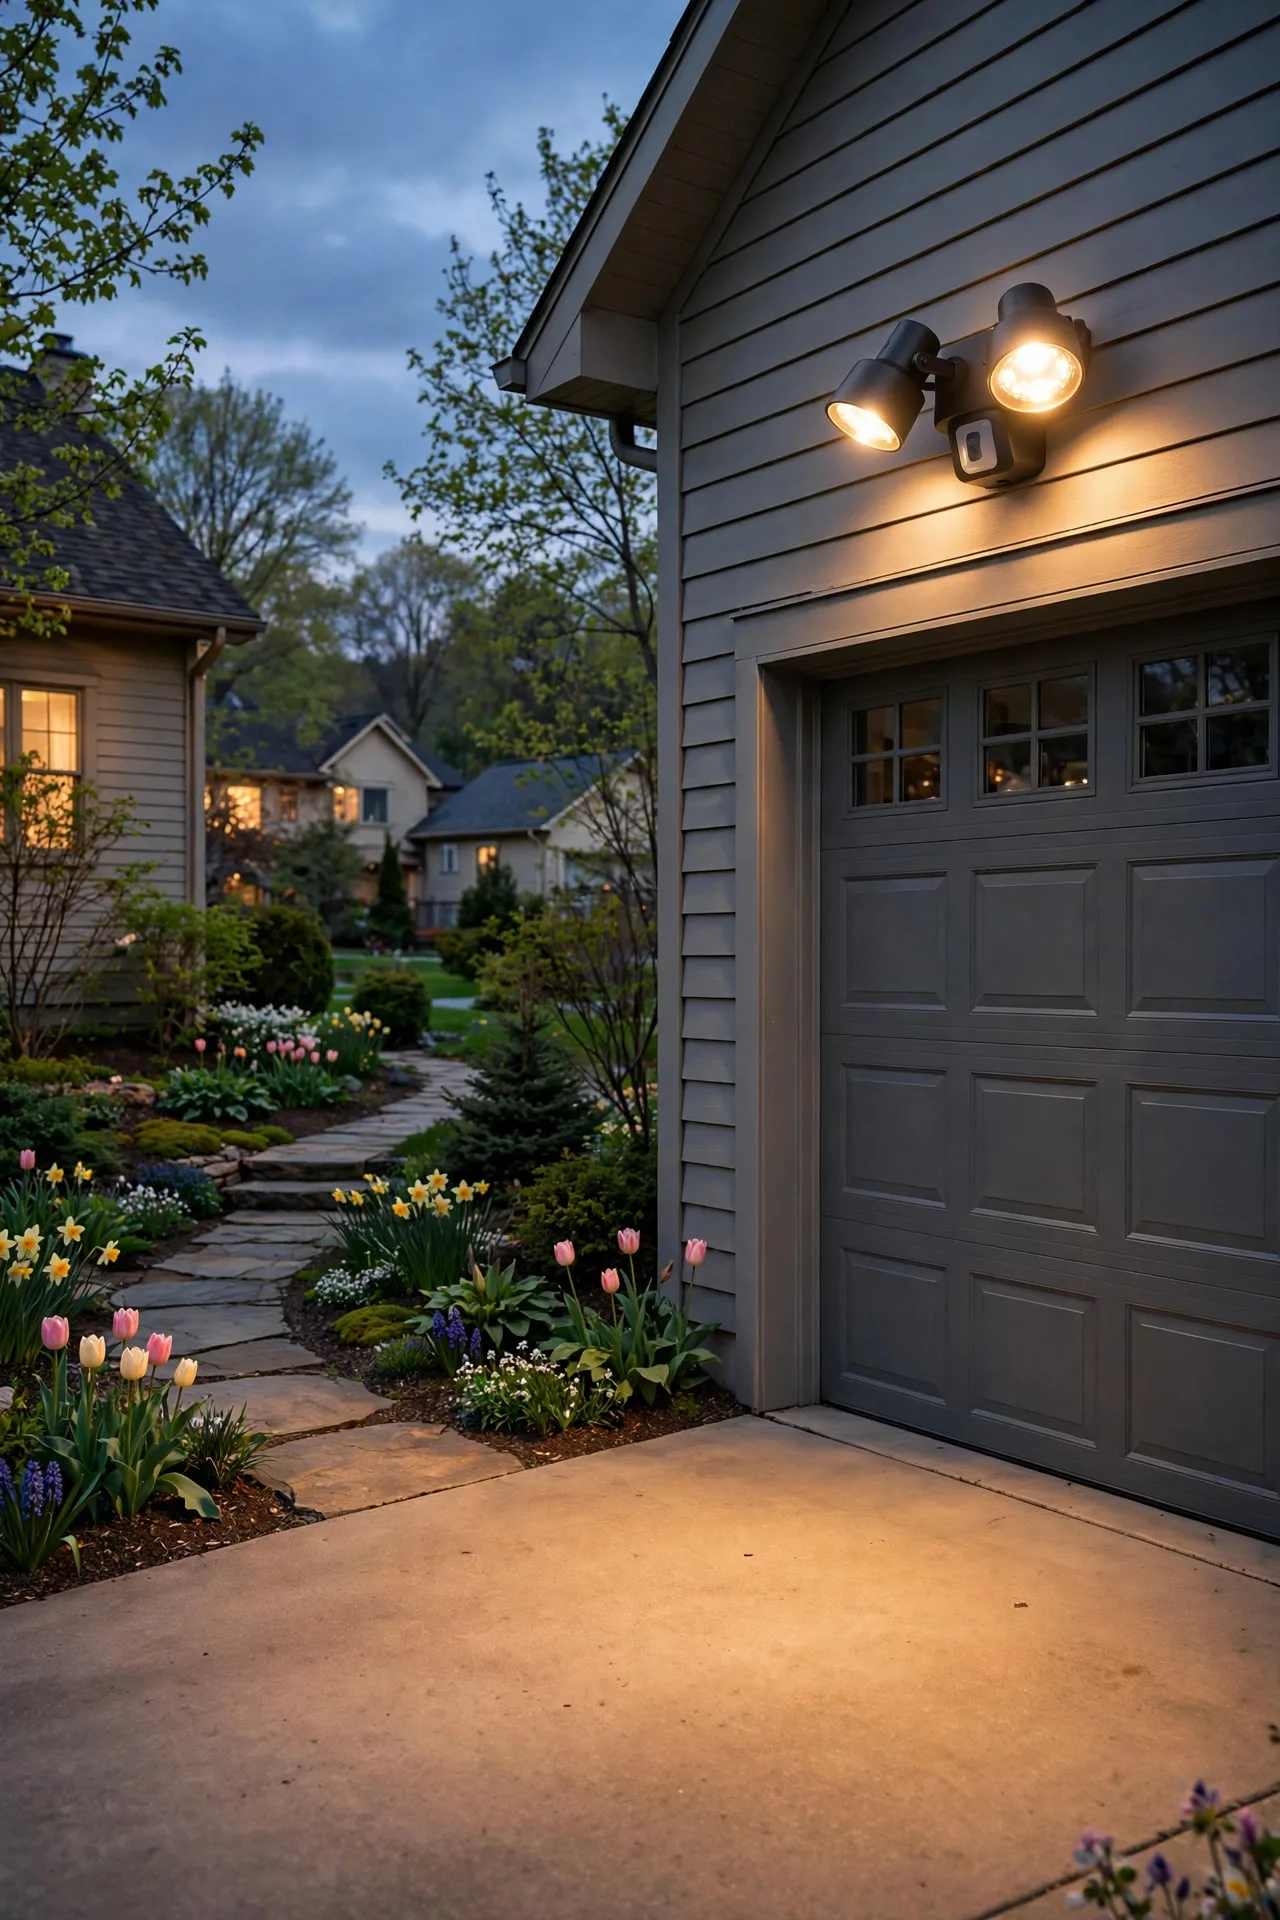
Curb appeal doesn't have to be purely decorative — a well-placed motion-sensor security light keeps the driveway safe and deters late-night visitors, and modern designs don't look industrial anymore. Mount a dual-head LED motion light 8 to 10 feet up on the garage or beside the driveway, aimed so the beams cover the walking path and the cars without blasting the street. Set the sensitivity to medium so passing cars don't trigger it every five minutes, and aim the heads slightly downward to keep the light on your property. I prefer warm white (3000K) over harsh cool white here — it feels welcoming rather than interrogatory, and it still shows detail clearly. Hardwired units with a photocell only activate after dark, which saves energy and keeps the light from firing in daylight. Always use a GFCI-protected circuit for hardwired outdoor fixtures, and if you're not comfortable with wiring, this is a quick job for an electrician.
Suggested budget range: $35 – $95.
16. Uplight the Birdbath or Fountain
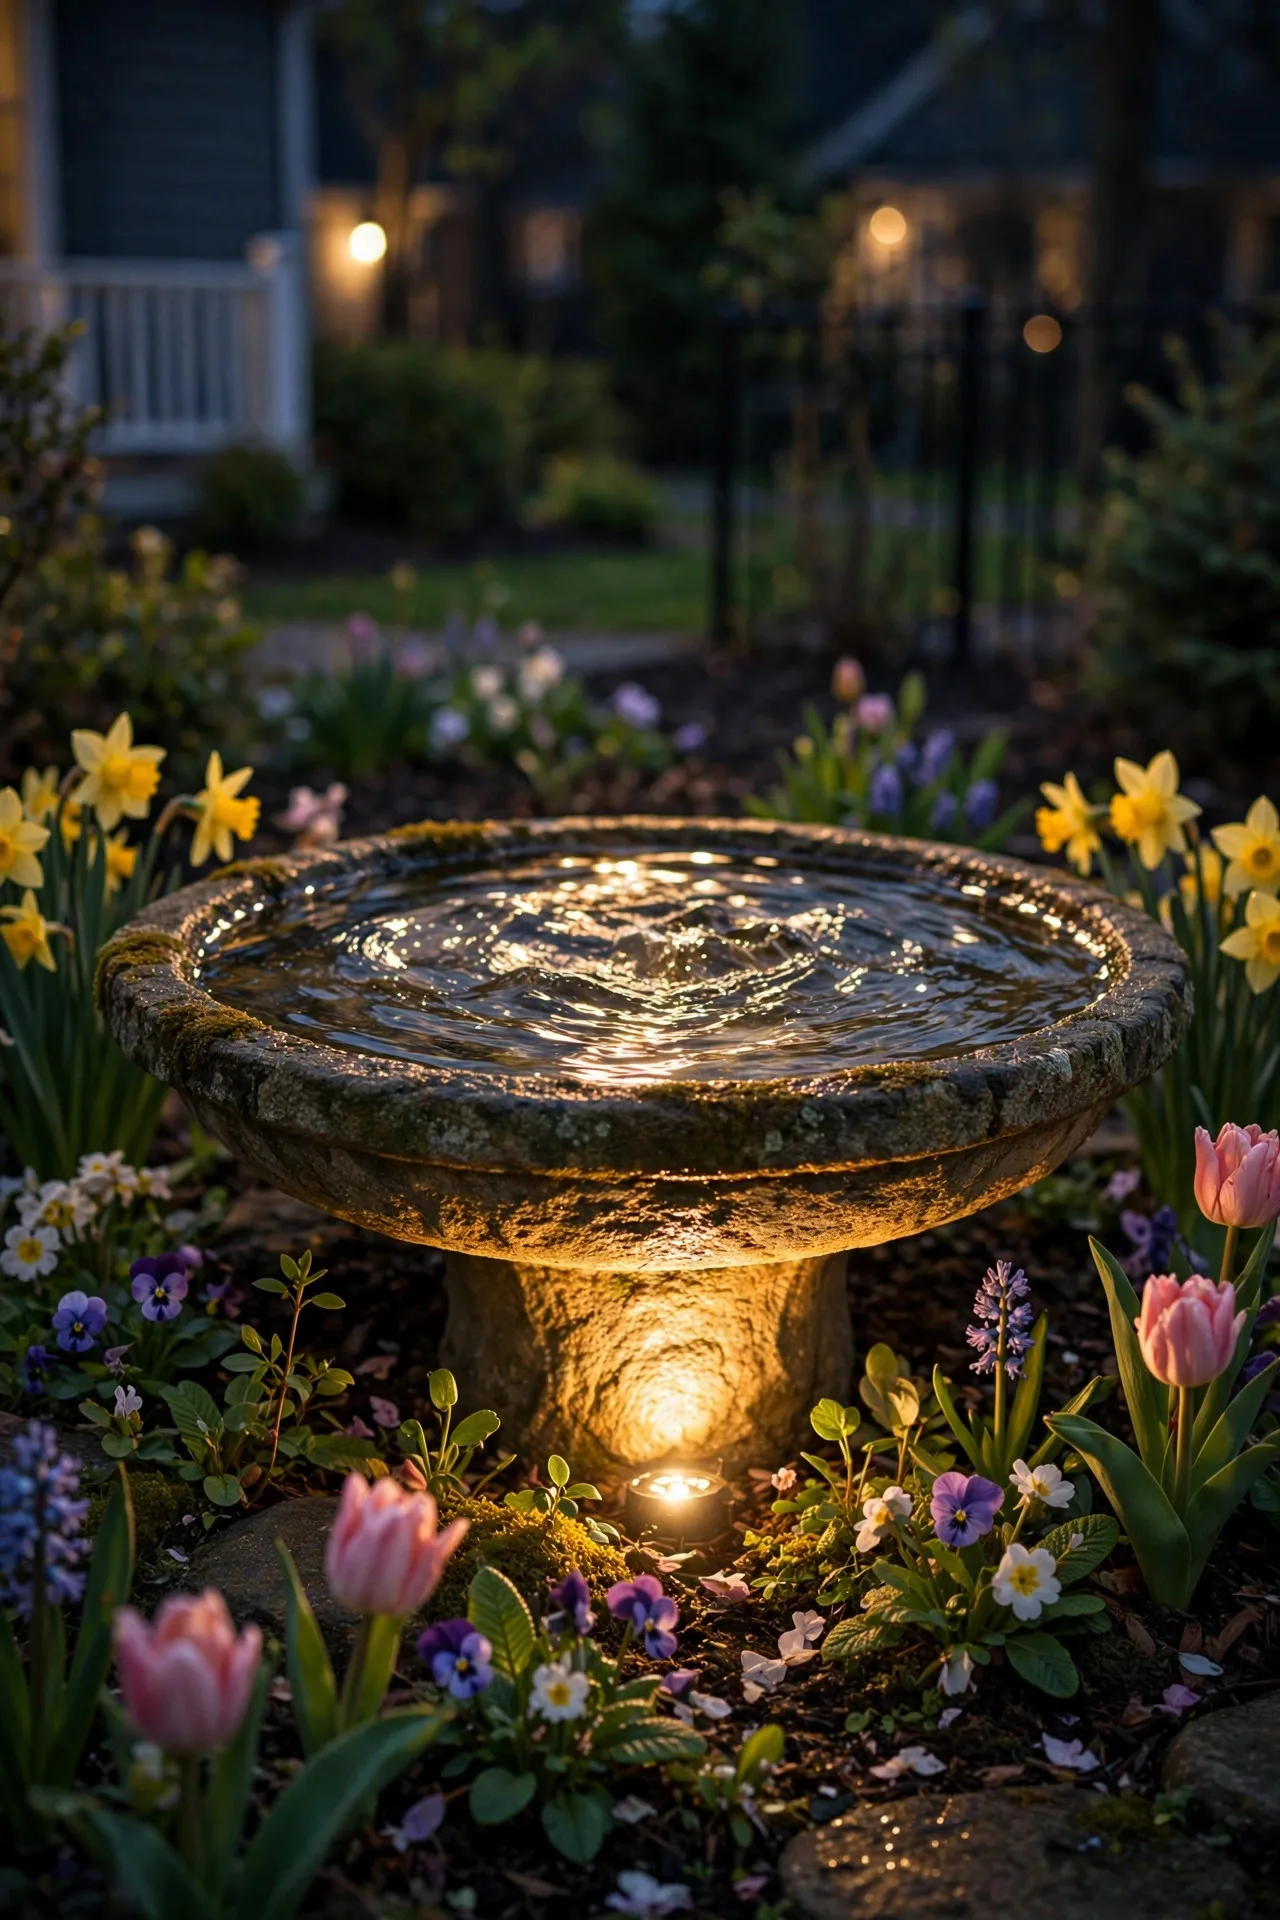
If you have a birdbath or small garden fountain in the front yard, a submersible or base-mounted accent light turns it into an evening centerpiece. Place a small waterproof LED spotlight just behind or beside the birdbath, aimed to catch the water surface — the light dancing on the ripples is genuinely mesmerizing, and it highlights the stone or ceramic texture too. For fountains, a submersible LED puck inside the basin creates a glow that shimmers through the falling water; make sure it's rated for submersion (IP68) and runs on low voltage. Keep the transformer indoors or in a weatherproof box, and run the cable through conduit where it crosses open ground so mowers can't catch it. In spring, clean the fixture monthly — algae and pollen film build up fast and dim the beam. One light is all you need; this is an accent, not a floodlight.
Suggested budget range: $30 – $85.
17. String Lights Through a Trellis With Climbing Roses
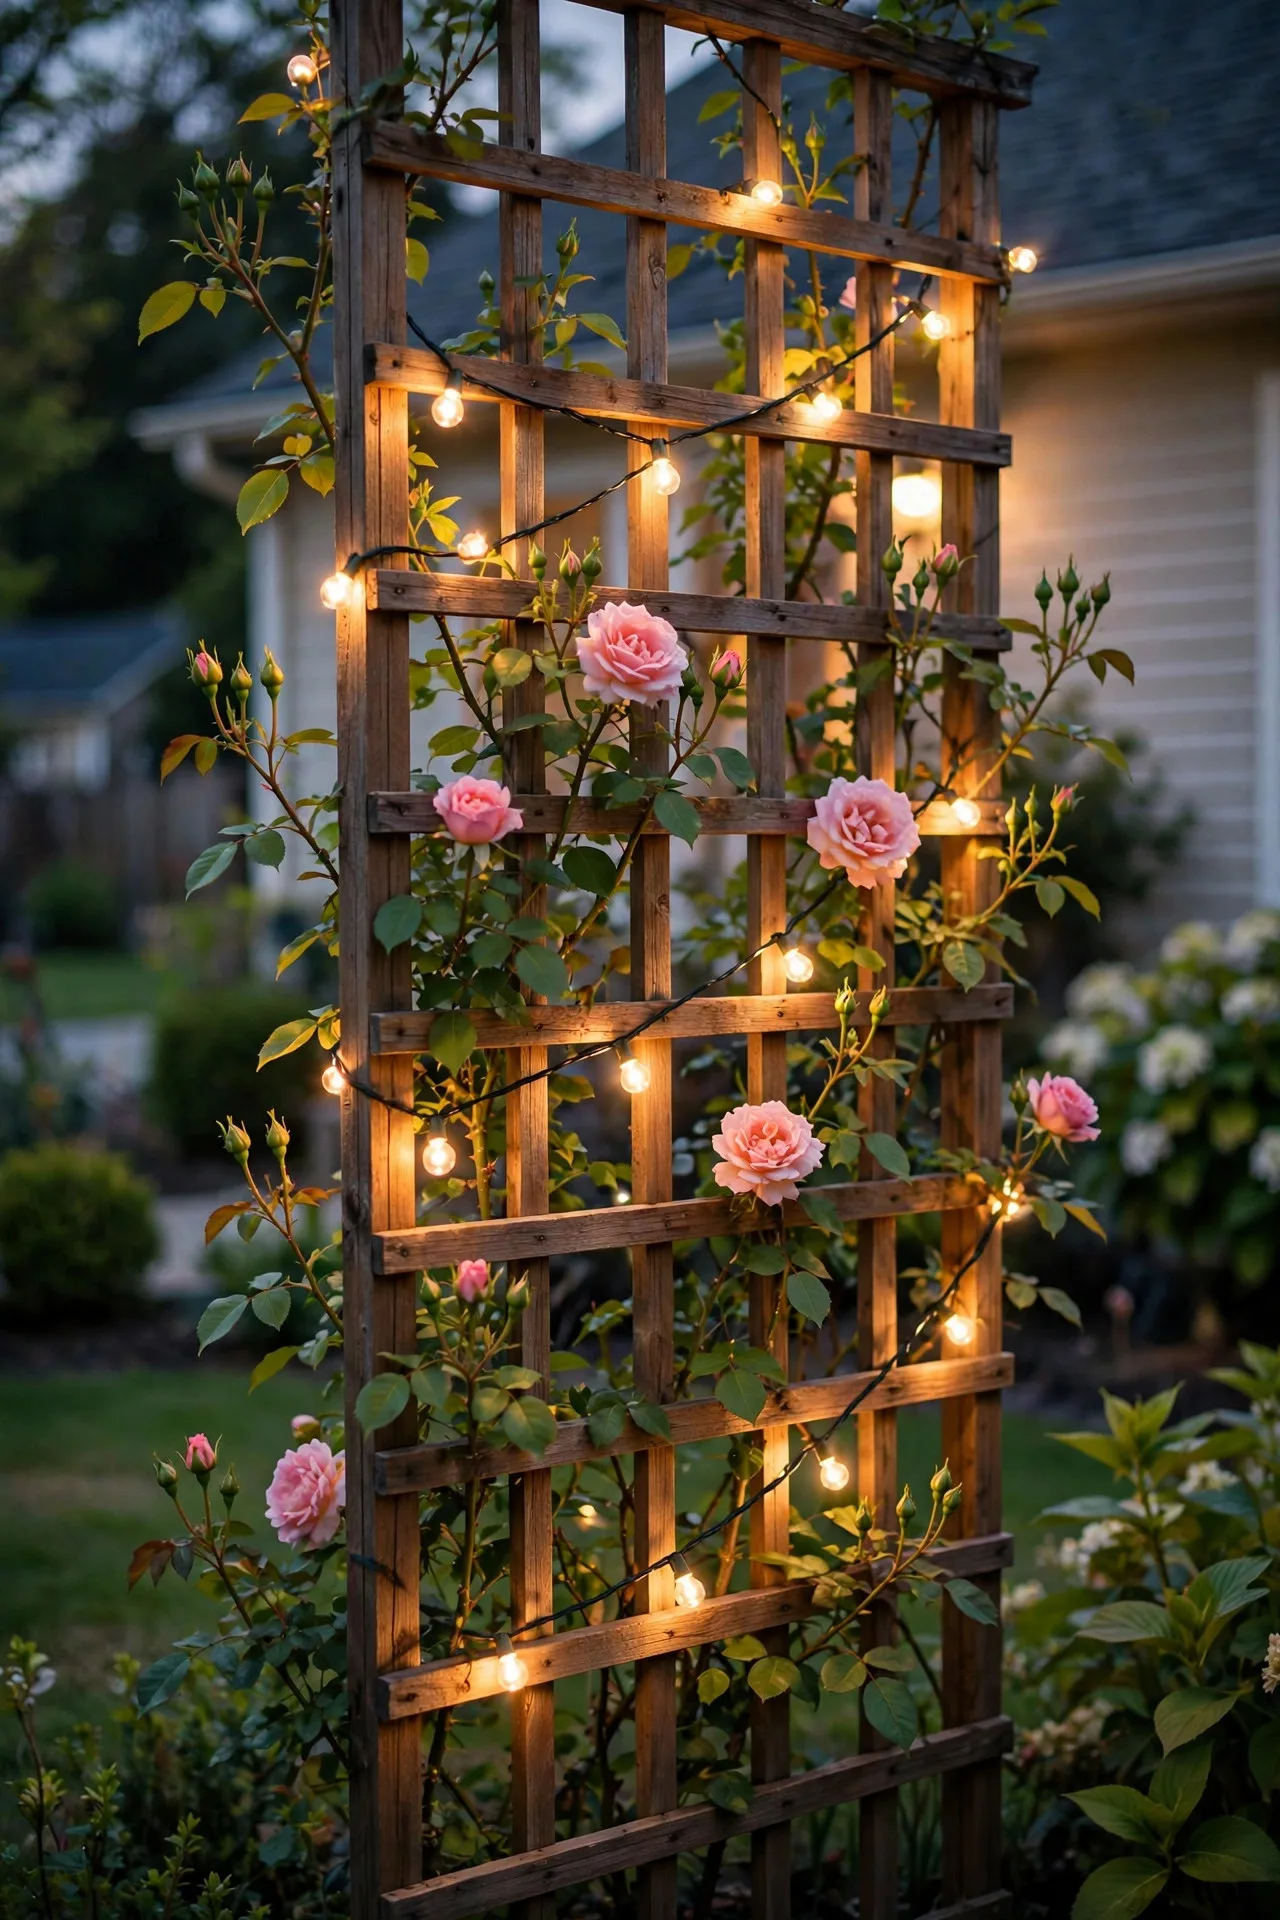
A trellis or arbor dressed with climbing roses and woven string lights is basically the cover of a gardening magazine — and it's easier than it looks. As your spring roses or clematis start their first flush of growth, weave a warm white LED string light through the lattice so the bulbs sit among the new leaves and buds. Use a strand with small, shatterproof bulbs on thin wire so it disappears into the foliage as the season fills in. Drape vertically in loose zigzags rather than wrapping tight spirals — you'll get better coverage and the wire won't strangle growing stems. Anchor the top of the strand to the trellis with zip ties (loose enough for growth) and plug into an outdoor timer or smart plug. LED-only bulbs are essential here since they'll be nestled among living, potentially dry plant material. By midsummer, the lights will be half-hidden in blooms — and at night they'll make the whole arbor shimmer.
Suggested budget range: $30 – $75.
18. Silhouette Your Shrubs and Hedges
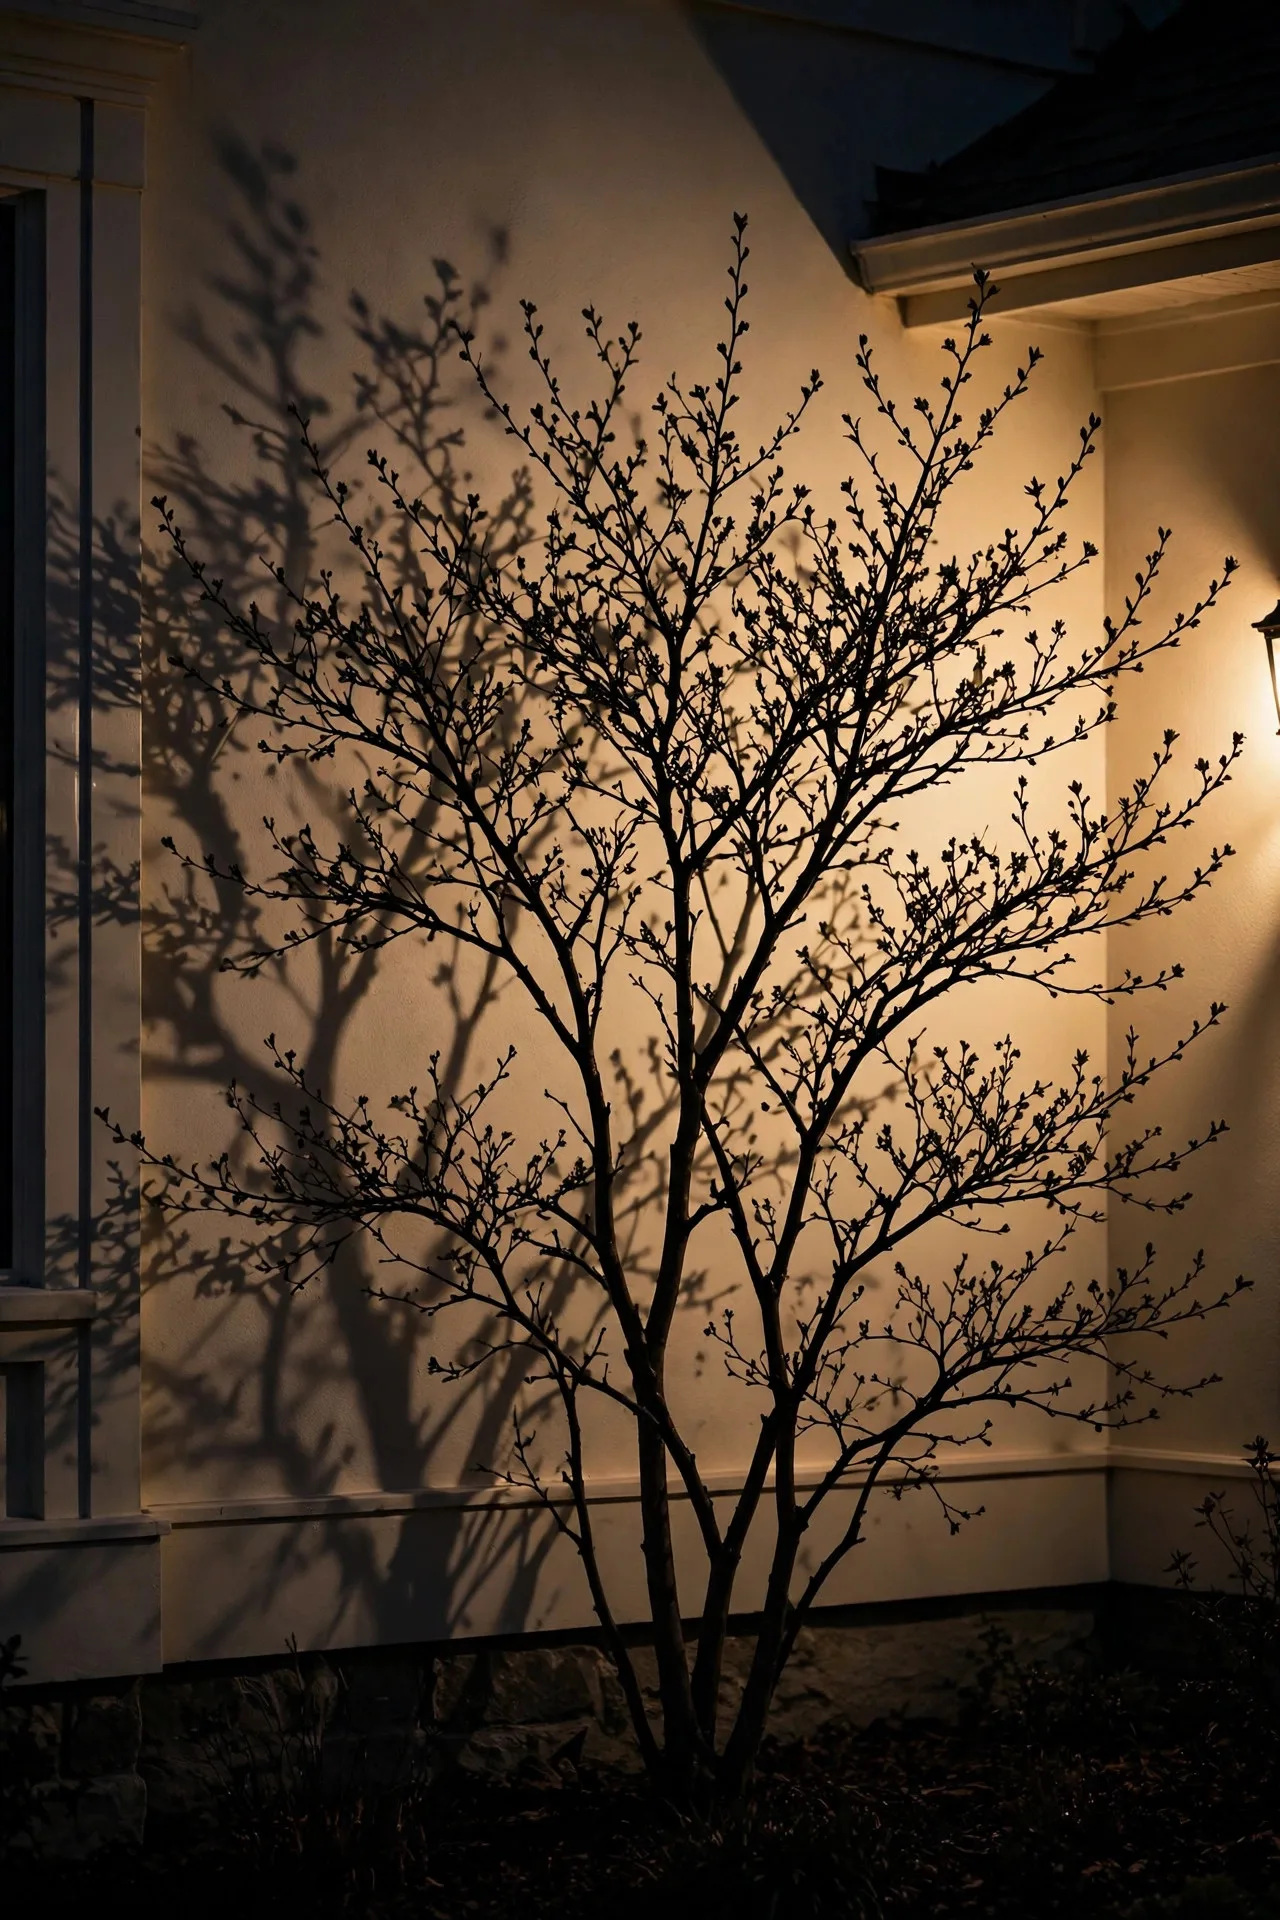
Here's a trick that costs almost nothing extra if you already have facade lighting: aim spotlights at the wall *behind* your shrubs so the plants appear as dramatic dark silhouettes against the lit surface. It works beautifully with ornamental grasses, Japanese maples, or anything with an interesting branch structure in spring. Position the fixture between the shrub and the wall, 12 to 18 inches from the facade, so the plant throws a crisp shadow upward. You'll need the wall wash to be even — grazing floods from idea #11 are perfect partners here — so spend time aiming before you finalize. Because silhouettes read as dark shapes, this technique actually works best with warm white light on a light-colored wall where the contrast is strongest. Avoid pointing the fixture directly at the shrub (that flattens everything); the whole point is the shadow play. It's sculptural, sophisticated, and uses fixtures you may already own.
Suggested budget range: $40 – $110.
19. Hang a Fresh Spring Prelit Wreath
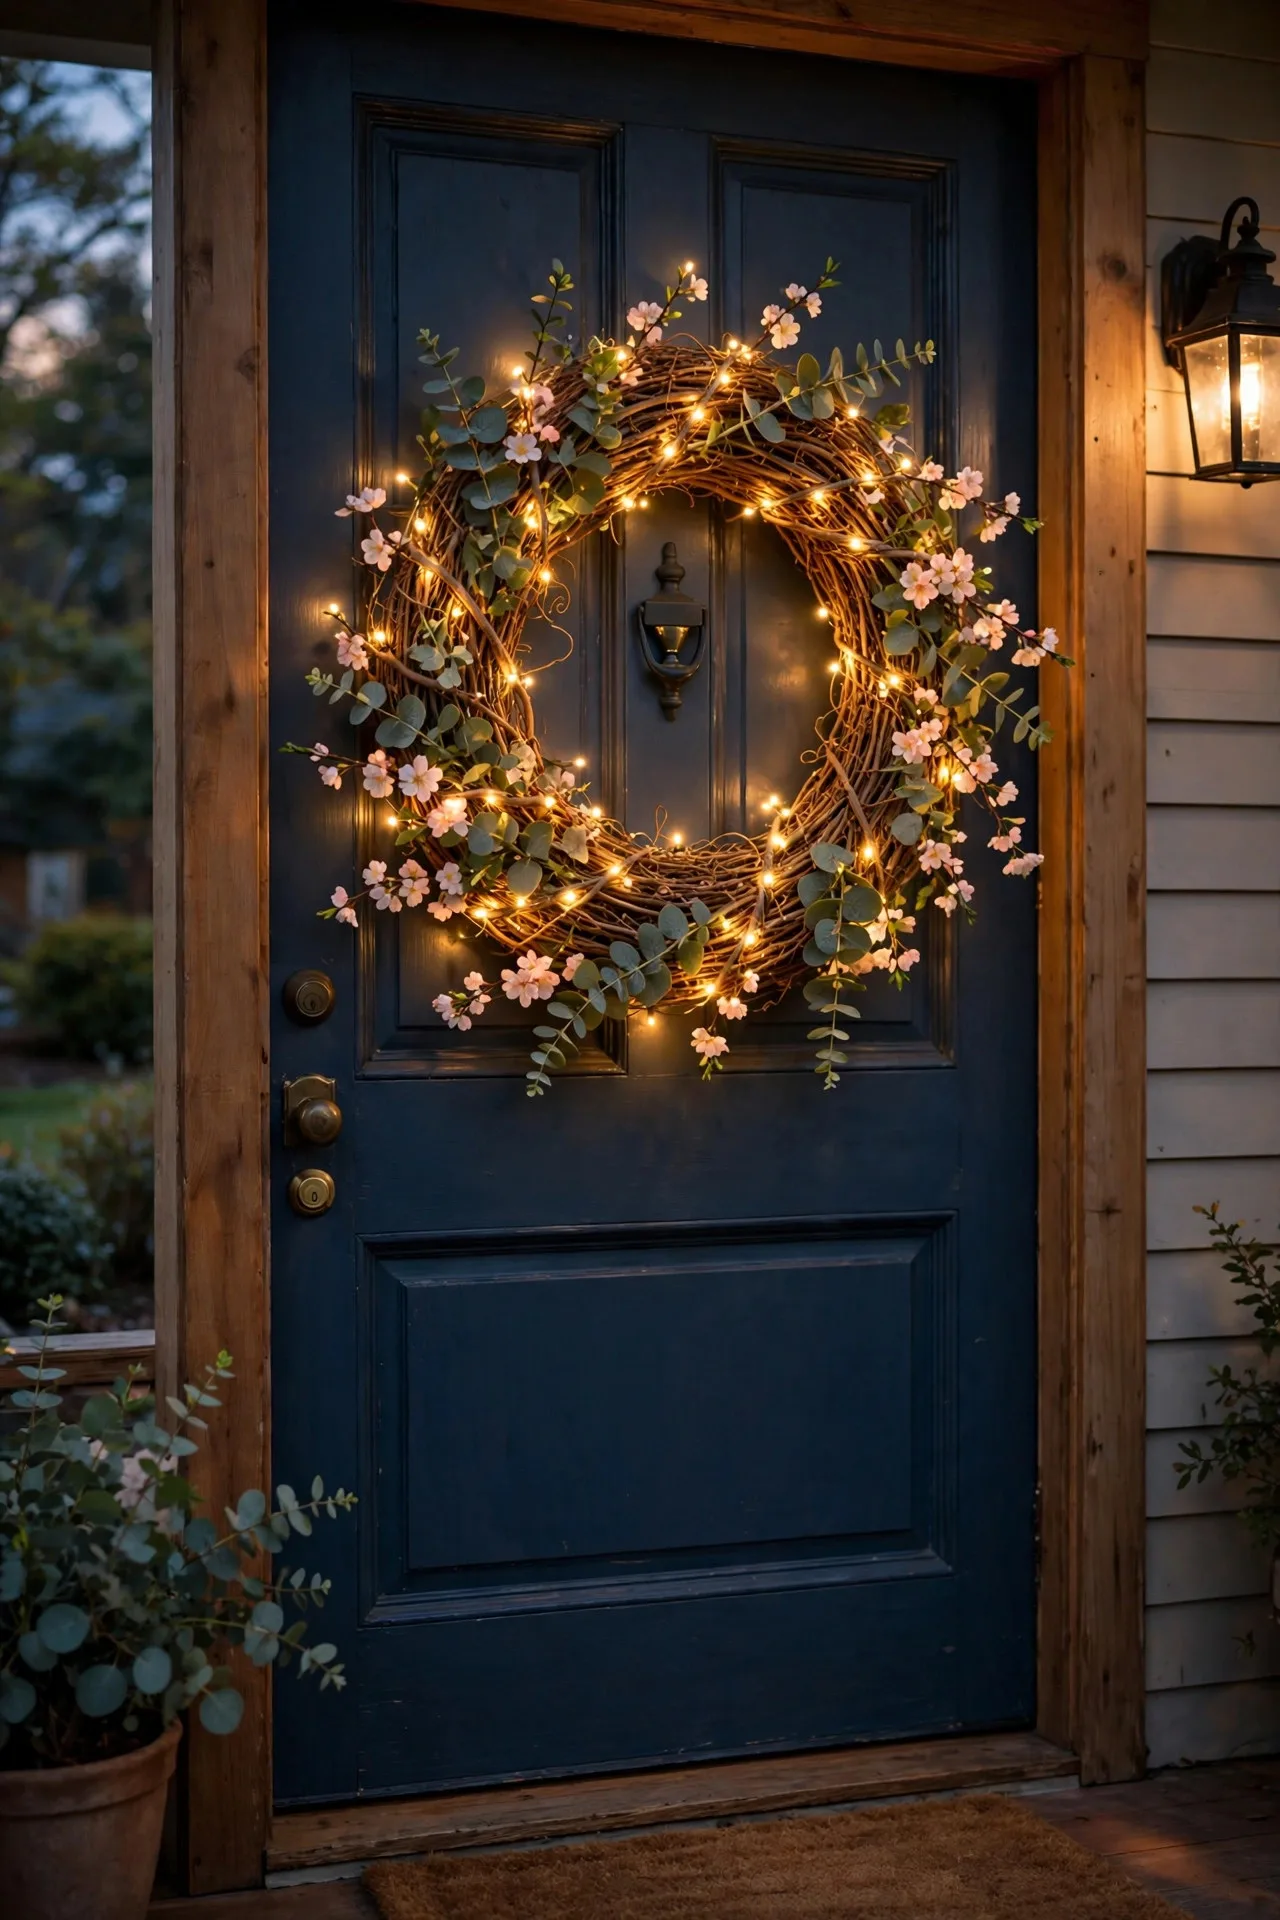
Don't retire the wreath with the holidays — a spring prelit wreath on the front door is one of the simplest spring front yard lighting ideas there is. Look for a grapevine or greenery base woven with warm white LED fairy lights and dotted with faux spring touches: eucalyptus sprigs, small blossoms, a pastel ribbon. Battery-operated versions with a built-in timer are the easiest — no cords across the door frame — just make sure the battery box sits inside the wreath form where it's shielded from rain. Hang it at eye level on a wreath hanger or an over-the-door hook; center it on the door so it frames with your new sconces from idea #4. LED-only, of course, since it's pressed against the door surface. In my experience, a prelit wreath pulls double duty: it reads as a decoration by day and a glowing focal point by night. Swap the ribbon when the season changes and it'll carry you into summer.
Suggested budget range: $30 – $70.
20. Outline Garden Bed Edges With Strip or Puck Lights
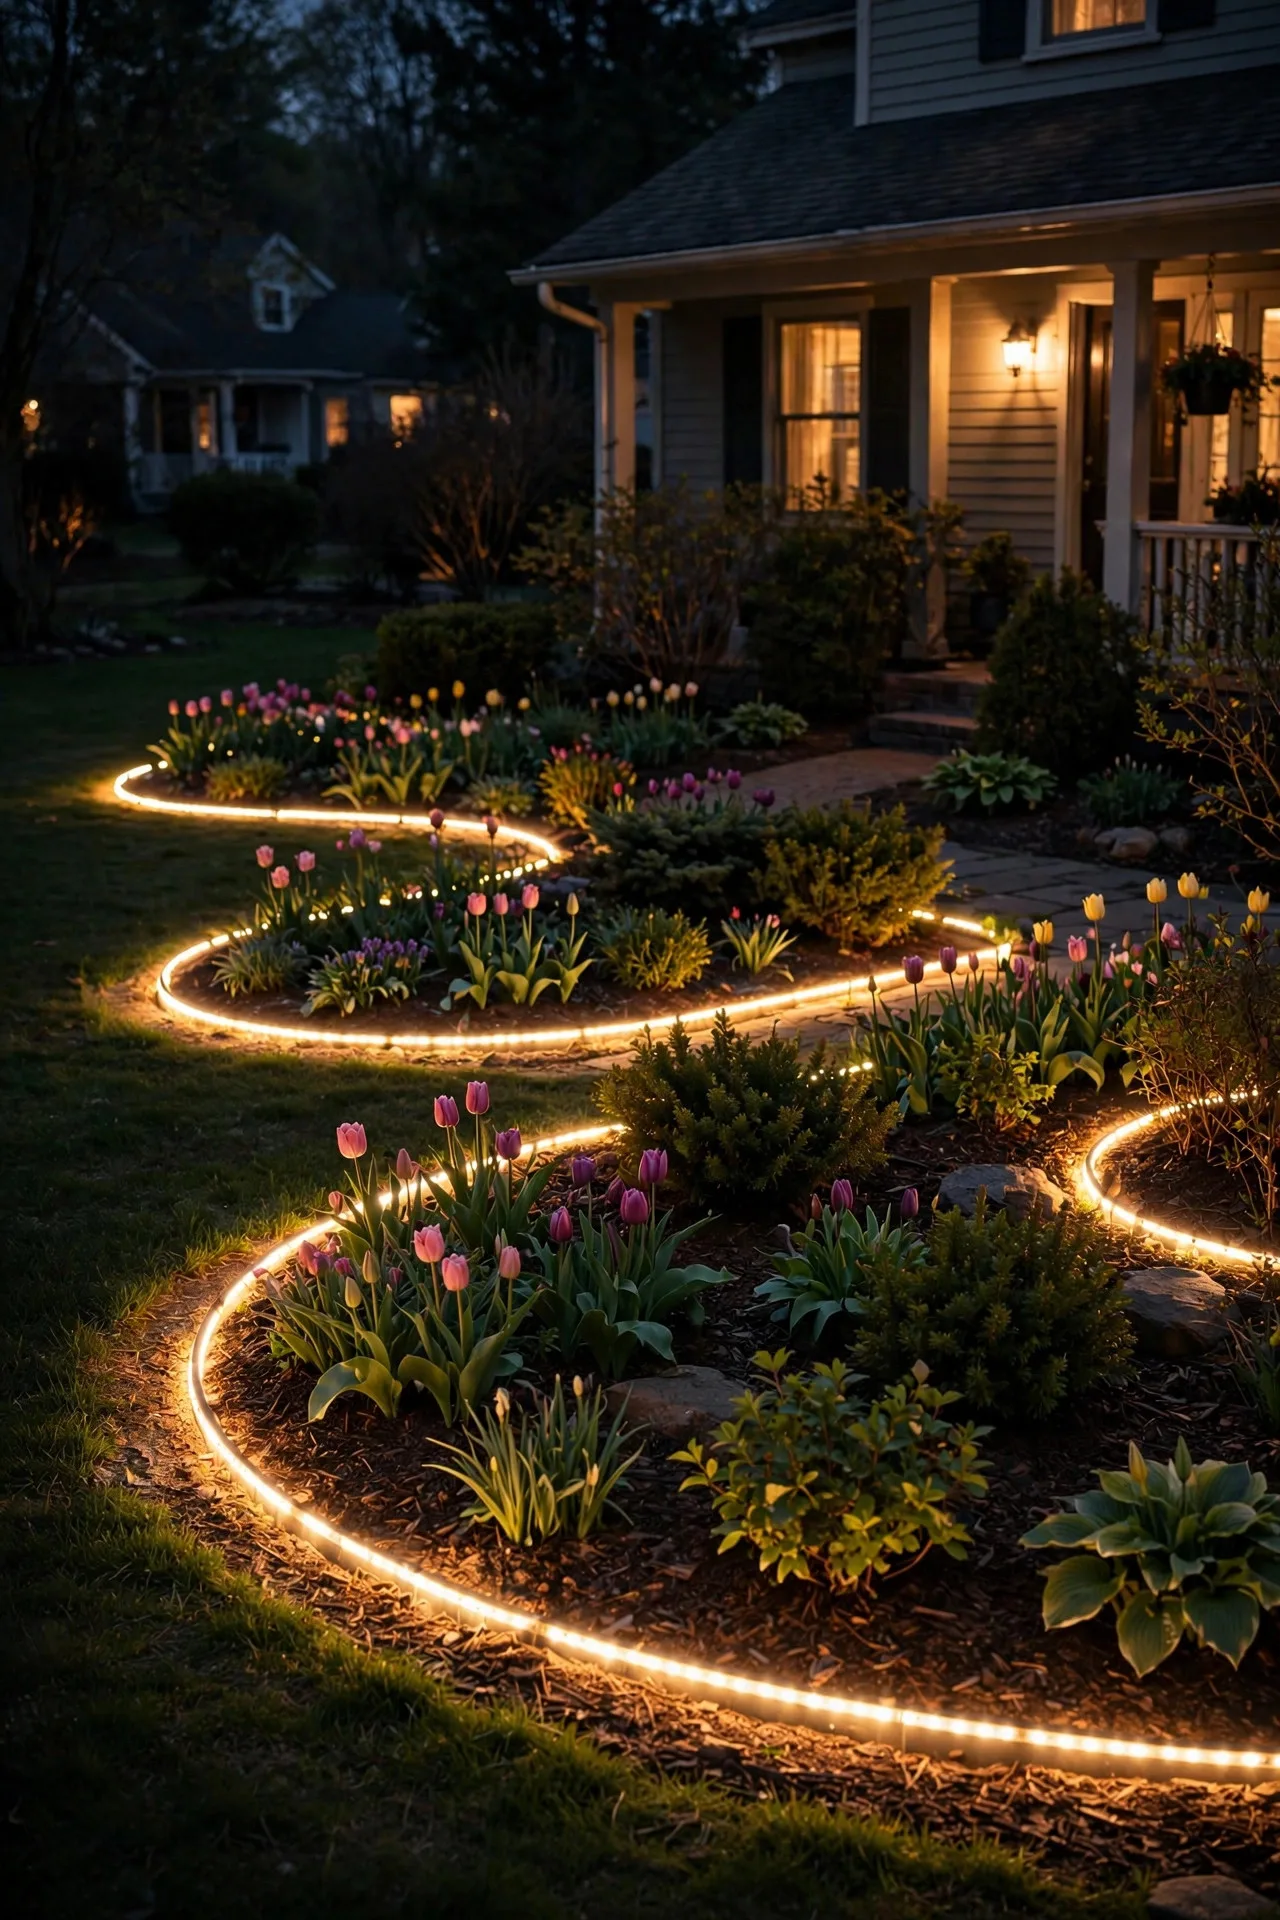
Defining the edges of your garden beds with light is a subtle move that makes the whole yard look landscaped, not just planted. Run low-voltage LED strip lights (outdoor-rated, IP65+) along the inside edge of metal or stone bed edging, or tuck slim puck lights into the mulch right at the border every 2 to 3 feet. The glow traces the curves of your beds and separates the planting zones from the lawn in a way that's gorgeous from the street. Use warm white 2700K to match your other landscape lighting, and connect to the same low-voltage transformer so everything switches on together. Mount strips facing *into* the bed rather than out toward the lawn — you want the light grazing the plants, not shining into walkers' eyes. Seal every connection against spring rain, and leave a little slack in the wiring near bed corners so you can re-aim fixtures as the plantings fill in.
Suggested budget range: $55 – $130.
21. Put Your Whole Spring Front Yard Lighting Display on a Smart Timer
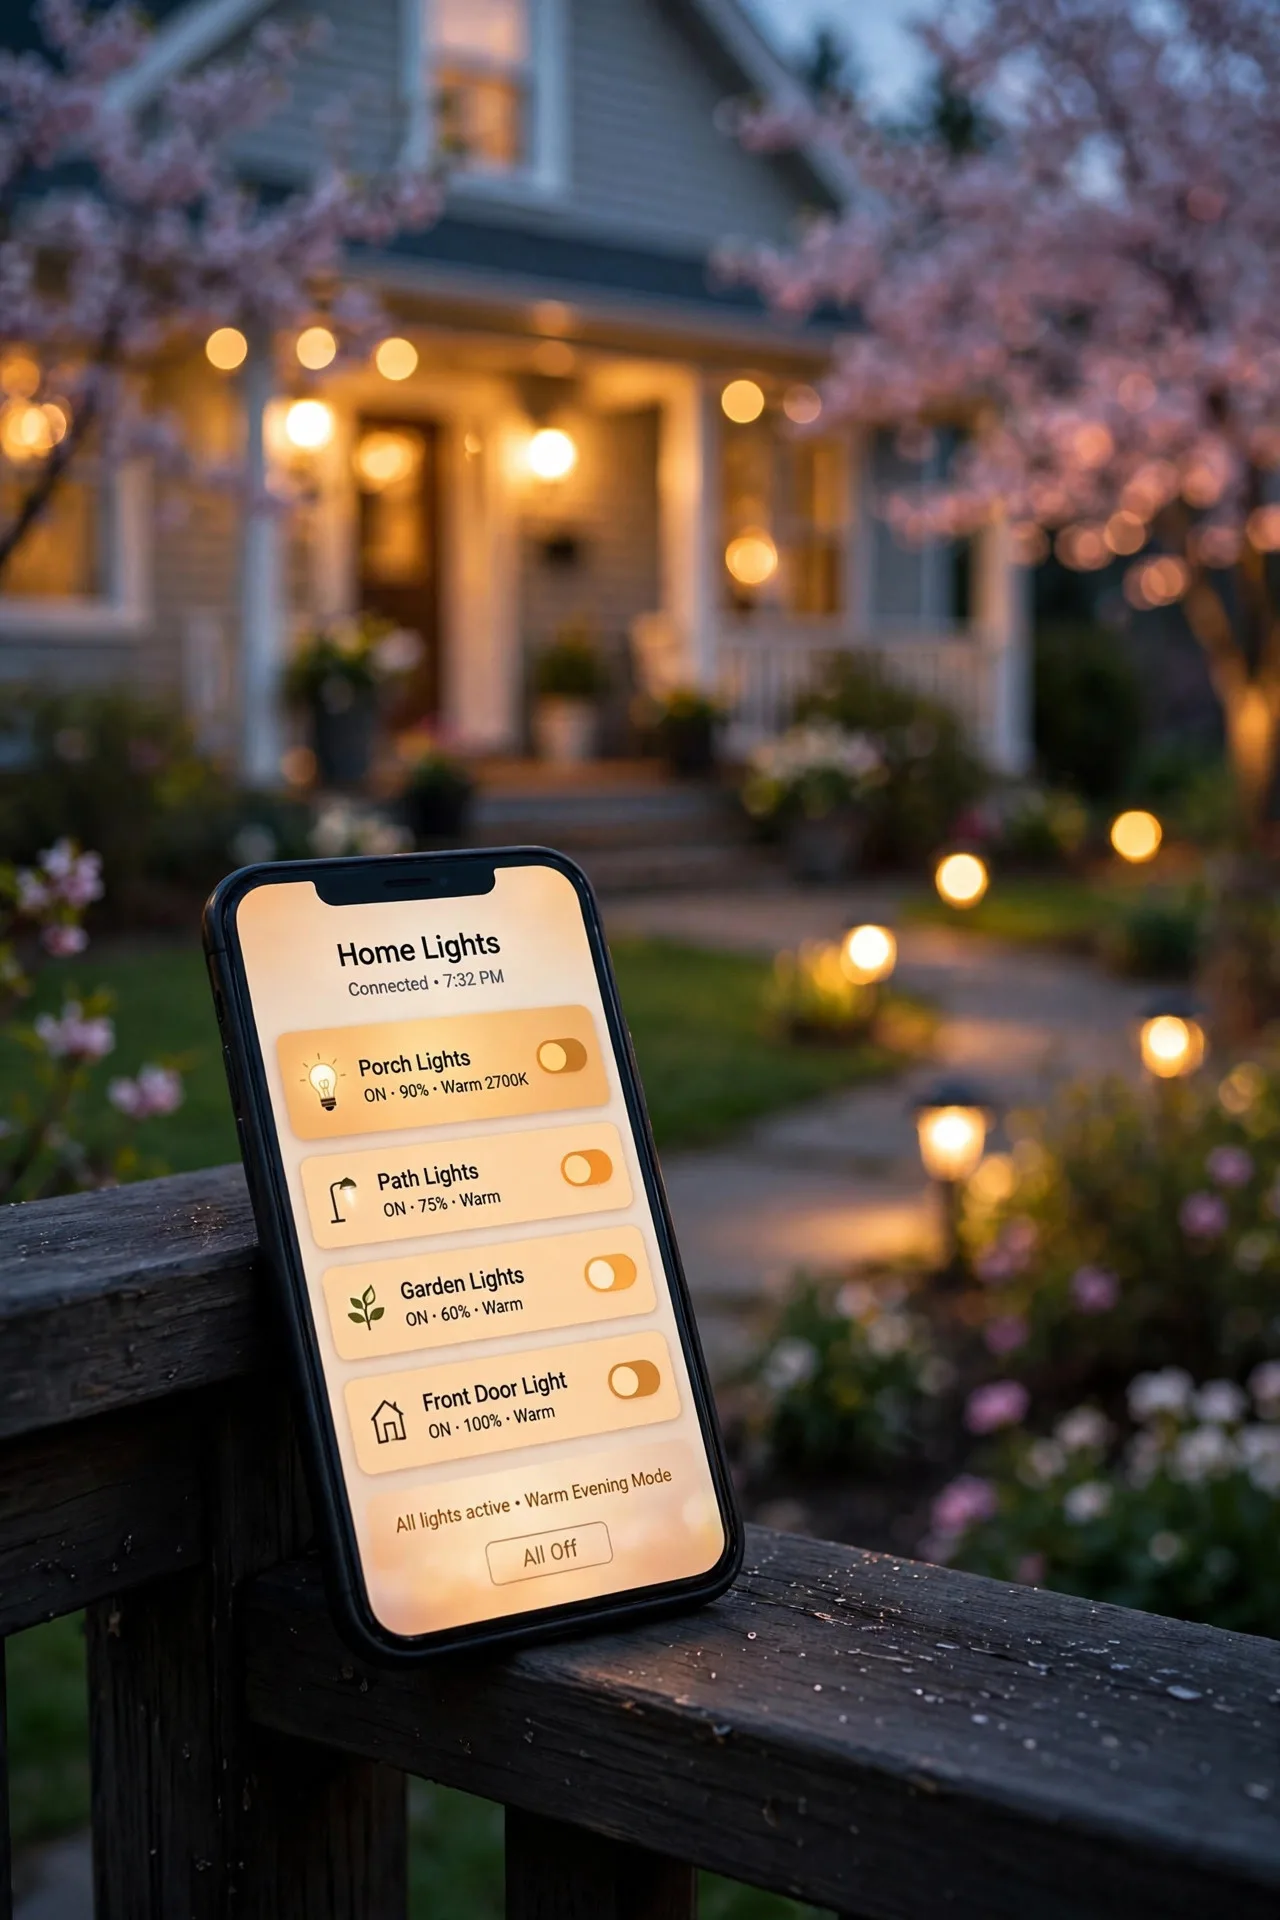
The final idea ties everything together: automate it. A smart timer or a set of outdoor smart plugs turns your entire spring front yard lighting display into a set-and-forget show. I use dusk-to-dawn mode on my main transformer for the low-voltage landscape lights, plus individual smart plugs for the string lights, wreath, and accent pieces — everything comes on as the sun sets and clicks off at a set bedtime or dawn. Group devices by zone in the app ("Walkway," "Porch," "Beds") so you can adjust brightness or schedules per area, and set up a simple routine like "on at sunset, off at 11 p.m." Most smart plugs are rated for outdoor use now; just check the IP rating and keep the plug itself sheltered under a porch or in a weatherproof box. Automation doesn't just save you the nightly walk-around — it means your curb appeal is on point every single evening, even when you're traveling. It's the cheapest upgrade with the biggest lifestyle payoff.
Suggested budget range: $25 – $70.
Frequently Asked Questions
What color temperature is best for spring front yard lighting?
Warm white — 2700K to 3000K — is my answer almost every time. Warm light makes spring blossoms, brick, and wood tones look rich and inviting, while cooler temperatures (4000K and up) cast a blue tint that reads as commercial or clinical. I keep my whole yard in the 2700K–3000K range so the layers blend seamlessly. The one exception is task lighting like motion-sensor security lights, where 3000K still feels warm but shows detail clearly. If you're buying new fixtures, look for the Kelvin rating on the box and avoid anything labeled "daylight" for decorative lighting — it's the wrong mood entirely.
Are solar lights or wired low-voltage lights better for a front yard?
Honestly, it depends on the job. Solar lights are fantastic for quick wins — path stakes, mason jar accents, fairy lights — because there's no wiring and you can rearrange them freely. But they're dimmer and die early on cloudy weeks, so I don't rely on them for anything structural. Low-voltage (12V) wired lighting is brighter, consistent, and runs all night on a timer, making it the right choice for uplights, facade grazing, and anything that defines your yard's look. My rule of thumb: use solar for accents and experiments, wired low-voltage for the foundation of your design. A simple 12V transformer kit with a photocell covers most front yards and costs less than a nice dinner out.
How do I keep outdoor lights safe in spring rain and storms?
Three things: outdoor ratings, sealed connections, and GFCI protection. Every fixture and plug should be rated for outdoor use — look for IP65 or higher on anything at ground level, and damp- or wet-rated sconces depending on your porch exposure. Seal all low-voltage wire connections with waterproof connectors, and keep transformers in weatherproof boxes or under cover. Plug everything into GFCI-protected outlets (required by code for outdoor circuits), and test the GFCI monthly in storm season. For smart plugs and battery packs on fairy lights, tuck them under eaves or in covered spots even if they're "outdoor rated" — a little shelter dramatically extends their life. And after any big spring storm, do a quick walk-around: re-aim knocked fixtures and clear mulch off solar panels.
Can I leave spring lighting up year-round?
Much of it, yes — and that's the beauty of layering. Path lights, uplights, sconces, facade floods, and your smart timer setup work beautifully in every season; you just adjust brightness or swap accents as the mood changes. Seasonal touches like pastel smart accents or a spring wreath get packed away, and fairy-light garland can be re-dressed for summer or fall. If you love the idea of permanent, always-on lighting, there's a great guide to permanent outdoor lighting systems that covers year-round installs and the cost math. My approach: build a solid year-round foundation of low-voltage lighting, then rotate the fun seasonal layers on top.
Conclusion
Spring front yard lighting is really about one thing: letting your home glow the way spring feels — fresh, warm, and full of promise. You don't need all 21 ideas to transform your curb appeal. Pick three: a walkway refresh, one tree or shrub accent, and a timer to run it all automatically. That layered trio — path, accent, and automation — delivers most of the magic for a fraction of the effort and budget.
As the season turns, keep playing with the layers. When autumn rolls around, my fall porch lighting ideas show how to shift the same foundation into cozy mode, and the outdoor Christmas light ideas will take you through the holidays. Your yard is a year-round canvas — spring is just the loveliest time to start painting with light.