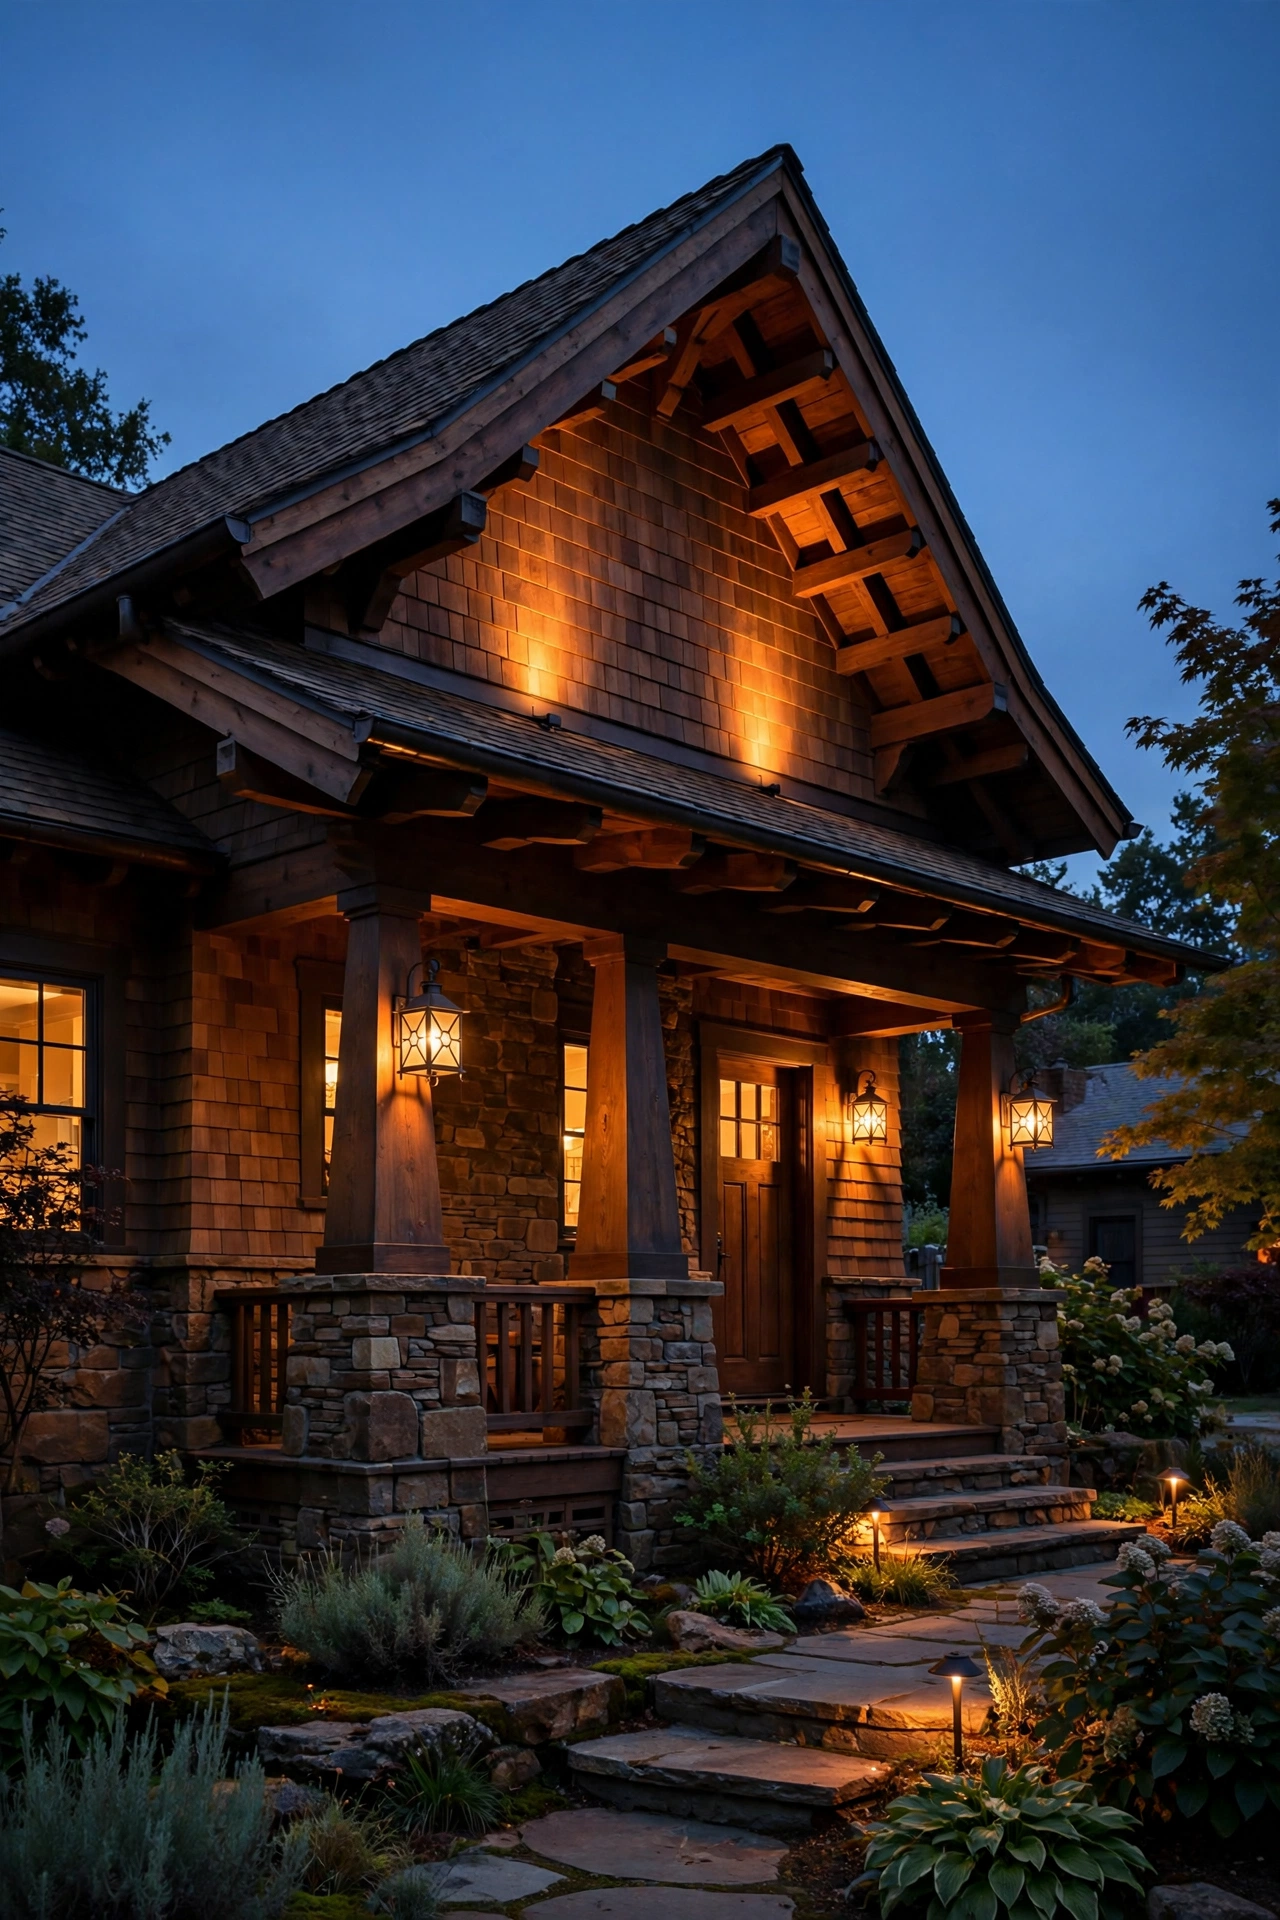
A craftsman bungalow has its own language at night — and honestly, most homes speaking it get the lighting wrong. Nothing breaks my heart like a gorgeous 1915 bungalow with tapered columns and stone piers, wearing a pair of harsh white builder-grade fixtures that wash everything out. Craftsman bungalow exterior lighting should feel like candlelight filtered through amber mica: warm, honest, and built from real materials.
The good news is that this style is the easiest to light well, because the architecture already does half the work. Those deep overhanging eaves, the exposed rafter tails, the stone foundation and the low-pitched gables — they were designed to catch and hold warm light. My whole philosophy with bungalows is layering: ambient porch light for living, task light at the steps and doors, and accent light that makes the architecture itself glow. No single fixture should do everything, and every layer should burn at that golden 2700K that makes wood and stone look their richest.
In this list, I'm walking you through 17 craftsman bungalow exterior lighting ideas — from mission-style sconces flanking the front door to uplights on the gable, step lights tucked into stone piers, and string lights under the porch eave. Every idea includes real placement measurements, bulb choices, and honest budget ranges so you can plan the whole project in one sitting.
1. Mission-Style Sconces: the Signature of Craftsman Bungalow Exterior Lighting
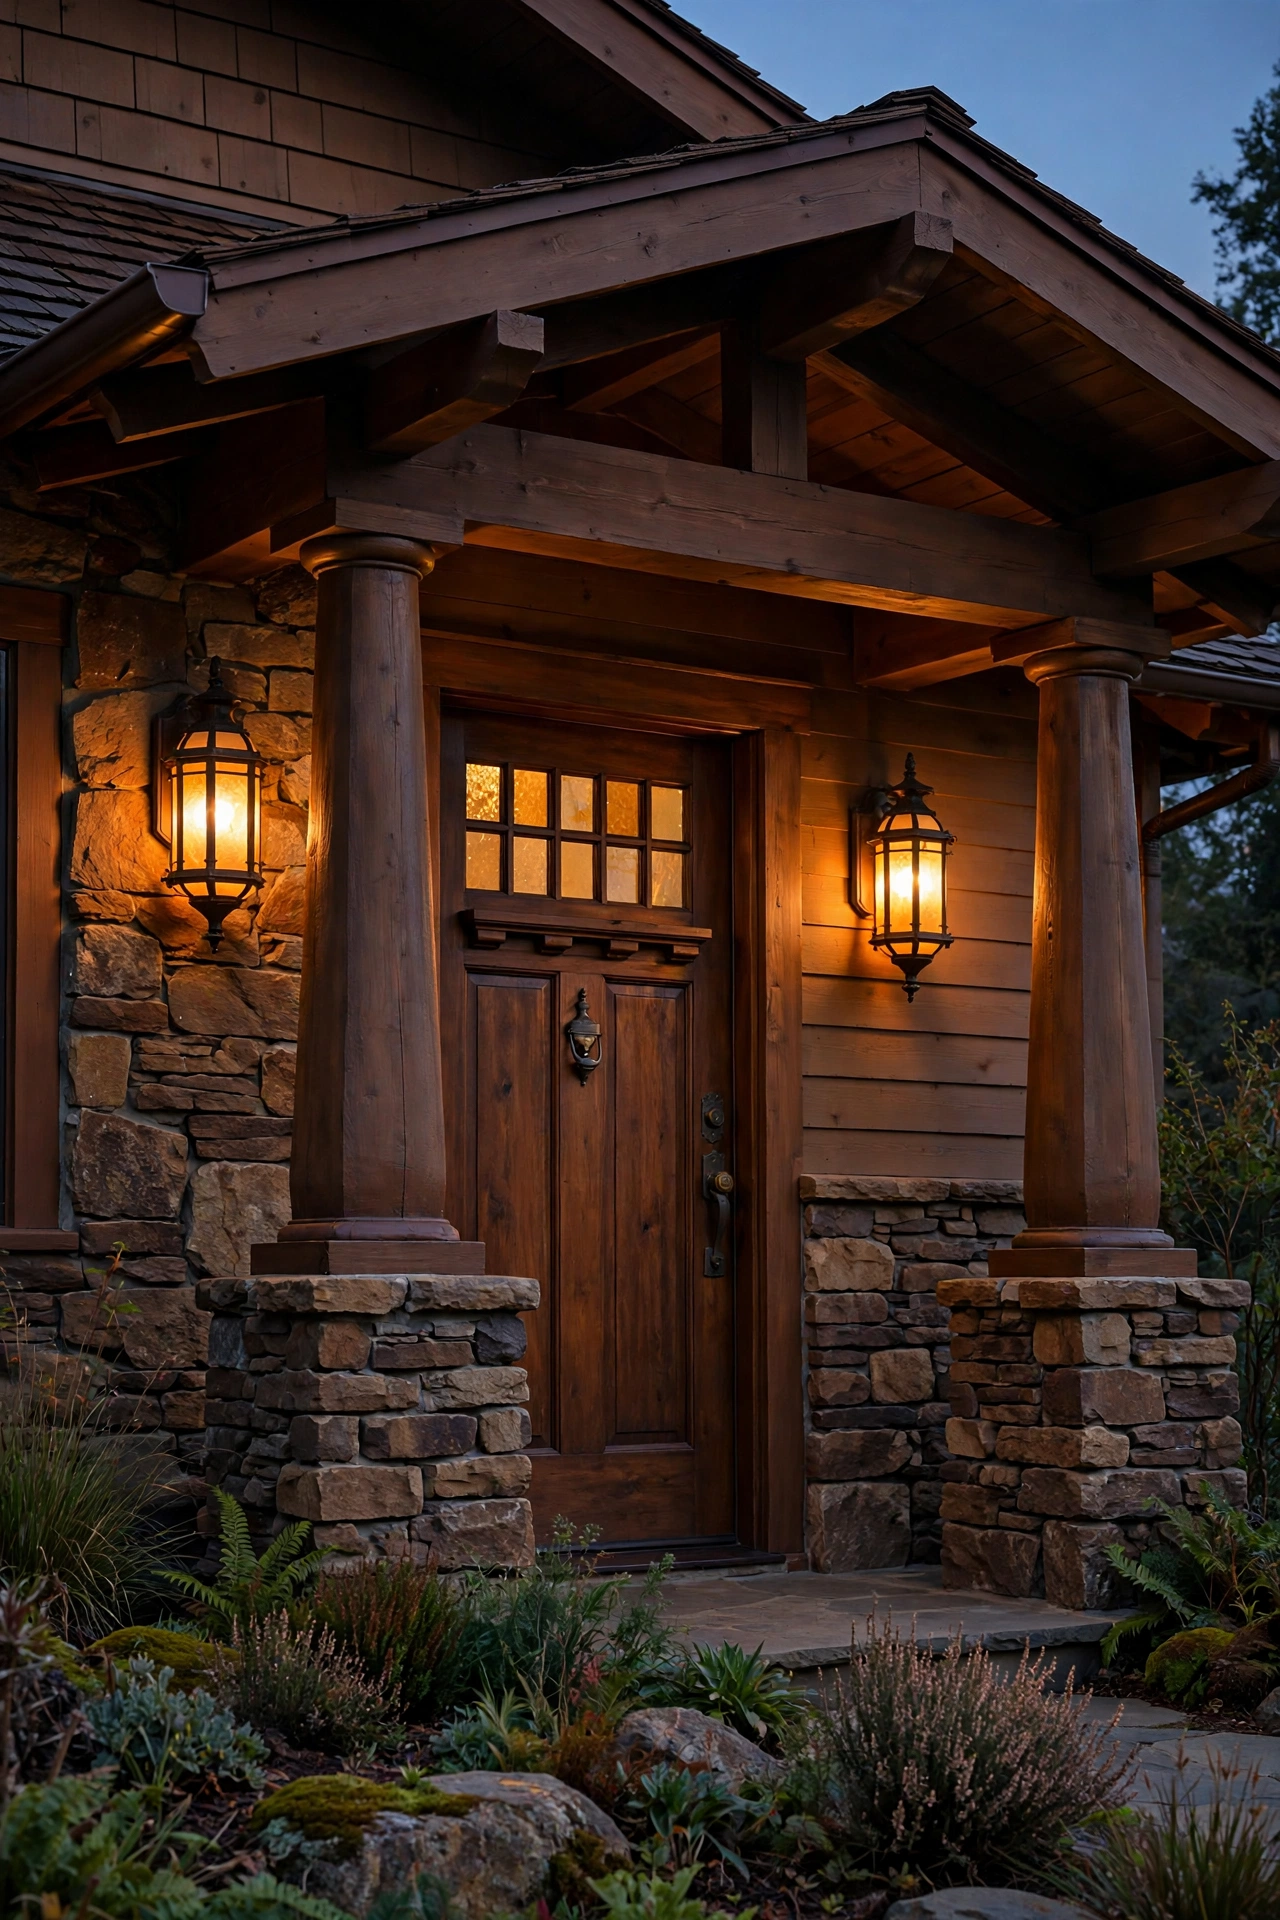
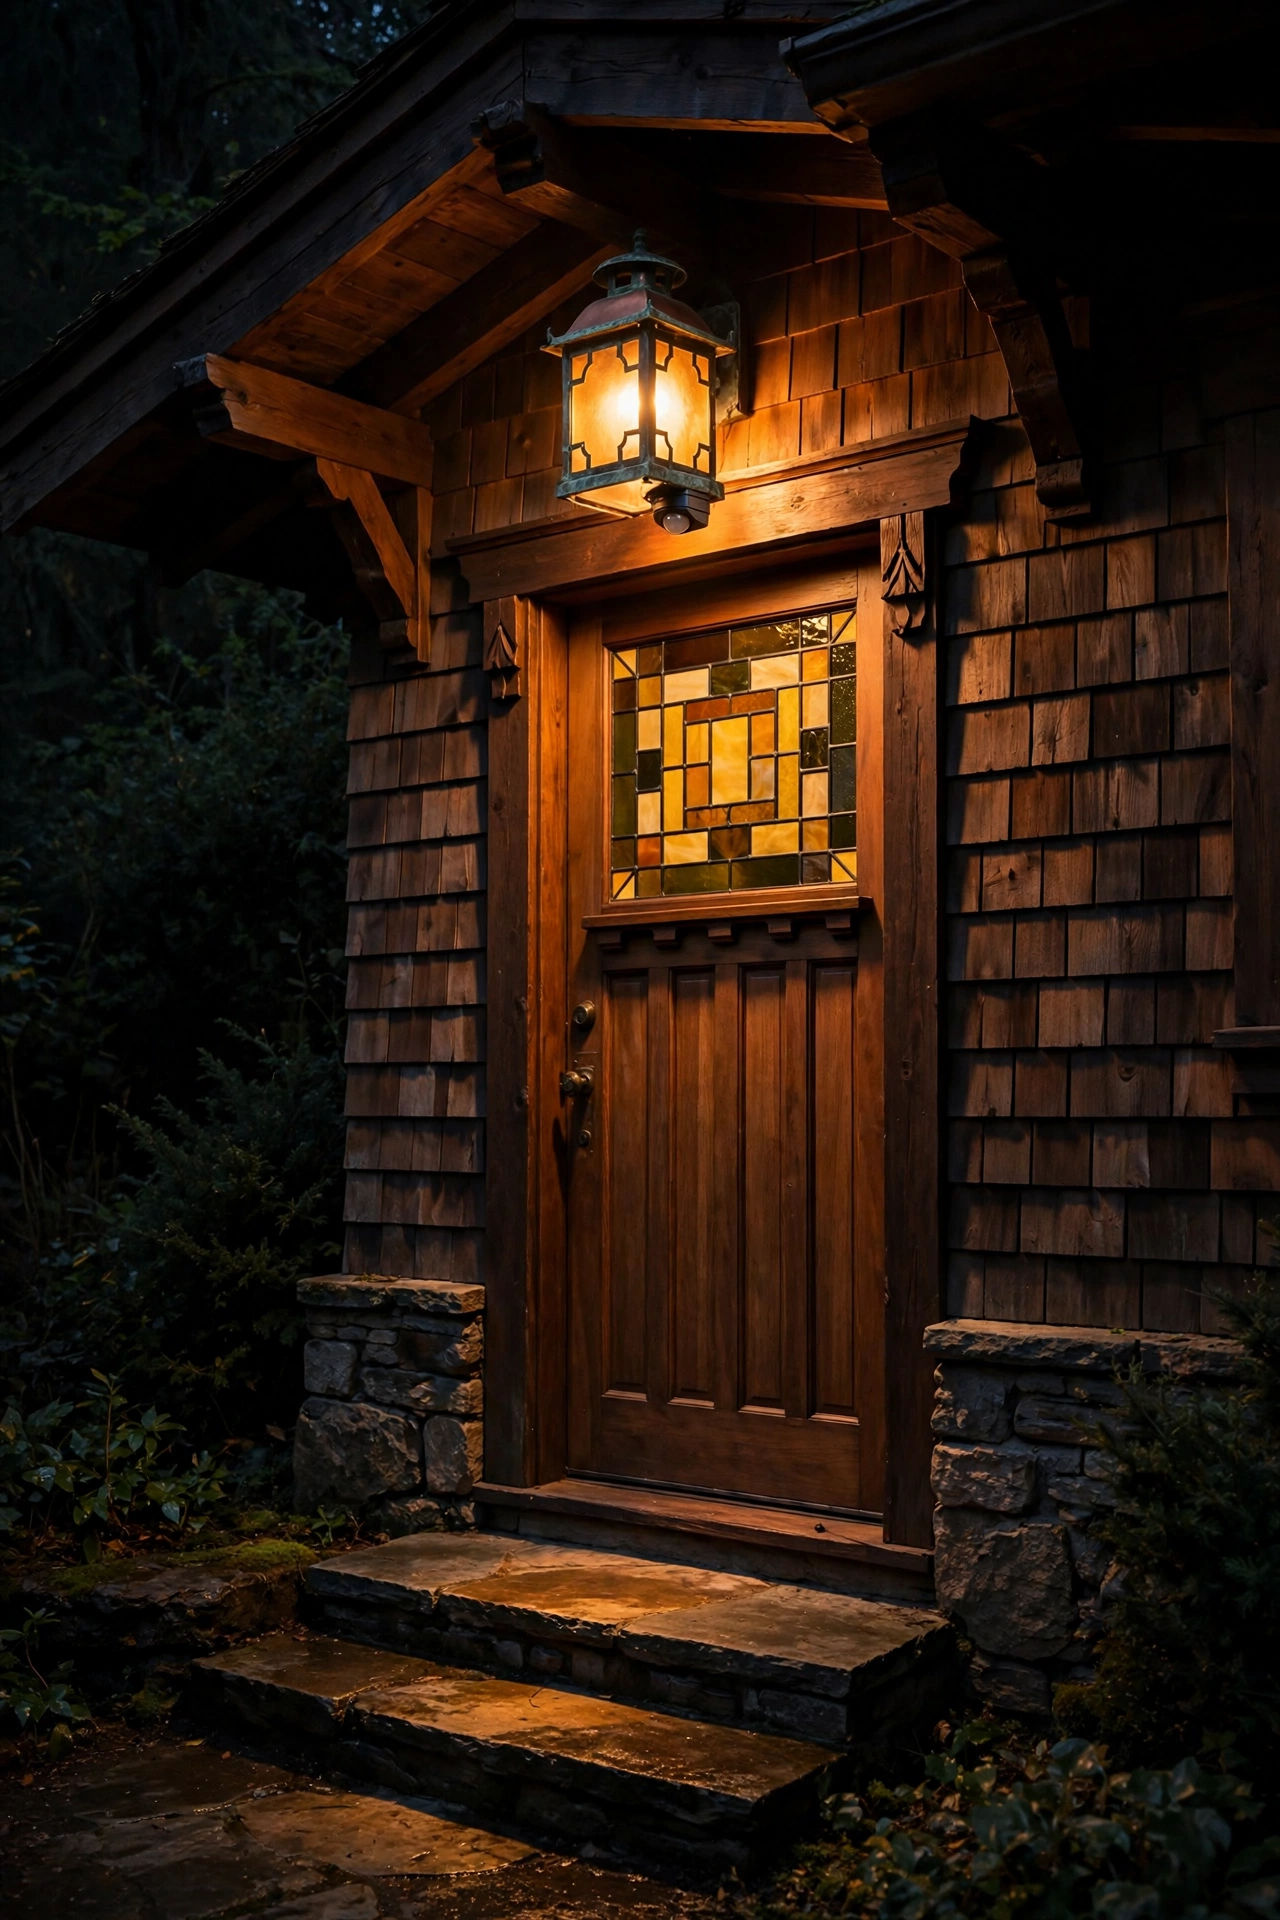
This is the single most important fixture choice on a craftsman bungalow, so let's get it right. Mission-style wall sconces — tapered frames in oil-rubbed bronze or dark copper, with amber mica or seeded glass panels — are the historically correct answer, and they're still the prettiest one. The amber mica is the secret weapon here: it diffuses the bulb into a warm, honey-colored glow that echoes the home's wood trim and makes everything at the entry feel ten degrees cozier.
Mount one on each side of the front door, centering each fixture about 6 to 10 inches from the door trim, with the center of the fixture 60 to 66 inches above the porch floor. Size them generously — 16 to 20 inches tall works on most bungalow entries, because deep porches swallow small fixtures. Use warm 2700K LED filament bulbs (about 400 to 600 lumens each) so the mica panels read as glowing amber rather than showing a harsh bulb silhouette. Put the pair on a dusk-to-dawn photocell or smart timer so they click on every evening without a thought. Make sure fixtures are rated for wet locations, since bungalow entries are open to driving rain. For detailed sizing rules on door pairs, my guide to front door sconce lighting ideas covers the measurements that keep a pair looking balanced.
Suggested budget range: $90 – $350 for the pair.
2. A Hanging Porch Pendant from the Beamed Ceiling
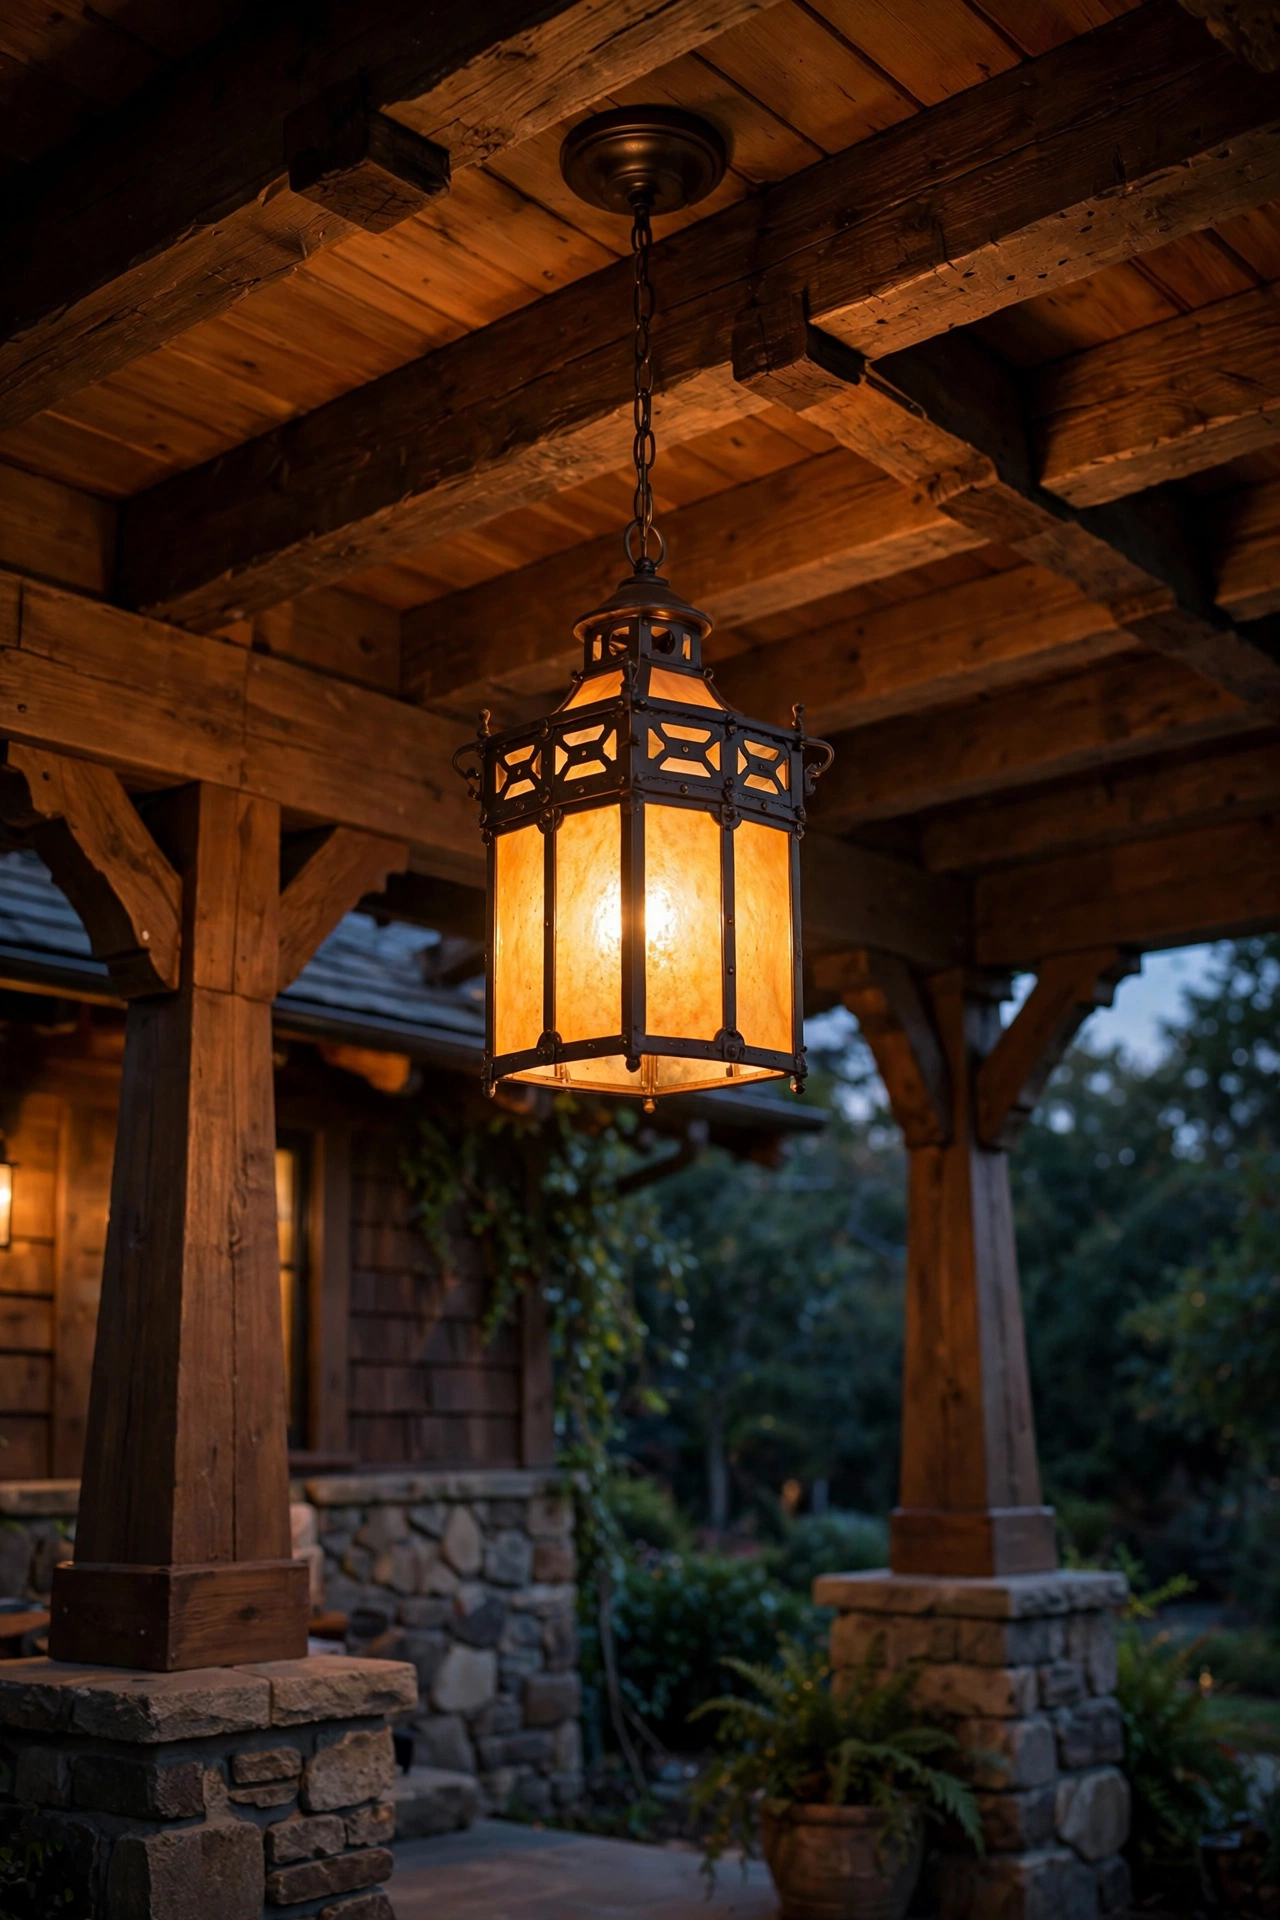
If your porch has a beamed or tongue-and-groove ceiling, hanging a pendant lantern from it is pure craftsman magic. A chain-hung or stem-hung mission lantern — square tapered body, copper or bronze frame, amber glass — drops warm light straight onto the porch floor and the seating area, turning the porch into a room rather than a hallway. In my experience, this is the fixture guests compliment most, because it reads as intentional in a way wall sconces alone never quite manage.
Hang the pendant so the bottom of the fixture sits 7 to 8 feet above the porch floor — high enough to walk under, low enough to feel intimate. Center it over the porch seating area or the front door path; on a wide porch, two pendants spaced 6 to 8 feet apart look better than one lonely fixture. Use a stem mount rather than a chain if your porch gets wind, so it doesn't swing. Warm 2700K LED bulbs around 800 lumens give you real reading light on the porch swing. Check that the existing ceiling box is rated for the fixture's weight — older porcelain boxes sometimes aren't. If your ceiling is sloped with the porch roof pitch, use a sloped-ceiling adapter so the lantern hangs level.
Suggested budget range: $120 – $400 per pendant, plus $150 – $300 for electrician install if no box exists.
3. Post-Top Lanterns on Tapered Porch Columns
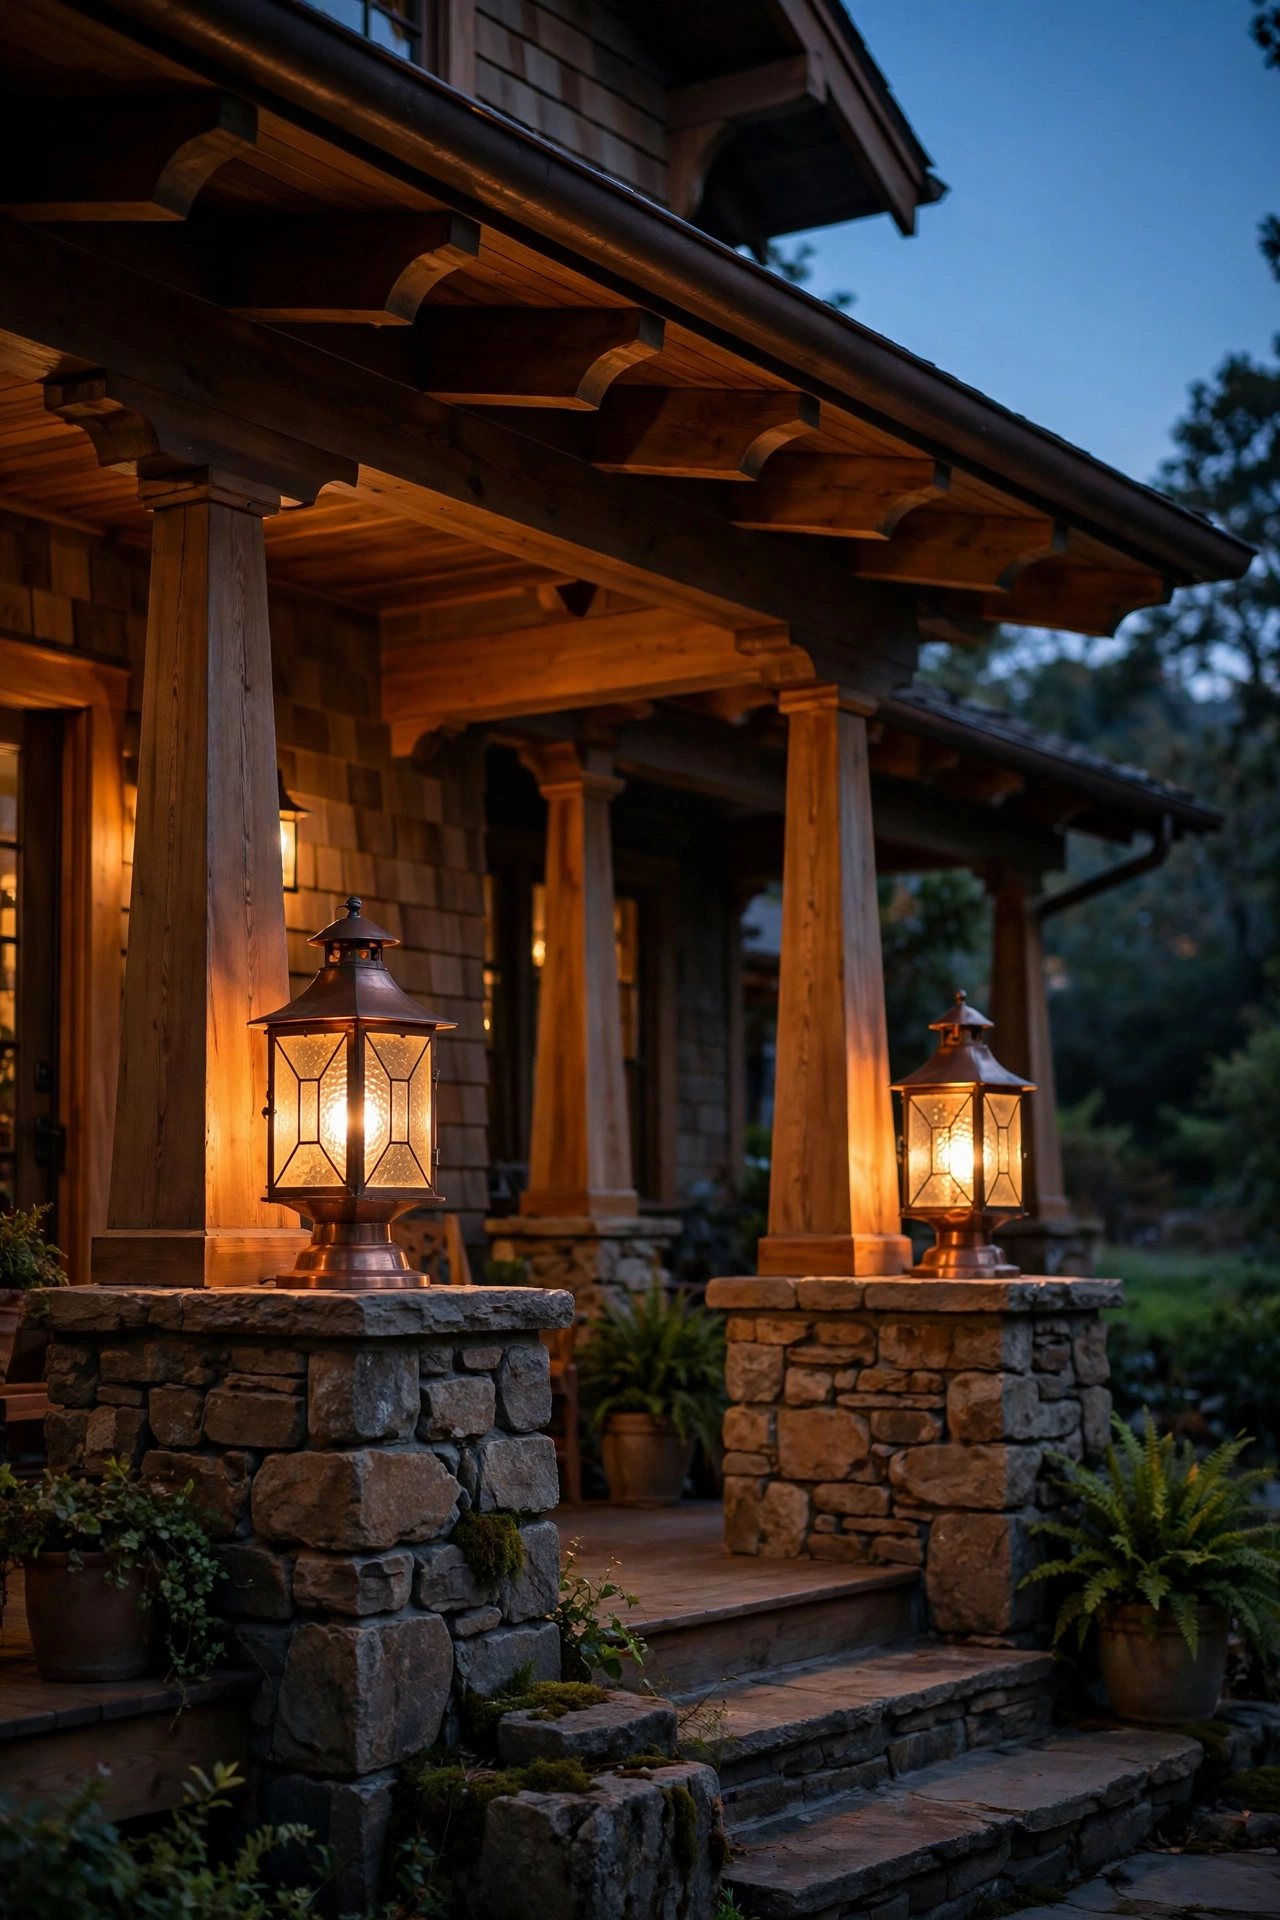
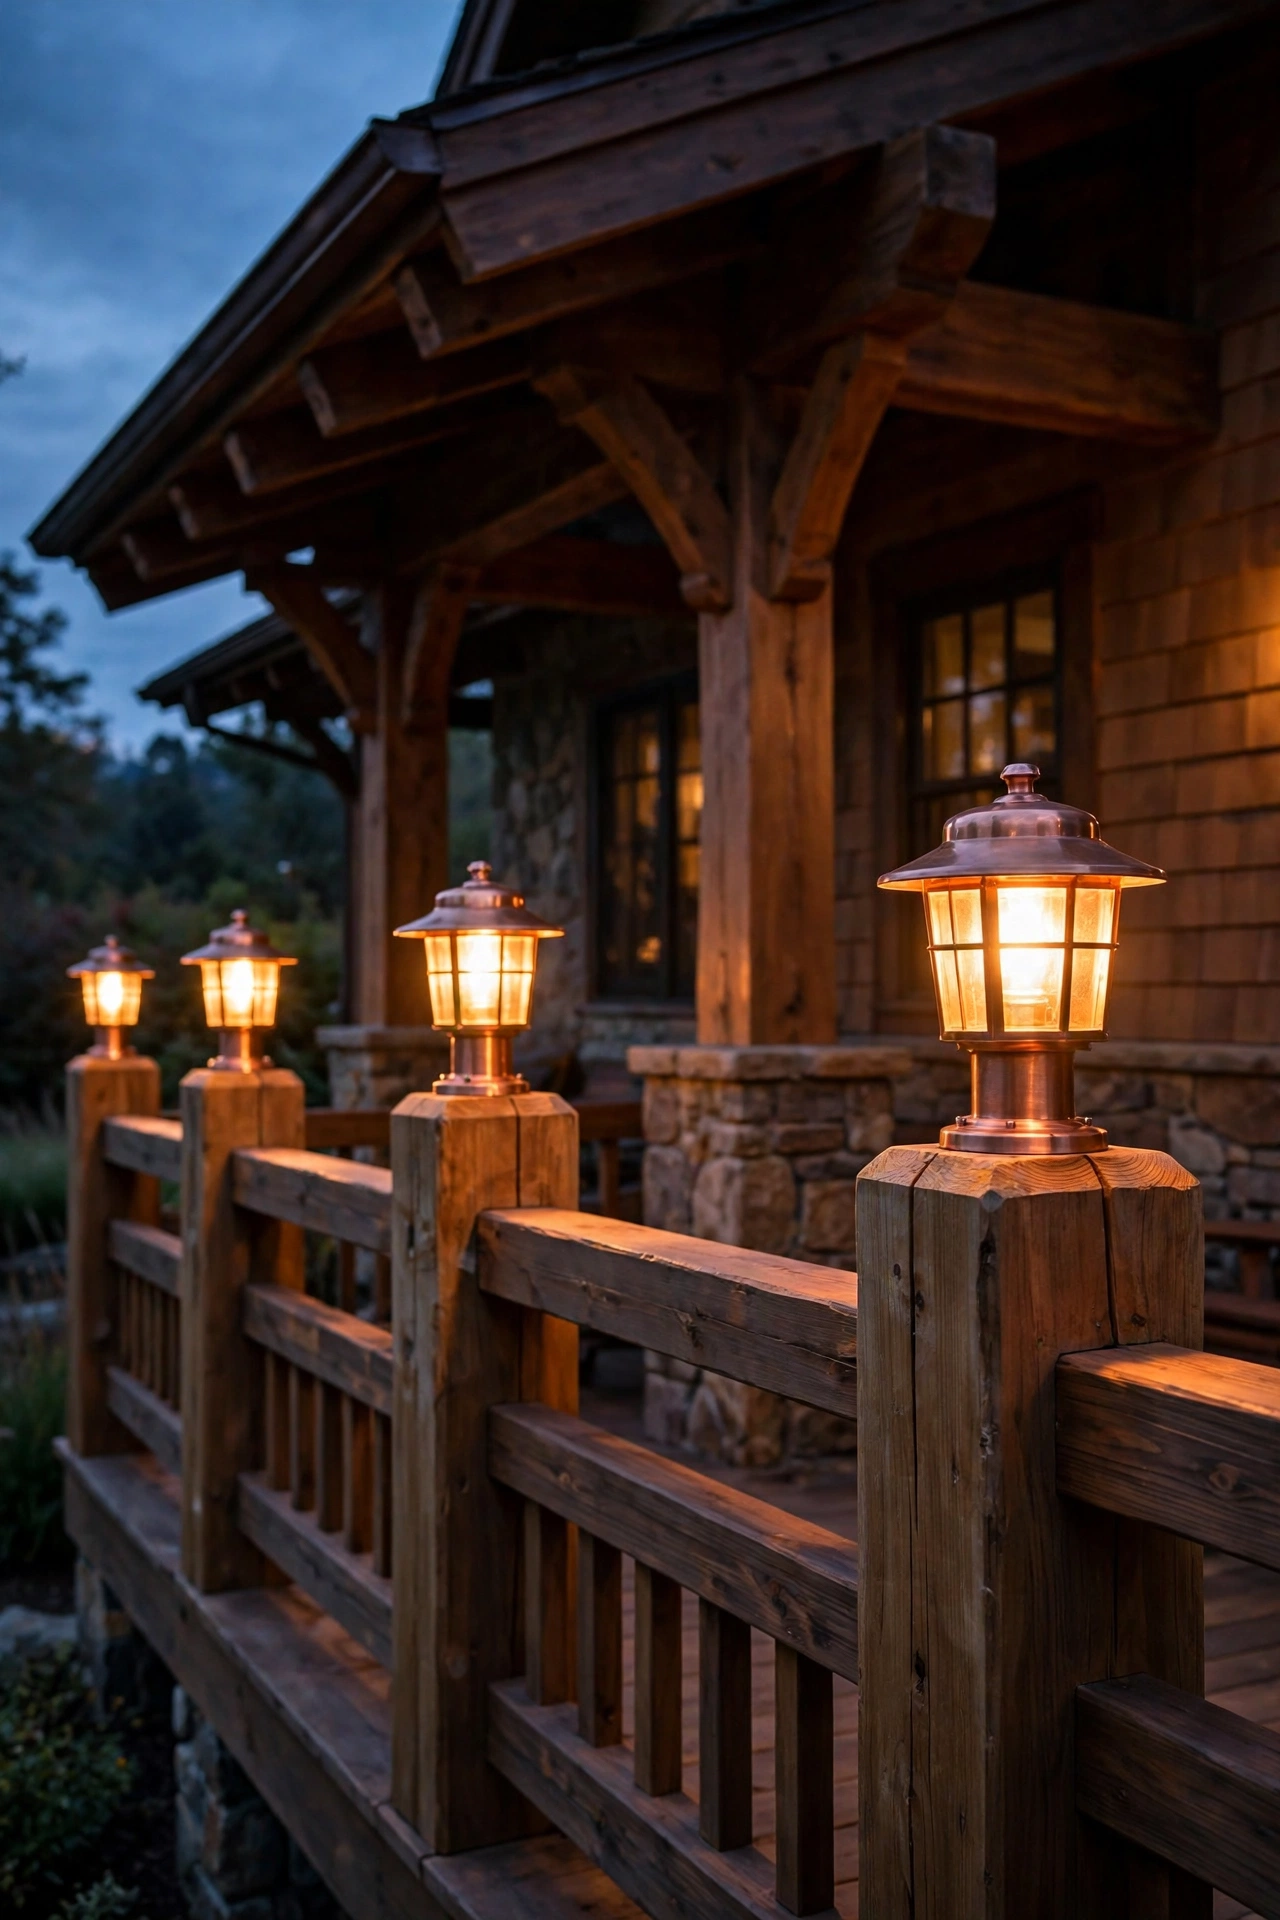
Those tapered porch columns sitting on stone or brick piers are the bungalow's signature move, and capping them with light takes the whole porch from pretty to unforgettable. Small mission-style post-top lanterns — the squat, square kind with copper caps and amber glass — mounted on short pier posts or column bases cast a warm pool of light across the porch floor and the railing. They light the architecture from inside, which is exactly what layered craftsman lighting is about.
This works best on the outer porch piers rather than every column: two lanterns, one on each front-corner pier, frame the entry symmetrically. Keep fixtures modest — 10 to 14 inches tall — so they don't overwhelm the column proportions. If running wire to the piers is a big job, low-voltage post lights tied into your landscape lighting transformer are the easy path: a 12-volt system with 3 to 5-watt LED lamps gives the same glow with safe, shallow-buried cable. Use 2700K lamps for consistency with the rest of the porch. Choose copper or bronze housings with real metal construction; plastic post caps look cheap within a season and fade unevenly next to real stone.
Suggested budget range: $140 – $420 for two post lanterns, wired.
4. Step Lights Recessed into the Stone Piers
Bungalow porches almost always have a short flight of steps between two chunky stone piers, and those piers are begging for step lights. Recessed step lights set into the inner face of each pier wash a soft pool of light across each tread — safer than a single overhead, prettier than a floodlight, and completely hidden during the day. This is the kind of detail that makes visitors feel like the house was designed by someone who actually thought about night.
Mount the fixtures 12 to 18 inches above each tread, centered on the pier face, aimed slightly downward. Low-voltage LED step lights (2 to 4 watts each, 2700K) are the standard here — they run on the same 12-volt transformer as your path lights, so wire them on one circuit. If the piers are existing stone, surface-mount louvered step lights are easier than coring into masonry; choose a bronze or copper finish that disappears against the stone. For new piers, have your mason leave a small recess box. Space fixtures so every tread gets light: on a typical 4-step bungalow stair, one light per side per pier usually covers it. Put them on the same timer as your porch lights.
Suggested budget range: $60 – $200 for a pair of piers' worth of step lights.

5. Gable Uplighting: the Craftsman Bungalow Exterior Lighting Showpiece
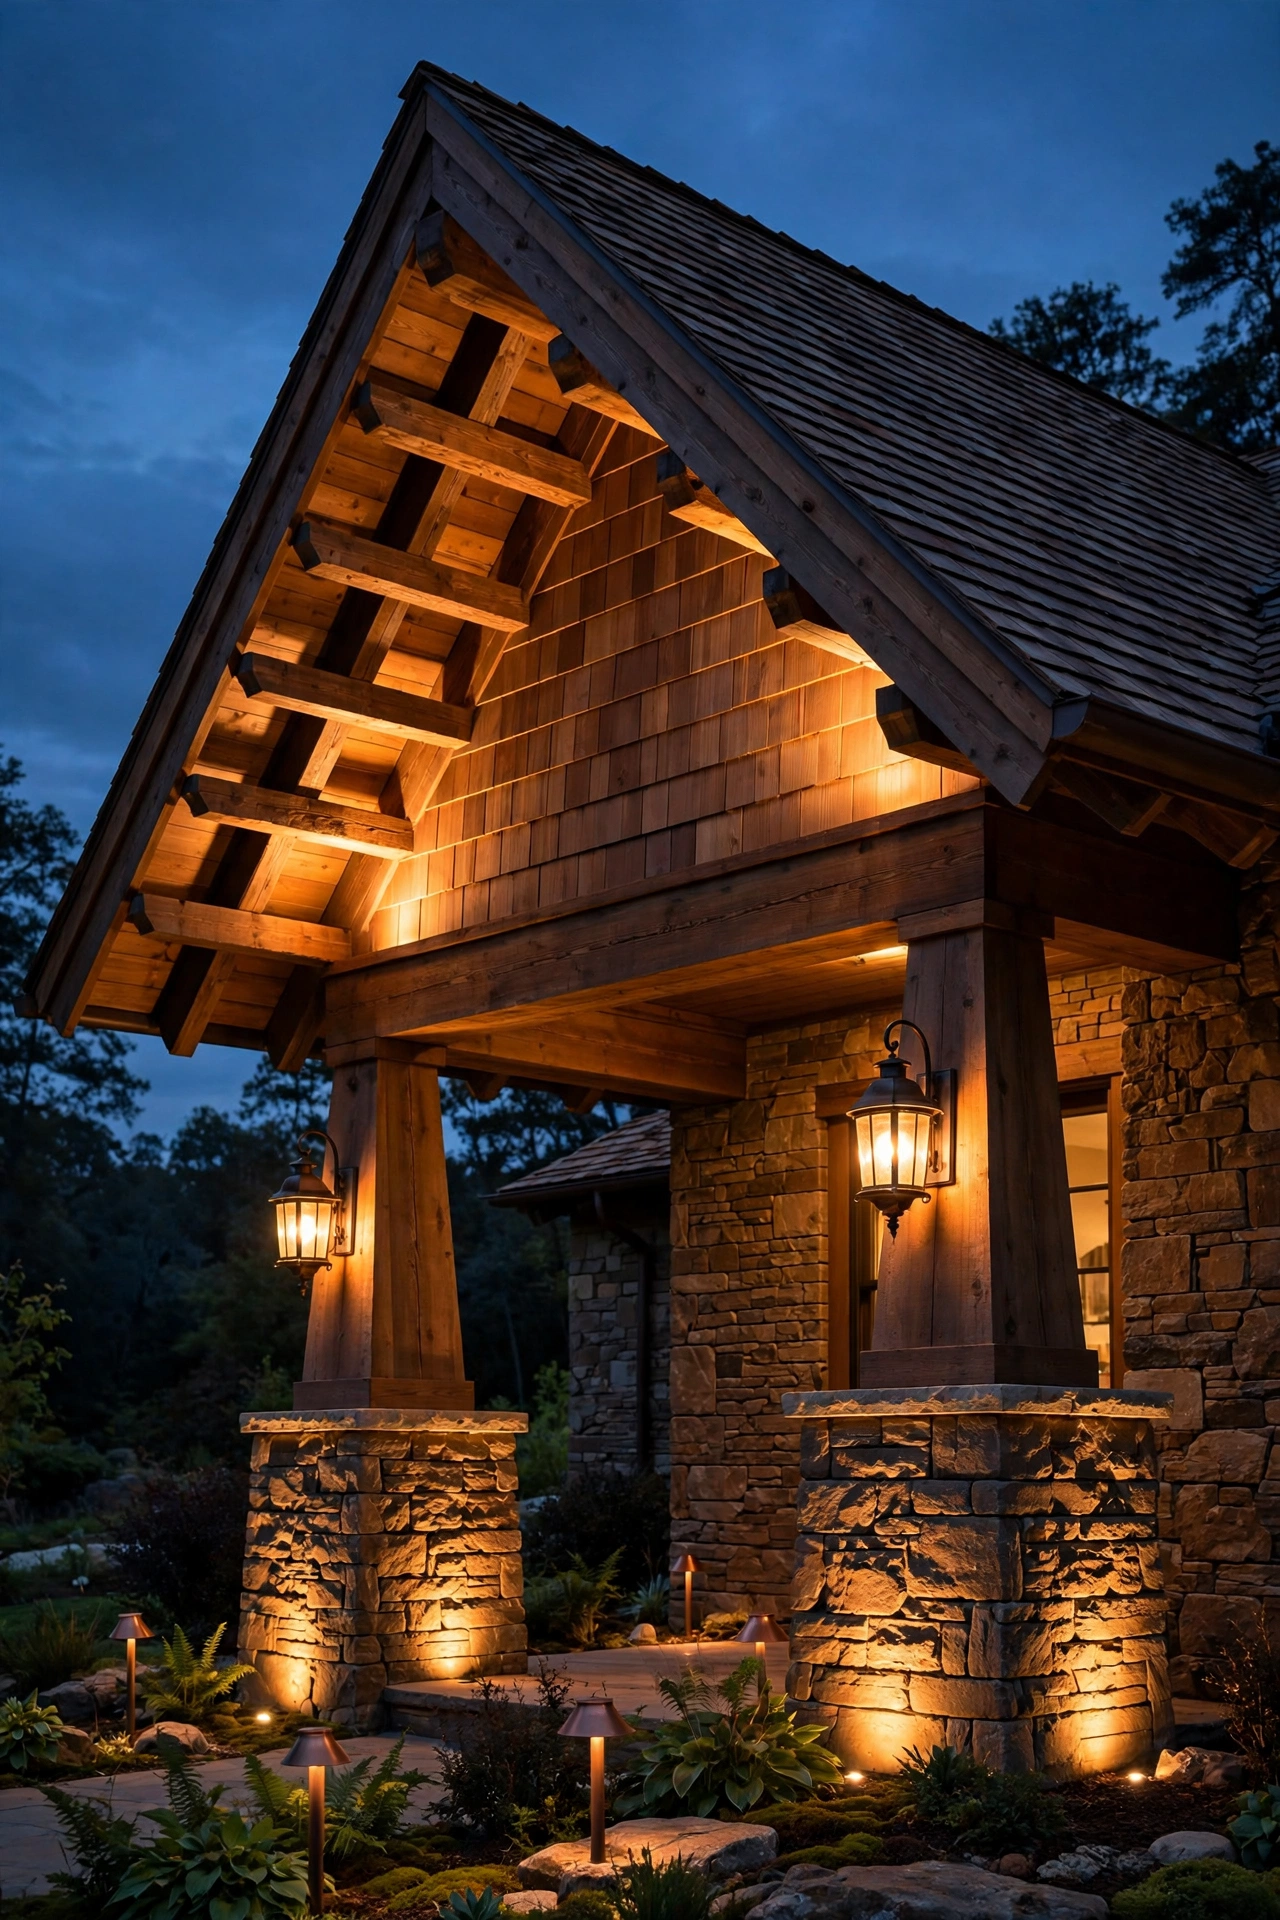
Here's the move that separates a lit bungalow from a glowing one: uplighting the gable. A pair of well lights or small spotlights aimed up at the low-pitched gable and its exposed rafter tails turns the whole front of the house into a lantern. The texture of the shingles or clapboard, the shadow lines of the rafter tails, the knee braces under the eaves — uplighting reveals all of it in a way flat daylight never does.
Place two low-voltage spotlights (35 to 50-watt equivalent LED, about 300 to 500 lumens each) about 2 to 3 feet out from the foundation, aimed at the gable peak at roughly a 30-degree angle. Keep them aimed at the wall, not the windows — you want glow, not glare spilling into the bedrooms. Use 2700K lamps so the siding reads warm; cooler temperatures turn wood siding ghostly. In-ground well lights disappear into the mulch bed during the day and are my top pick for a clean look; stake-mounted spots are easier to adjust. One caution: if your gable has a vent, don't park a hot halogen near it — LED only, which runs cool anyway. Put gable uplights on the same photocell timer as the porch.
Suggested budget range: $80 – $250 for two uplights installed on low voltage.
6. A Gooseneck Light Over the Garage Carriage Doors
Most bungalows have a detached garage or carriage house, and a gooseneck barn light over its doors is the perfect period echo — these fixtures date to the same era as the bungalow itself. Choose a gooseneck with a copper or aged-bronze shade (10 to 14 inches across) and an amber or seeded-glass diffuser rather than the typical farmhouse black; the craftsman version of this fixture trades industrial starkness for warm metal and glass.
Mount the fixture centered over the garage doors, with the bottom of the shade 12 to 18 inches above the door trim. For a two-car garage, one generously sized fixture (14-inch shade) centered reads better than two small ones fighting the low roofline. Use a warm 2700K LED bulb around 800 lumens — bright enough to read the driveway, soft enough to match the porch. A motion-sensor version is genuinely useful here, clicking on when you pull in after dark. Since garages are often unwired at the door head, check for an existing junction box before you shop; adding one is a quick electrician job.
Suggested budget range: $100 – $300 installed.

7. Path Lights Staggering Down the Front Walk
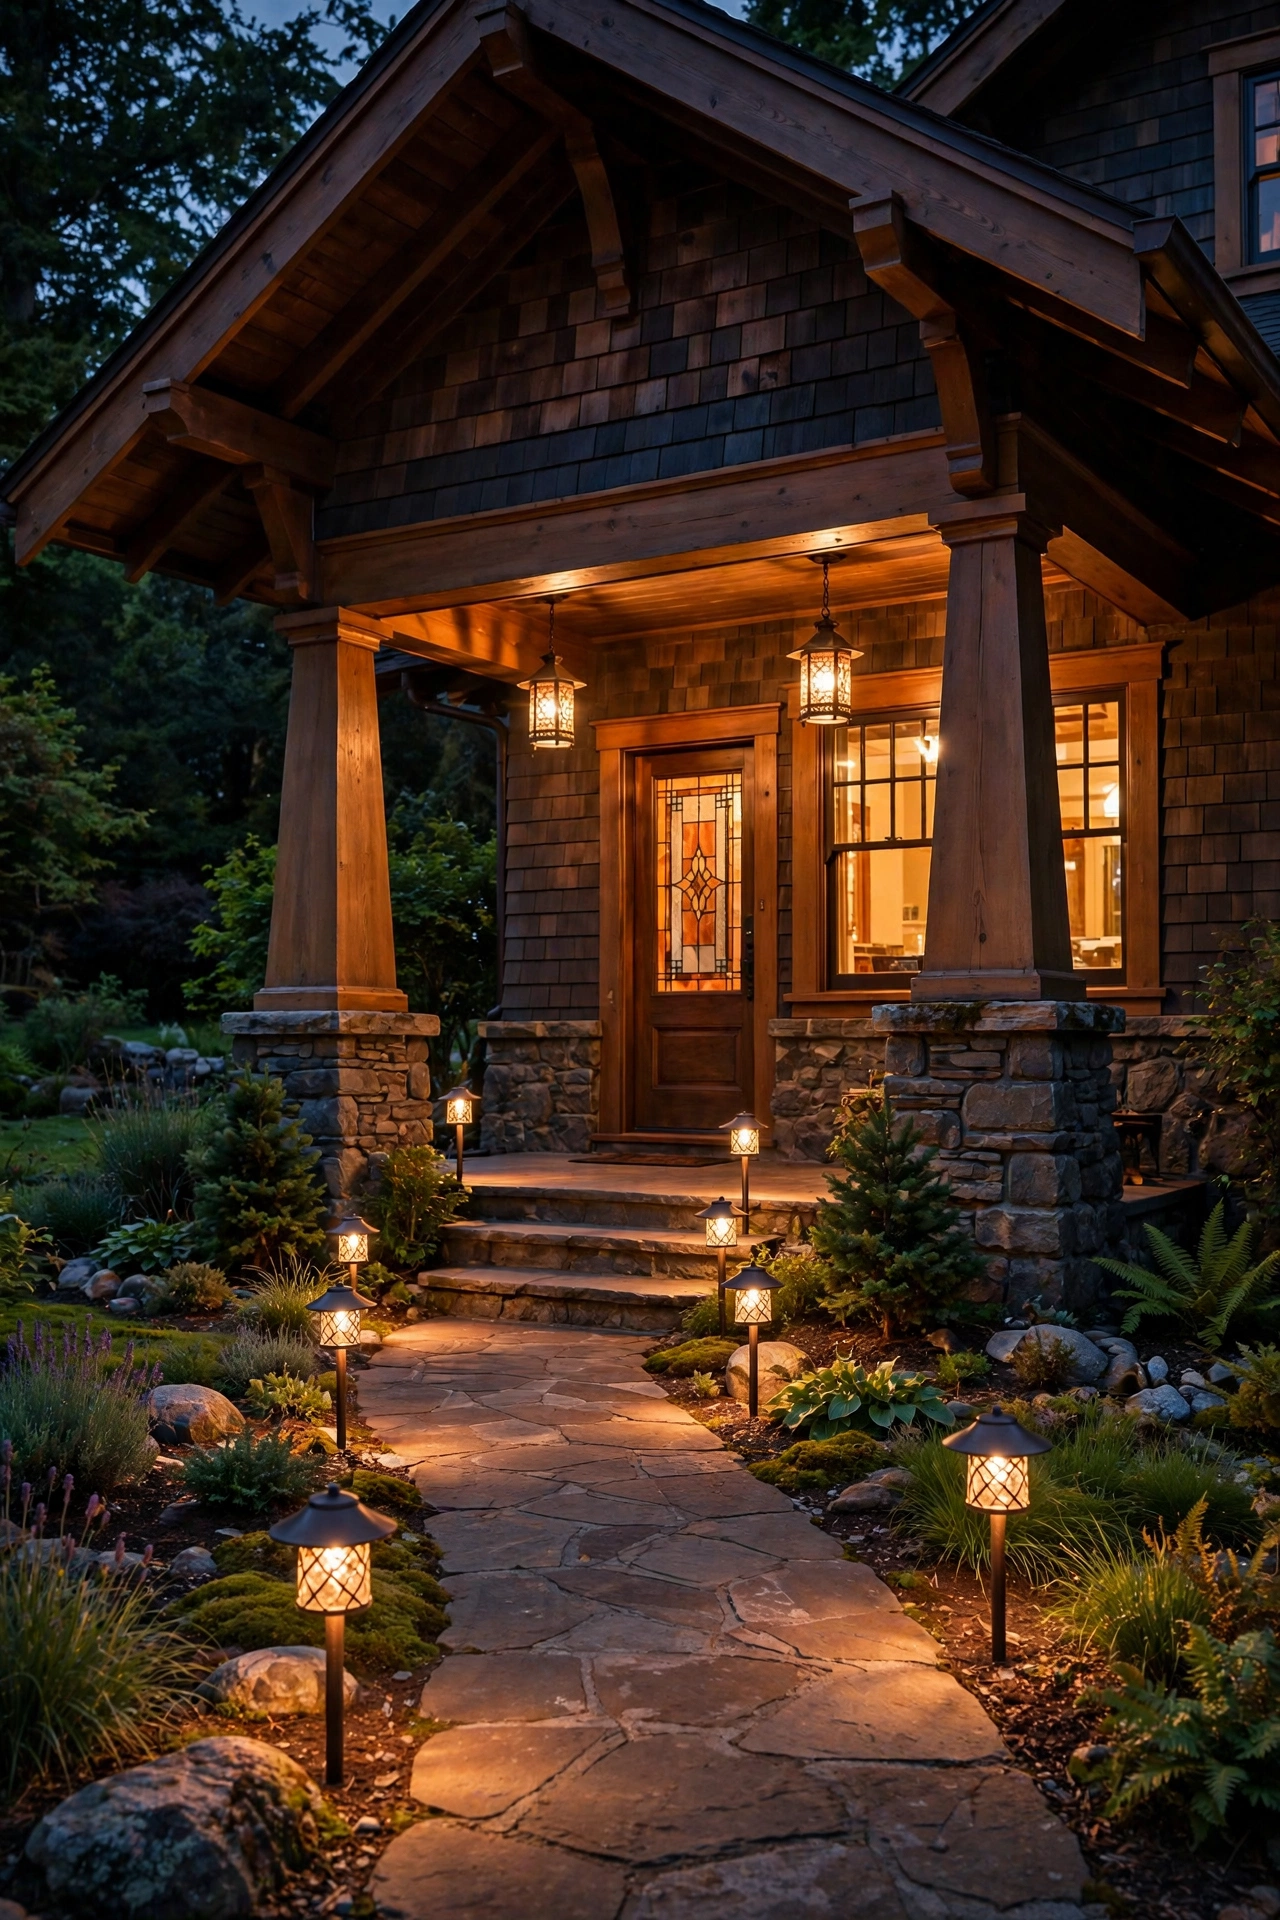
A bungalow's front walk — usually straight, often flanked by low planting beds — is made for path lights. The trick is restraint: craftsman style hates clutter, so choose simple fixtures and let spacing do the work. My go-to is a mission-style path light with a square copper or bronze cap and a seeded-glass lens — a miniature echo of the porch sconces. Three to five of them, staggered alternately on each side of the walk, guide visitors with zero fuss.
Space path lights 6 to 8 feet apart, staggered so they alternate sides rather than lining up like runway lights. Set each fixture 12 to 18 inches back from the walk edge so the light pool overlaps the paving. Low-voltage LED path lights (2 to 4 watts, 2700K) on a 12-volt transformer with a photocell timer are the standard setup — bury cable 6 inches deep in the beds. Avoid solar path lights for the main walk if you can; they're dimmer and die by midnight in shady bungalow yards. Honestly? Five well-placed wired lights beat ten solar ones every time. Keep the fixture height low — 18 to 22 inches — so the glow stays on the walk, not in visitors' eyes.
Suggested budget range: $150 – $450 for a 4-to-5-light low-voltage kit.
8. String Lights Under the Deep Porch Eave
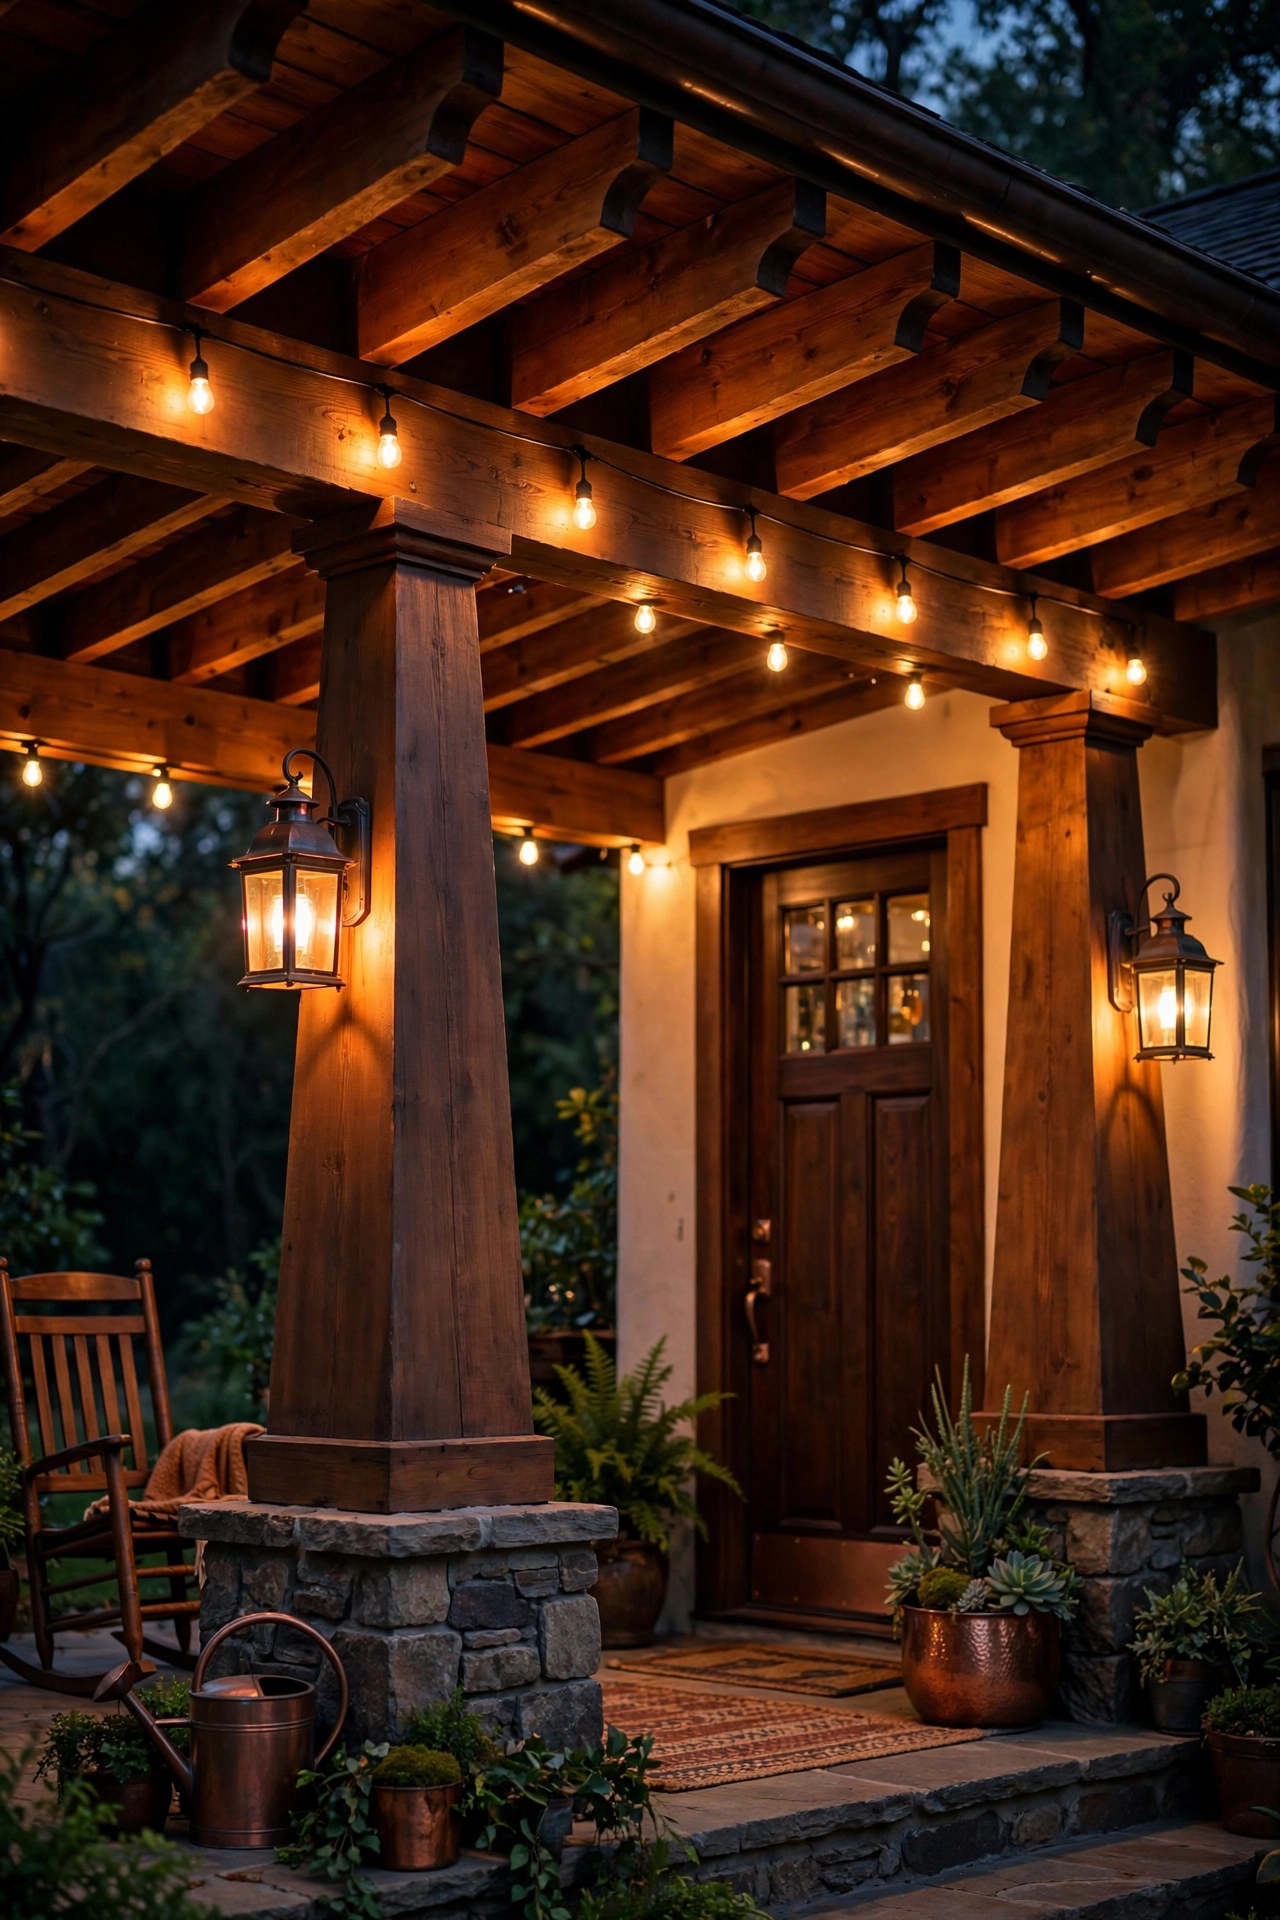
Those deep overhanging eaves are one of the bungalow's best features, and string lights tucked just inside the eave line make the porch ceiling glow like a lantern. Drape a single strand of warm-white globe or Edison-style LED string lights along the front edge of the porch, clipped to the fascia or the first beam — close enough to the ceiling that the wood catches the light, far enough back that the strand itself is barely visible from the street.
Use outdoor-rated LED string lights at 2700K, with shatterproof bulbs (polycarbonate, not glass) since porch ceilings are low and ladders happen. Space a strand every 12 to 18 inches of drop — one clean line beats a zigzag tangle on a craftsman porch. Plug into a timer or smart outlet so they run dusk to about 11 p.m. rather than all night; bungalows look best with a "settled" evening glow, not a party that never ends. For a historic look, choose bulbs with visible filaments in amber-tinted casings — they read as gaslight from the sidewalk. Secure the strand with discreet clips, never nails through the bulbs' wire, and keep the wire 12 inches from any flammable dried decor.
Suggested budget range: $40 – $120 for one to two strands plus timer.
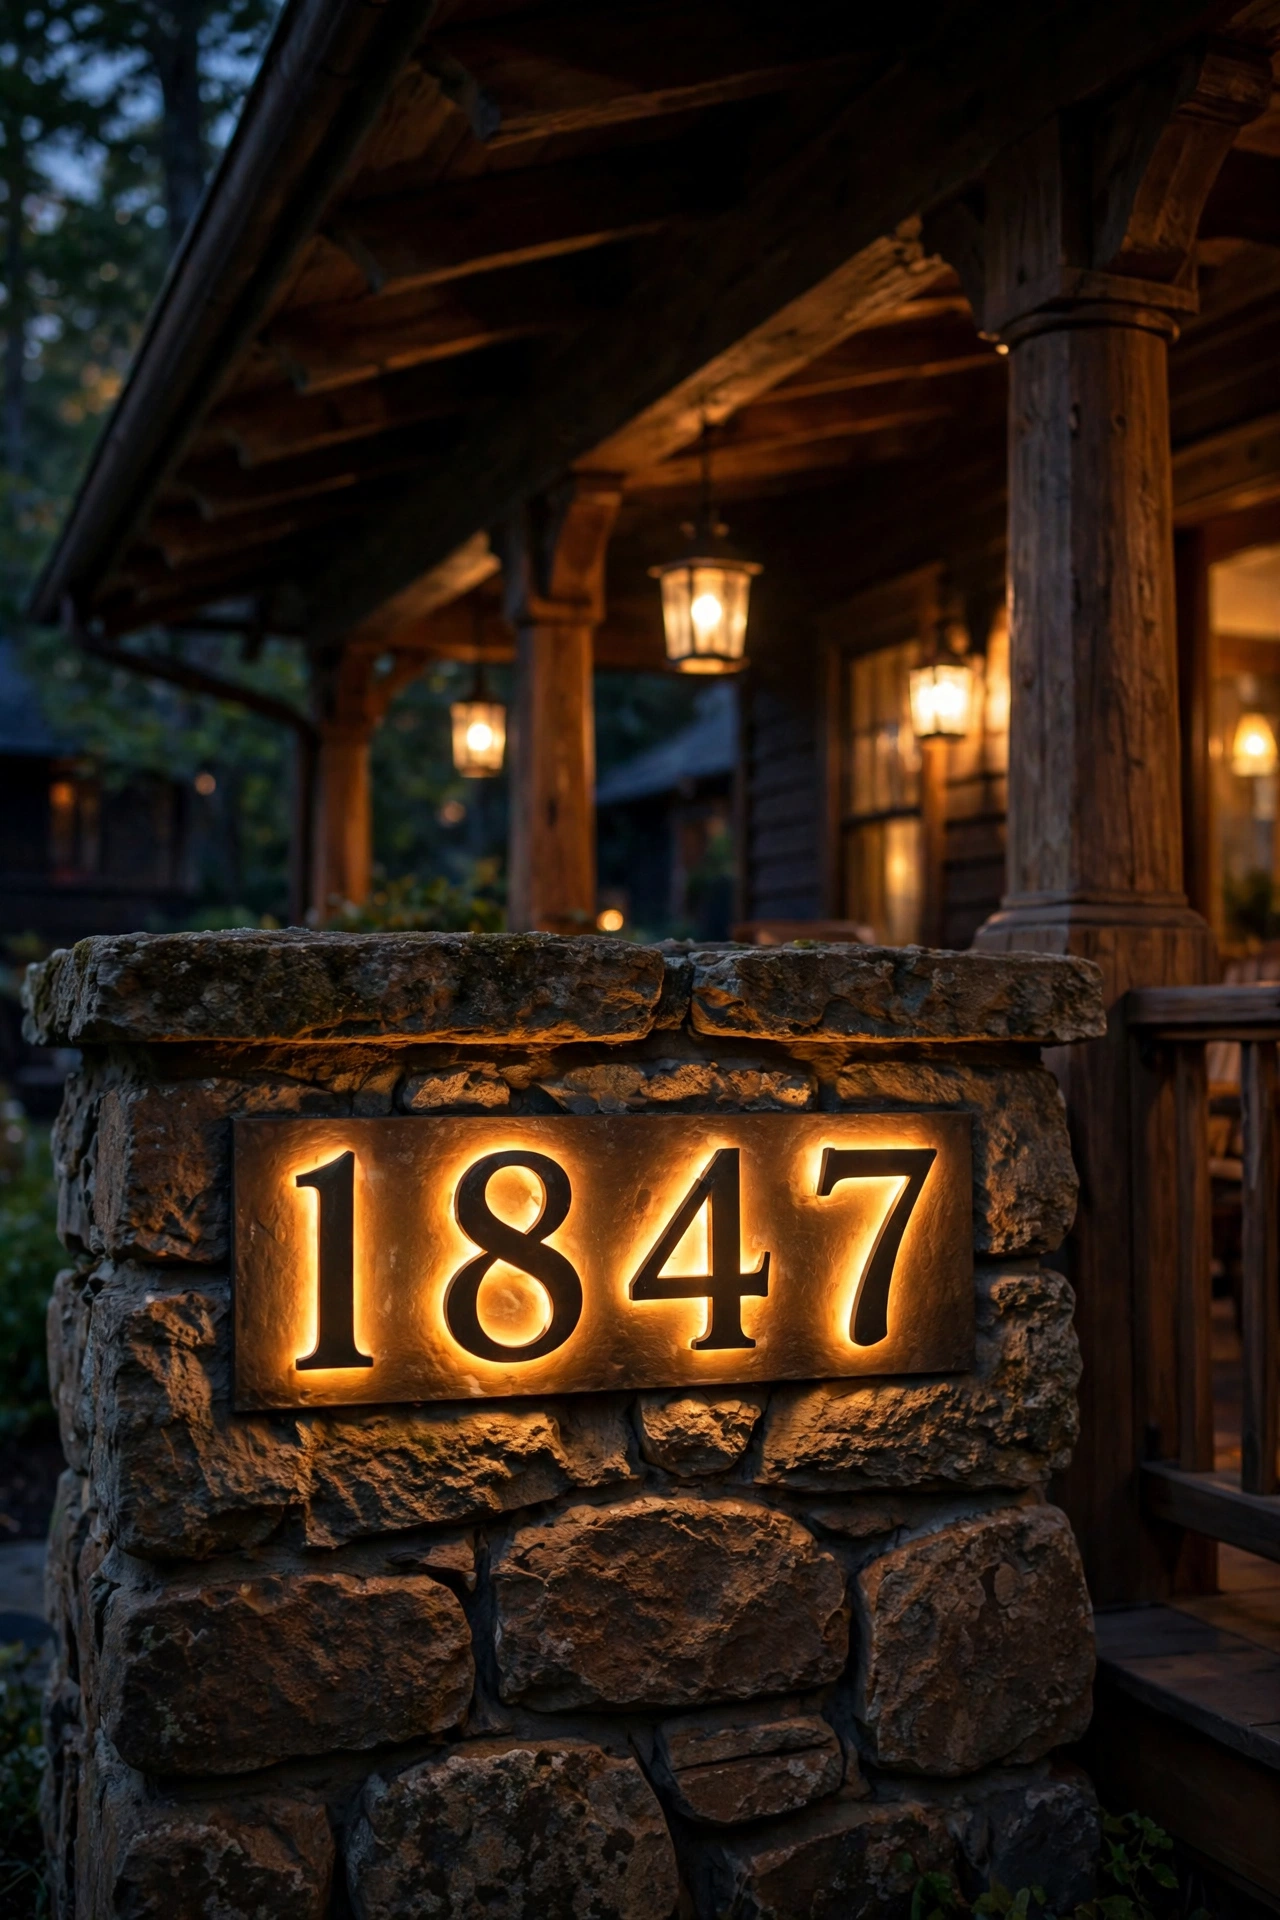
9. Backlit House Numbers on the Porch Pier
House numbers on a bungalow should look hand-set, not stuck on — and backlighting them makes them readable and beautiful after dark. Mount 5- to 6-inch-tall bronze or copper numbers on the face of the front porch pier or the wall beside the door, then wash them with a small adjustable LED accent light mounted above or below. The light raking across the raised numerals makes each digit pop in shadow relief, which reads better from the street than any glowing plastic plaque ever could.
Mount the numbers at 60 to 66 inches above the porch floor — the same sightline as your sconces — and place the accent light 12 inches above or below, aimed to graze the surface. A 3-watt 2700K LED bullet light on the same low-voltage circuit as your path lights does the job. Choose a number style with some heft: Arts & Crafts block numerals in oil-rubbed bronze or aged copper, never skinny modern fonts on a bungalow. If your pier face is rough stone, mount the numbers on a small cedar or bronze plaque first so they sit flat. Wire the accent to your photocell timer so the numbers glow whenever the porch does — delivery drivers and guests will thank you.
Suggested budget range: $50 – $150 for numbers plus accent light.
10. Recessed Soffit Lights for Layered Craftsman Bungalow Exterior Lighting
If your bungalow's eaves are deep enough to stand under — and most are — recessed soffit lights are the invisible workhorse of craftsman bungalow exterior lighting. Small recessed downlights set into the porch soffit wash the porch floor, the steps, and the foundation plantings in even, shadow-free light, while the fixtures themselves vanish into the wood. This is the "nobody notices the fixtures, everybody notices the glow" layer.
Space recessed soffit lights 4 to 6 feet apart along the porch soffit, set back 12 to 18 inches from the fascia so the light washes down the wall and floor rather than shooting straight past. Use 2700K LED retrofits or integrated modules, 600 to 900 lumens each, on a dimmer — bungalow porches want mood, not interrogation-room brightness. Choose wet-rated housings (porch soffits trap moisture) and warm-dim LEDs that drop to 2200K as they dim for late-evening coziness. If your soffit is original tongue-and-groove, have an electrician cut clean holes and use remodel housings so you don't butcher the wood. Keep the trim rings in a dark bronze that blends with stained wood.
Suggested budget range: $200 – $600 for 4 to 6 recessed lights installed.

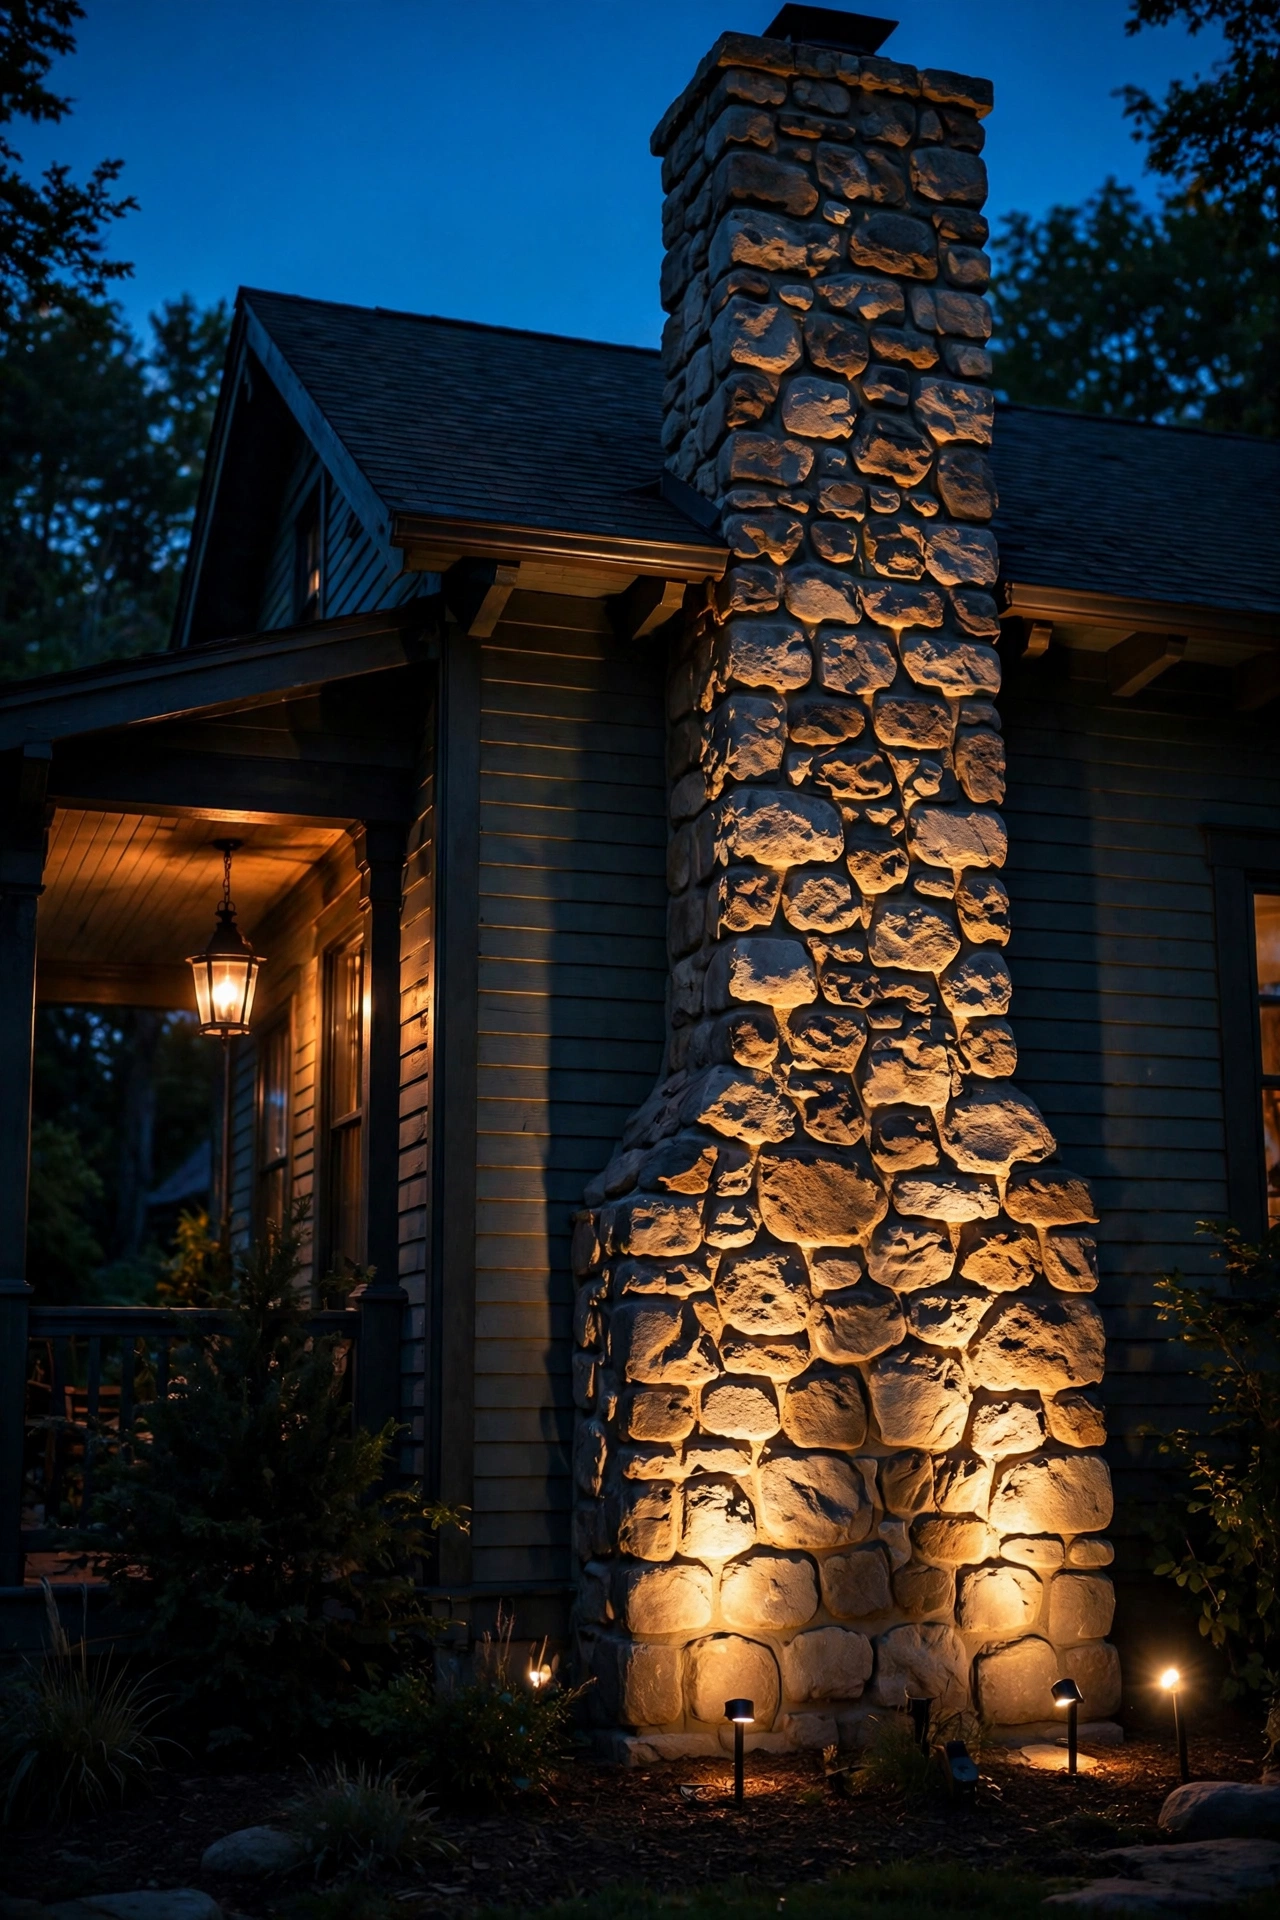
11. Uplighting the Stone Chimney or Foundation
Bungalows wear their masonry proudly — river-rock chimneys, cobblestone foundations, brick piers — and a little uplighting turns that stonework into the star of the yard. One or two low-voltage well lights aimed up a stone chimney at night bring out every color in the rock: the grays, the rusts, the mossy greens that flat daylight washes out. It's the most dramatic single accent you can add, and it costs less than most people expect.
Place a well light 2 to 3 feet from the chimney base, aimed up the face at a slight angle so the beam grazes rather than blasts. A 35-watt-equivalent LED spot (around 300 lumens, 2700K) is plenty; stone reflects warm light beautifully, so you don't need much power. For a long stone foundation wall, space two or three well lights 6 to 8 feet apart for a continuous wash. In-ground well fixtures with bronze grates disappear into the planting bed by day. Keep beams off bedroom windows — aim at masonry, not glass. And give the stone a rinse in spring; uplights are brutally honest about cobwebs and dust on rock.
Suggested budget range: $70 – $220 for one to two well lights on low voltage.
12. A Lantern at the Gable Peak
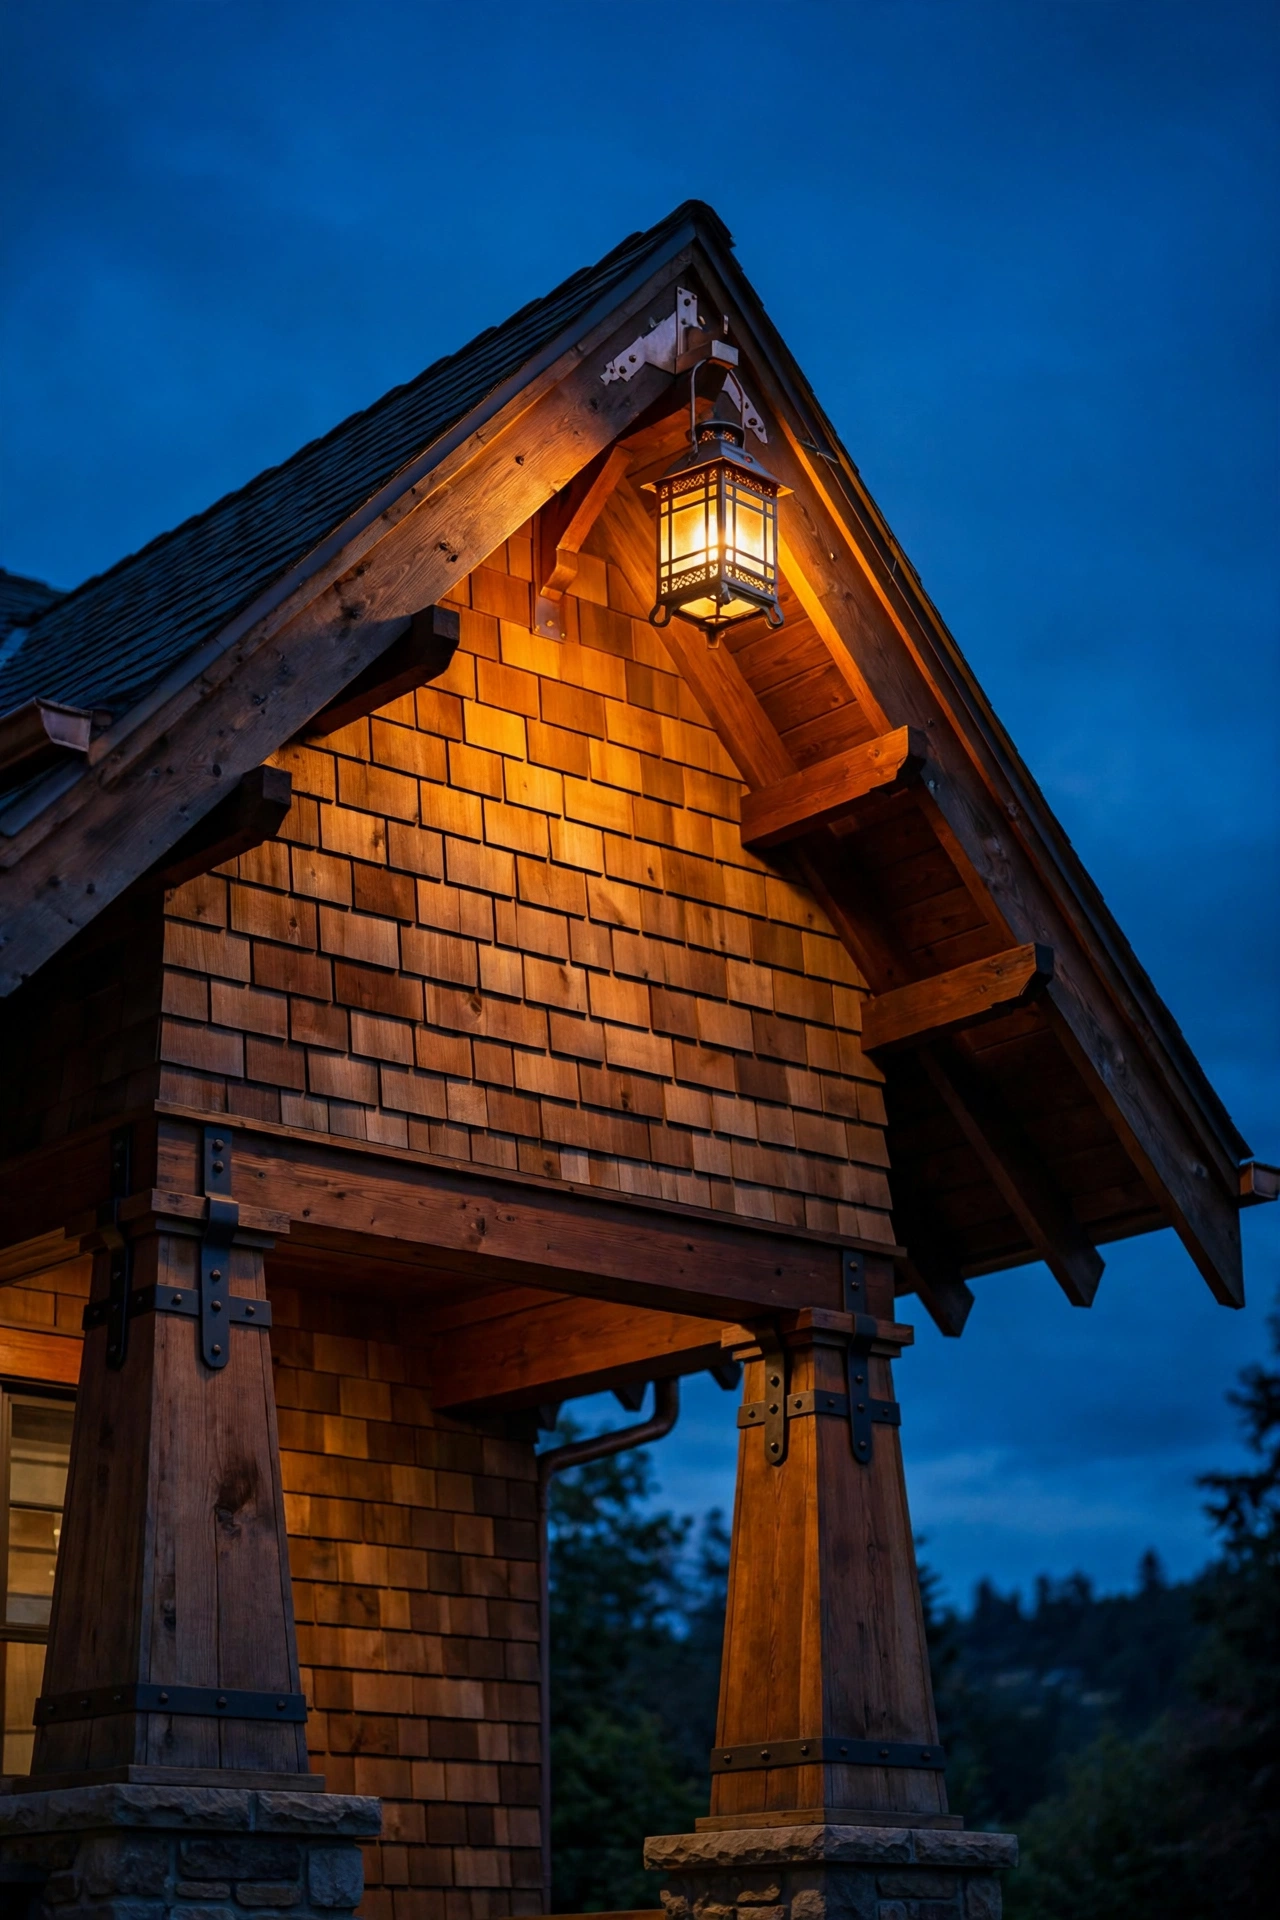
A small lantern mounted at the gable peak is the most authentically craftsman accent on this list — original bungalows often had one, and it gives the house a jewel-box focal point visible from down the street. Choose a petite mission lantern, 10 to 14 inches tall, in copper or oil-rubbed bronze with amber glass, mounted on a small bracket or directly to the gable trim just below the peak.
Because it's high and hard to service, this fixture should be LED with a long-life bulb (15,000+ hours) and ideally on the same dusk-to-dawn circuit as everything else — you do not want to be climbing a ladder to flip a switch. Keep the brightness modest, 200 to 400 lumens; at that height, a little glow reads as a beacon, and too much looks like a lighthouse. Check that the mounting surface is solid — gable trim on old bungalows can be thin, so anchor into the framing behind it. If your gable has a decorative vent or exposed truss, center the lantern below it for a composed look. This is a job for an electrician with a tall ladder, not a Saturday DIY.
Suggested budget range: $120 – $350 including professional install.
13. Accent Spots for Foundation Plantings
Bungalow foundation beds — the ferns, hostas, azaleas, and ornamental grasses tucked against the porch — deserve their own light. Two or three small adjustable spotlights aimed into the planting bed create depth behind the porch and keep the house from floating in a black void at night. Backlit ornamental grasses are the showstopper here: the seed heads catch the light and glow like fiber optics.
Use 12-volt LED bullet spots (3 to 5 watts, 2700K) on stakes, pushed into the bed 12 to 18 inches from the plants and aimed up through the foliage. Space them 4 to 6 feet apart for a continuous wash, and angle at least one fixture to backlight a grass clump or small shrub so you get silhouette as well as wash. Put the bed spots on the same transformer and timer as your path lights — one photocell runs the whole yard. Keep fixtures out of the mower's path and aim them away from the porch so you don't glare the people sitting on it. In fall, re-aim one spot at a Japanese maple and thank me later — my fall porch lighting ideas are full of seasonal re-aiming tricks like this one.
Suggested budget range: $90 – $260 for three spots on low voltage.

14. Post-Cap Lights on the Back Porch or Deck Rail
The back porch of a bungalow is where real life happens — grilling, morning coffee, late talks — and it deserves the same warm treatment as the front. Post-cap lights on the railing or stair posts give you soft, even light exactly where people gather, without the bug-magnet harshness of a single bright fixture. Choose caps in copper or bronze with a frosted amber lens that matches the front porch fixtures, so the whole house speaks one language.
Fit caps to your actual post size — 4×4 and 6×6 are standard, but old bungalow railings are often true-dimension lumber, so measure before ordering. Low-voltage caps wired into your landscape transformer are the cleanest install (no batteries to swap); solar caps are fine as a supplement but fade by midnight. Use 2700K lamps for consistency, and put the run on a separate zone or smart switch from the front yard so the back porch can dim down after the front goes to sleep. Space them on every post for railings under 12 feet, or every other post on longer runs — too many caps looks like an airport runway.
Suggested budget range: $80 – $300 for 4 to 6 post-cap lights.
15. Motion-Sensor Lantern at the Side or Mudroom Door
Every bungalow has the door everyone actually uses — the side door, the mudroom, the kitchen entry — and it usually gets the saddest light on the property. A single mission-style lantern with a built-in motion sensor fixes that with zero daily effort: it snaps on when you come home with groceries and fades off when you leave. Choose the same bronze-and-amber-mica style as your front sconces, just in a smaller 12- to 14-inch size.
Mount it 66 to 72 inches above the landing, centered on the door, and aim the sensor's detection zone down the walk rather than at the street so passing cars don't trigger it. Set the timeout to 5 minutes and the sensitivity to medium — most sensors ship cranked to maximum and will fire at every cat in the county. Use a warm 2700K LED bulb around 600 lumens; side entries need real task light for locks and packages. If the side entry has no existing box, a surface-mount conduit in matching bronze paint keeps the install honest on old siding. Motion light plus a small welcome mat, and the "service entrance" suddenly feels like an entrance.
Suggested budget range: $70 – $220 for fixture and sensor.
16. Amber Window Candles in the Front Windows
This is the oldest trick in the book, and on a bungalow it looks like it was always meant to be there. Battery or plug-in LED window candles with amber flicker flames, one centered in each front window, give the house that "someone's home and the kettle's on" feeling from the street. On a bungalow with its low windows and deep porch, the effect is pure storybook — especially in fall and winter.
Use one candle per window, centered on the sill, with the flame at roughly the lower third of the glass. Choose LED candles with a realistic flicker (not a strobe) in a warm amber tone — 2200K or lower reads as candlelight rather than "light bulb." Battery candles with built-in dusk timers are the zero-fuss option; they click on at sunset and run 5 to 6 hours. For a permanent setup, plug-in candles on a timer never need batteries. Safety note: LED only, always — never real flame candles in windows near curtains or old wood trim, and keep any plug-in cord away from window locks and sashes. Match the candle base finish (bronze or dark wood) to your trim for a composed look.
Suggested budget range: $30 – $90 for a set of four to six candles.

17. Driveway Apron Markers Flanking the Drive
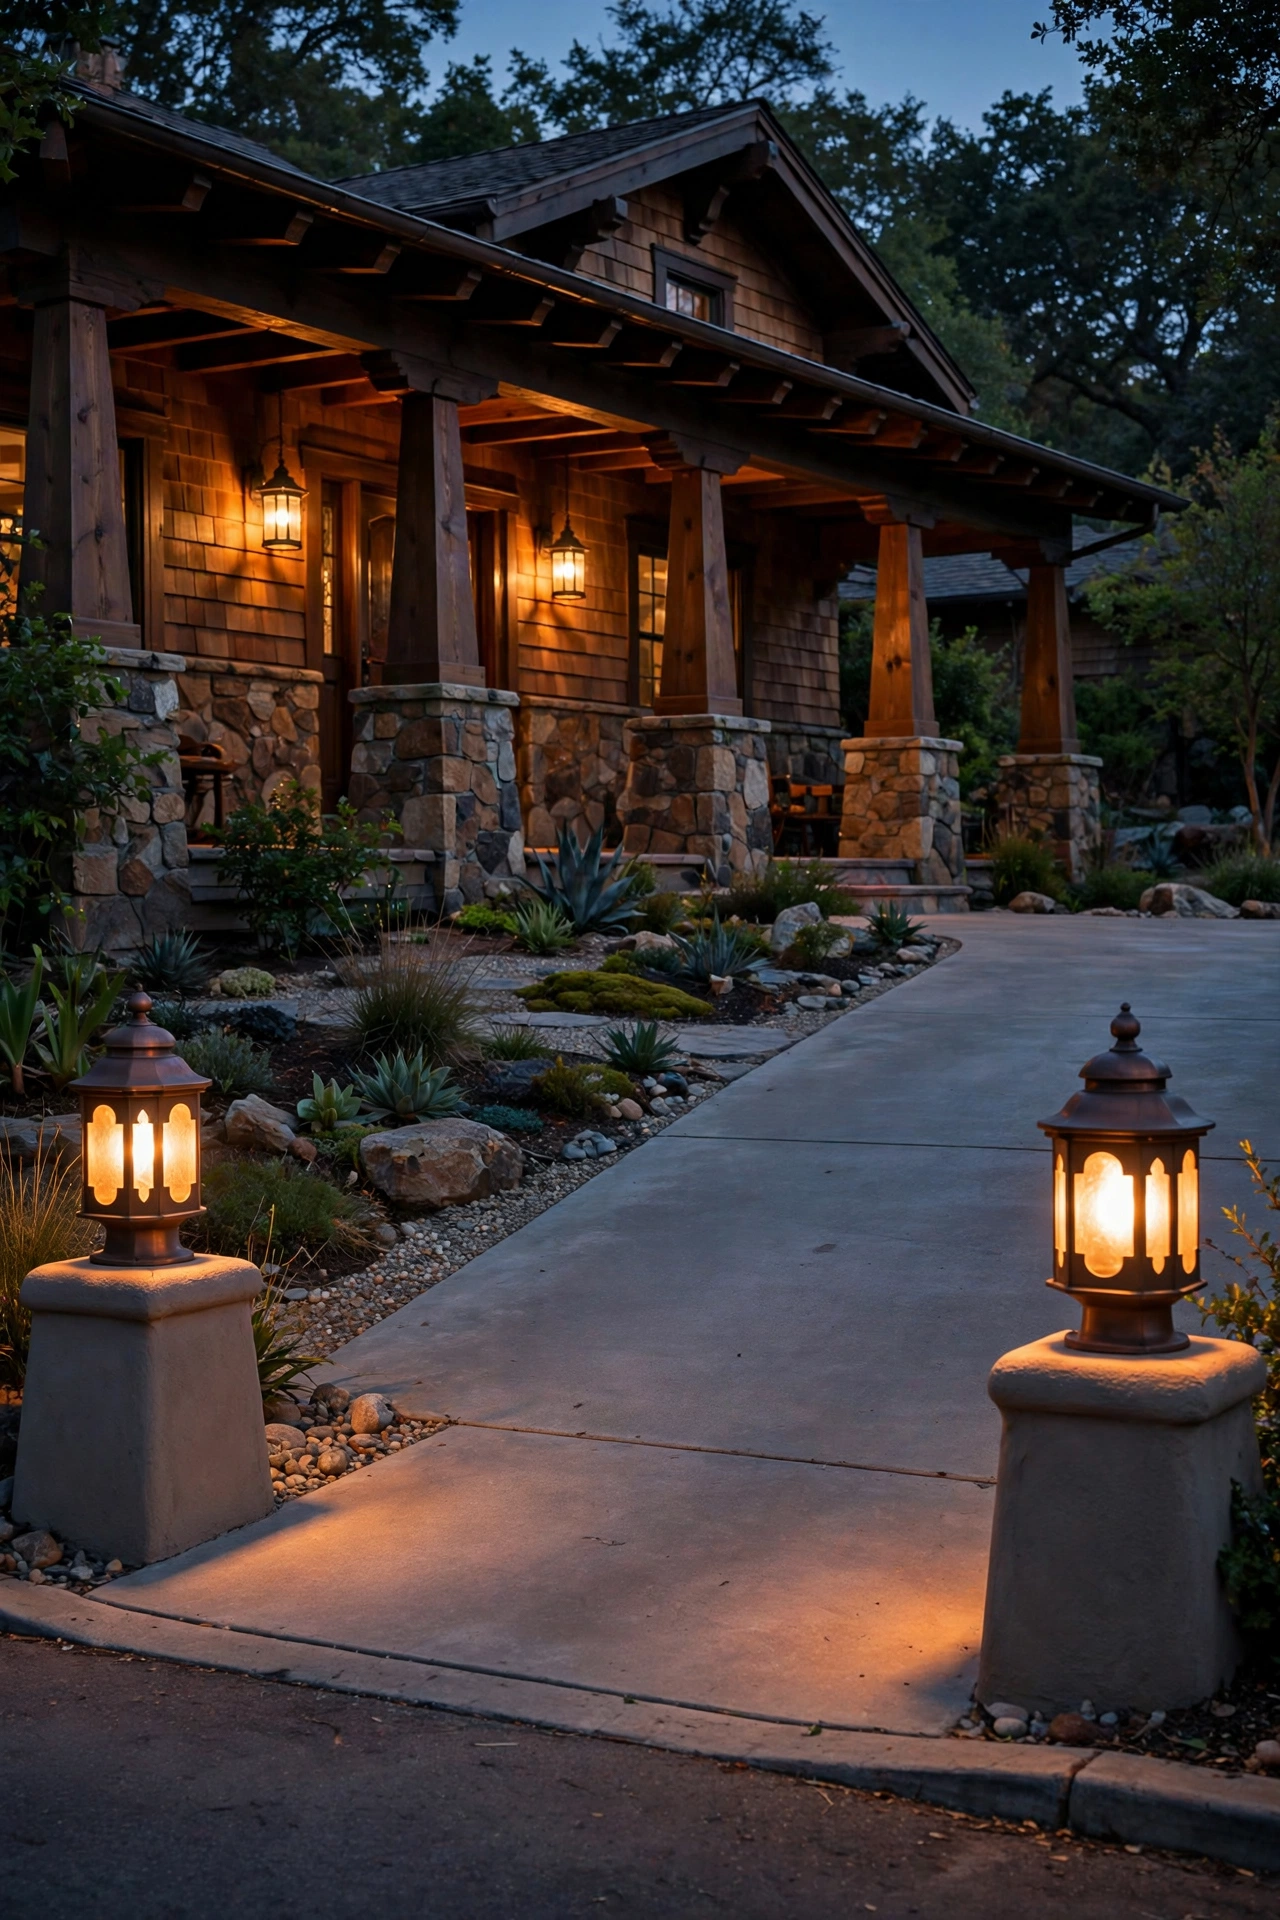
The last layer is the arrival: two low fixtures flanking the driveway apron where it meets the street. On a bungalow lot, this frames the whole property and guides visitors in without lighting up the neighborhood. My favorite approach here is a pair of short mission-style bollards or pier-mounted lanterns in copper or bronze, 24 to 30 inches tall, with amber glass that echoes the porch — a bookend to the front door sconces.
Space them 8 to 10 feet apart, one on each side of the apron, set back 12 inches from the paving edge so car doors and snow shovels clear them. Low-voltage bollards (3 to 5 watts each, 2700K) wired to your landscape transformer are the standard; choose fixtures with a shielded top so the light washes down and out, not up into drivers' eyes. If you have existing stone pillars at the drive entrance, mount small pier lanterns on top instead — even better, and very period-correct. Put them on the main photocell timer with everything else. Two fixtures, one transformer tap, and your bungalow reads as a complete composition from the curb.
Suggested budget range: $120 – $380 for the pair on low voltage.
Frequently Asked Questions
What are the most authentic fixture styles for a craftsman bungalow?
The historically correct styles come straight from the Arts & Crafts movement: mission-style lanterns with tapered square frames, amber mica or slag-glass panels, and oil-rubbed bronze or copper finishes. Look for honest materials, simple geometric lines, visible joinery-like detailing, and warm amber glass — never polished chrome, fussy scrollwork, or cool-toned glass. Greene and Greene-era originals used mica because it glows like candlelight; modern reproductions with amber seeded glass get you 90 percent of the look at a fraction of the cost. When in doubt, simpler and heavier beats ornate and light.
How do I match new lighting to my bungalow's existing woodwork?
Pull your finish palette from the house itself, not from a catalog. If your porch columns and trim are stained a warm dark brown, oil-rubbed bronze fixtures will disappear into the architecture in the best way; if you have natural cedar or redwood tones, aged copper picks up the same warmth. Match the glass to the mood too — amber mica or seeded amber glass flatters wood, while clear glass can look stark against dark stain. And repeat: whatever finish you choose for the front door sconces, carry it to the post lanterns, the garage light, and the house numbers. Two finishes maximum across the whole exterior.
Can I retrofit LED bulbs into vintage-style craftsman fixtures?
Yes, and you should — it's the single best upgrade for old fixtures. Most mission and craftsman lanterns use standard E26 medium or E12 candelabra bases, so warm 2700K LED filament bulbs screw right in. LED filaments are ideal here because the visible filament looks like an old Edison bulb through amber mica, while running cool and sipping 5 to 8 watts. Two cautions: check that the bulb physically fits inside the lantern (some Edison-style LEDs are long), and if the fixture is on an old dimmer, make sure both the dimmer and the bulb are LED-compatible or you'll get flicker. Never put a high-heat halogen in an enclosed mica fixture — the heat cooks the adhesive over time.
What size should porch post lights be on a bungalow?
Scale to the column, not the catalog. On the classic tapered bungalow column sitting on a stone pier, a post-top lantern of 10 to 14 inches tall looks proportional; anything over 16 inches starts to look like a lighthouse on most residential porches. A good rule: the lantern's height should be roughly one-eighth to one-tenth the height of the column-and-pier assembly below it. If your piers are especially chunky river rock, lean toward the larger end of that range so the fixture holds its own. And keep the style consistent — a squat square mission lantern echoes the column's taper far better than a tall colonial coach light.
Conclusion
Great craftsman bungalow exterior lighting isn't about any single fixture — it's about layering warm 2700K light across the porch, the walk, and the architecture itself, in materials that look like they grew with the house. Start with the mission sconces at the front door, add the pendant and the gable uplights, then fill in the path, the steps, and the details. Do that, and your bungalow won't just be lit — it'll glow the way the Arts & Crafts builders intended.
If this got you excited about the entry specifically, browse more outdoor wall lantern ideas for every home style, or dive deeper into sizing and placement with my front door sconce guide. Your bungalow deserves to look this good after dark.