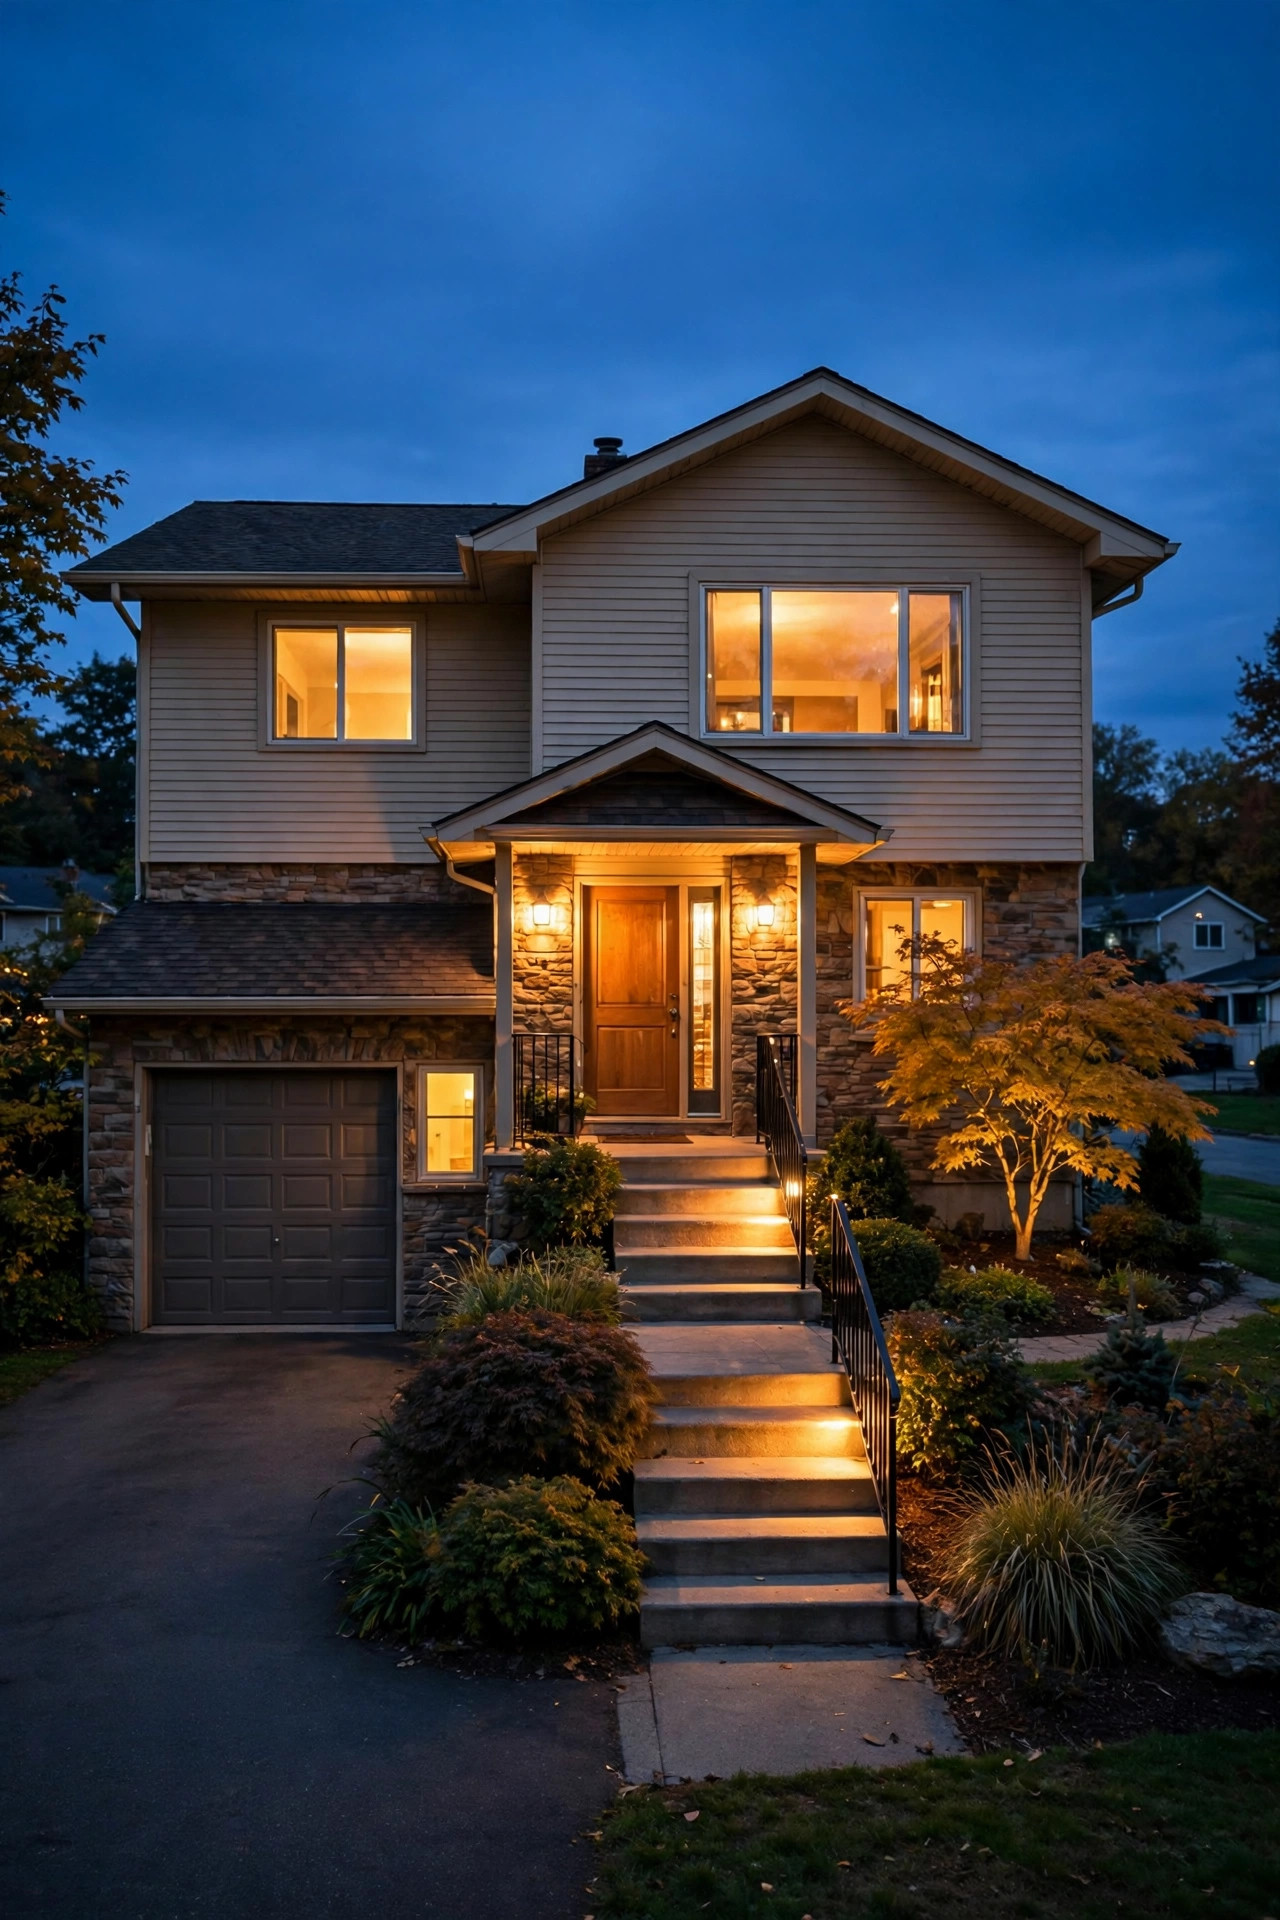
If you own a split-level or raised ranch, you already know the entryway struggle is real. The front door sits half a flight up (or tucked down at garden level), the stairs eat half your facade, and one lonely porch light does absolutely nothing for the steps guests actually have to climb. Good split-level entryway lighting fixes all three zones — the walk, the stairs, and the door — in warm layers instead of one harsh bulb. I have helped light a lot of these homes, and honestly? They respond beautifully to a little planning, because all those levels give you more places to glow. Below are 19 ideas, from five-minute solar fixes to weekend wiring projects, each with a real budget range so you can mix and match. If you want the broader picture first, my general roundup of outdoor entryway lighting ideas pairs nicely with everything here. We will work our way from the door down to the driveway, one layer at a time.
1. A Tall Statement Sconce for the Two-Story Entry Wall
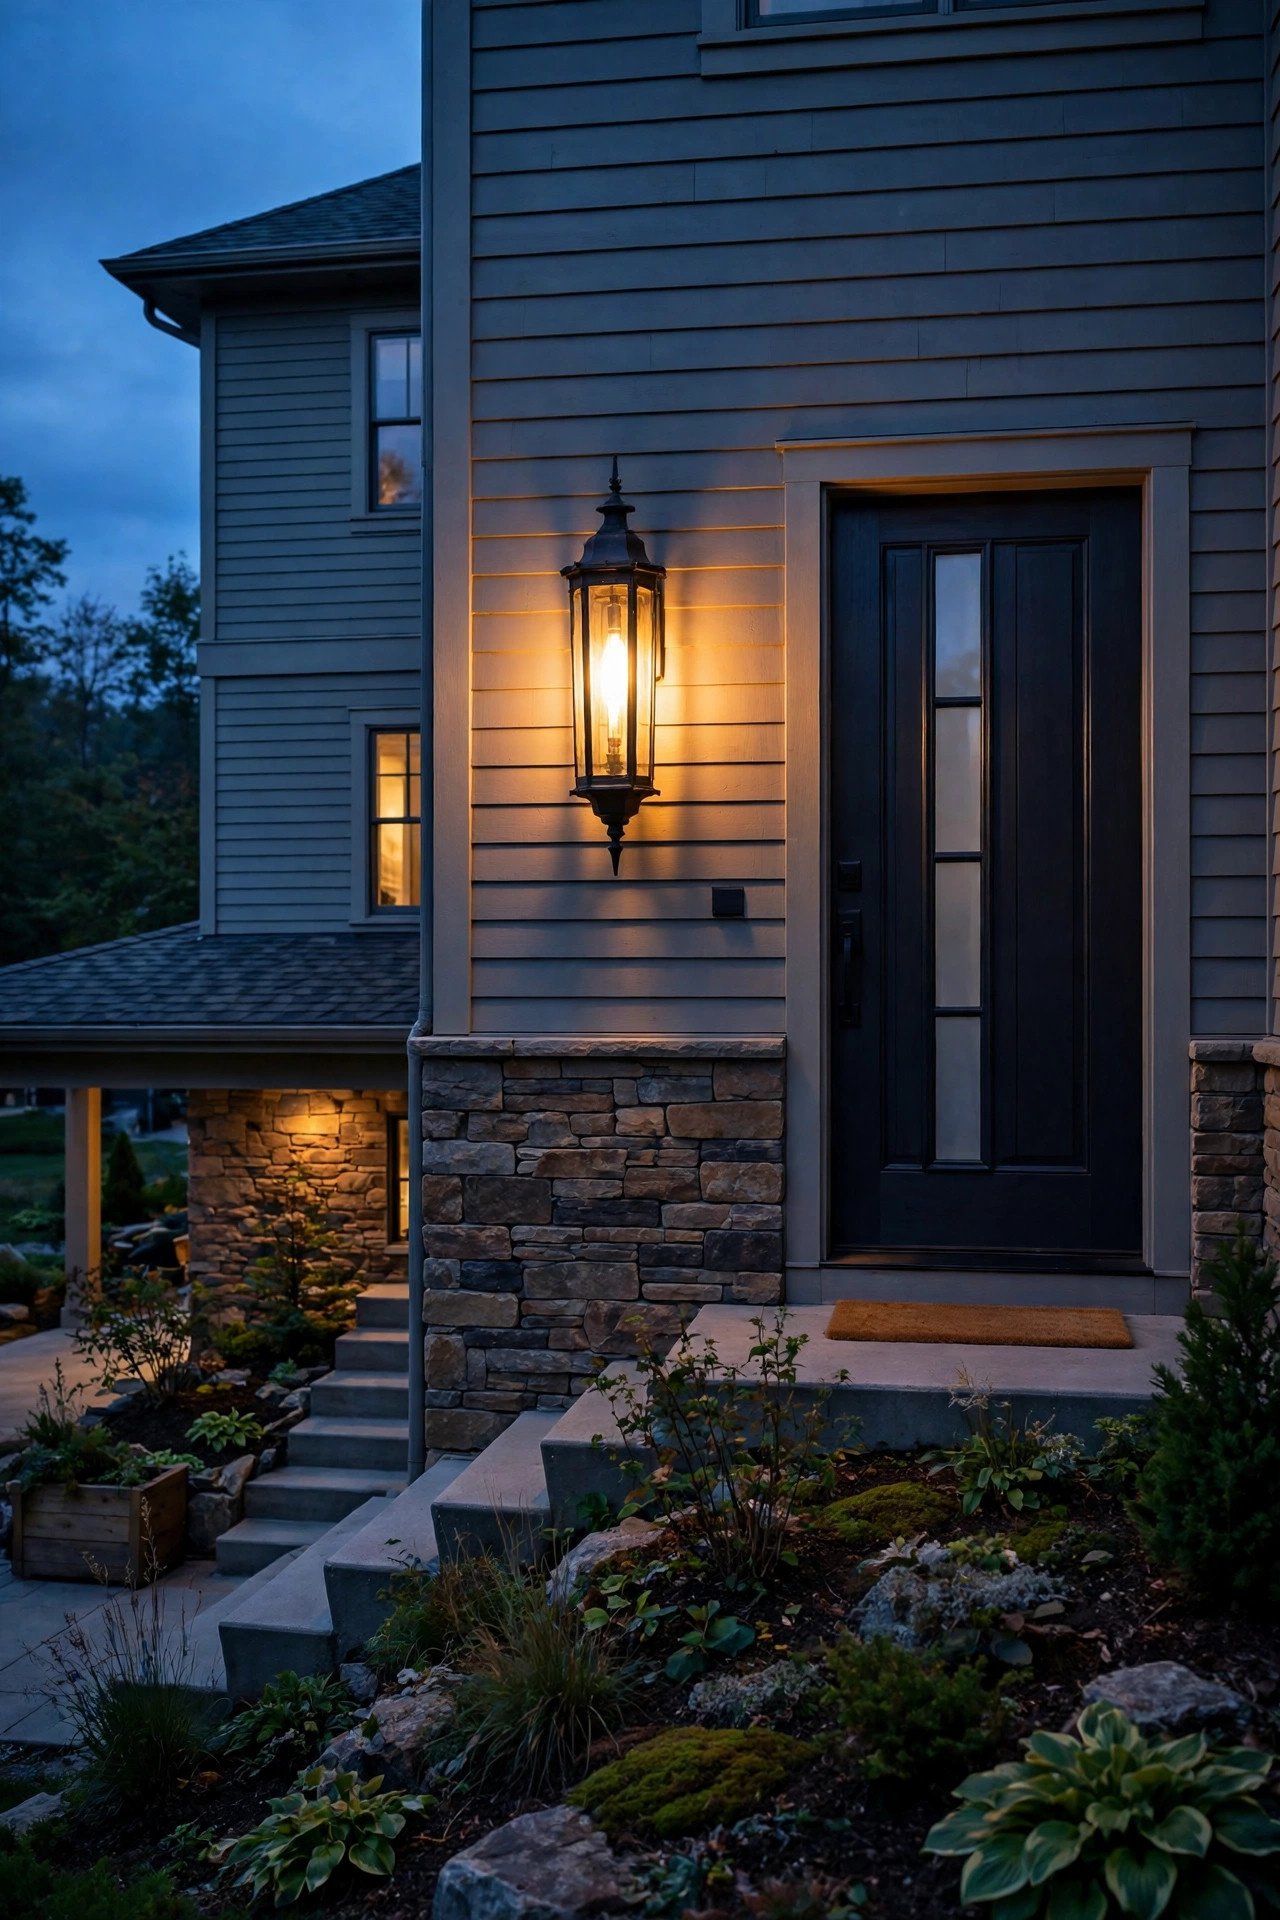
Split-level entries often sit under a tall, blank stretch of wall where the foyer rises inside, and a standard 8-inch sconce gets completely lost against it. Go bigger: a lantern-style wall light 16 to 20 inches tall reads correctly from the street and finally balances that big facade. Mount it so the center of the fixture sits 66 to 72 inches above the landing floor, and let it clear the top of the door trim by a few inches if your siding allows. Choose warm white LED filament style bulbs at 2700K, around 800 lumens, in a wet-rated fixture — that upper wall catches every drop of rain the roof misses. In my experience, this single swap does more for a raised ranch's curb appeal than any other entry change, because it gives the whole split facade a focal point. If your junction box sits low, an electrician can raise it an hour's work at a time, or pick a fixture with a long backplate that visually stretches upward. Matte black and oil-rubbed bronze both disappear handsomely against brick and vinyl alike. Keep the bulb shielded or frosted so guests climbing the stairs are not staring straight into glare.
Suggested budget range: $60 – $180.
2. A Matching Sconce Pair to Frame the Door
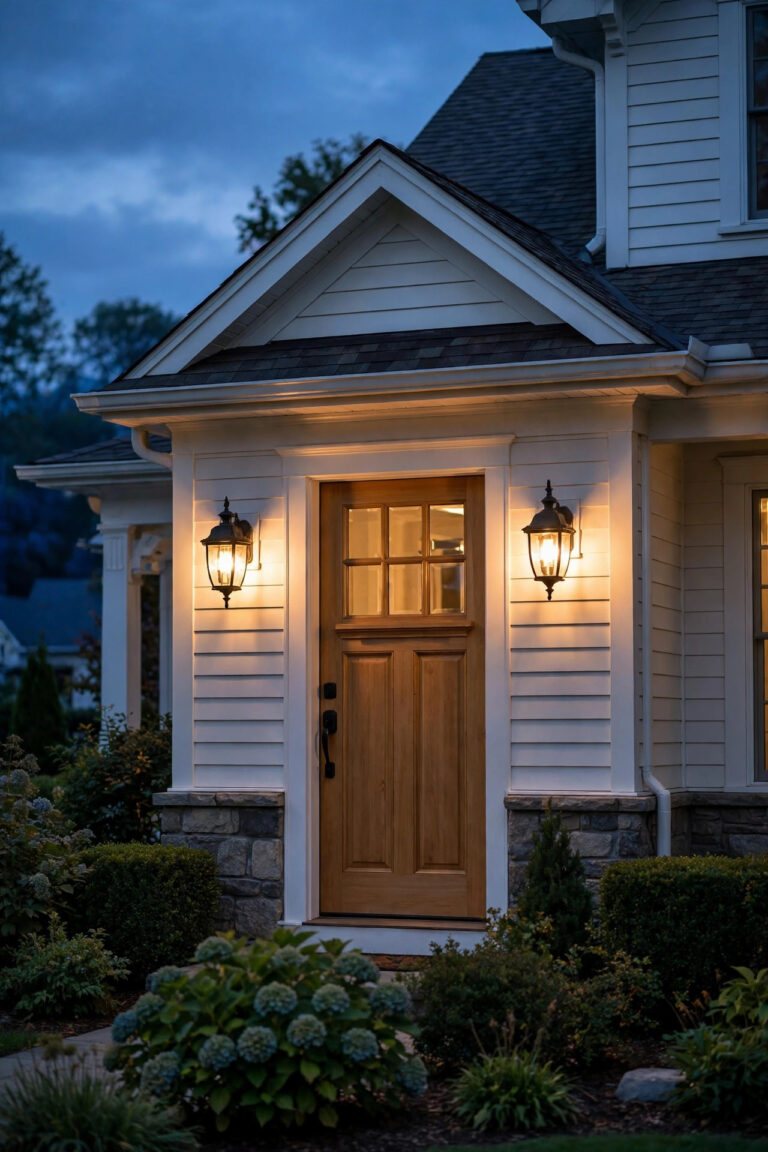
Symmetry is the oldest trick in the entryway book, and it works especially well on split-levels because the architecture itself is asymmetrical — stairs on one side, garage dropping away on the other. Two matching sconces, one on each side of the door, pull the eye straight to the entry and calm the whole composition down. You need roughly 10 to 12 inches of flat wall on each side of the trim; measure before you fall in love with a wide fixture. Keep both lights at identical heights, centers about 66 inches above the landing, and wire them to the same switch so they always match. Matching 2700K bulbs matter more than people think — one warm and one daylight bulb will make the pair look broken even in identical fixtures. If one side of your door is blocked by the stair railing, cheat the pair slightly toward the open side and add a third small light at the landing corner to restore balance. Honestly, paired sconces plus lit steps is the combination I recommend most often for raised ranches; it photographs beautifully and guests instantly understand where to go.
Suggested budget range: $90 – $260.

3. Recessed Step Lights — the Heart of Split-Level Entryway Lighting
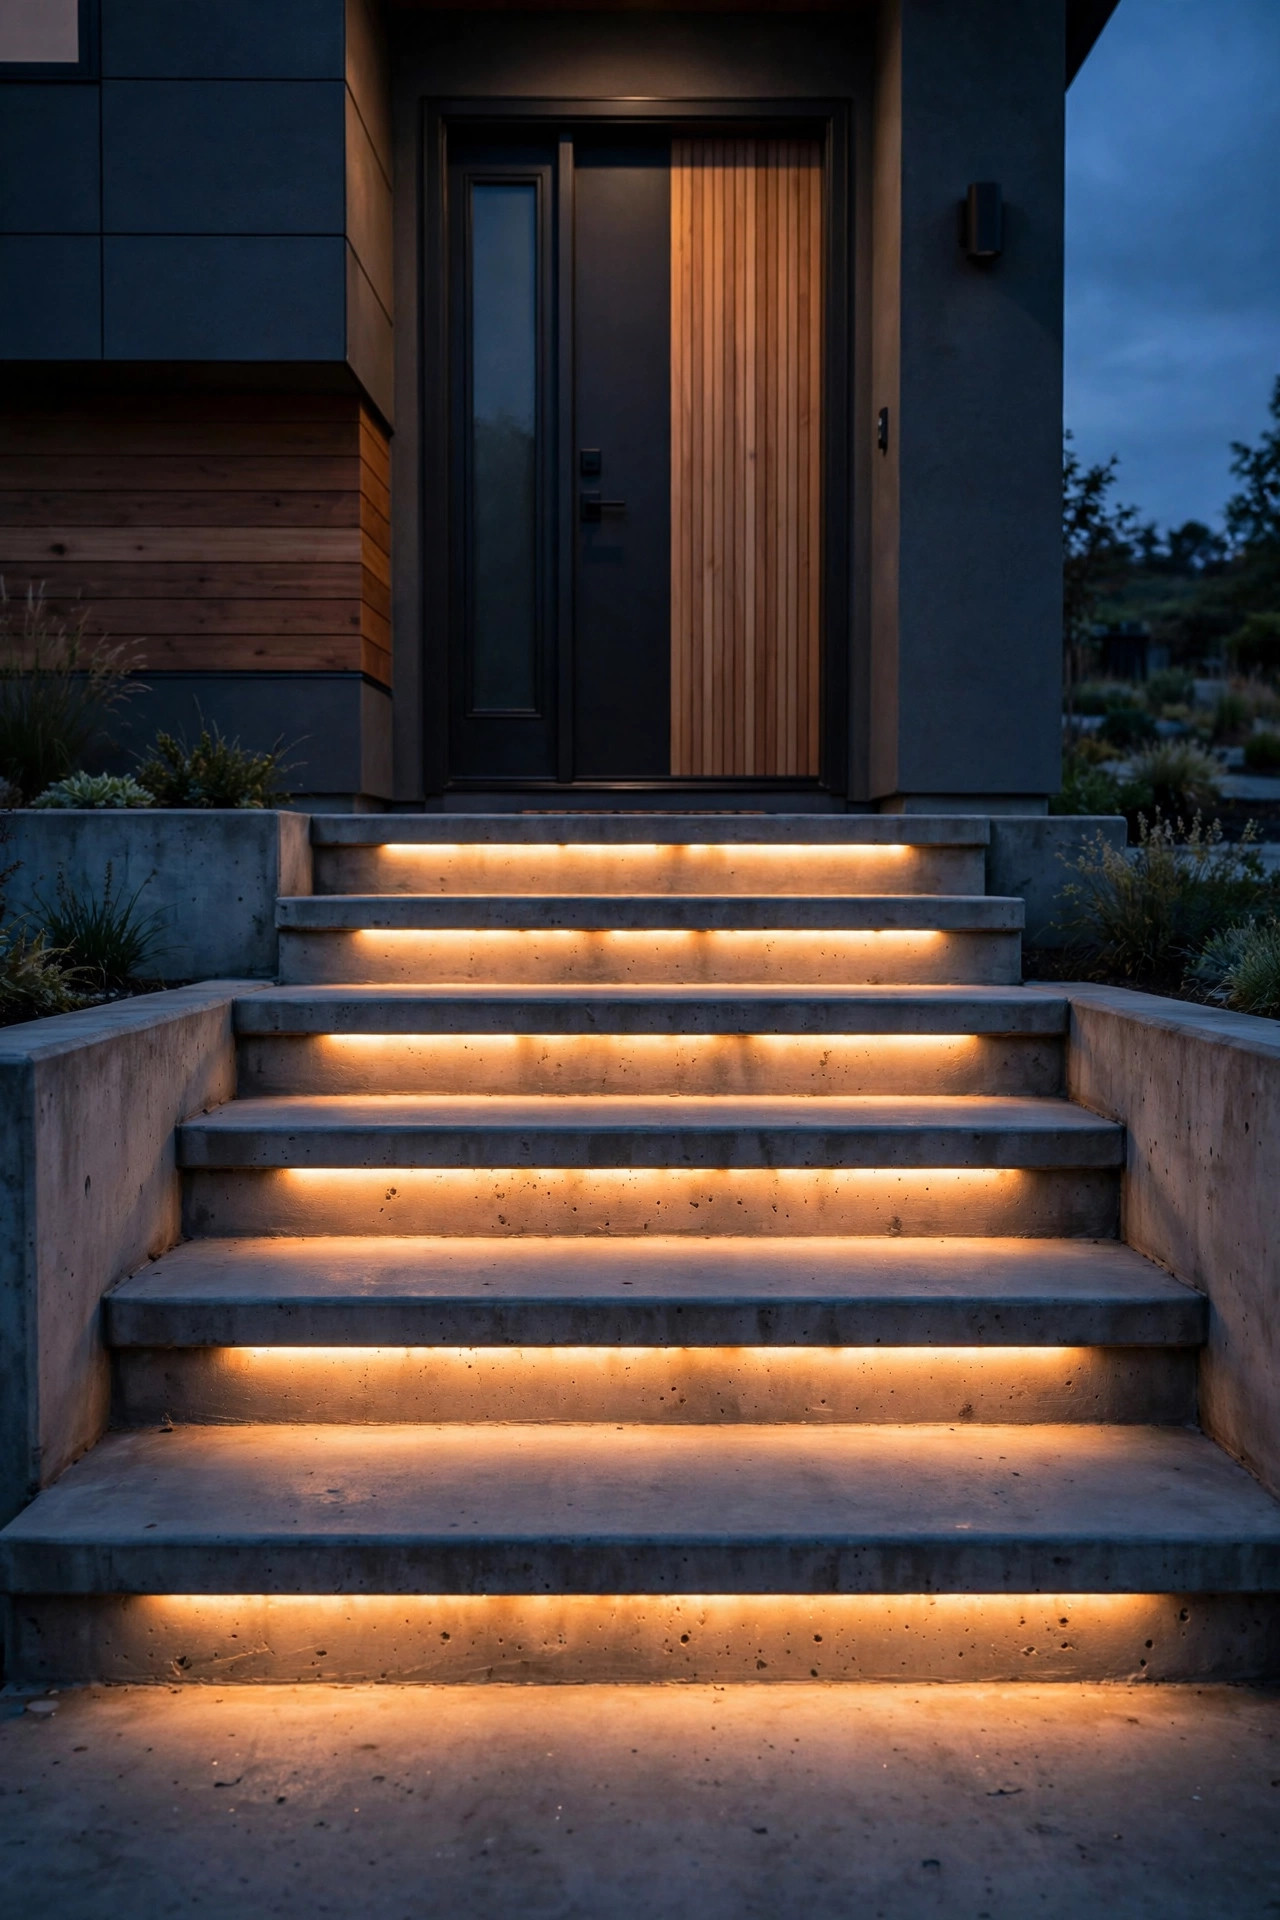
Those half-flight concrete or timber steps are the defining feature of a split-level entry, and they deserve built-in light, not a flashlight app. Recessed step lights sit flush in the vertical riser of each tread (or in the stringer wall beside it) and wash each step in a soft pool of light exactly where feet land. Plan one fixture per step on stairs up to 42 inches wide; wider stairs take two, spaced evenly. Low-voltage LED versions are the friendly DIY route — the transformer plugs into an outdoor GFCI outlet and the cable runs in a shallow channel along the stringer. Core-drilling concrete risers is pro territory, but surface-mount half-moon fixtures achieve nearly the same look with four screws each. Aim for fixtures rated for direct burial or wet locations with sealed lenses, because risers take splashed rain and the occasional pressure washer. My full walkthrough of porch step lighting ideas covers spacing diagrams in more depth. The result is the single biggest safety upgrade on this list — no more shadowed edges, no more missed bottom step.
Suggested budget range: $120 – $450.
4. Solar Step Lights for a No-Wire Weekend Refresh
No outlet near the stairs? Solar step lights are the honest shortcut, and the newer ones are genuinely good. Look for models with a separate, reasonably large solar panel face, warm white 2700–3000K output, and at least 8 hours of claimed runtime — then mount them where the panel actually sees midday sun, which on a north-facing split-level entry might mean the sunny side of the stringer only. Stainless or powder-coated housings outlast the thin plastic versions by years. Attach with the included screws rather than adhesive pads wherever the surface allows; freeze-thaw cycles pop pads off by February. One light centered on each riser works for narrow stairs, and staggering them left-right-left on wide stairs looks intentional and kind of charming. Expect a softer glow than wired lights — think guidance light, not task light — and pair them with a lit handrail or post light if your stairs are steep. In my experience they are the perfect first step (pun fully intended) before committing to a wired system, and renters can take them along when they move.
Suggested budget range: $25 – $80.

5. An LED Strip Tucked Under the Stair Handrail
Here is the trick hotels use, and it translates beautifully to a split-level entry: a waterproof LED strip mounted under the handrail, aimed down at the treads. The light source stays invisible, so all you see is a continuous ribbon of warm light floating along the stairs — modern, glare-free, and incredibly effective on the open-riser or railed staircases many raised ranches have. Use an outdoor-rated strip with an IP65 or IP67 silicone coating at 2700K, and run it inside an aluminum channel with a frosted diffuser if you want that seamless, dotted-free line. The low-voltage transformer tucks behind a shrub or inside the garage with the cable entering through a small drilled hole. Stick to LED only here, keep connections inside waterproof junction boxes, and put the strip on a timer so it wakes up at dusk without you thinking about it. Honestly, this is the idea guests ask about most at my own door. It also quietly solves the shadow problem that a single overhead light creates, where your own body blocks the light exactly where you are stepping.
Suggested budget range: $45 – $140.

6. Low Path Lights From the Sidewalk to the Steps
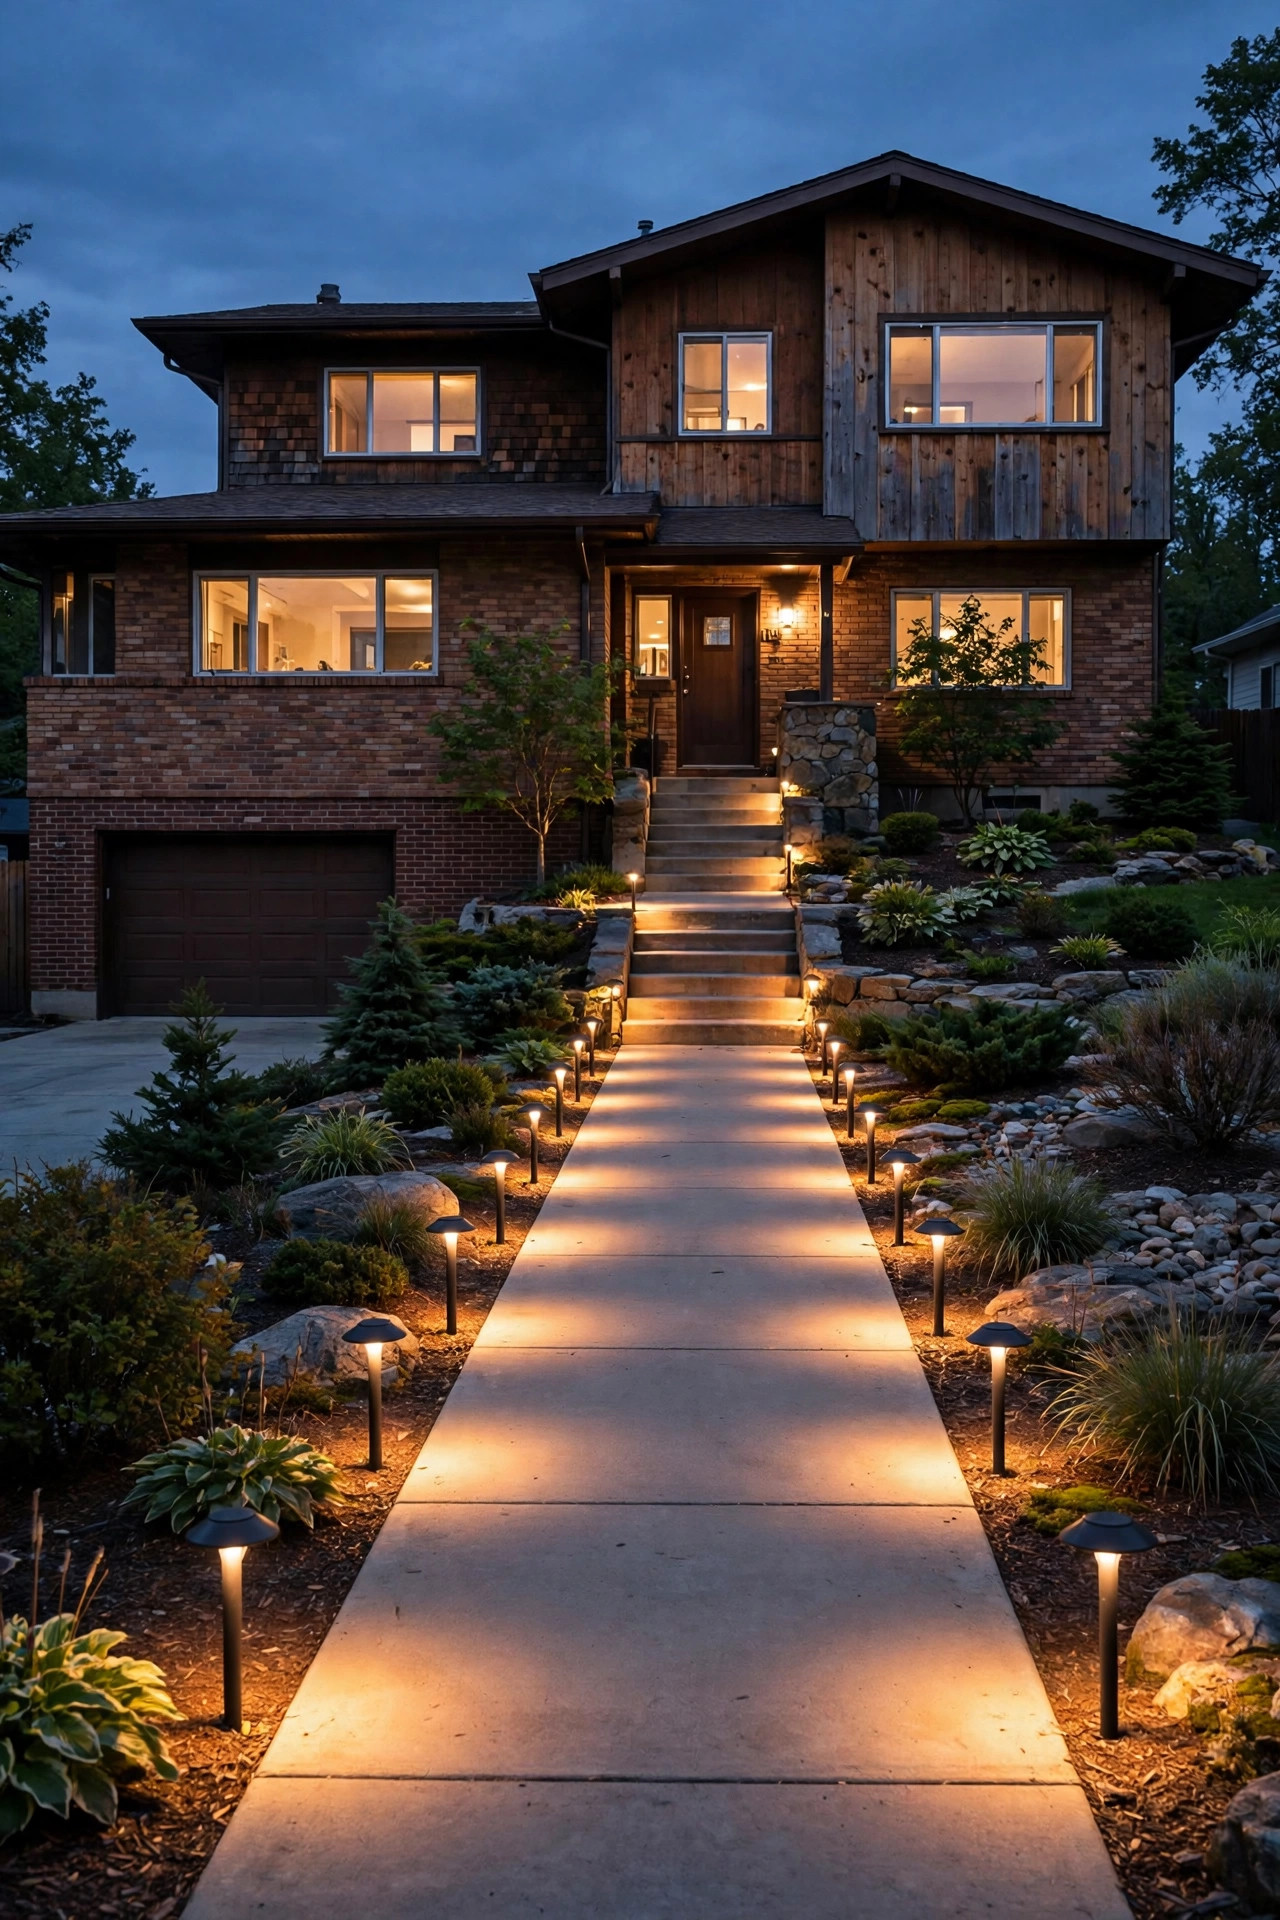
Split-level entries usually sit back from the street with the door elevated, so guests read the house in sequence: sidewalk, walkway, stairs, door. Low path lights handle the first leg of that journey. Space fixtures 5 to 6 feet apart along one side of the walk — one side only, always, or you get the airport runway effect — and stagger them at curves. Keep them low, 12 to 18 inches tall, with shielded tops that throw light down onto the pavement rather than into eyes. Low-voltage wired sets give the steadiest, warmest result; solar versions work if the bed gets real sun. Angle the last path light to gently overlap the pool of light at the bottom step, so there is no dark gap between walkway and staircase. That dark gap is where ankles get rolled, by the way. Choose finishes that match your sconces for a pulled-together look, and push stems deep enough that they stand straight after the first frost heave — nothing looks sadder than a row of tipsy path lights leaning like they have had a long weekend.
Suggested budget range: $50 – $220.
7. A Lantern Post at the Foot of the Stairs
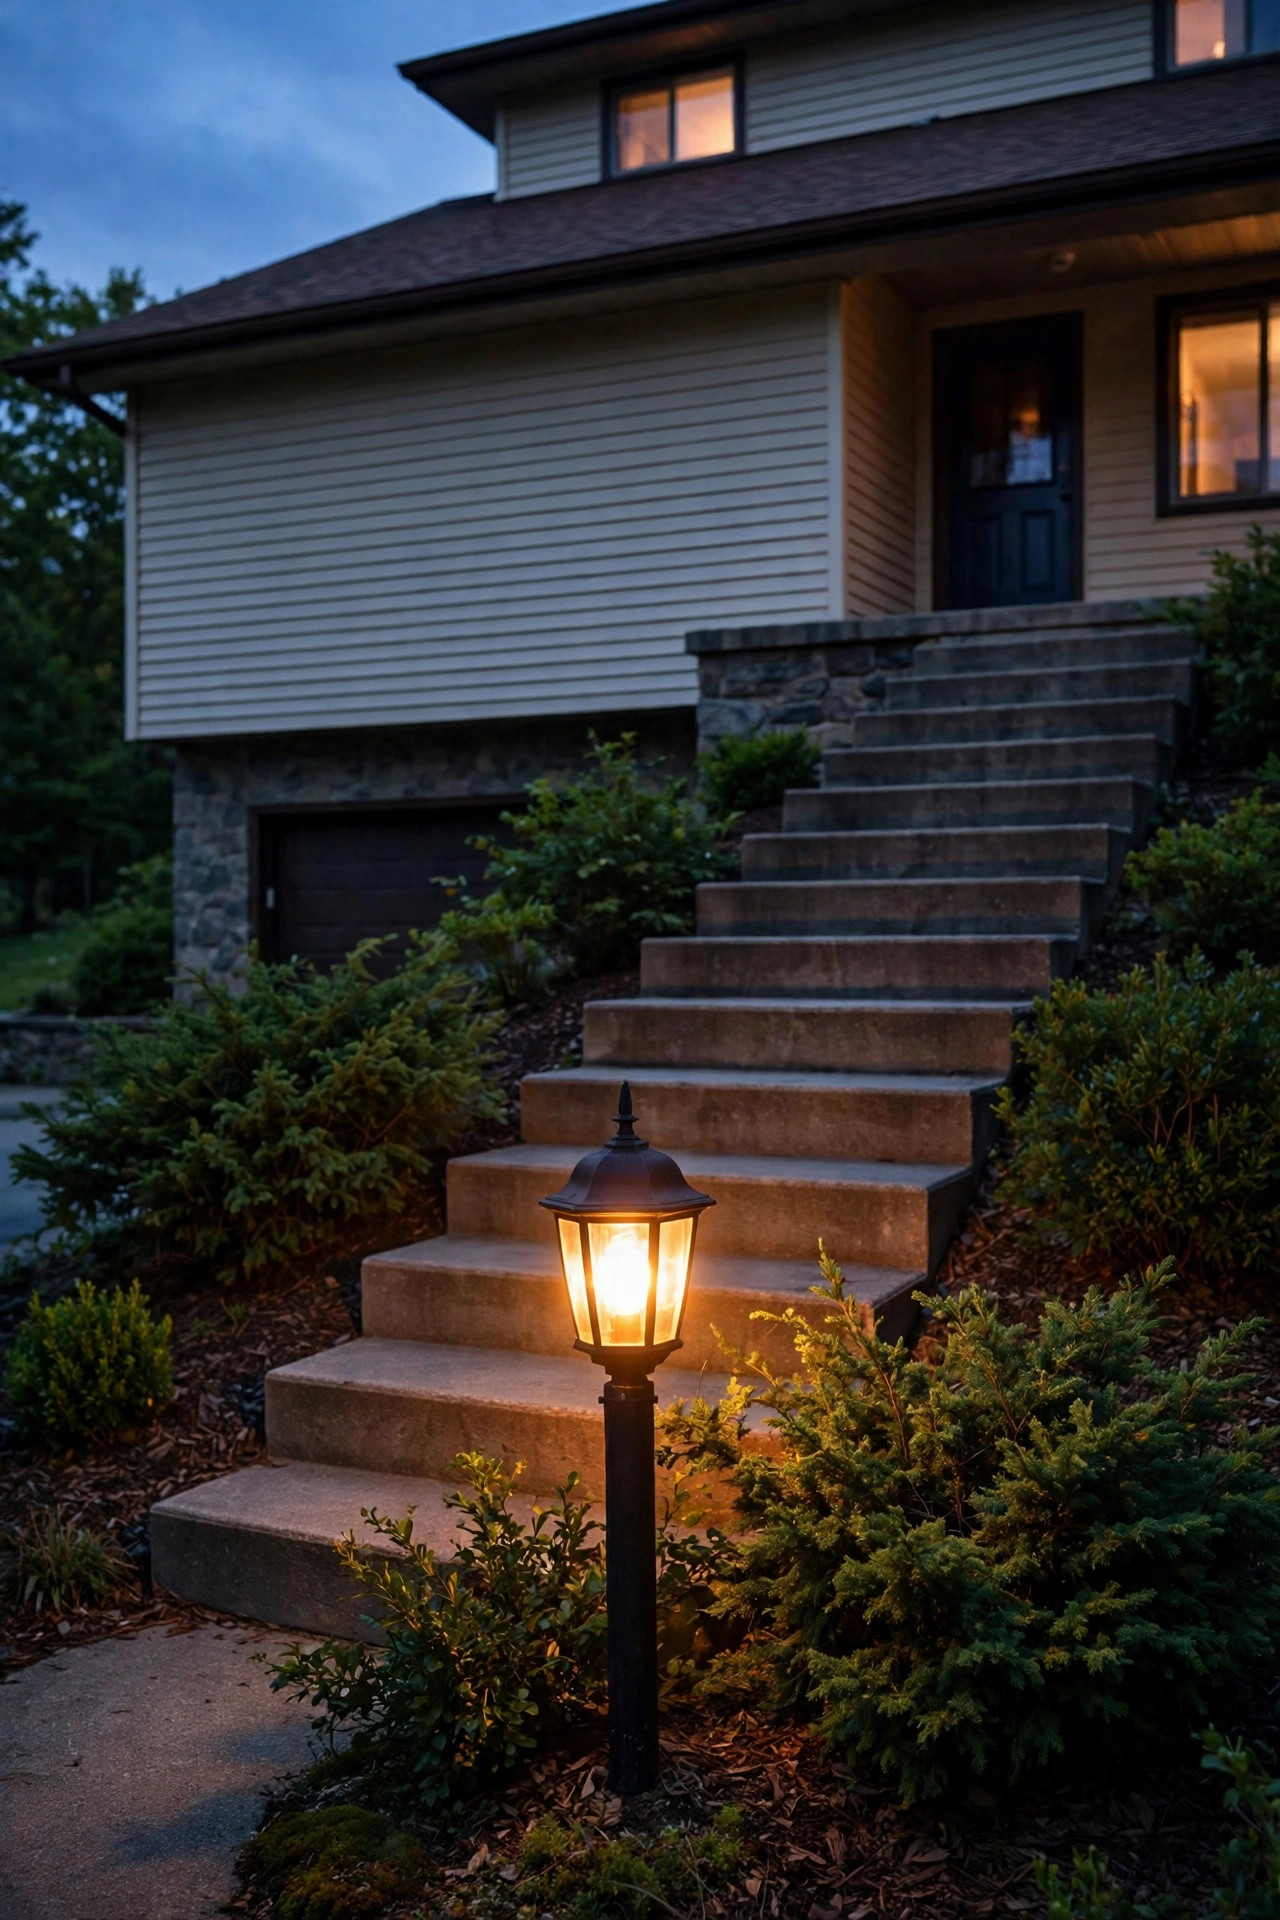
The bottom of a split-level staircase is a natural gathering point — it is where the walkway ends, where packages land, where guests pause to find the doorbell. A post lantern there acts like a punctuation mark that says: start here, climb up. Choose a post 5 to 6 feet tall with a lantern head that matches your door sconces, and set it back about 18 inches from the first tread so the railing and the light never crowd each other. Hardwired posts want a concrete footing and a trench for the cable — a solid Saturday project — while solar post lanterns have improved enough to be a real option in sunny yards. Keep the bulb at 2700K and moderate brightness; this is a beacon, not a floodlight, and blasting guests at the exact moment they start climbing is poor hospitality. In my experience the post light also does quiet double duty in winter, marking the stair base when snow blurs every edge. Plant something low and soft around its base — a small ornamental grass or a mound of creeping thyme — and the whole corner looks designed rather than installed.
Suggested budget range: $70 – $300.
8. A Hanging Pendant Over the Raised Landing
Many split-level entries have a small covered landing or portico where the roofline dips over the door, and a hanging lantern pendant turns that cramped ceiling into the prettiest moment of the facade. Hang it so the bottom of the fixture sits at least 6 feet 8 inches above the landing floor — enough for tall guests and carried grocery bags — and center it on the door, not the landing, if the two disagree. On a sloped portico ceiling, a short length of chain forgives the angle gracefully. Pick a damp-rated or wet-rated outdoor pendant with seeded or frosted glass to hide the bulb, at 2700K, and size it boldly: a 12 to 16 inch lantern suits the tall proportions of these homes far better than a timid 8-inch one. If your landing has no ceiling box, a corded plug-in pendant swagged from a hook plus a weatherproof cord cover gets you 90 percent of the look in an afternoon. Pair it with dim step lights below and the whole entry reads like a little outdoor room.
Suggested budget range: $55 – $220.

9. A Soffit Downlight That Washes the Door
Raised ranch entries often sit beneath a generous eave, and one recessed downlight in that soffit pours a clean, even wash over the door and landing that no wall fixture can match. It flatters painted doors especially — a deep green or classic black door under a warm downlight looks genuinely expensive. Use a wet-rated recessed trim or a surface-mount soffit light with a wide beam, 2700K, and aim for the fixture to sit 18 to 24 inches out from the wall so the light grazes the door rather than spotlighting the top of guests' heads. This is usually an electrician job unless a junction box already exists, because soffit work means fishing wire through the eave. Put it on the same switch or smart schedule as your sconces so the layers come on together. The downlight's real superpower is shadow control: combined with step lights below, it leaves no dark triangle on the landing where the door swing hides a delivered package or, worse, an icy patch. Keep brightness moderate — 600 to 800 lumens — so the door glows rather than glares.
Suggested budget range: $90 – $280.

10. A Motion-Sensor Light for the Driveway-Side Approach
On most split-levels, the garage and driveway sit at the lower level, which means the family's real everyday entrance is a dark walk from the car, around or up the side, to the door. A motion-sensor fixture mounted on the garage wall or the lower-level corner covers that route without burning power all night. Choose a dual-head LED unit with an adjustable sensor, set the range to about 20 to 25 feet and the on-time to 1 to 3 minutes, and aim the heads to wash the driveway edge and the path to the stairs rather than the street — your neighbors will thank you. Keep the sensor's view clear of shrubs that wave in the wind and trigger it hourly. I always recommend pairing the motion light with a low, always-on layer (path lights or a dusk-to-dawn bulb) so the scene never drops to pitch black between activations; the motion light is the exclamation point, not the whole sentence. Color temperature matters for cameras too: warm 2700–3000K light renders faces and car colors far more naturally than blue-white security light.
Suggested budget range: $35 – $130.

11. Illuminated House Numbers Guests Can Actually Find
Delivery drivers circle split-levels endlessly because the numbers hide beside a dark door on a half-raised facade. Fix it permanently with numbers that light themselves: individual backlit LED numerals, a backlit plaque, or a simple solar number sign staked where the walkway meets the stairs. Individual modern numerals, 5 to 6 inches tall, mounted on the wall beside the door and wired into the porch light circuit, glow with a soft halo that reads from the street. A backlit plaque is the easier retrofit — one box, one set of numbers, done. Whatever style you pick, contrast is the whole game: dark numbers on a lit pale plaque, or lit numbers against dark siding. Place them within the pool of your entry light and at roughly eye level from the walkway, not centered on the door where tradition puts them and nobody looks. Honestly, this is the least glamorous idea on the list and the one that earns the most thank-yous, usually from a pizza driver standing in your yard at 9 p.m. Also check your local rules — some towns require visible numbers for emergency services, so this upgrade may literally be the law smiling on you.
Suggested budget range: $30 – $150.

12. Uplights That Graze the Split Facade
The split-level facade — half brick or stone below, siding above, roofline stepping between them — has more texture than almost any other suburban style, and grazing light shows it off. Two low-voltage uplights in the planting bed, angled up at the stone or brick portion, create soft shadow play that makes the whole entry feel grounded and intentional. Keep the fixtures 12 to 18 inches out from the wall with a narrow-to-medium beam, and aim them at the textured level only; lighting the flat siding above just makes glare. This is a background layer, not the main event, so modest brightness wins — the goal is a gentle gradient that dies out before the roofline. Shielded well lights sunk flush in the bed are the tidy option if kids and mowers patrol the area. In my experience this layer is what makes neighbors slow down on evening walks, because texture plus warm light reads as "designed" even when the rest of the yard is simple. My notes on ranch home front yard lighting cover the same grazing technique across a full-width facade if your raised ranch stretches wide.
Suggested budget range: $60 – $240.

13. Retaining Wall Cap Lights on the Sloped Yard
Split-levels love a slope, and many have a low retaining wall terracing the front yard right beside the entry stairs. Cap lights — slim fixtures that tuck under the wall's top course and wash light downward — were practically invented for this house style. They outline the terrace edge so guests read the grade change instantly, and they throw a gentle sheet of light across the bed or walk below without any visible fixture by day. Low-voltage versions daisy-chain along the wall from the same transformer as your path lights, which keeps the whole system on one timer. Space them 4 to 6 feet apart, and always add one near the end of the wall closest to the stairs, since that corner is the classic shin-meets-concrete spot. If your wall is still in the planning stage, tell your mason to leave the last course of caps loose until the cable is run — retrofitting means prying caps and re-mortaring, which is doable but dusty. The finished effect is quiet, architectural, and makes a modest yard feel twice as considered.
Suggested budget range: $80 – $320.

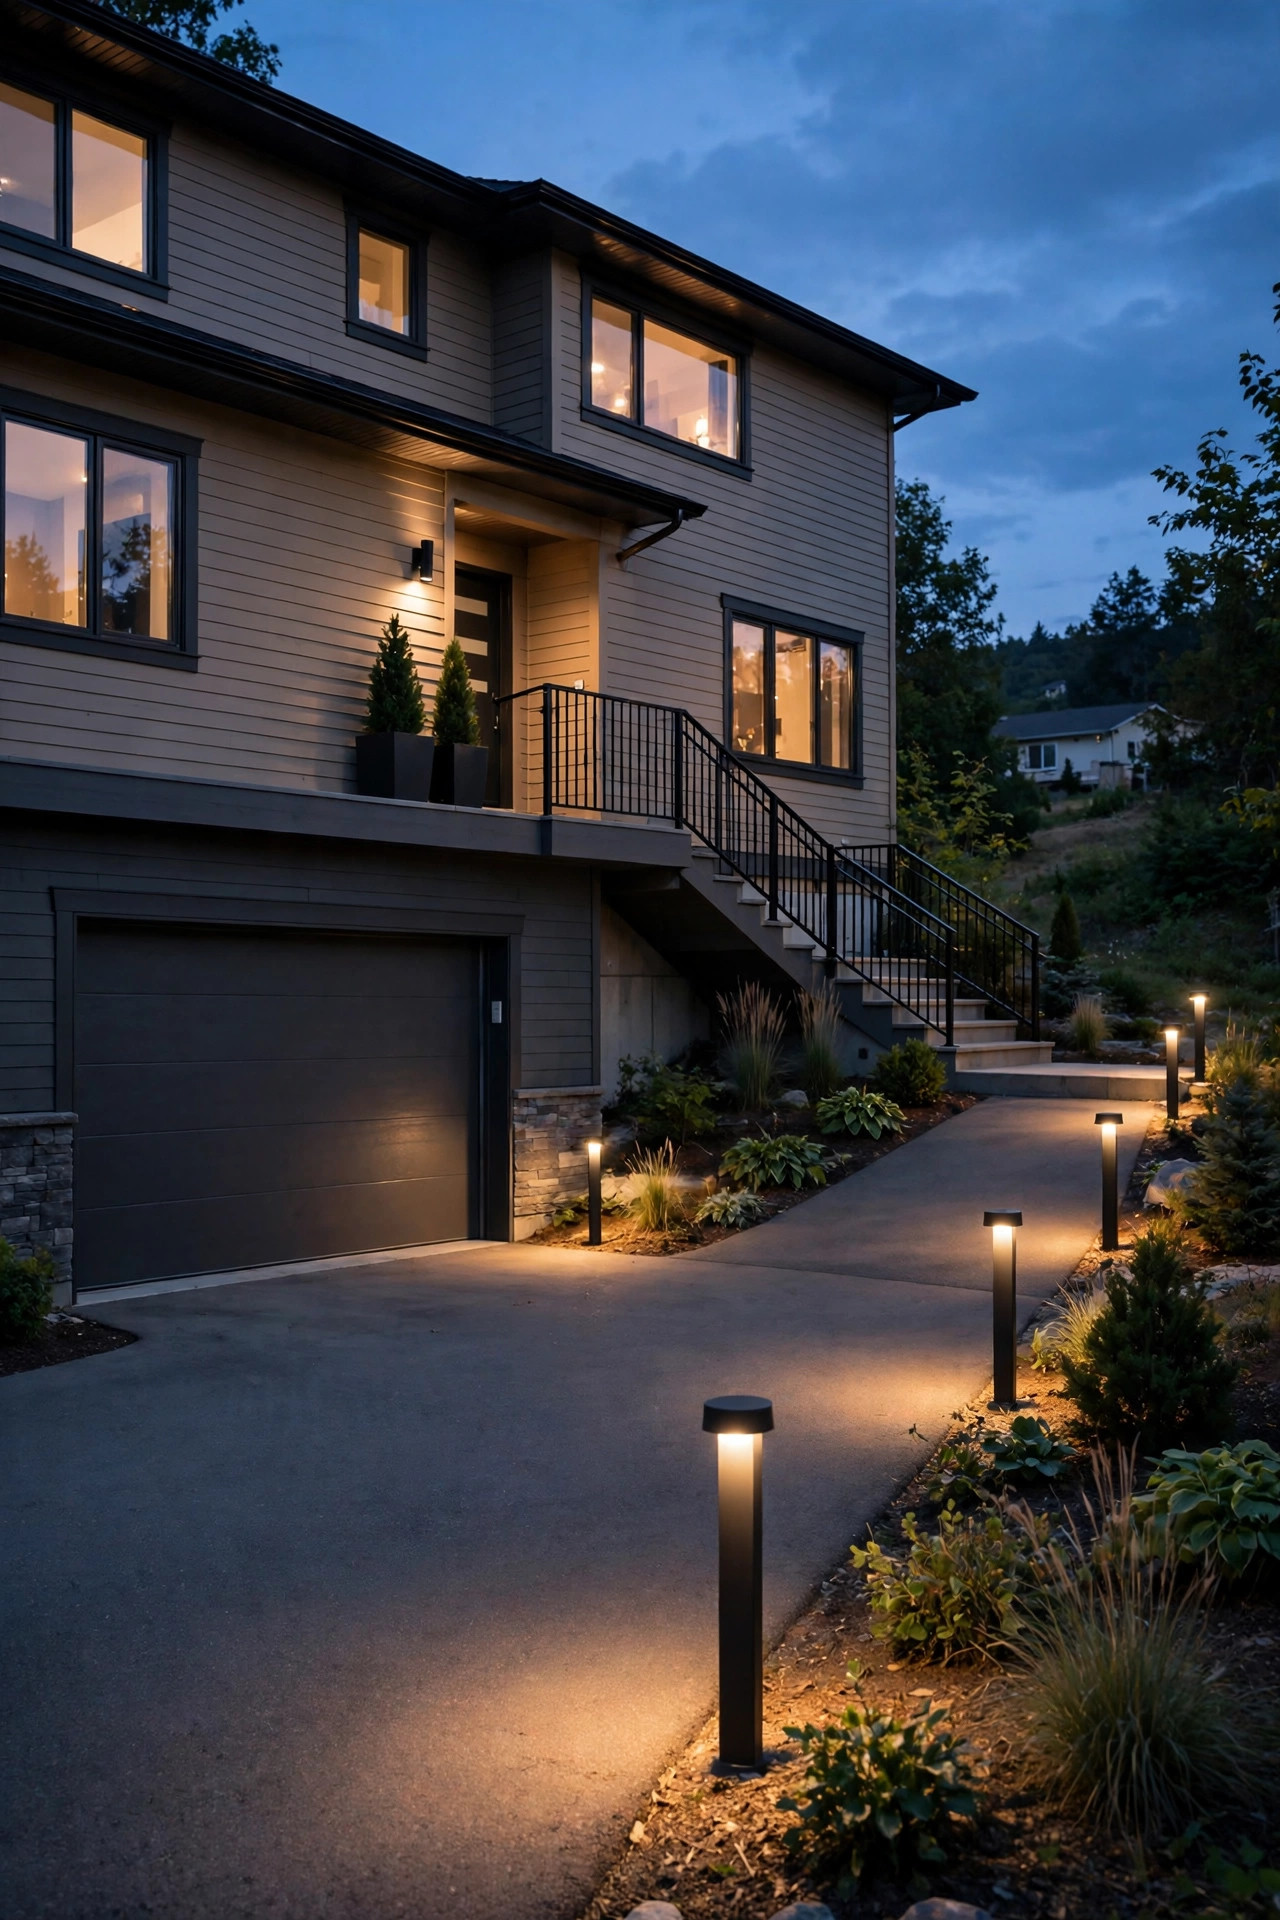
14. Driveway Bollards That Tie the Two Levels Together
Because the garage level and the entry level are visually separate on a raised ranch, the yard can feel like two houses stacked. A short run of bollard lights along the driveway edge — the side nearest the front walk — stitches them together, guiding cars and giving the lower level its own warm layer. Modern bollards 20 to 28 inches tall with a downward-facing, shielded light source are the right scale; anything taller starts competing with the door. Three bollards usually suffice for a standard driveway edge, spaced 8 to 10 feet apart, set back at least a foot from the pavement so mirrors and snowplows pass safely. Wired low-voltage versions hold brightness best in winter, and a photocell timer handles the schedule. Keep the finish in the same family as your post light and sconces — visual repetition across levels is exactly what makes the split facade feel unified. I especially love this idea for corner-lot split-levels, where the driveway faces one street and the door another; the bollards tell arriving guests which way the house "flows" before they ever reach the stairs.
Suggested budget range: $90 – $350.
15. Dusk-to-Dawn Smart Bulbs: Split-Level Entryway Lighting on a Routine
Sometimes the entry is fine and the habit is the problem — nobody remembers to flip the porch switch, so the split-level entry sits dark at the exact moment everyone comes home. Smart outdoor bulbs or a smart switch running a dusk-to-dawn routine fixes it permanently. Screw-in smart LED bulbs in your existing sconces and post light, set to warm white at full brightness, can follow an astronomic schedule that self-adjusts through the seasons; add a gentle dim to 60 percent after 11 p.m. if your street prefers things subtle. If your fixtures take decorative filament bulbs you would rather keep, a smart switch or a simple photocell socket adapter achieves the same automation for a few dollars. Make sure any smart bulb lives inside a fully enclosed, outdoor-rated fixture or is itself rated for outdoor use — electronics and landing-zone rain do not mix. This is also the cheapest security upgrade here: a house whose entry lights itself every single evening simply looks occupied. Honestly, once you have lived with lights that just handle themselves, a manual porch switch feels like churning your own butter.
Suggested budget range: $15 – $60.

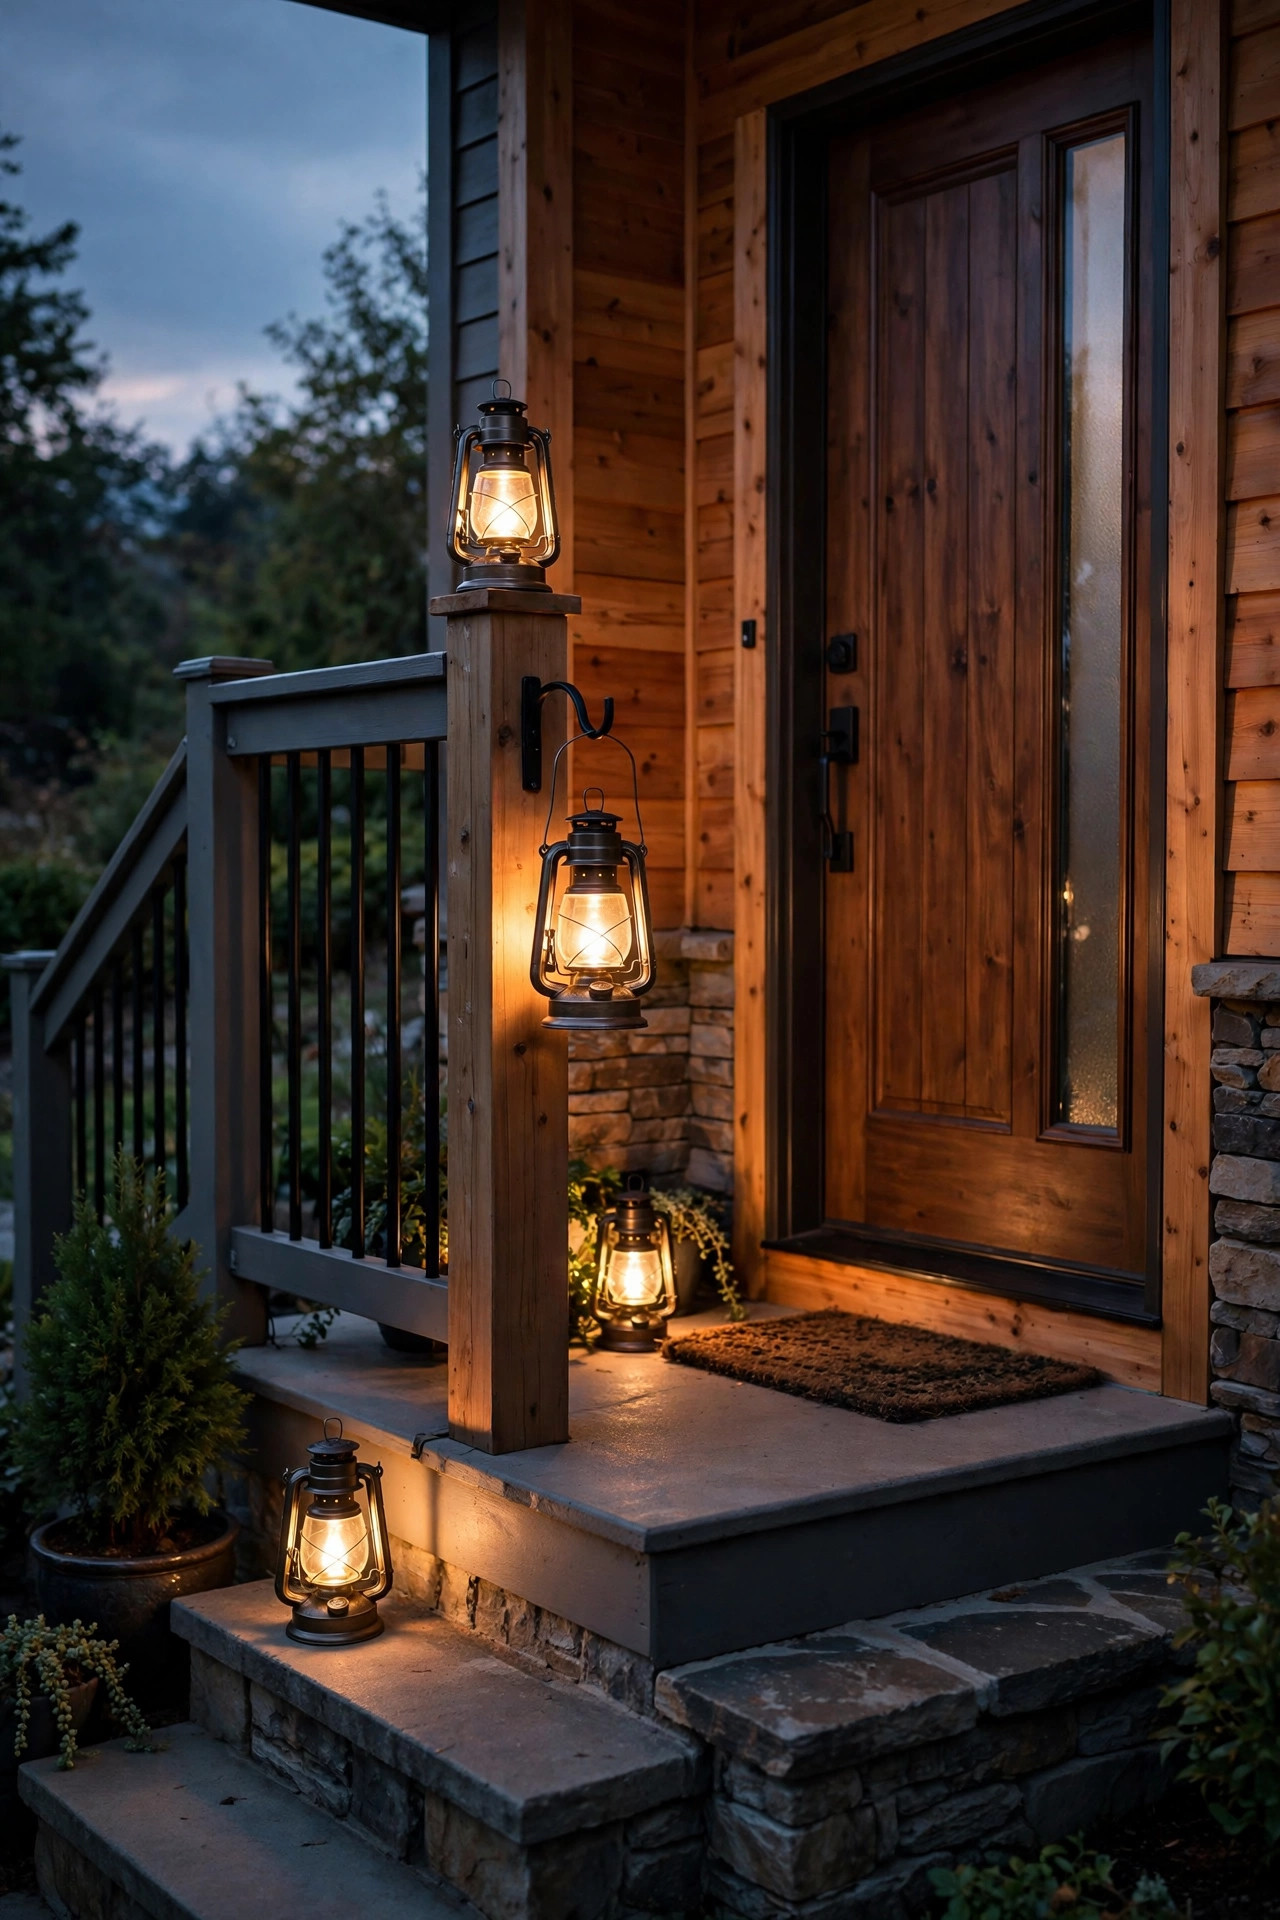
16. Battery Lanterns Clustered on the Landing
For a landing with no outlet and no appetite for wiring, a cluster of battery-powered lanterns does a surprising amount of work. Group three lanterns of different heights on the quiet corner of the landing — the side away from the door swing — and choose versions with warm 2700K light, a timer function, and real heft so wind does not redistribute them across the yard. Rechargeable models with USB charging save the battery-buying treadmill; a 6-hours-on timer setting means they greet you at dusk and rest by midnight without any attention. Treat them as the soft accent layer: they will not safely light a full staircase alone, so pair them with solar step lights or a lit rail if guests climb after dark. Their other gift is flexibility — carry one down to the mailbox, borrow two for the back deck, line the stairs with them for a party. In my experience, lantern light at ankle-to-knee height is also the most flattering light there is; faces above it look warm and welcoming in a way overhead light never manages.
Suggested budget range: $30 – $110.
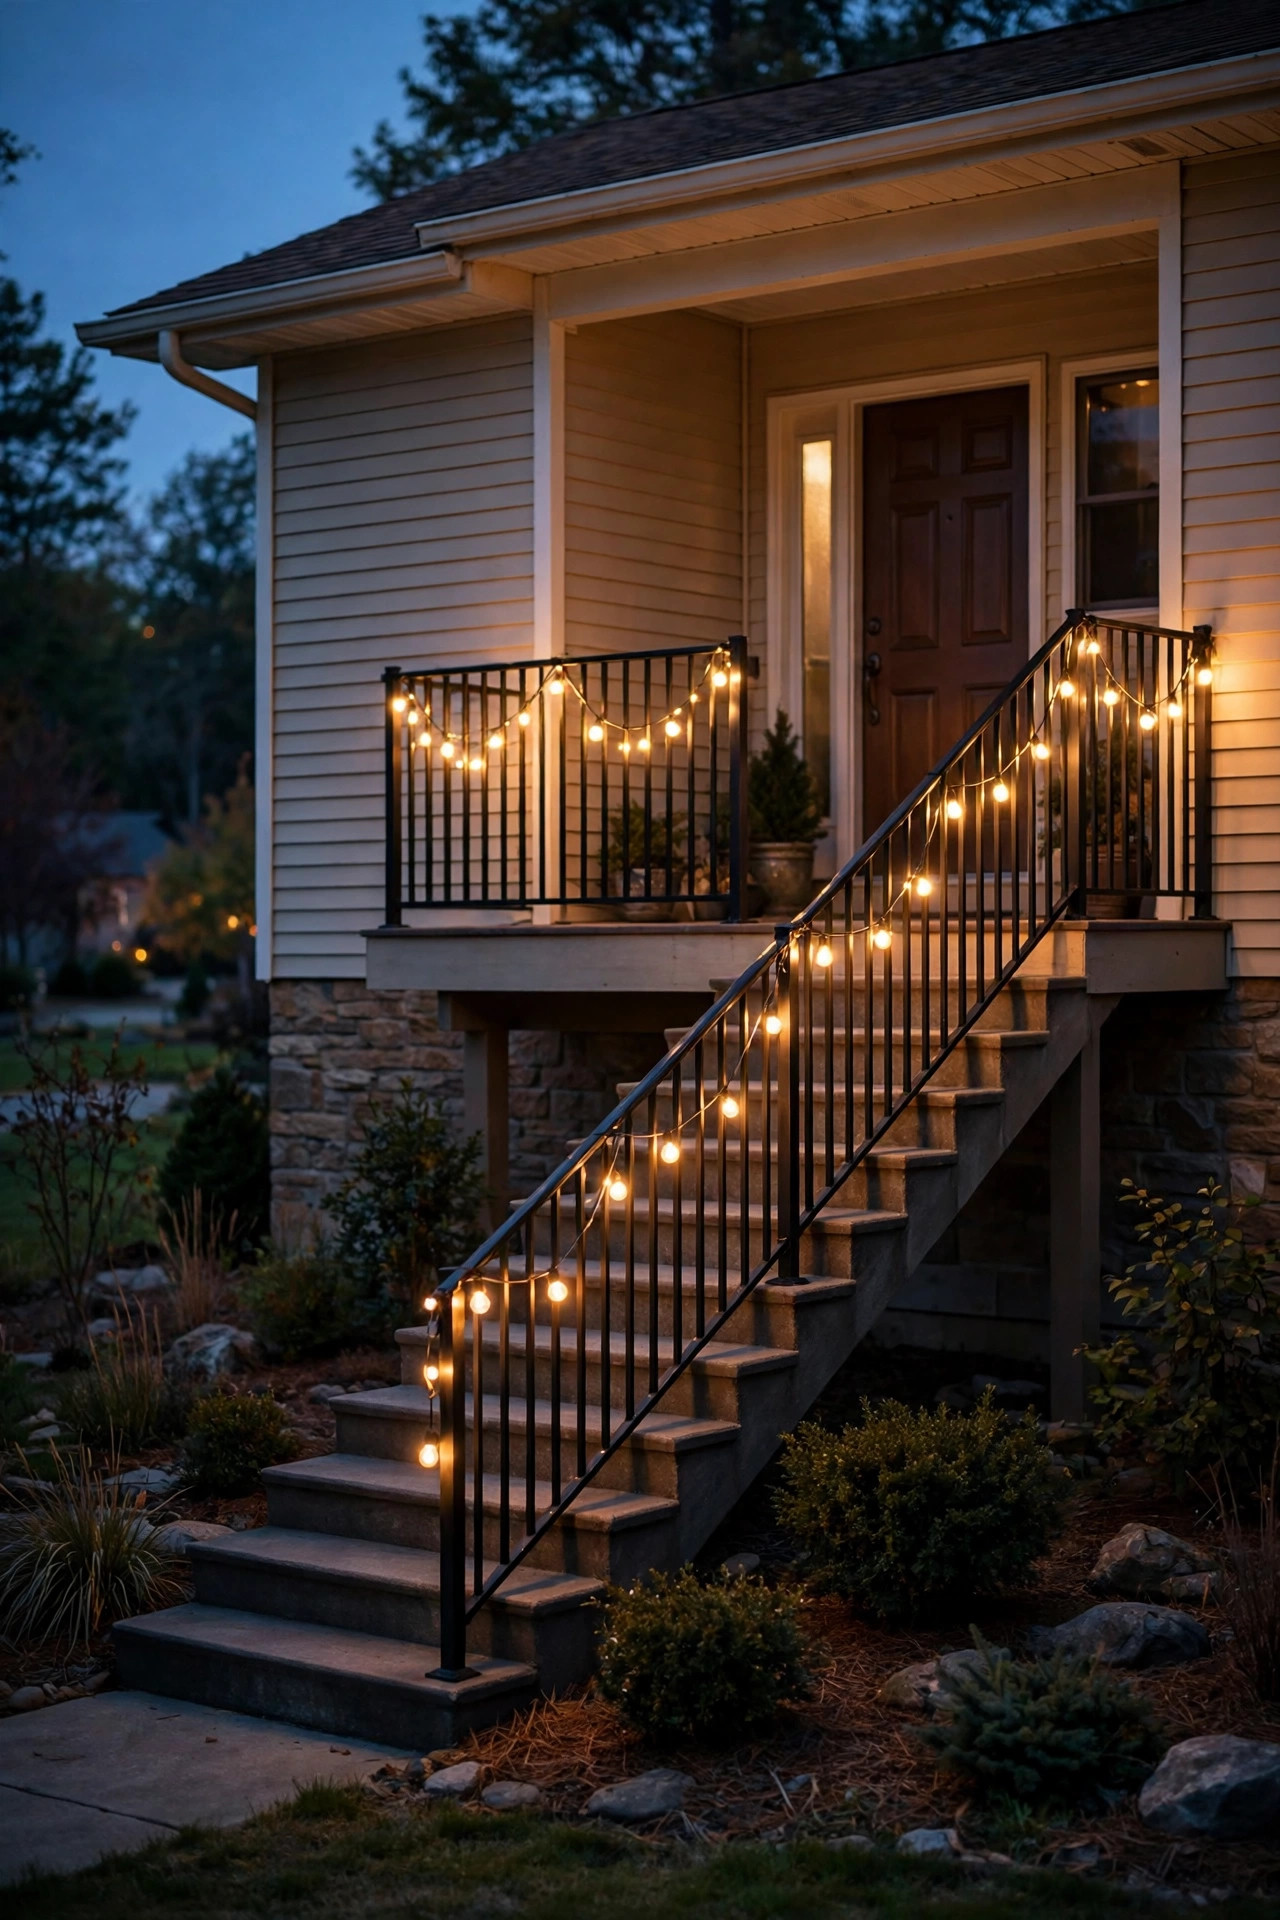
17. String Lights Along the Entry Rail and Landing Edge
If your raised ranch has a railed landing, a small entry deck, or an iron rail marching up the stairs, string lights were made for it. A single strand of outdoor globe or café-style lights woven along the rail turns the most architectural part of the house into the coziest, and the bulbs at hand height put soft light exactly along the stair route. Use commercial-grade outdoor string lights with suspended sockets and LED bulbs — never indoor strands — and plug into a GFCI outlet through a timer. Secure the strand with UV-resistant zip ties or rail clips every bulb or two so it drapes in even swags instead of sagging sadly by August. One strand is tasteful; two, run parallel along the landing rail, can be lovely for summer. Keep bulbs LED-only anywhere near vinyl railing or dried wreaths, and check the strand's IP rating if your rail catches direct rain. This is the idea that makes a plain split-level entry feel like the set of a movie about people who have their lives together, and it costs less than the pizza you will order to celebrate finishing it.
Suggested budget range: $20 – $75.
18. A Real Light for the Lower-Level Door, Too
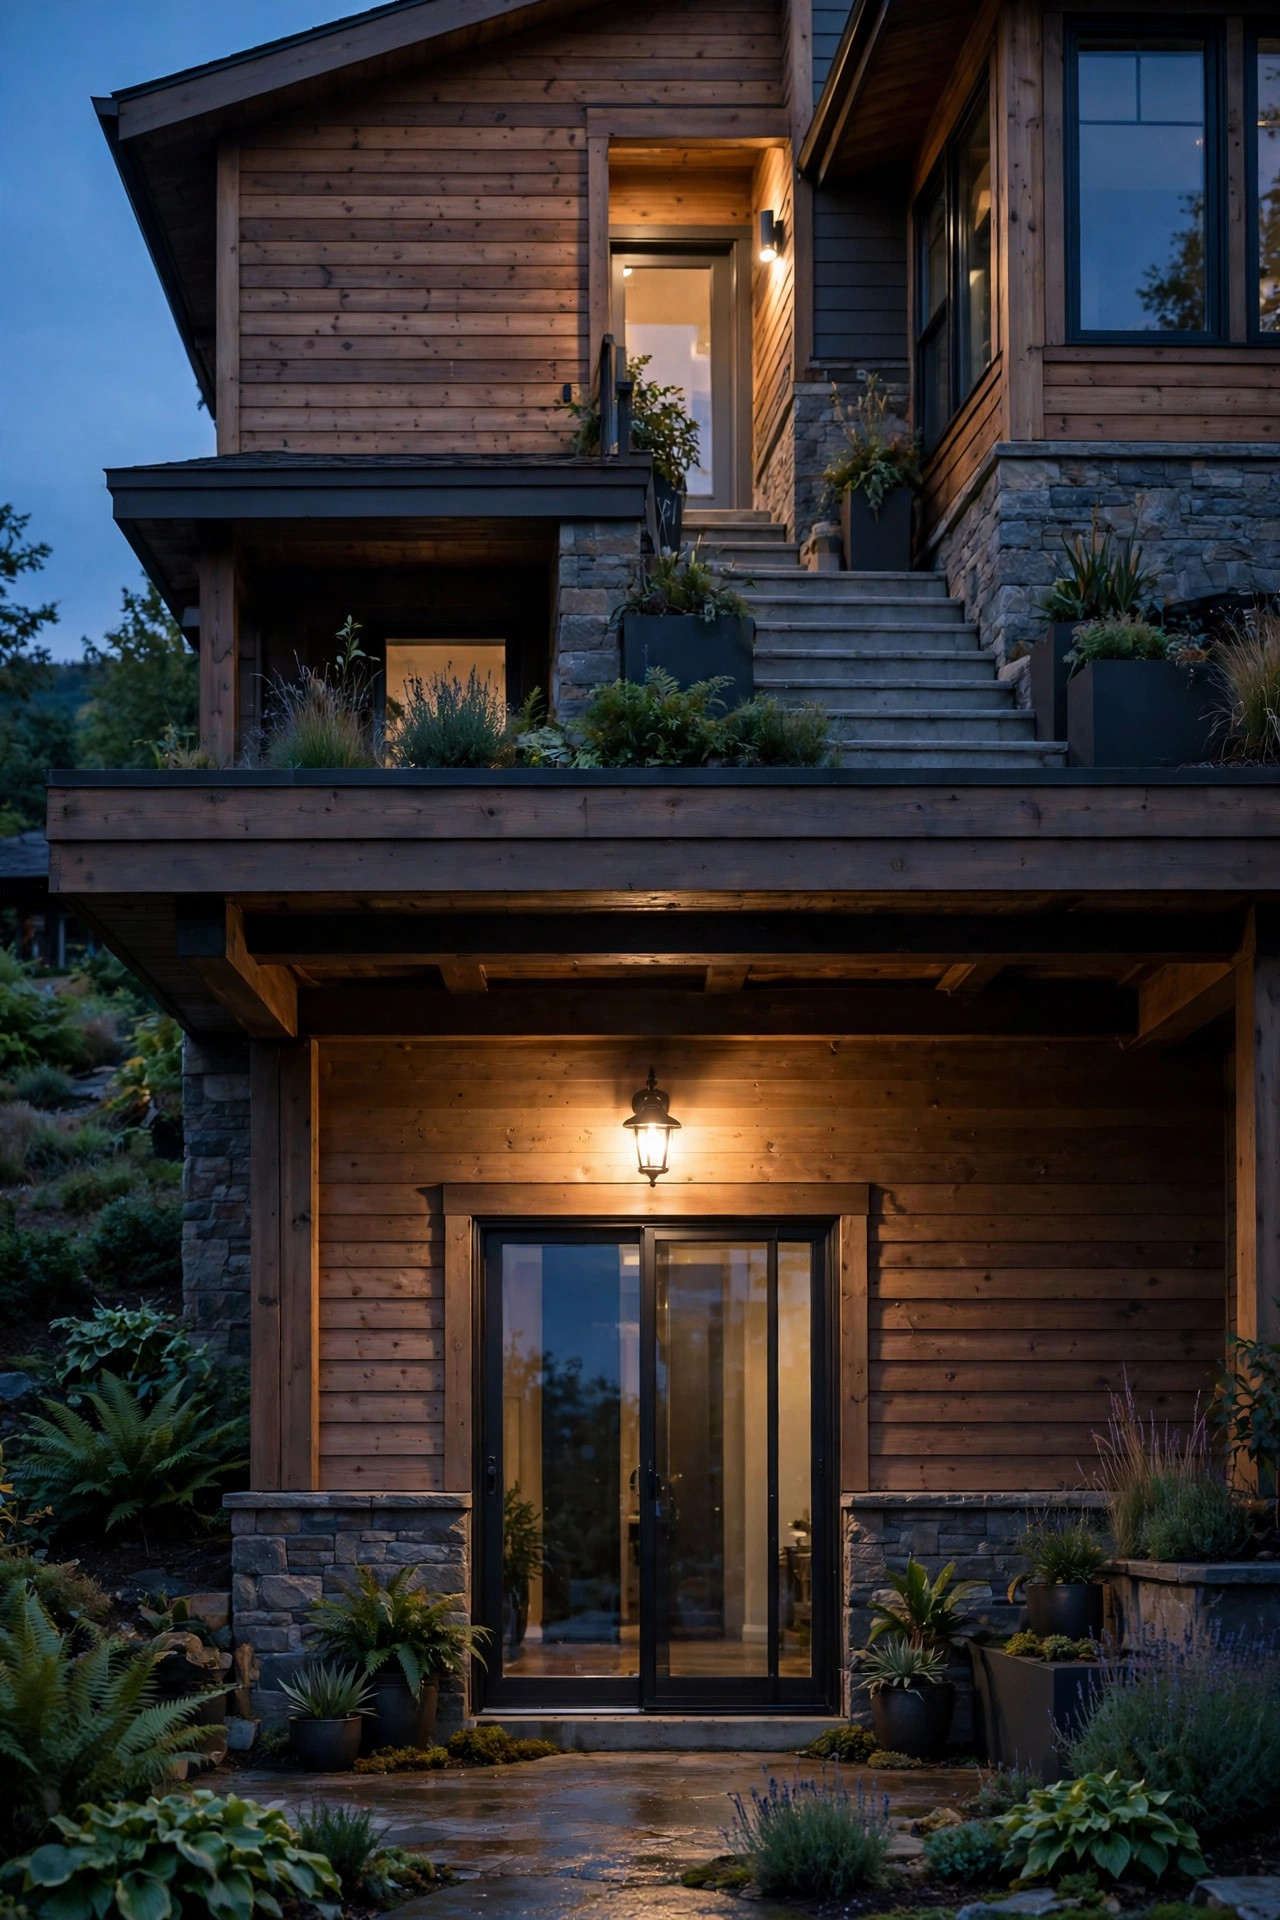
Many split-levels hide a second exterior door at garden level — into the family room, the mudroom, or the garage-adjacent entry — and it almost always sits in total darkness behind the shadow of the upper level. Give it the same respect as the main door: a compact wet-rated sconce or a small motion-activated fixture at 66 inches beside the frame, warm white, on its own switch. This door is often the one kids and dog-walkers actually use, and it is where muddy shoes and dropped keys happen after dark. If the lower door opens onto a patio, one fixture plus a solar step light on any grade change covers the route back to the yard. Lighting both doors also balances the house from the street — a lit upper entry floating over a black lower level reads as unfinished, almost haunted, while two warm points of light make the split facade look intentional. Keep the style related to the main entry fixtures, a finish or shape in common, so the house reads as one design told at two heights.
Suggested budget range: $40 – $160.
19. A Warm Spotlight on the Door Itself
End where every guest's eye should land: the door. One narrow-beam spotlight from the planting bed, or a small adjustable accent light mounted under the eave, aimed squarely at the door makes the entry the undeniable hero of the facade — especially effective if you have painted the door a rich color, as so many raised ranch owners now do. Keep the beam tight, around 15 to 25 degrees, so light kisses the door panel and wreath without spilling onto siding, and choose 2700K to keep reds, greens, and navy blues looking deep rather than washed out. For holidays, this single spotlight is what makes a wreath look professionally styled; a battery timer spotlight is a perfectly good seasonal-only version you can stake in ten minutes. Angle from slightly below and to one side — straight-on light flattens the door's panels, while a gentle angle models them with shadow. I saved this for last because it is the cheapest professional secret on the list: designers light the destination, not just the journey. Do the steps for safety, the walkway for guidance, then let one warm beam say "here, this door, welcome home."
Suggested budget range: $25 – $90.

Frequently Asked Questions
What color temperature is best for split-level entryway lighting?
Warm white, 2700K to 3000K, for every layer — sconces, step lights, path lights, and accents. Split-levels are brick, stone, and wood-heavy homes, and warm light flatters all three while staying welcoming. The most common mistake I see is mixing temperatures, like a 5000K daylight security light over a 2700K porch; pick one warm family and hold it across both levels so the house reads as one home.
How do I light exterior stairs to a raised entry safely?
Light every tread from a low angle: recessed riser lights, solar step lights, or an LED strip under the handrail all work because they reveal each step's edge without glare. Avoid relying on a single overhead porch light — your own body shadows the steps as you climb. Add a light at both the top landing and the foot of the stairs, and keep bulbs shielded so eyes adjust to the steps, not the fixture.
Are solar lights bright enough for entry stairs?
For guidance, yes; for task lighting, not quite. Modern solar step and path lights clearly mark edges and routes, which is most of the safety job, but they dim on cloudy winter stretches and rarely match wired brightness. My usual recommendation for split-levels is a hybrid: low-voltage wired lights on the stairs themselves, solar anywhere the sun is strong and the stakes are low, like garden edges and the lower patio.
How much does it cost to light a raised ranch entryway?
A satisfying refresh — smart bulbs, solar step lights, and illuminated numbers — runs about $75 to $250 in a weekend. A full layered setup with wired step lights, sconces, path lights, and a post lantern typically lands between $400 and $1,200 in materials, or $1,500 to $3,500 installed by an electrician and lighting contractor, depending on how much trenching and new wiring your two levels require.
Conclusion
Split-level entryway lighting works when you stop treating the entry as one fixture and start treating it as three little scenes: the walk, the stairs, and the door. Layer something warm at each level, hold every bulb in the 2700–3000K family, and let timers handle the routine so the glow is simply always there when you come home. Start with the stairs if safety is calling, or the statement sconce if curb appeal is — either way, your raised ranch is one weekend away from looking like the intentional, welcoming home it always had the bones to be. Browse the rest of my lighting ideas here whenever you are ready to carry the same layered glow around the sides and back of the house.