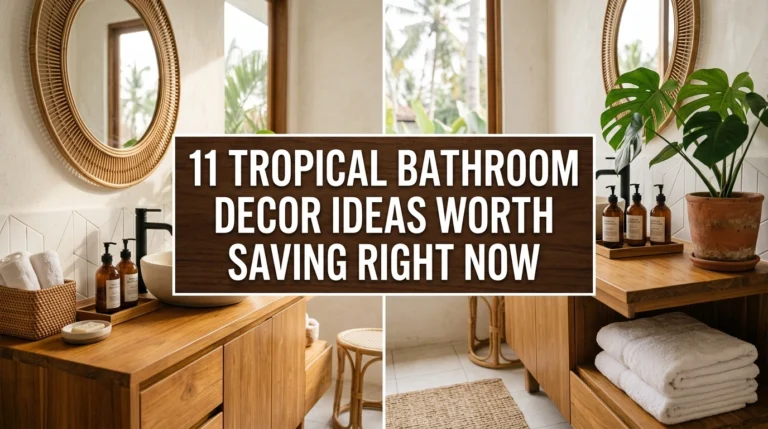
15 Small Master Bath Ideas That Feel Way Bigger 2026
Dealing with a cramped main bathroom is one of the most frustrating daily struggles. You start your morning bumping your elbows against the walls, struggling to find a spot for your hair dryer, and feeling instantly claustrophobic before your day even begins. If you are looking for 15 small master bath ideas that feel bigger, you are in the right place. Creating a functional, spacious sanctuary is not about physically knocking down walls or spending tens of thousands of dollars on a massive home extension. Often, it comes down to clever visual tricks, smart storage choices, and a better understanding of how light moves through a room.
In this guide, we are going to walk through simple, actionable design shifts that can completely open up a tight layout. You do not need to be an interior architect to pull these off; many of these adjustments can be made over a weekend or planned out for a straightforward remodel. From changing how you mount your sink faucet to choosing the right style of shower door, these ideas prioritize real-life practicality and budget-friendly choices. By the end of this article, you will know exactly how to turn a cluttered, tight en suite into a breezy, functional space where you actually want to spend time.
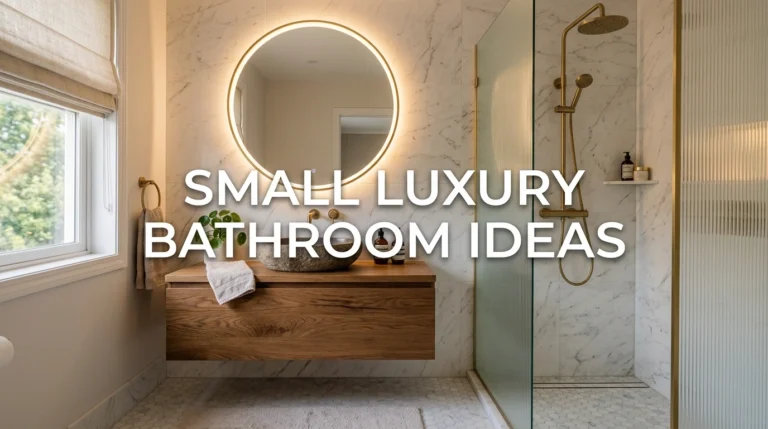
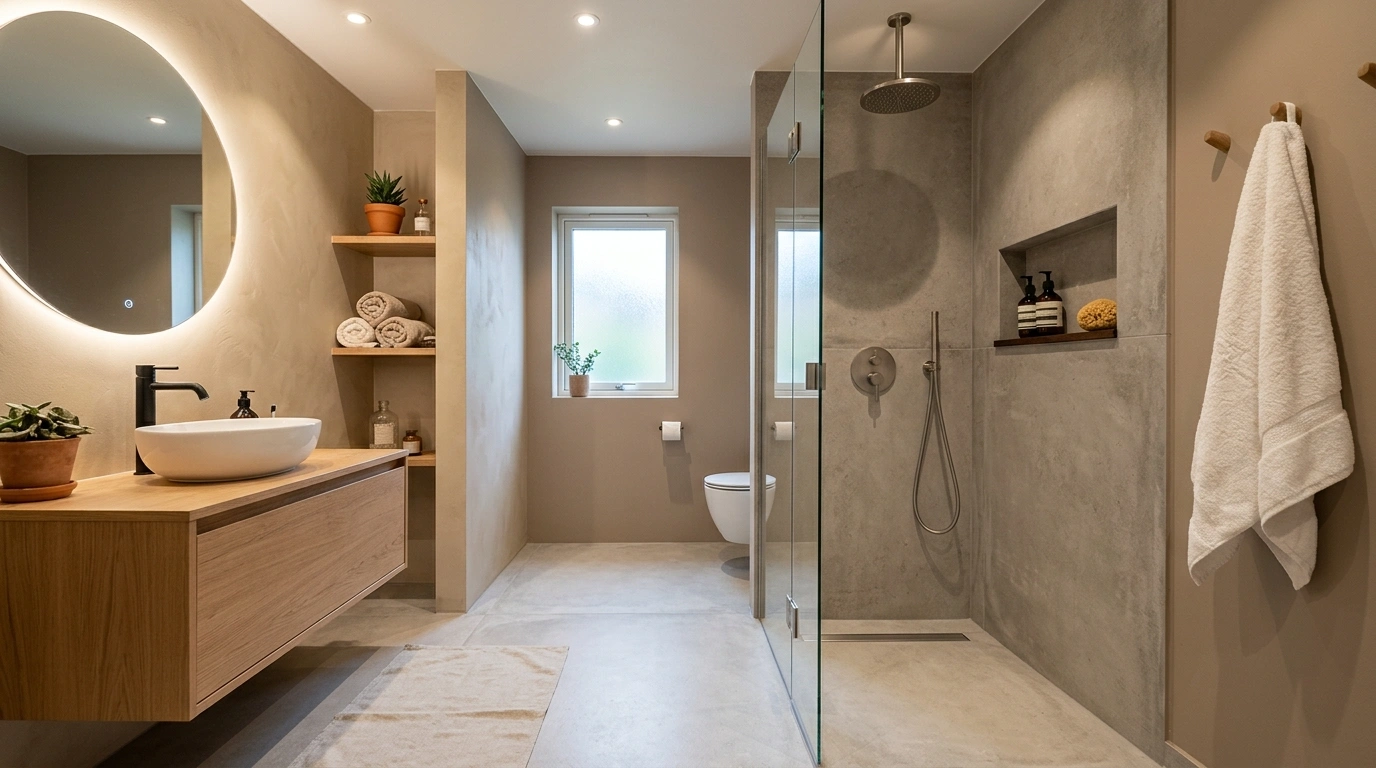
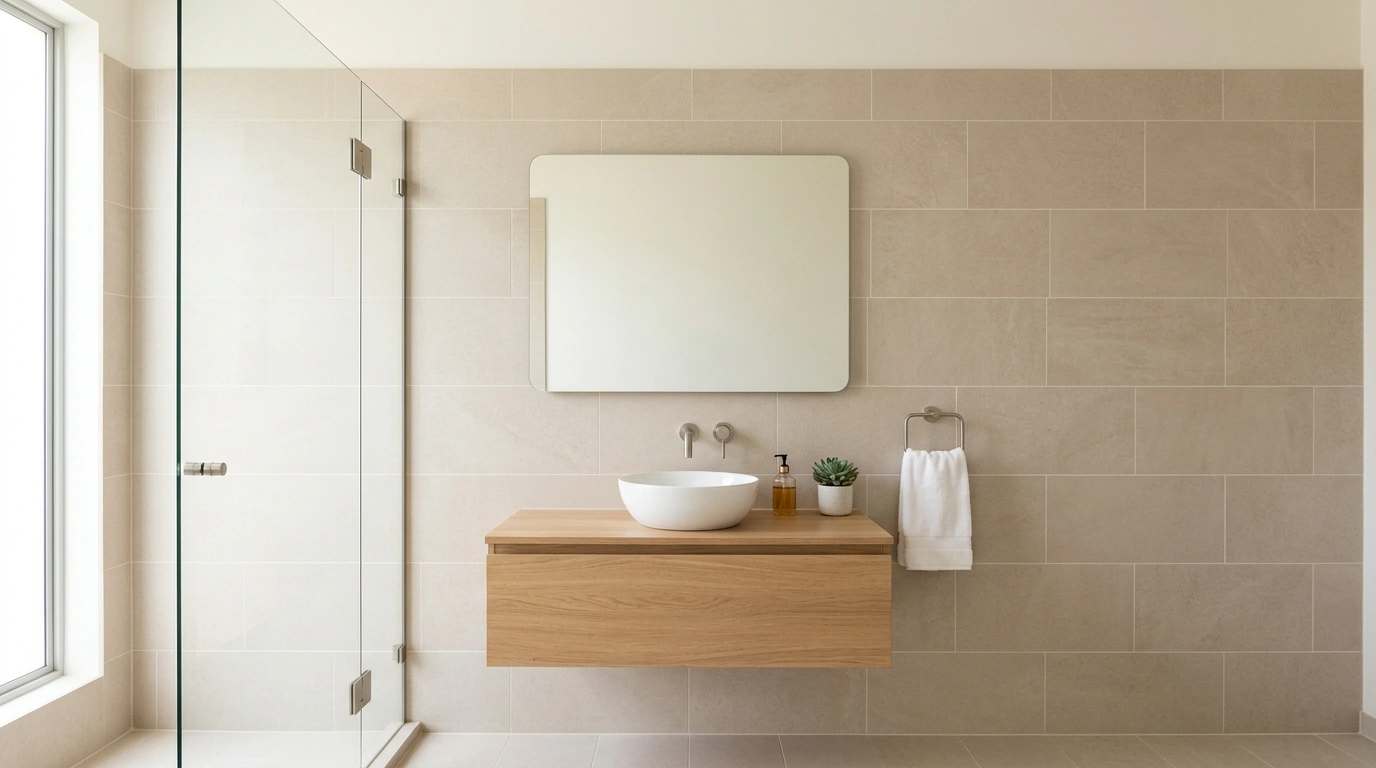
Wall-Mounted Floating Vanities
What I personally love about this look is how much visual weight it lifts off the floor. When you can see the flooring extend all the way to the back wall, your brain naturally registers the bathroom as a wider, more open area. It creates a clean, modern feeling that instantly makes a tiny en suite feel less like a closet and more like a high-end spa. The wood textures or matte finishes of a floating unit bring in warmth without crowding the physical space.
To make this work in your home, look for a vanity with deep drawers rather than cabinets with doors, as drawers make it much easier to organize toiletries without wasting awkward corner space. I always recommend starting with a unit that is roughly 24 to 30 inches wide to balance counter space and floor clearance. The biggest mistake people make here is forgetting to measure the plumbing outlet behind the wall; you may need a plumber to reroute the pipes higher up so they stay hidden. Expect to spend around $350 to $800 for a solid mid-range floating vanity setup.
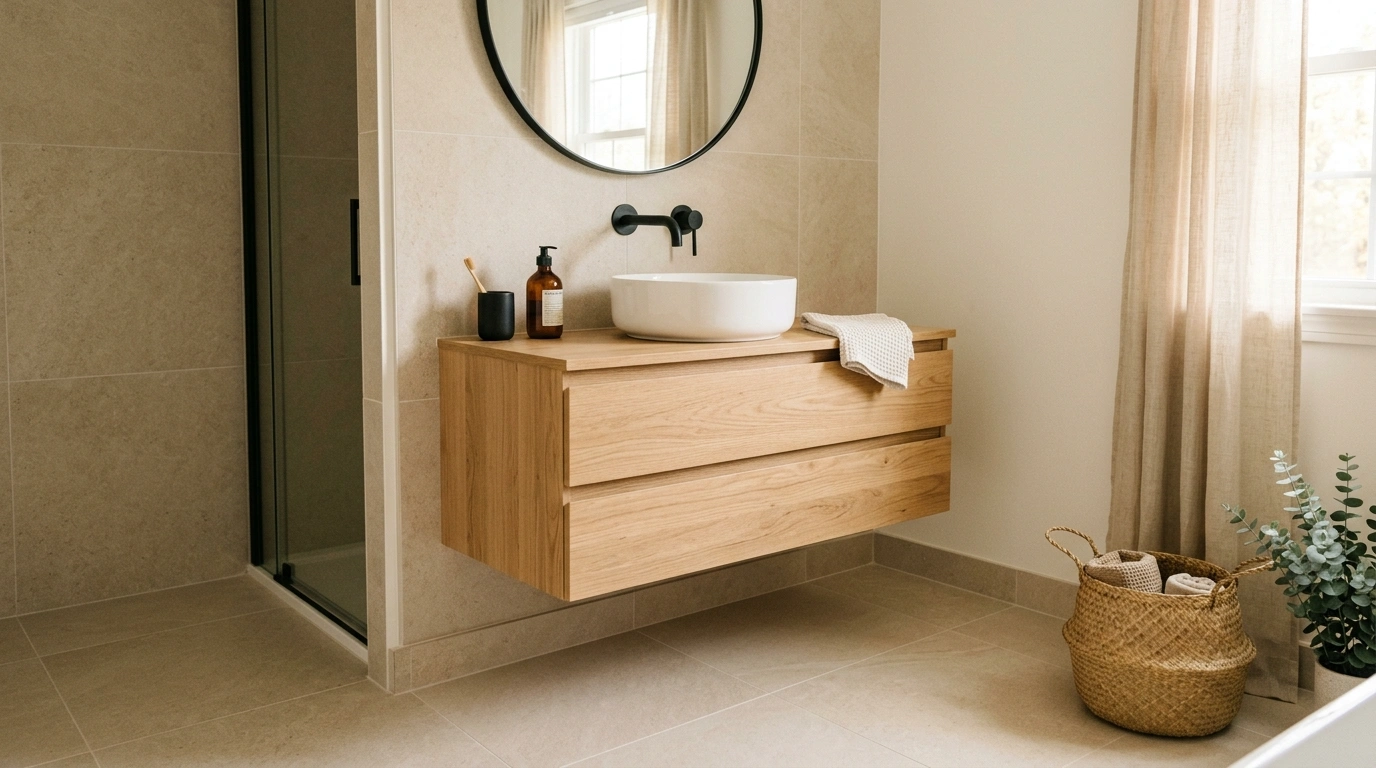
Frameless Glass Shower Enclosures
Replacing an old tub-and-shower curtain combo with a clear, frameless glass panel completely changes the visual boundaries of a room. Traditional shower curtains act like a solid wall, cutting your bathroom’s footprint in half the second you pull them shut. Clear glass lets light travel freely from one corner of the space to the other, highlighting the tilework inside the shower and making the room feel twice as deep. It looks bright, clean, and highly functional for daily use.
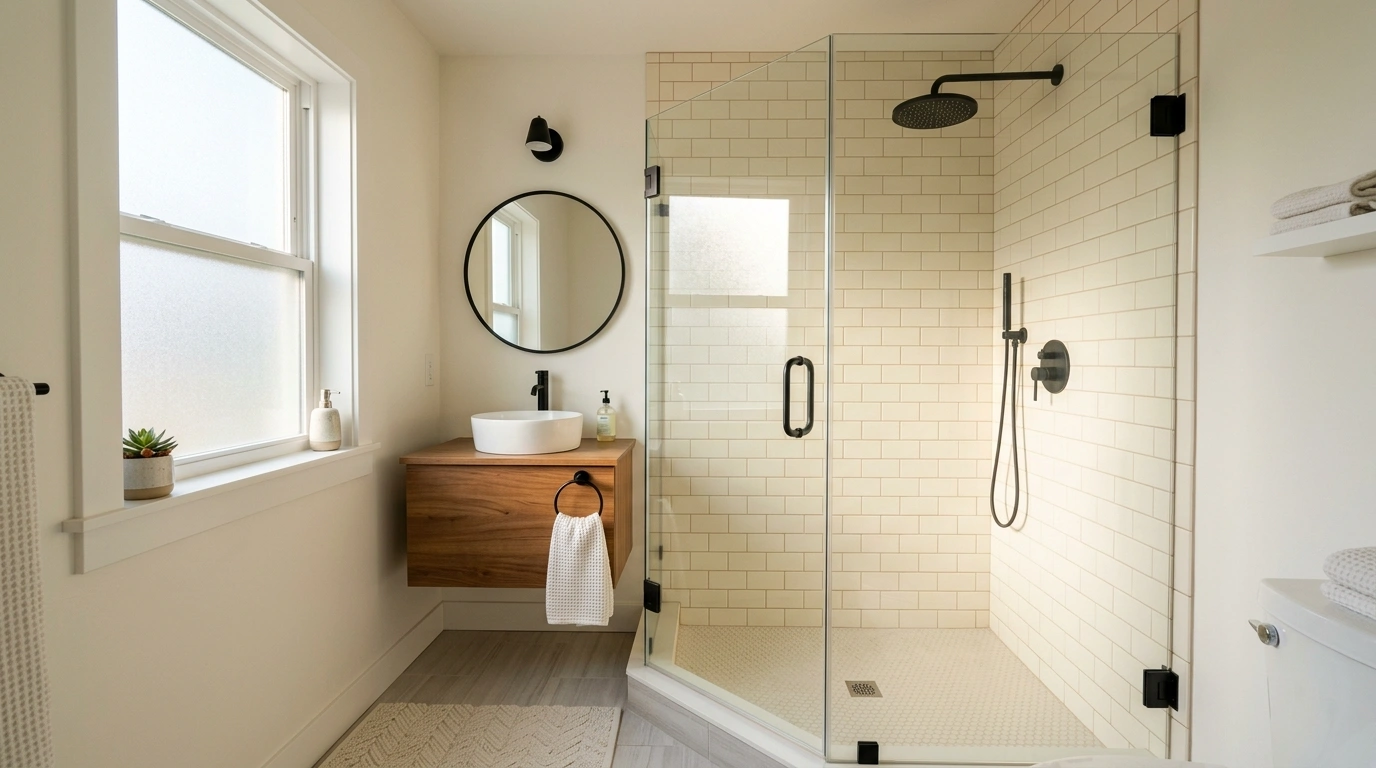
When installing a glass panel, choosing a fixed pane of heavy, thick glass is often much cheaper and easier to clean than a sliding door system. Keep in mind that clear glass does require a bit of upkeep, so keeping a small squeegee nearby is a must for daily maintenance. If you want a cheaper alternative that still achieves a similar feel, use an extra-long, bright white shower curtain and hang the rod directly below the ceiling line to draw the eyes upward. A high-quality frameless glass door typically costs between $600 and $1,200, depending on custom measurements.
Oversized Strategically Placed Mirrors
Mirrors are the ultimate secret weapon for multiplying natural light and creating the illusion of double the square footage. Instead of choosing a standard, small medicine cabinet, opt for a massive mirror that spans almost the entire width of your sink area or even the whole wall. It catches the glow from light fixtures and windows, bouncing it back into dark corners and instantly opening up the entire visual plane.
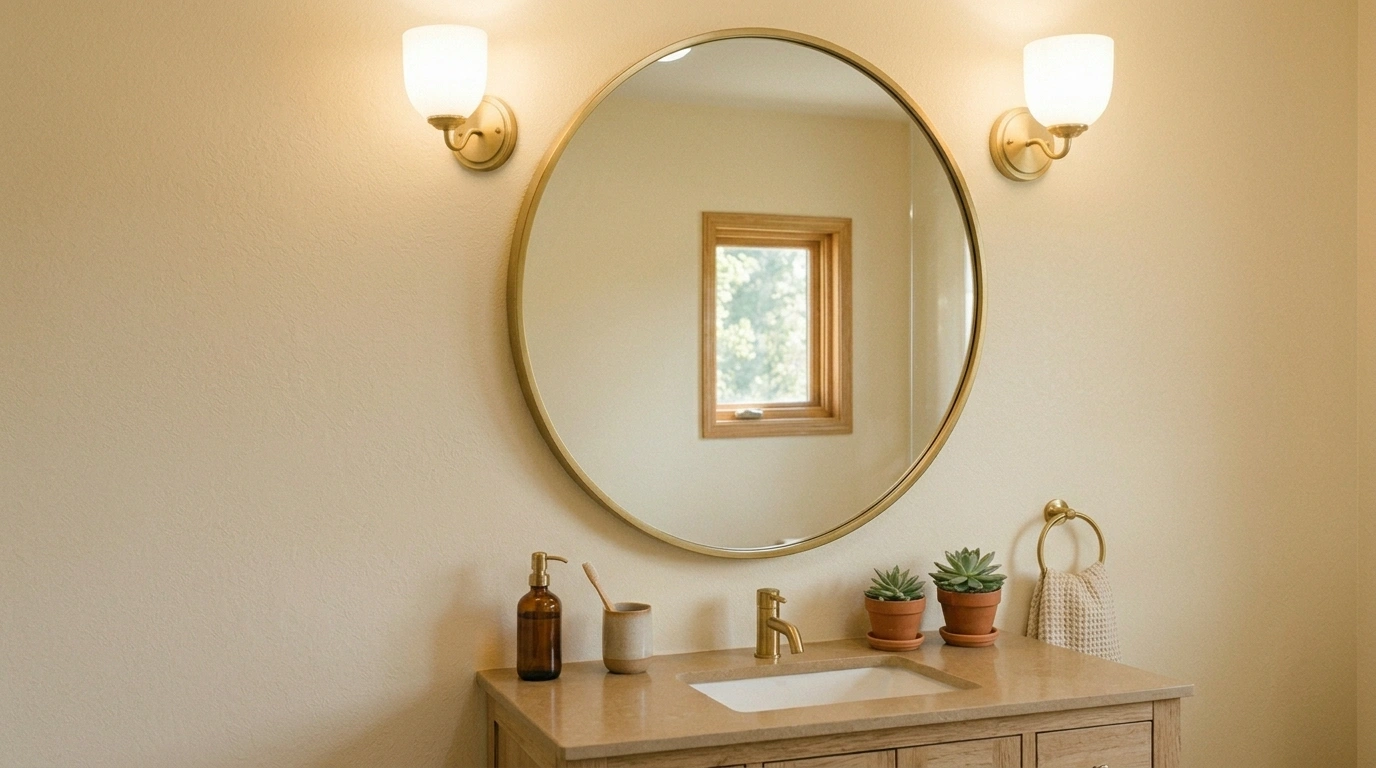
A lot of people overlook this detail, but hanging a round or arched mirror can break up the hard, boxy lines commonly found in small bathrooms. Alternatively, a large frameless rectangular mirror glued directly to the drywall gives a seamless, custom-built look that feels incredibly open. Just make sure the mirror does not sit too low where water constantly splashes off the faucet. You can find beautiful, large, thin-framed mirrors online or at local home goods stores for $80 to $200.
Run Floor Tiles Directly into a Curbless Shower
This works especially well if you want to make a tight floor plan feel integrated and continuous without trying too hard. By removing the physical step-up barrier of a standard shower curb and using the exact same tile across the entire room, the eye does not stop at a dividing line. It makes the entire floor feel like one giant, cohesive zone, which is a brilliant way to trick your brain into seeing more space than actually exists.
To recreate this layout safely, you must ensure your floor is properly sloped toward a linear drain so water does not pool in the middle of the room. It is a slightly larger remodeling project, but it pays off immensely in terms of accessibility and aesthetic value. For a budget-friendly option that still visually links the spaces, simply use matching tile colors on both the main bathroom floor and the shower floor. A professional curbless shower installation typically runs between $2,000 and $4,500 depending on your existing plumbing.
Recessed Shower Niches
Having bottles of shampoo, body wash, and razors cluttering up your shower ledge or hanging from a wire caddy makes a small bathroom feel instantly disorganized and cramped. A recessed wall niche built directly into the studs of your shower wall keeps all your daily products tucked away flush with the wall surface. This keeps your clean lines completely intact while providing highly functional, permanent storage where you need it most.
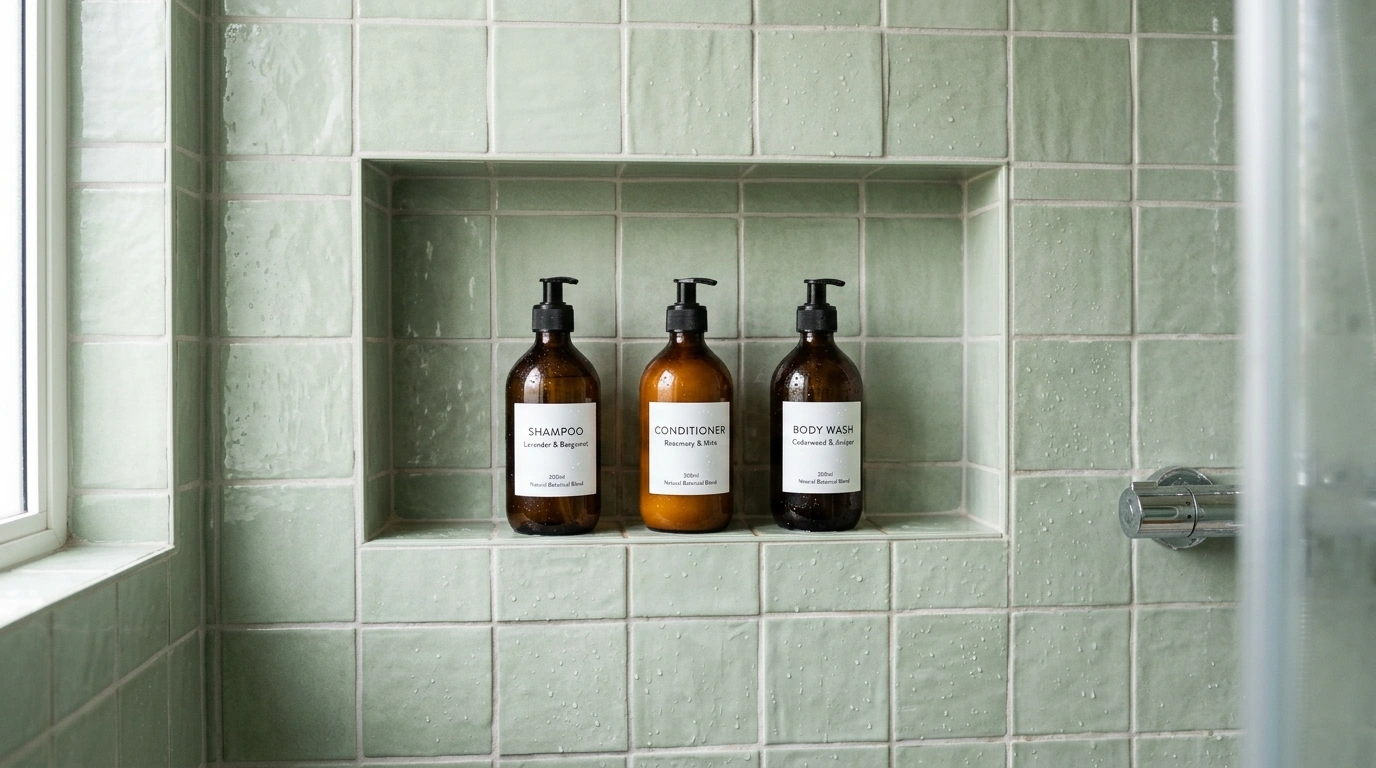
In my experience, the biggest mistake people make is building a niche that is too short to hold tall pump bottles of shampoo or body wash. Always measure your favorite brands before framing the cutout, and make sure to tilt the bottom sill slightly downward into the shower so water drains out naturally. If a remodel is out of the budget right now, a neat set of matching amber or white refillable bottles placed on a small corner shelf can mimic this clean, organized look. Framing and tiling a custom niche usually adds about $150 to $300 to a tiling project.
High-Gloss Paint on the Ceiling
Ceilings are often ignored during renovations, but using a high-gloss or semi-gloss finish in a light tone can do wonders for overhead space. The subtle sheen acts almost like a mirror, catching rising light from vanity bulbs and bouncing it back down into the room. This simple trick prevents the ceiling from feeling like a heavy lid on top of a tiny, dark box, creating a much airier, vertical atmosphere.
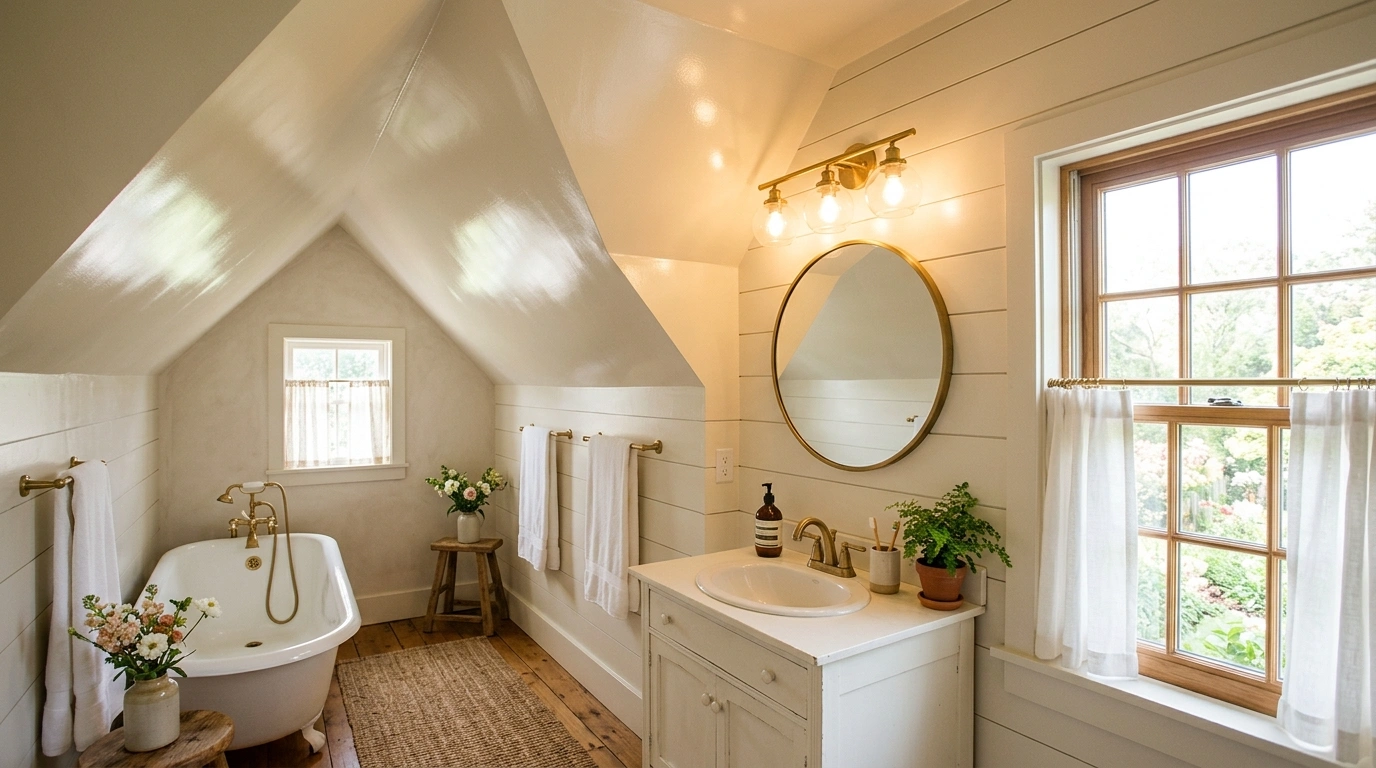
I always recommend starting with a high-quality mold-and-mildew resistant paint specifically formulated for high-humidity bathrooms. When applying high-gloss paint, keep in mind that every single bump, seam, and imperfection in your drywall will show, so taking the time to sand and prime the ceiling perfectly beforehand is essential. If a high-gloss ceiling feels a bit too bold for your style, even a satin finish in a soft, creamy white will offer a gentle reflective quality. A gallon of premium kitchen and bath paint will cost about $40 to $70.
Vertical Beadboard or Shiplap
If your master bathroom has low ceilings, using vertical wooden wall paneling is an incredibly effective way to stretch the height of the room. The long, continuous vertical lines draw the viewer’s eye upward toward the ceiling, creating an illusion of height that balances out a narrow floor plan. It adds beautiful, rustic texture and character without the visual clutter of busy patterned wallpaper or heavy cabinetry.
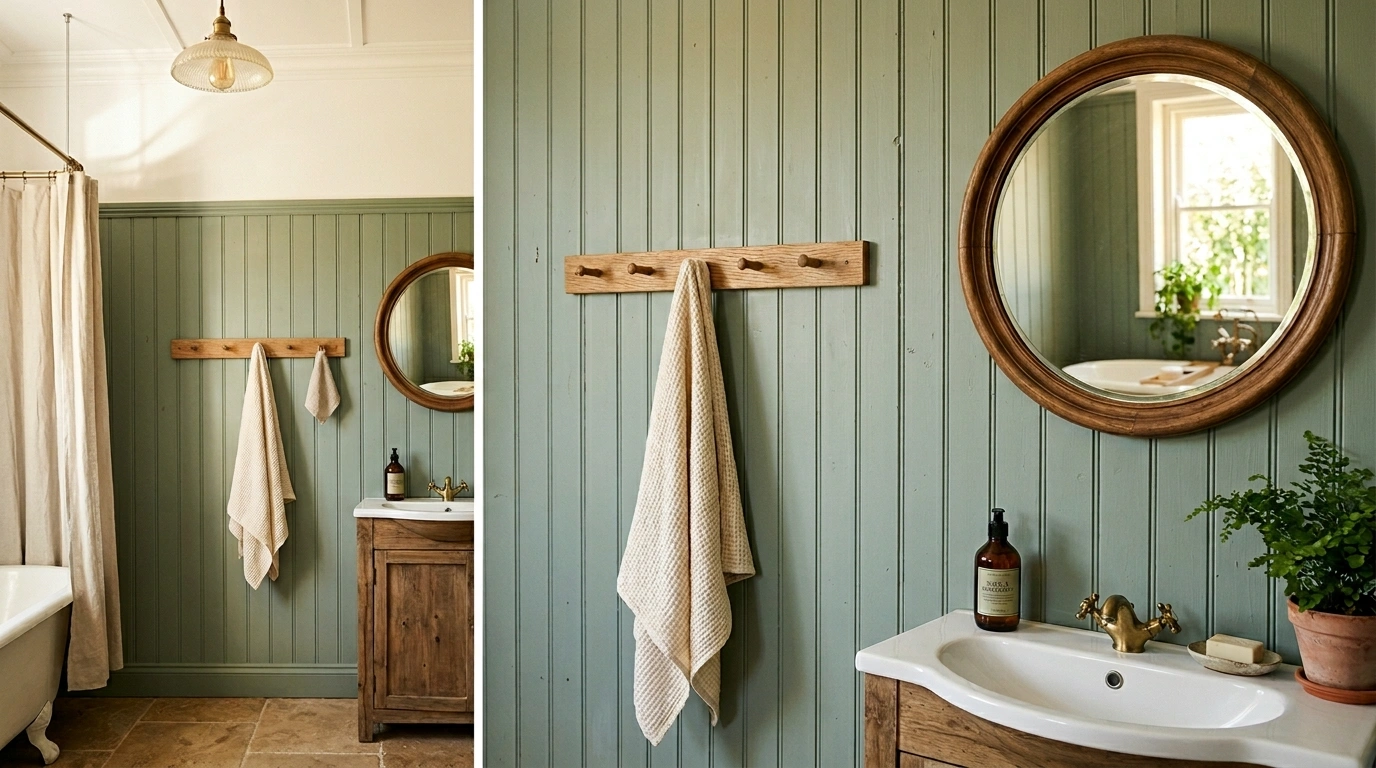
To make this practical for a damp bathroom environment, always use moisture-resistant MDF or cedar panels, and seal them with an exterior-grade paint to prevent warping or water damage. A classic soft sage green or a muted cream paint color on vertical beadboard looks incredibly fresh and inviting. Avoid running the paneling only halfway up the wall if you have low ceilings, as this can chop the wall in half; instead, run it nearly to the top or all the way up. You can easily complete a DIY beadboard wall project over a weekend for around $100 to $250.
Wall-Mounted Faucets
When you are short on counter space, every single square inch around your sink counts. Mounting your sink faucet directly onto the wall instead of the countertop frees up that valuable real estate behind the basin, leaving room for hand soap, a small vase, or simply a cleaner, clutter-free surface. It looks incredibly intentional, uncluttered, and highly custom, giving your small vanity a much more spacious feel.
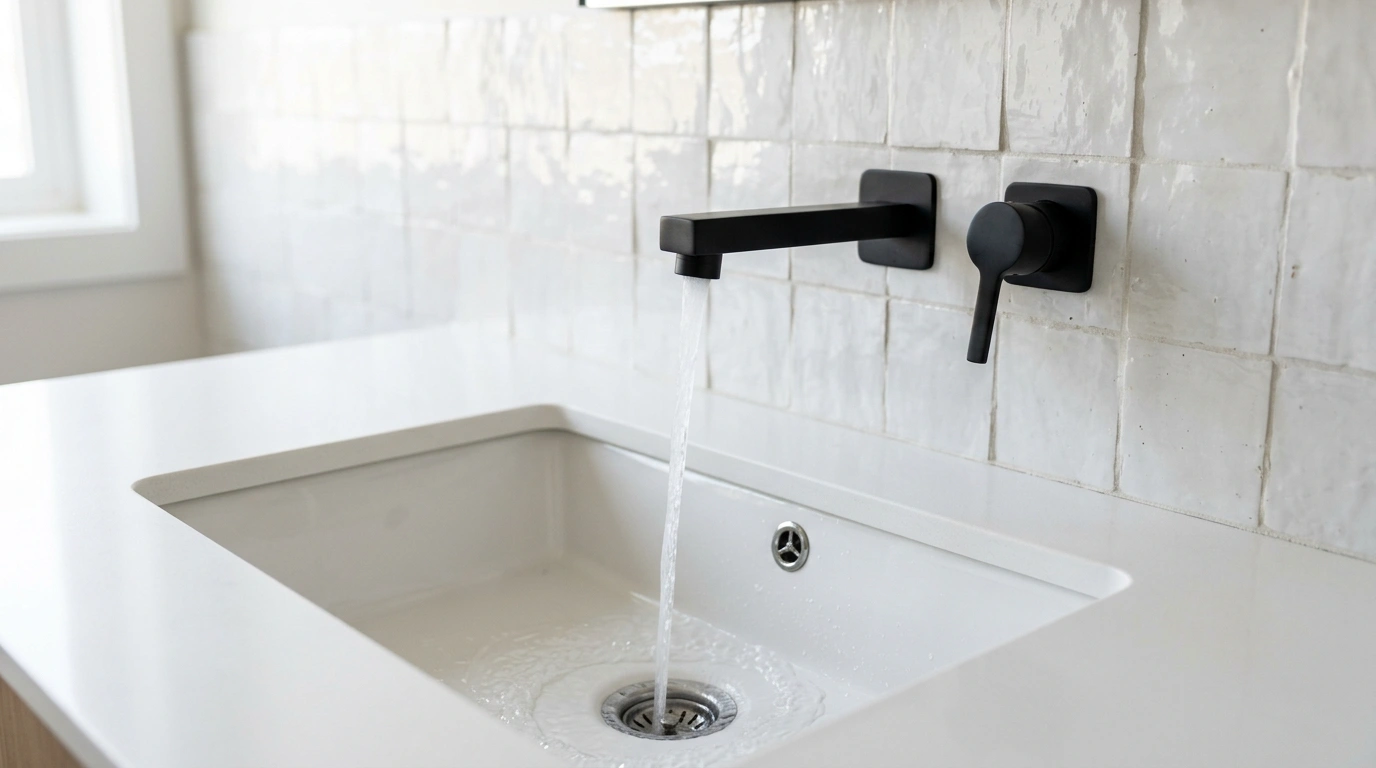
For a successful wall-mount installation, you must choose your sink basin and faucet together to ensure the water stream lands perfectly over the drain without splashing everywhere. Because the plumbing connections are sealed inside the wall, hiring an experienced plumber to set the rough-in valves is highly recommended to avoid hidden leaks down the road. If you are on a tight budget, look for single-handle deck-mounted faucets with a very slim, vertical base to save as much counter space as possible. A quality wall-mounted faucet and the necessary in-wall valves usually run between $200 and $500.
Monochromatic Soft Color Palettes
Using a highly contrasting color scheme with dark walls and bright floors can slice a small room into tiny, choppy sections. A monochromatic palette consisting of soft creams, warm beiges, light grays, or muted earth tones allows your eyes to glide across the room without any abrupt interruptions. The boundaries of the space blur together, making the master bathroom feel much more peaceful, expansive, and filled with light.
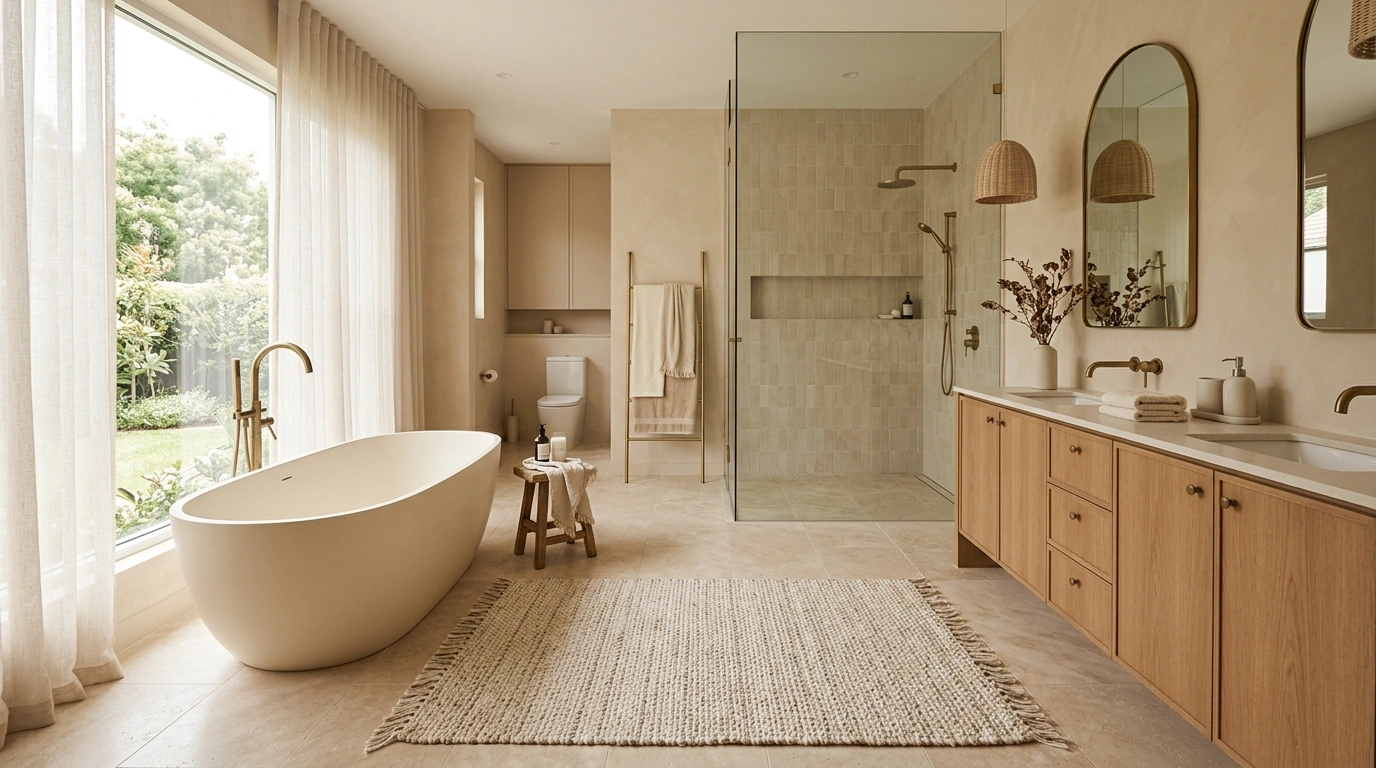
To prevent a single-color room from looking flat or boring, focus on layering different textures like a woven waffle-knit bath mat, a textured linen hand towel, and a natural stone tray on the counter. What I love about this approach is that it is highly affordable; paint is one of the cheapest ways to make a massive impact on your home. Avoid harsh, stark cold whites, which can make a windowless bathroom feel clinical and gloomy under artificial light. A fresh coat of premium wall paint will cost you around $50 to $100.
Pocket Doors or Sliding Barn Doors
Standard interior doors require a significant amount of “swing space” to open and close, which often eats up a massive portion of a small bathroom’s usable floor plan. Replacing a traditional hinged door with a pocket door that slides directly into the wall cavity recovers that lost footprint, allowing you to place your vanity or shower closer to the entryway without any awkward door collisions. It is a total game-changer for layout flexibility and daily comfort.
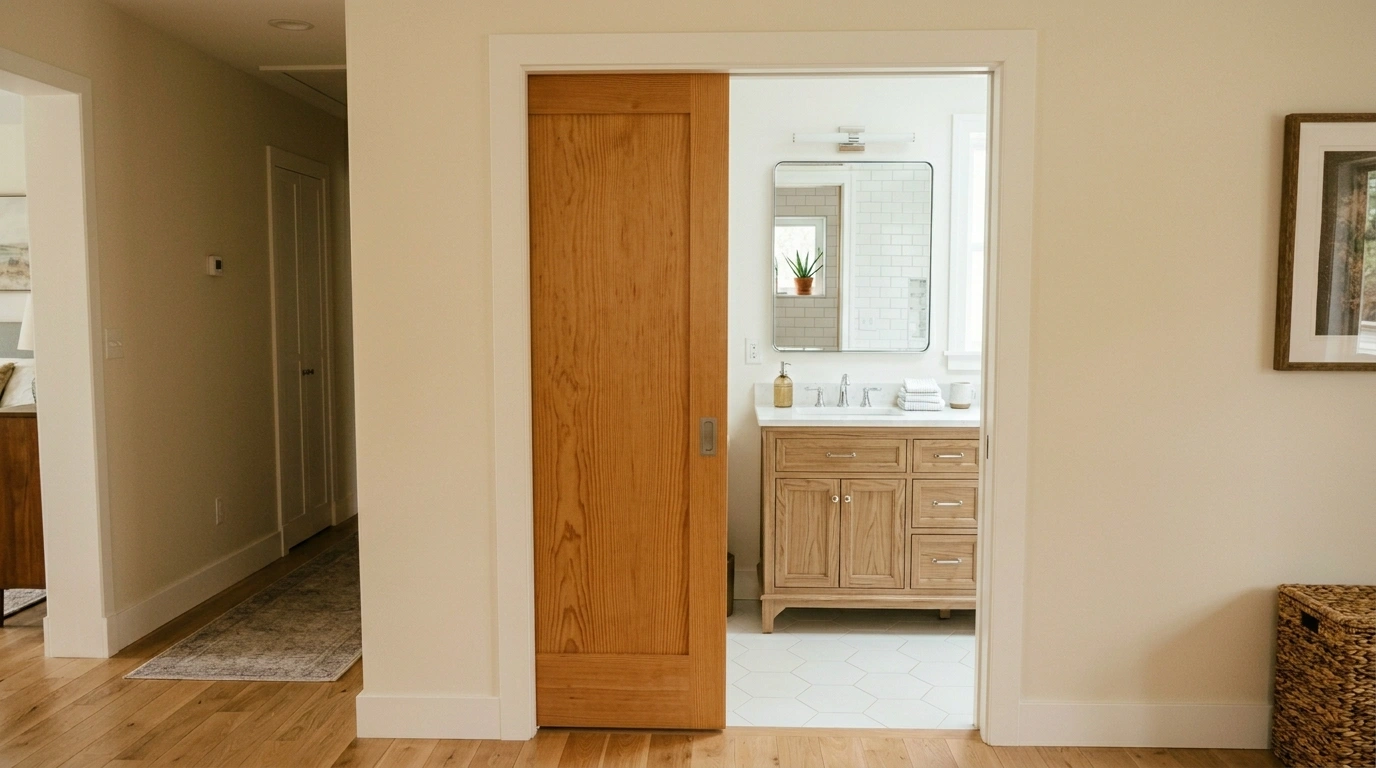
If tearing open drywall to install a pocket door frame is not possible in your current home, a sleek, modern sliding barn door hung on the outside of the bathroom wall is a fantastic, easier alternative. Ensure you choose high-quality rollers and tracks so the door glides silently and stays firmly in place. Remember to leave enough clearance on the adjacent wall for the door to slide completely open. A basic DIY pocket door frame kit costs about $100 to $250, while professional installation can add another $300 to $600.
Large-Format Wall Tiles
Many homeowners assume that small spaces require small tiles, but using tiny mosaic tiles with dozens of dark grout lines can make a room look incredibly busy and chaotic. Using large-format tiles (like 12×24 inch rectangles) on the shower walls means you have far fewer grout lines chopping up the surface. The result is a clean, continuous plane of color and texture that makes the walls look wider and significantly less cluttered.
When choosing your tile, match the grout color as closely as possible to the tile color to minimize any harsh grid lines. This keeps the wall looking like a single, seamless slab rather than a collection of tiny blocks. If you are working on a budget, look for larger ceramic tiles, which are often much cheaper than porcelain but offer the same grand scale. A standard 12×24 tile project for a small shower typically costs between $400 and $900 for materials.
Open Shelving Over the Toilet
Toilets often leave a massive amount of empty wall space directly above them that goes completely unused. Installing two or three simple, thick wooden open shelves provides excellent storage for extra towels, folded washcloths, and a few small decorative items without the heavy, boxy look of a solid wall cabinet. The open nature of the shelves keeps the wall feeling light and airy while keeping essentials within arm’s reach.
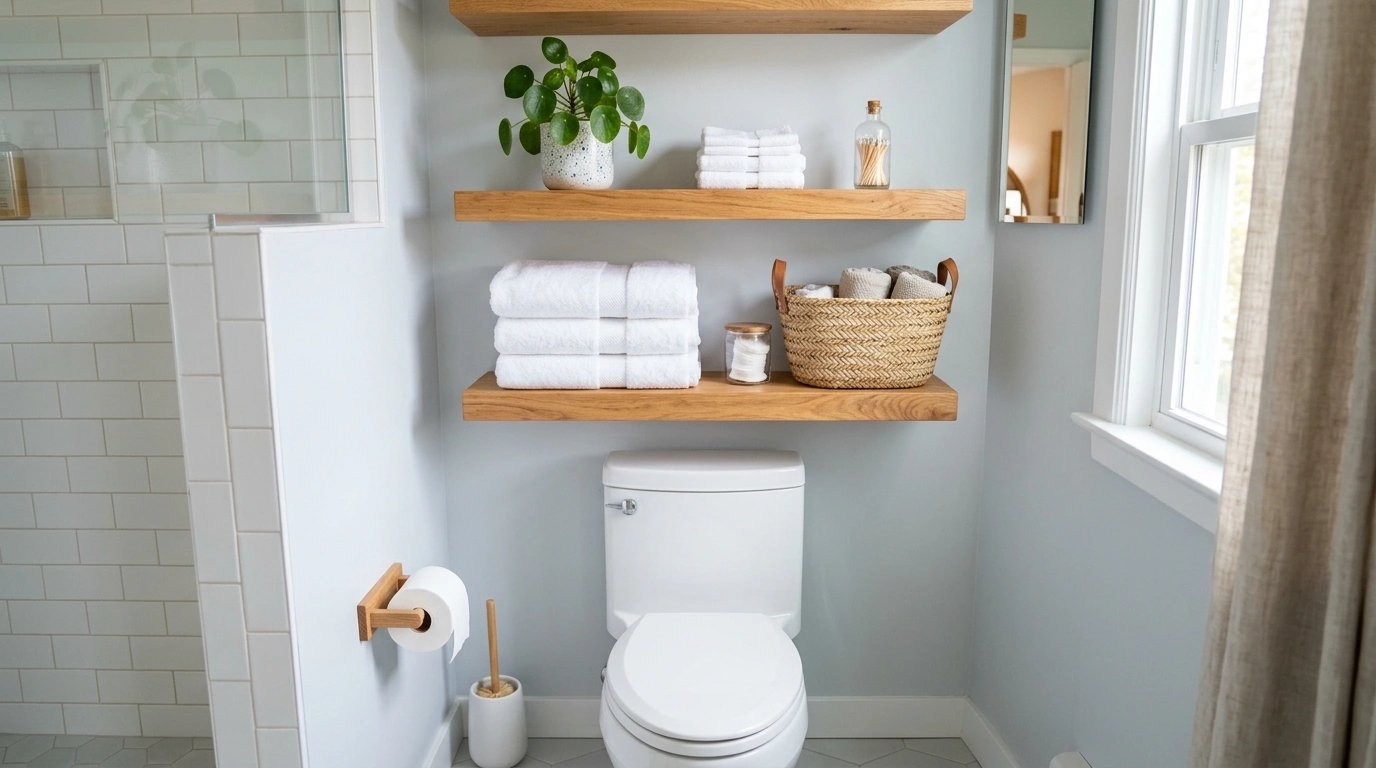
The key to keeping open shelves looking beautiful is avoiding clutter; do not pile them high with miscellaneous plastic bottles or loose toiletries. Instead, use a few matching woven baskets or small ceramic canisters to hide smaller items like cotton swabs and makeup pads. Make sure the shelves are securely mounted into wall studs or high-quality drywall anchors so they do not sag over time. You can easily source and install stylish wooden floating shelves for $40 to $120.
Skylights and Solar Tubes
Nothing opens up a small room quite like natural, glowing daylight streaming in from above. If your master bathroom is completely landlocked in the middle of your home without any exterior windows, a skylight or a compact solar tube can bring in tons of natural light. It highlights the colors of your tiles, eliminates dark corners, and instantly connects the space to the outdoors, making it feel bright and spacious.
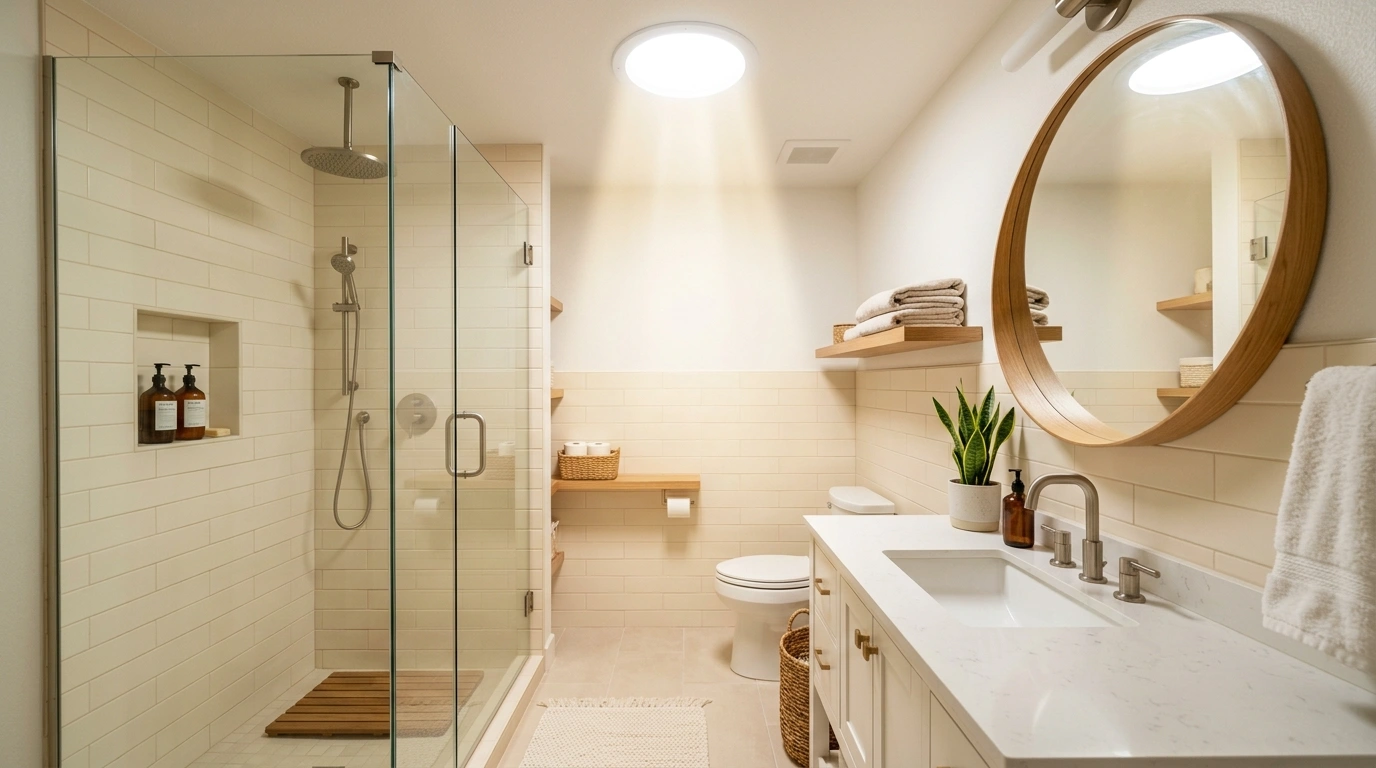
A solar tube is a fantastic, highly affordable alternative to a traditional skylight; it uses a reflective tube to funnel sunlight from your roof down through a small ceiling fixture, requiring very minimal framing changes. It fits perfectly between standard ceiling rafters, meaning you do not have to worry about major structural modifications. Always ensure any roof penetration is sealed professionally to prevent water leaks during heavy rain. A solar tube kit and installation typically cost between $600 and $1,500.
Toe-Kick and Under-Cabinet LED Lighting
Lighting is often an afterthought, but adding hidden light sources close to the floor can create an incredible sense of depth. Installing a simple strip of warm LED tape lighting along the toe-kick of your floating vanity or underneath open shelving casts a soft, ambient glow downward. This subtle wash of light erases heavy shadows and makes the vanity appear as if it is weightlessly hovering in mid-air, adding a gorgeous layer of visual interest.
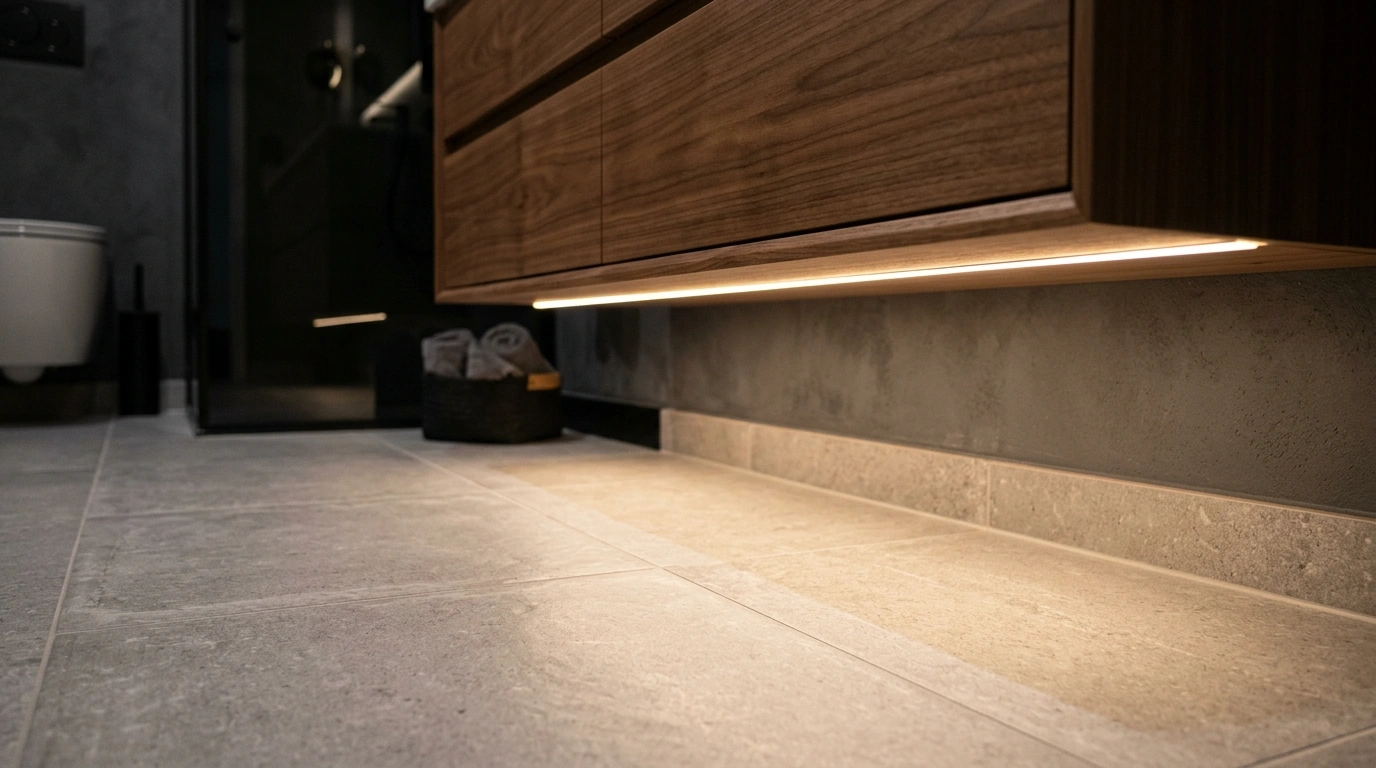
Choose dimmable LED strips with a warm color temperature (around 2700K to 3000K) to avoid a cold, clinical office-style look. You can connect these lights to a motion sensor so they turn on automatically at a low brightness level for middle-of-the-night bathroom visits. This is an incredibly inexpensive way to make your bathroom look custom-built and spacious without any major construction. A complete DIY LED strip kit with a power supply will cost you only $20 to $50.
Low-Profile Linear Drains
Traditional circular shower drains require the shower floor to slope down from all four corners, which forces you to use very small tiles that can look busy and segmented. A sleek, low-profile linear drain only requires the floor to slope in a single direction toward one wall. This allows you to lay down beautiful, large-format tiles all the way through the shower floor, creating a completely seamless look.
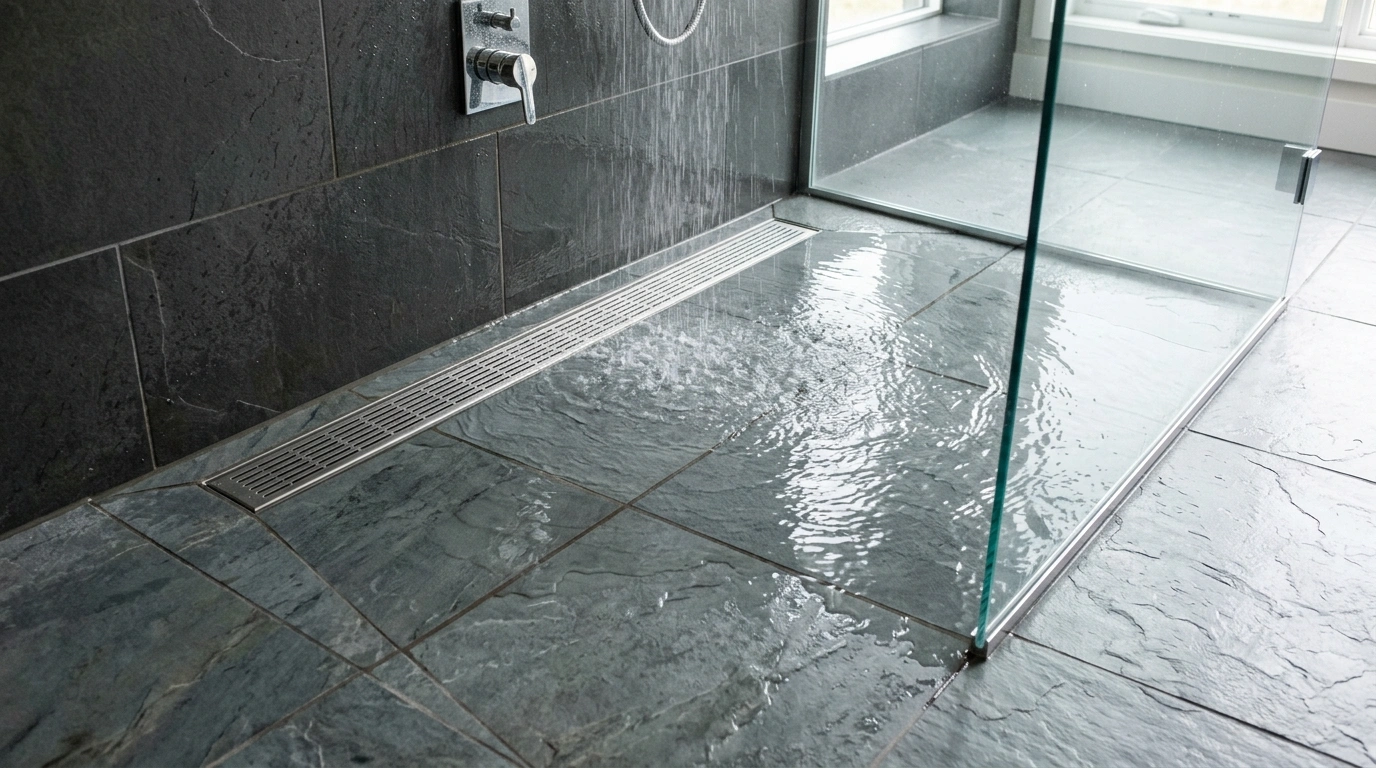
What I love about linear drains is how incredibly clean and hidden they look, especially when you use a tile-in model where a slice of your floor tile sits right inside the drain grate. It makes the floor surface look uninterrupted, sleek, and highly modern. Make sure to clean out the internal hair trap regularly to keep the drain running smoothly and prevent any slow draining issues. A high-quality stainless steel linear drain unit typically costs between $100 and $300.
Conclusion
When you are working with a tight master bathroom, trying to cram in a double vanity, a massive freestanding tub, and a separate walk-in shower is a recipe for a cramped disaster. It is always better to have a highly functional, spacious layout with a single sink and a beautifully tiled walk-in shower than a crowded room stuffed with fixtures you can barely move around. Prioritize easy movement, smart storage, and continuous lines of sight. When you design with daily movement and light in mind, even the smallest en suite can feel like a luxurious, peaceful retreat where you can start and end your day in complete comfort.
Which of these small master bathroom ideas are you planning to try out first in your own home? I would genuinely love to know what layout struggles you are currently trying to solve!
Q: How do I make my small master bathroom look more expensive?
Focus on high-impact details like replacing outdated plastic plumbing fixtures with high-quality brushed brass or matte black metals, and install cohesive storage like matching amber glass bottles. Keep countertops completely clear of daily clutter by using deep drawers and simple wall shelves.
Q: What paint colors work best for a small, windowless bathroom?
Warm, light-reflective neutrals like soft creams, light sand, muted sage green, or pale warm grays work best. Avoid cool, stark whites, which can look blue or clinical in windowless spaces without natural daylighting.
Q: Is a light or dark floor better to make a bathroom look bigger?
A light-colored floor is generally better for creating an airy feeling, especially if it matches the wall color. This reduces visual contrast and allows the eye to travel smoothly across the entire space without stopping.
Q: Can I have a freestanding tub in a small master bathroom?
You can, but only if you have at least a few inches of clearance on all sides of the tub to allow for easy cleaning. If the tub is wedged tightly against three walls, it will make the room feel incredibly crowded and create hard-to-reach dust traps.
Q: How do I add storage to a small bathroom without adding bulky cabinets?
Utilize vertical space by adding floating wooden shelves above the toilet, installing recessed medicine cabinets that sit flush inside the drywall, or opting for a vanity with deep, fully extendable drawers.